- Работаем с PostgreSQL через командную строку в Linux
- Установка PostgreSQL на Linux (Mint)
- PostgreSQL Подключение, Пользователи (Роли) и Базы Данных
- PostgreSQL создание новой роли и базы данных
- Включить удаленный PostgreSQL доступ для пользователей
- Полезные команды PostgreSQL
- Выбор shema psql в консоли:
- Sequences
- Connect to PostgreSQL Database on Linux, Windows
- Connect to PostgreSQL from the command line
- Connecting PostgreSQL using psql and pgAdmin
- Connecting PostgreSQL using psql
- a. Locating psql:
- i. On Linux:
- ii. On Windows:
- iii. On Mac:
- b. Connecting psql:
- Server [localhost]:
- Database [postgres]:
- Port [5432]:
- Username [postgres]:
- Connecting PostgreSQL using pgAdmin 4
- Launching pgAdmin
- Connecting PostgreSQL using pgAdmin 4
Работаем с PostgreSQL через командную строку в Linux
Установка PostgreSQL на Linux (Mint)
Для подключения к базе данных PostgreSQL понадобится установленный PostgreSQL клиент:
Для установки PostgreSQL сервера:
Проверим, можем ли мы подключиться к базе данных PostgreSQL:
Вывод команды должен быть примерно таким:
PostgreSQL Подключение, Пользователи (Роли) и Базы Данных
Логин в только что установленный postgreSQL сервер нужно производить под именем пользователя postgres:
Для подключения к базе данных PostgreSQL можно использовать команду:
Если такая команда не просит ввести пароль пользователя, то можно еще добавить опцию -W.
После ввода пароля и успешного подключения к базе данных PostgreSQL, можно посылать SQL-запросы и psql-команды.
PostgreSQL создание новой роли и базы данных
Создать новую роль c именем admin (указывайте нужное имя):
Создание новой базы данных:
Дать права роли на базу данных:
Включить удаленный PostgreSQL доступ для пользователей
Нам нужно отредактировать файл /etc/postgresql/ /main/pg_hba.conf, задав опцию md5 вместо peer.
может быть 10, 11, 12 и т.д.
После этого сделать restart PostgreSQL:
Полезные команды PostgreSQL
Выйти из клиента PostgreSQL:
\q
Показать список баз данных PostgreSQL:
\l
Показать список таблиц:
\dt
Показать список пользователей (ролей):
\du
Показать структуру таблицы:
Переименовать базу данных:
Удалить базу данных:
Изменить текущую базу данных в PostgreSQL (вы не сможете переименовать или удалить текущую базу данных):
\connect db_name или более короткий alias: \c db_name
Удалить роль (пользователя):
Роль не будет удалена, если у нее есть привелегии — возникнет ошибка ERROR: role cannot be dropped because some objects depend on it .
Нужно удалить привелегии у роли, например если нужно удалить роль admin2, нужно выполнить последовательность комманд с Drop Owned:
Дать права пользователю/роли на логин ( role is not permitted to log in ):
Выбор shema psql в консоли:
Посмотреть список всех схем:
Подключиться к конкретной схеме:
Sequences
Получить имена всех созданных sequences:
Получить последнее значение sequence, которые будет присвоено новой вставляемой в таблицу записи:
Источник
Connect to PostgreSQL Database on Linux, Windows
Connect to PostgreSQL from the command line
Running the PostgreSQL interactive terminal program, called psql, which allows you to interactively enter, edit, and execute SQL commands. At the time of installing postgres to your operating system, it creates an «initial DB» and starts the postgres server domain running. Typically initdb creates a table named «postgres» owned by user «current logged in user name»
At the command line in your operating system, type the following command.
Debian based systems like Ubuntu :
Connect/login as root —
Redhat based systems like Centos / Fedora :
Connect/login as root —
Windows :
In windows, current user doesn’t matter
After accessing a PostgreSQL database, you can run SQL queries and more. Here are some common psql commands
- To view help for psql commands, type \?.
- To view help for SQL commands, type \h.
- To view information about the current database connection, type \conninfo.
- To list the database’s tables and their respective owners, type \dt.
- To list all of the tables, views, and sequences in the database, type \z.
- To exit the psql program, type \q.
psql is a terminal-based front-end to PostgreSQL. It enables you to type in queries interactively, sent them to PostgreSQL, and see the query results.
| Option | Description |
|---|---|
| -a —echo-all | Print all nonempty input lines to standard output as they are read. This is equivalent to setting the variable ECHO to all. |
| -A —no-align | Switches to unaligned output mode. |
| -c command —command=command | Specifies that psql is to execute one command string, command, and then exit. This is useful in shell scripts. Start-up files (psqlrc and |
/.psqlrc) are ignored with this option.
—dbname=dbname
—echo-queries
—echo-hidden
—field-separator=separator
—host=hostname
—html
—list
—log-file=filename
—no-readline
—output=filename
—port=port
—pset=assignment
—quiet
—record-separator=separator
—single-line
—tuples-only
—table-attr=table_options
—username=username
—set=assignment
—variable=assignment
—version
—no-password
—password
—expanded
—no-psqlrc
—field-separator-zero
—record-separator-zero
—single-transaction
—help
Connect to PostgreSQL database using pgAdmin GUI application
You can also connect to PostgreSQL database using pgAdmin GUI application. Connect to the database at localhost:5432 using the user name postgres and the password supplied.
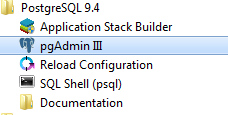
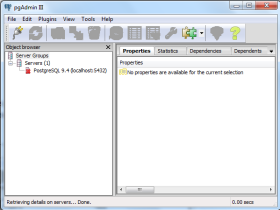
Clicking on pgAdmin III following screen will come:
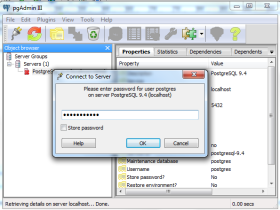
Now, double click on PostgreSQL 9.4 under the «Servers Groups». pgAdmin will ask you for a password. You have to supply the password for the postgres user for authentication.
Under the Database(s) on this server section, find the desired database and execute SQL queries:
Источник
Connecting PostgreSQL using psql and pgAdmin
SUMMARY: This article explains how to connect to the PostgreSQL database using the terminal or command line and the pgAdmin connection tool. Differences in connections in the three major operating systems are covered.
- Connecting to PostgreSQL using psql
- Locating psql
- On Linux
- On Windows
- On Mac
- Connecting with psql
- Connecting to PostgreSQL using pgAdmin 4
- Launching pgAdmin 4
- Connecting with pgAdmin 4
This is a two-part article for beginners who have installed the most advanced open source database, PostgreSQL, and are now looking to connect to it. Since terminal/command line and pgAdmin are the most favored ways for connecting to PostgreSQL, I explain the basics of using both methodologies.
Here I offer separate steps for users of different operating systems, where required; in cases where the operating system is not specified, the steps can be treated as a universal approach, and are valid for any operating system that you are using.
So let’s take our first steps and get connected to PostgreSQL.
Connecting PostgreSQL using psql
Since this is probably the first time you are trying to connect to a PostgreSQL database that you have installed, we will cover some of the possible scenarios you may encounter so you can start working in just a short period of time.
a. Locating psql:
PostgreSQL is supported on three major platforms. To connect using psql you will first need to locate its location on the operating system that you might be using:
i. On Linux:
The easiest way to connect is to check whether you already have psql in your environment variables on not. You can try the following command on the terminal:
This gives you the path, and also, since the OS knows the location, you will not need to browse for it. However, if it errors out, you can locate the psql utility by searching for the file with the following command on terminal:
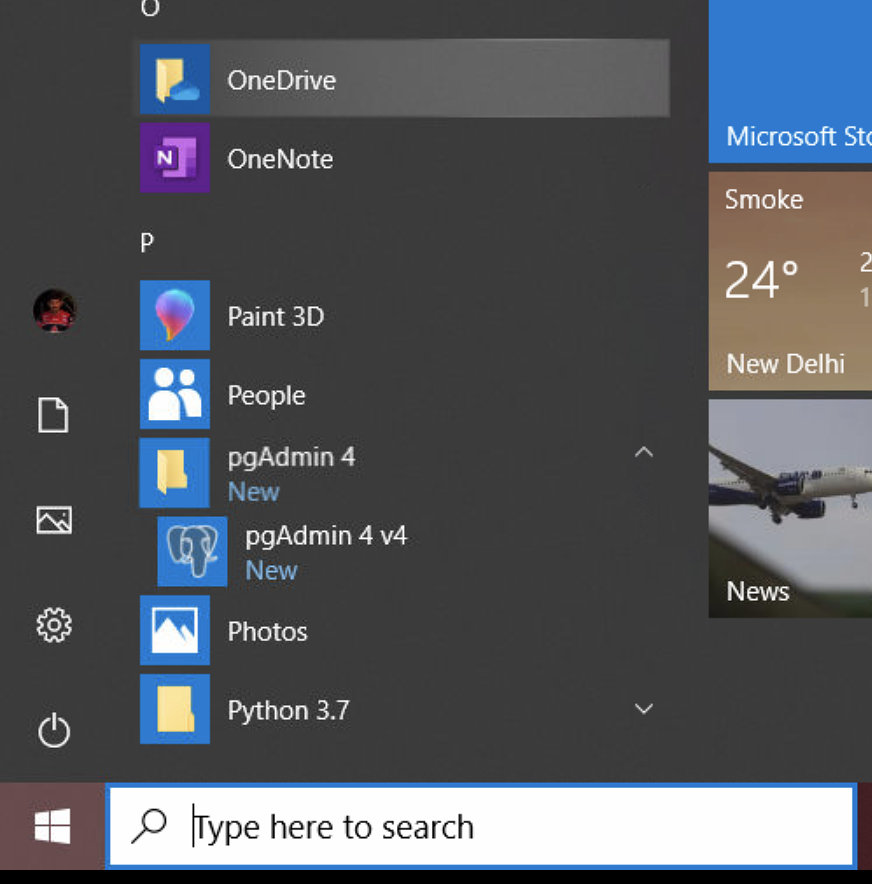
ii. On Windows:
On Windows, you can find psql in the Program Files, and you should be able to launch it in a command prompt simply by clicking on it.
iii. On Mac:
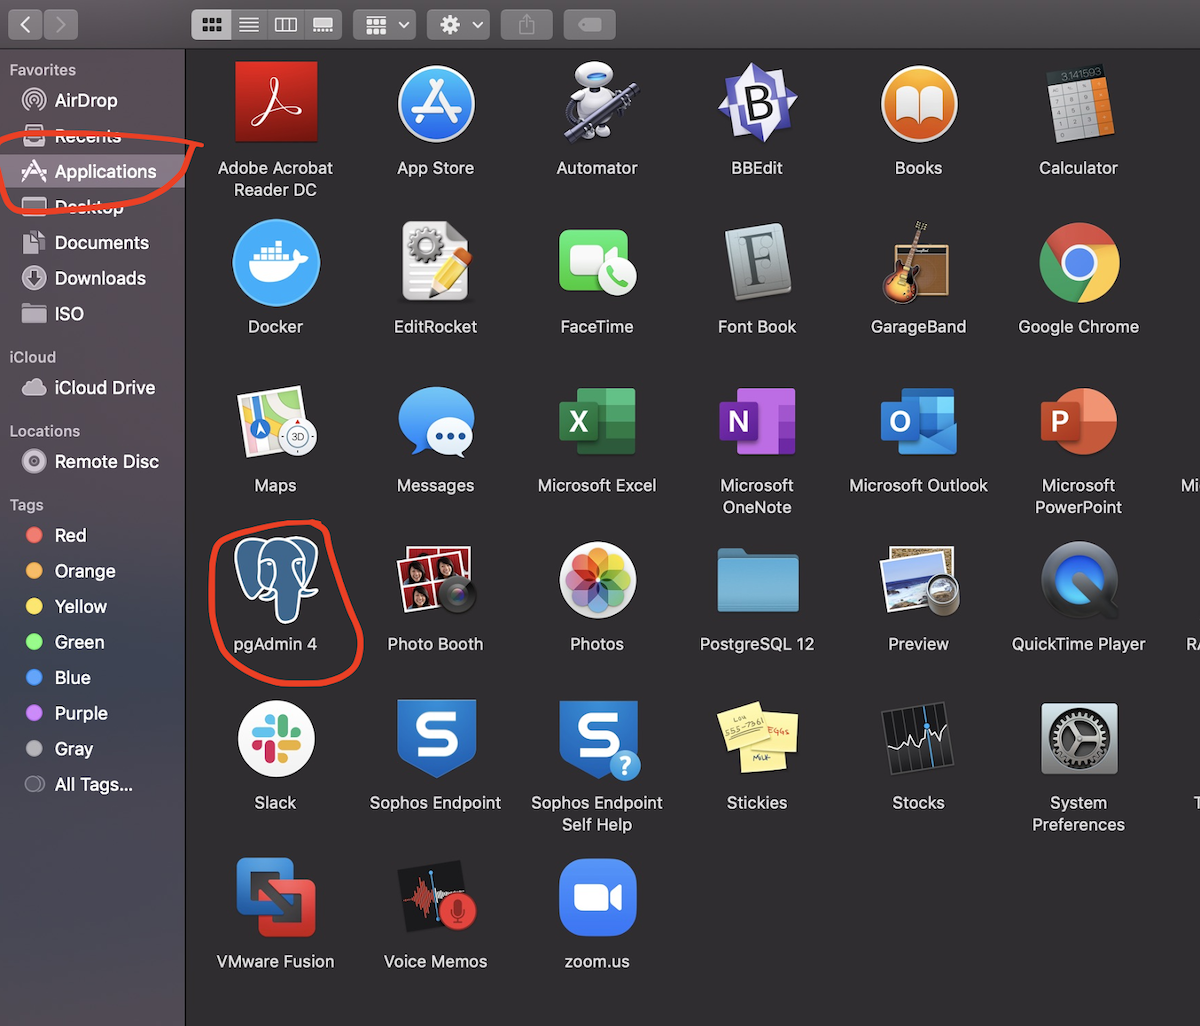
On a Mac you should be able to locate psql under the Applications > PostgreSQL (version number) > SQL Shell (psql).
b. Connecting psql:
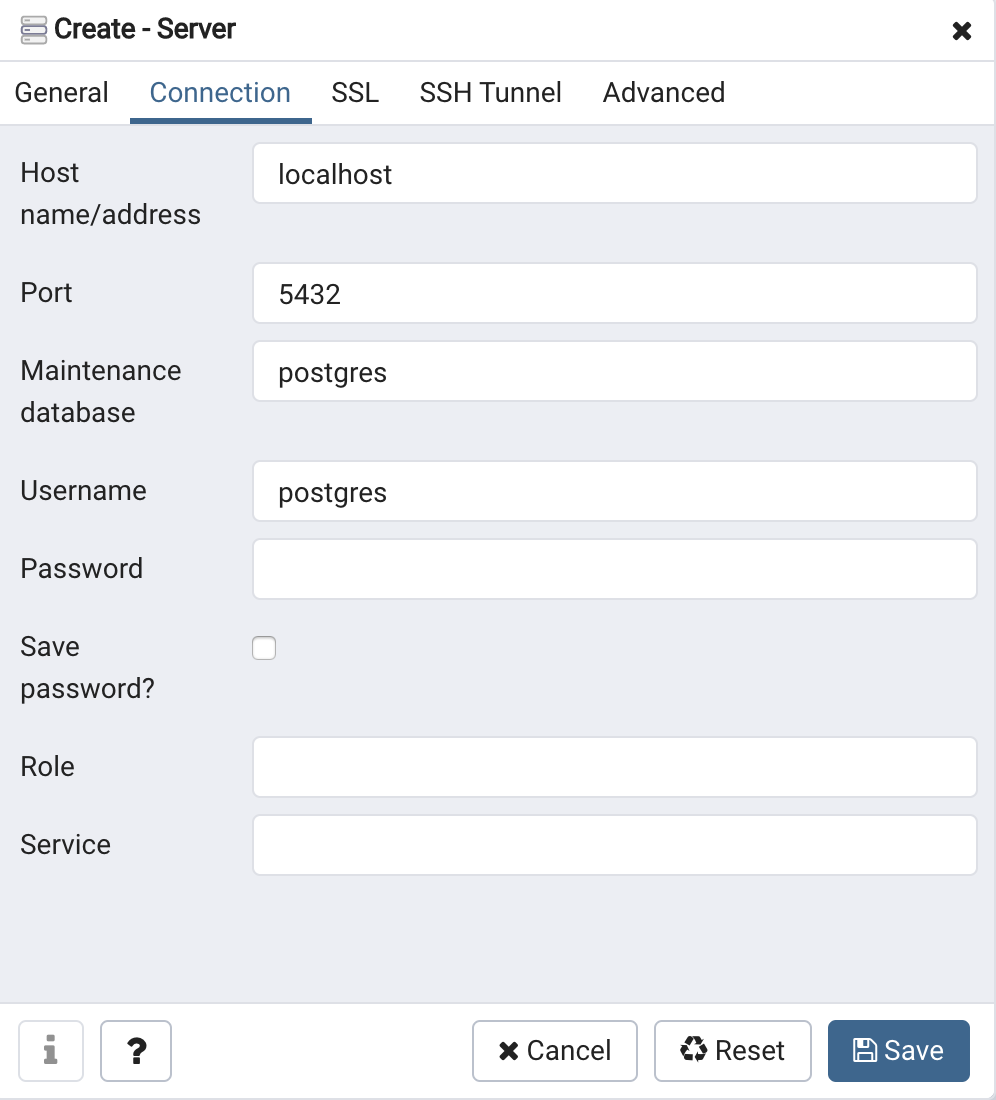
Now that we have located psql, we need to understand what it requires to connect to the database. The basic parameters on any of the platforms are as follows:
Server [localhost]:
This is the address for the server. You can use an IP address or the hostname of the machine on which database server is running. If you do not give any value, by default it is localhost.
Database [postgres]:
The name of the database with which you want to connect. The default name of the database is the same as that of the user. (If you are using Advanced Server, the default name would be edb.)
Port [5432]:
This is the port on which you have configured your instance while installing or initializing. The default port is 5432. (If you are using Advanced Server this would be 5444.)
Username [postgres]:
This is the username that is created while the installation takes place. The default username for postgres is postgres. (If you are using Advanced Server it is enterprisedb.)
On a Mac or Windows, you are able to connect to the default instance by simply hitting enter at the shell or command prompt when trying to run psql and keying in the password.
On Linux, you will explicitly need to pass these parameters at the shell:
For PostgreSQL: -bash-4.2$ psql -d postgres -U postgres
For Advanced Server: -bash-4.2$ psql -d edb -U enterprisedb
If connecting to a remote server from any of the operating systems, you can pass on the specific parameters in the following format:
Connecting PostgreSQL using pgAdmin 4
pgAdmin is the community client for using PostgreSQL. It can be downloaded from the pgAdmin website (https://www.pgadmin.org/download/).
Launching pgAdmin
Launching pgAdmin is easy. It is available in the respective application or programs folder for the operating system that you may be using.
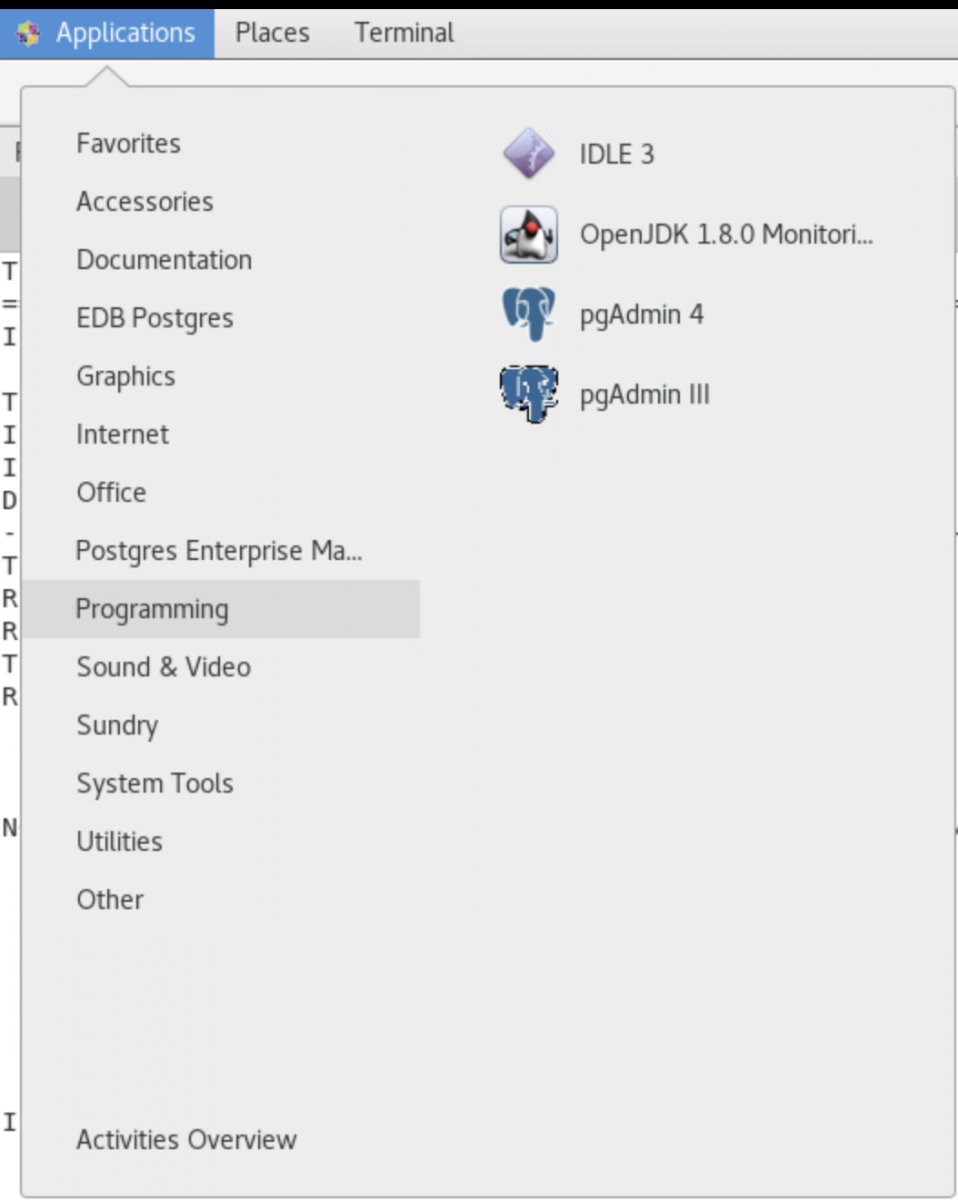
1. On Linux pgAdmin is available under Programming in the Applications menu:
2. On a Mac it is available in the Applications folder as an application:
3. On Windows it is available under Program Files:
Connecting PostgreSQL using pgAdmin 4
pgAdmin 4 is a web application and works as a browser-based client for PostgreSQL. The interface is very user friendly, and most of the options are visible in the first go. Logging in to the pgAdmin client requires you to set a master password when you launch it for the first time.
Once you have logged into the pgAdmin client, you can connect to your database servers using the Create Server option:
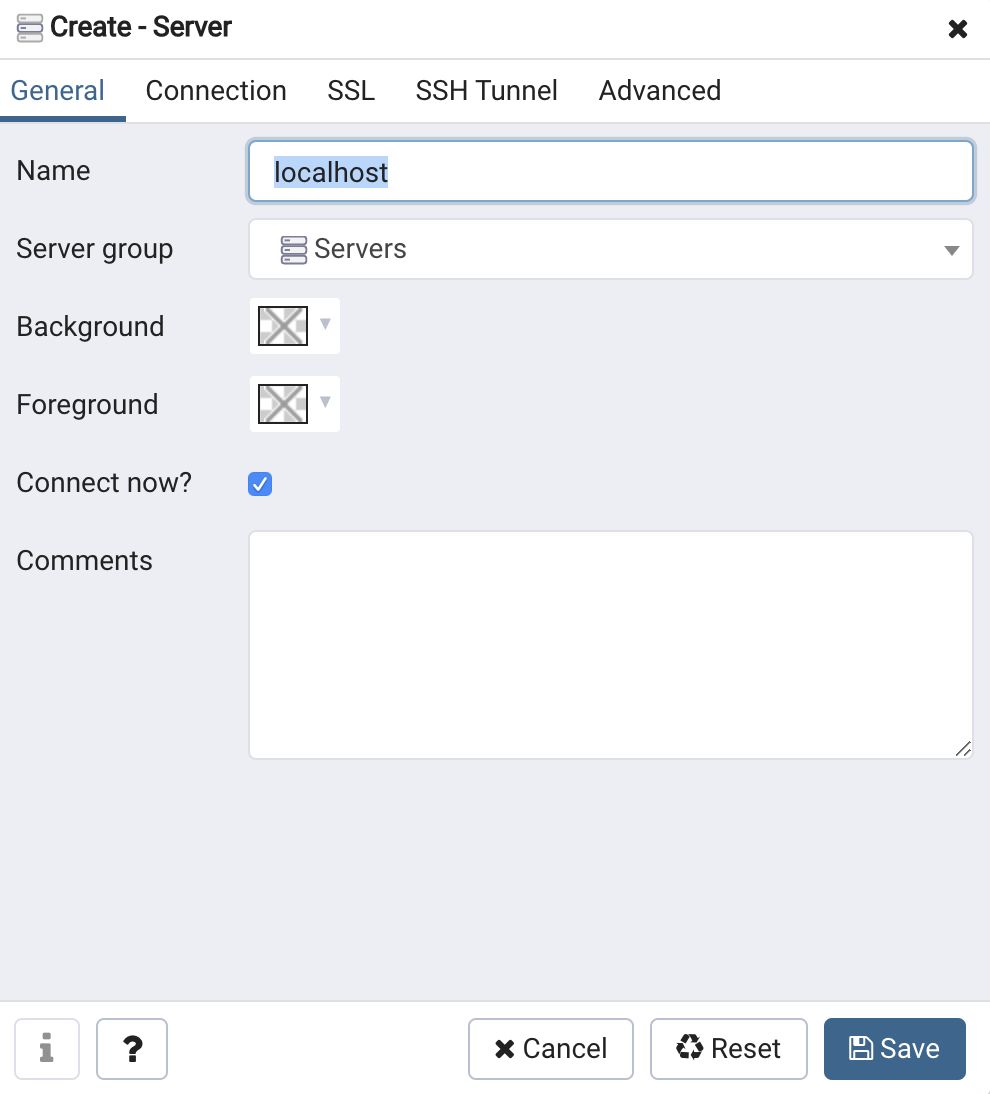
In the first window you only need to provide an identifiable name for the server. The connection details for that server are in the connection tab below::
Once you have filled in the required details, you can click Save, and it will add the name to the list of the servers on the left-hand side tab:
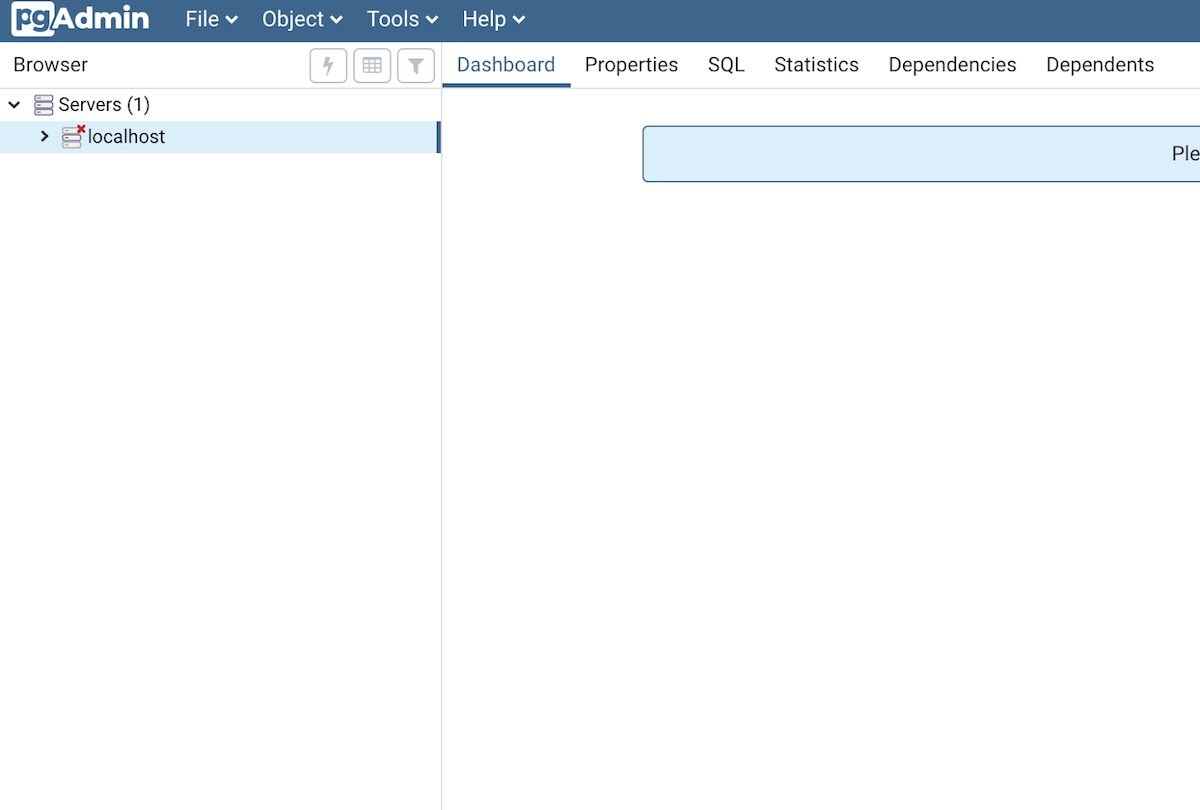
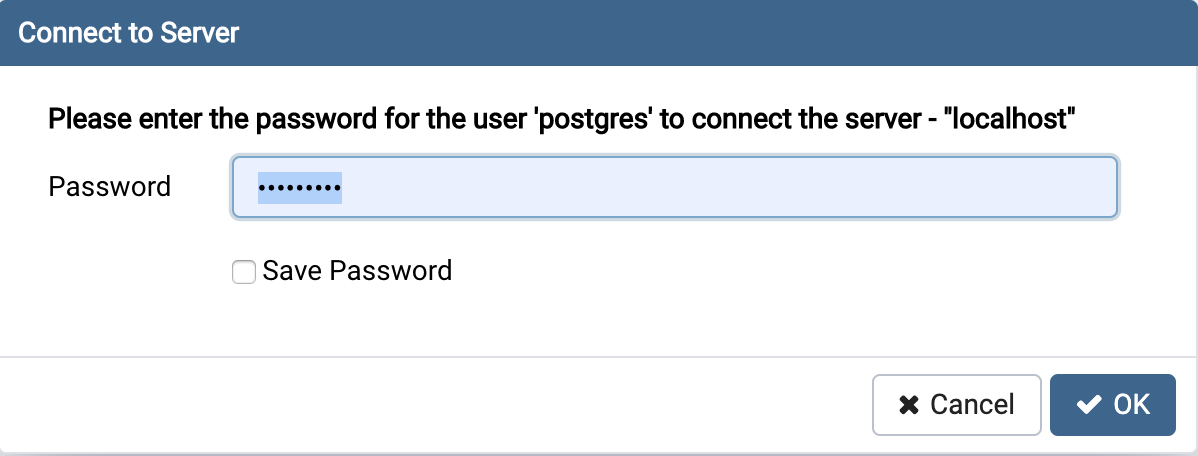
Now you are ready to connect to the server by double clicking the server name under Servers (1) and entering your password:
After you provide the server credentials, you will be presented with the server tree and dashboard:
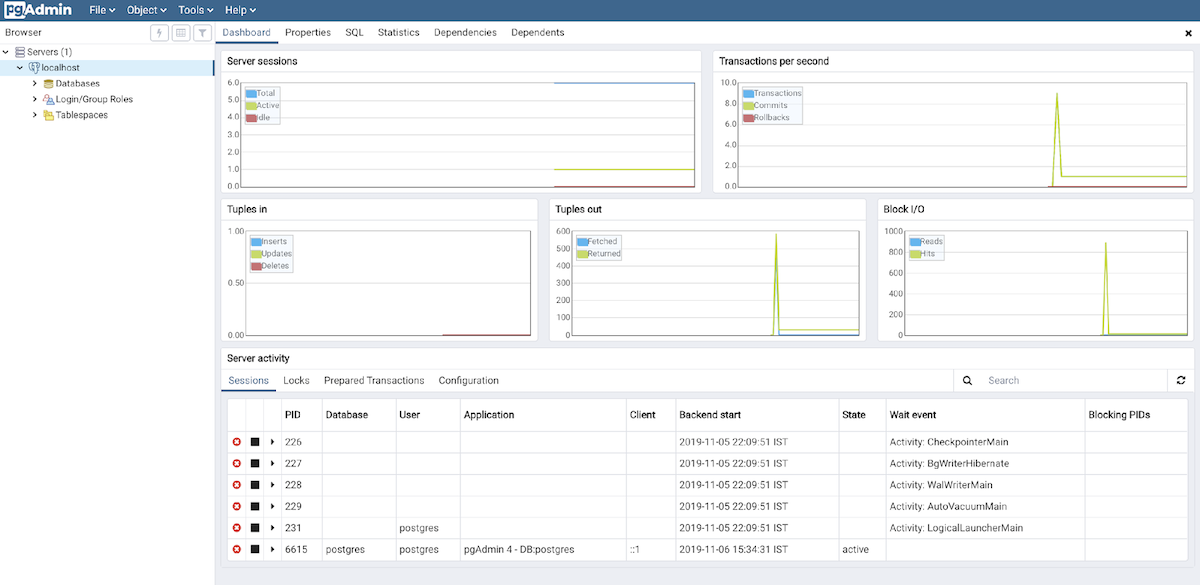
You should be able to select any of the options from the tabs above the dashboard in order to proceed.
Источник


