- Xrdp — Connect Ubuntu Linux Remote Desktop via RDP from Windows
- Xrdp Requirement
- 1) Installation on Linux
- on Ubuntu 18.04
- On Centos/Redhat 7
- 2) Connect from Windows
- Access Remote desktop of Ubuntu/CentOS
- Connecting to Windows Networks Shares from Ubuntu Desktop
- Access Windows Shares
- Connect to a file server
- How to login into Ubuntu using SSH from Windows 10/8/7?
- How do I SSH into Ubuntu from Windows?
- Step 1: OpenSSH-server on Ubuntu Linux machine
- Step 2: Enable the SSH server service
- Step 3: Check the SSH status
- Step 4: Download the Putty on Windows 10/9/7
- Step 5: Install Putty SSH client on Windows
- Step 6: Run and configure Putty
- Step 7: Login to Ubuntu server via Putty SSH client
- Как подключиться к Linux из Windows
- Удалённый доступ к Linux с помощью VNC
- Шаг 1. Установка рабочей среды XFCE
- Шаг 2. Установка TightVNC
- Шаг 3. Настройка пароля
- Шаг 4. Настройка скрипта запуска
- Шаг 5. Запуск VNC сервера
- Шаг 6. Подключение из Windows
- Шаг 8. Настройка systemd
- Использование RDP для удалённого подключения
- Подключение к Linux из Windows по SSH
- Использование Putty для подключения к Linux
- Выводы
Xrdp — Connect Ubuntu Linux Remote Desktop via RDP from Windows

How often do you access Linux Desktop? What tools do you use to access remote desktop?
Xrdp is an open source tool which allows users to access the Linux remote desktop via Windows RDP. Apart from Windows RDP, xrdp tool also accepts connections from other RDP clients like FreeRDP, rdesktop and NeutrinoRDP. Xrdp is now supporting TLS security layer.
Xrdp Requirement
- xrdp and xorgxrdp packages
- Listens on 3389/tcp. Make sure your firewall accepts connections
In this article, I will show how you can remotely connect to Ubuntu Desktop from a Windows machine using Xrdp tool.
1) Installation on Linux
on Ubuntu 18.04
First, you need to install Xrdp on Ubuntu
You have to configure the polkit rule to avoid an authenticate popup after inputting the username and password at the xrdp login screen on windows
restart the xrdp service
Then make sure that the service is running
Now make sure to automatically start the service at the system startup
Now you will need to check your ip address because you will need it for the connection
My ip address is 172.16.8.177 . So keeps yours it in your mind.
Xrdp works with port 3389 so make sure to open it. UFW is disabled by default so you will need to enable the firewall and create a rule for xrdp
Now you can continue the configuration on windows side
On Centos/Redhat 7
Make sure to install the Epel repositories before
Now install xrdp packages
Add a rule in the firewall. On Centos/RedHat is not ufw but firewalld to configure
Then reload the firewall
Now enable and restart the xrdp service
Check your ip address for the remote connection on Windows
2) Connect from Windows
On your windows machine such as windows 10 in our case, launch the default remote desktop connection tool.

You will need to enter the ip address of your machine and you will be asked to enter the username
Access Remote desktop of Ubuntu/CentOS
Enter the ip address and the username

Now confirm the information and launch the connection. If you are not logged out in local, the remote login would fail.

Now you will be asked for your password

Now confirm your credentials. You can see the IP address of my Ubuntu on the top and the login page. Enter your password and enjoy

Are you aware of any other tools? Please advise us on the comments
Connecting to Windows Networks Shares from Ubuntu Desktop
Remote users can connect over the network and access shared files and folders as if they were directly connected to the local machines. This is a convenient way to make files and folders available to other people on your local network.
This brief tutorial is going to show students and new users how to access Windows network shares from Ubuntu desktops. When you open Ubuntu file manager, it should find network shares that are automatically advertise across the network.
Ubuntu and other desktop computers should be able to view and connect to the shares… however, if the shares are not advertised, you will need to connect to the shares manually by typing the resource network address. To get started with access Windows shares across the network, follow the guide below:
Access Windows Shares
To browse Windows files over the network, open the Files application from the Activities overview (top left corner) or click File Manager on the dock and click Other Locations in the sidebar.

Connect to a file server
To connect to Windows shares, use the guide below:
In the file manager, click Other Locations in the sidebar.
In Connect to Server , enter the address of the server, in the form of a URL . Details on supported URLs are listed below .
If you have connected to the server before, you can click on it in the Recent Servers list.
Then click the Click Connect button . The files on the server will be shown. You can browse the files just as you would for those on your own computer. The server will also be added to the sidebar so you can access it quickly in the future.
Windows computers use a proprietary protocol to share files over a local area network. Computers on a Windows network are sometimes grouped into domains for organization and to better control access. If you have the right permissions on the remote computer, you can connect to a Windows share from the file manager.

A typical Windows share URL looks like this:
This how to connect to Windows shares from Ubuntu.
How to login into Ubuntu using SSH from Windows 10/8/7?
SSH which is a Secure shell protocol allows the users to connect the Unix and Linux based operating systems running on servers or desktops remotely. We can run all commands on remote servers like Ubuntu, Debian, Centos, RedHat etc. using the lightweight piece of SSH software. To know more about it see our article: What is SSH (Secure Shell)?
Well, running SSH on Linux using SSH server to connect and login some other Linux system is pretty easy but how to do it between Ubuntu (Linux) and Windows 10/8/7. In this article, we focus on this and let you know the simple way to SSH into Ubuntu from Windows 10.
Note: This method will be the same for Ubuntu 18.04,170.4, 16.04, 14,04… to log in using Windows 7, Windows 8 or Windows 10.
How do I SSH into Ubuntu from Windows?
Step 1: OpenSSH-server on Ubuntu Linux machine
To connect & login the Ubuntu using the SSH first of all we need to install the same on Ubuntu. For this purpose use the command:
Step 2: Enable the SSH server service
After installing the SSH server, enable it on Ubuntu by using the command:
Step 3: Check the SSH status
Once you enabled the SSH service, its time to check whether it is running in the background or not. Use this command:
If you output for above command is * sshd is running then everything is fine and move to the next step.
Step 4: Download the Putty on Windows 10/9/7
To connect or log in the Ubuntu via SSH, we need an SSH client for Windows. The Putty is a free and easy way to login Ubuntu and other Linux servers remotely from Windows using SSH. However, there are numbers of other free SSH clients available online those ones can be used too. Here is the Putty Download Link.
Step 5: Install Putty SSH client on Windows
We can install the Putty.exe downloaded file just like any other software with few clicks. There is no special configuration or setup. Double click on it and follow the guided steps.
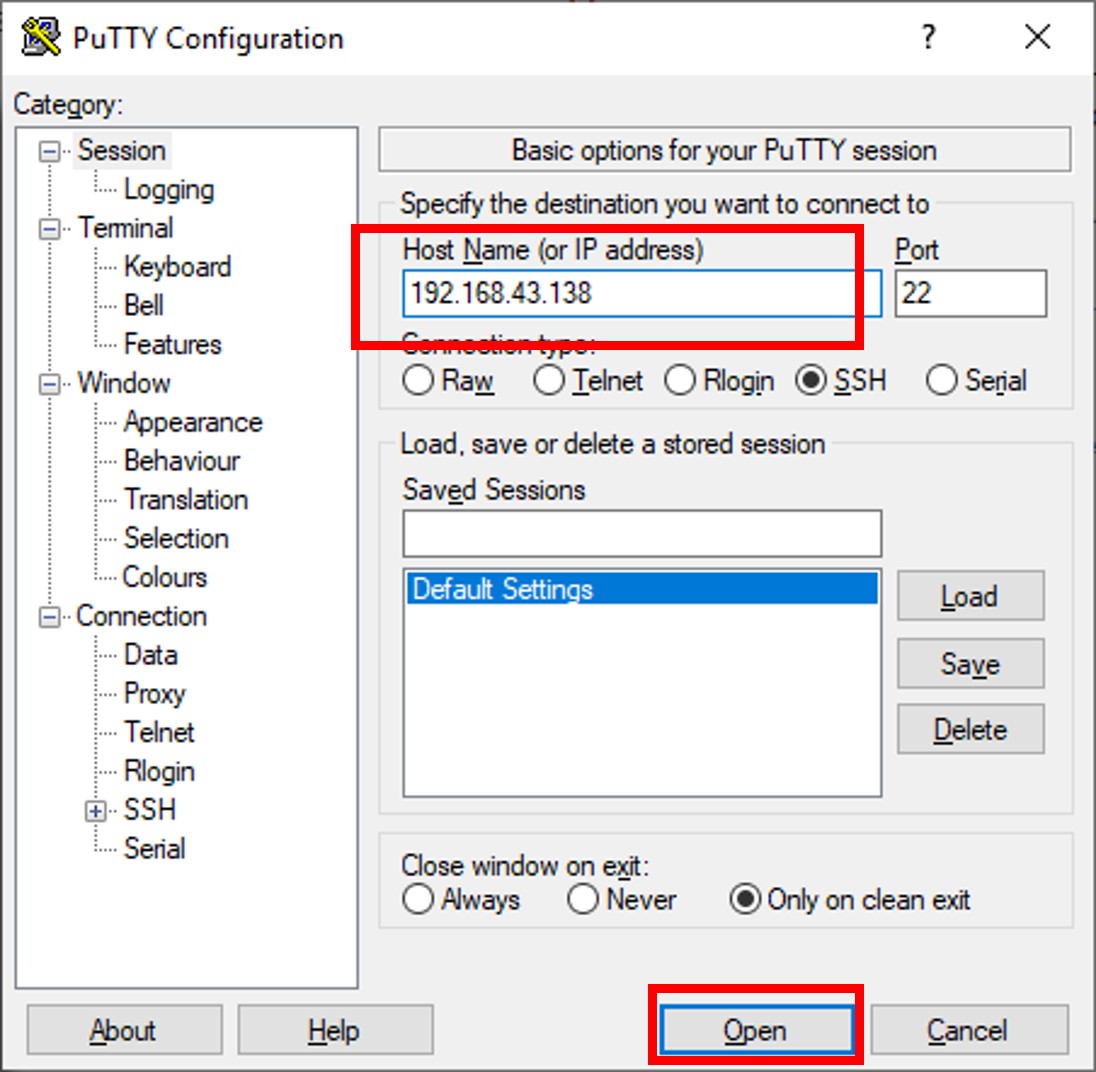
Step 6: Run and configure Putty
As we open the Putty, the first screen will be something like shown in the below screen. Now in the Host Name (or IP address) box type the Ip address of the remote Ubuntu server which you want to connect using the SSH protocol.
After adding the right IP address just click on the Open button.
Step 7: Login to Ubuntu server via Putty SSH client
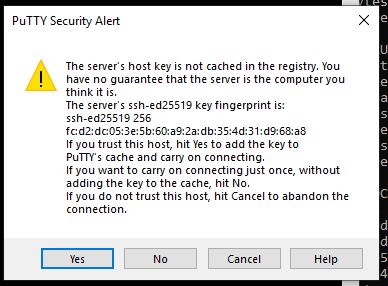
As we click on the Open button, the putty will ask whether you trust the server you about to connect or not, click on YES button.
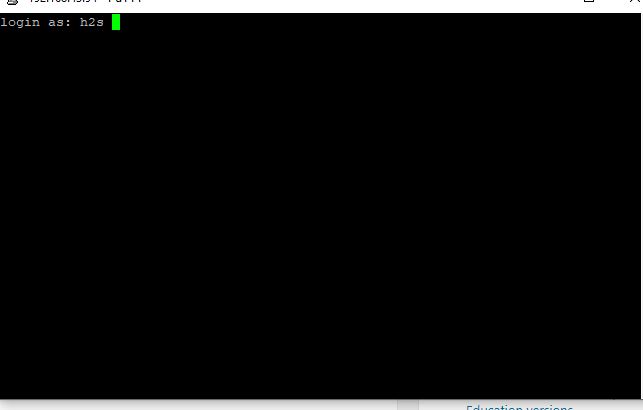
The black colour command terminal window of the Putty will appear along with login as: text. Enter the username and password of the remote server you want to login. That’s it.
You can also use the command prompt to use the SSH after installing the Putty. Go to Command prompt or PowerShell on Windows 10 and type: putty [ipaddres] and hit the enter button.
For example– putty 192.168.43.94
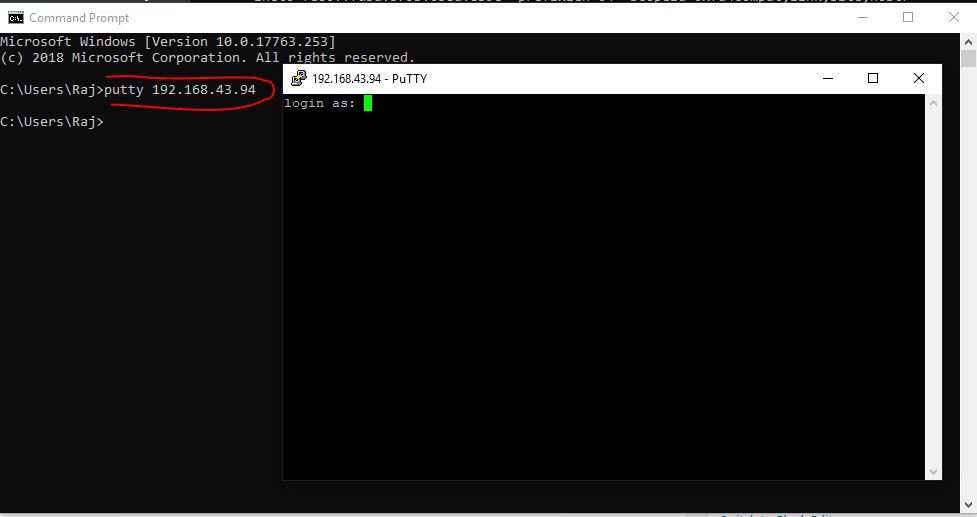
In this way, we can connect and login remote Ubuntu server or any other Linux or Unix machine over SSH from Windows 10/8/7.
Other Resources to read:
Как подключиться к Linux из Windows
В мире ИТ существует уже довольно широкий спектр операционных систем, начиная с серверных, заканчивая операционными системами для мобильных устройств. В обычных пользовательских компьютерах и в серверах довольно часто используются две ОС — Linux и Windows. Поэтому очень часто возникают ситуации, когда приходится подключаться по сети из одной операционной системы к другой для выполнения разнообразных операций.
В этой статье мы рассмотрим варианты подключения к Linux из Windows. Существуют бесплатные и условно бесплатные утилиты вроде AnyDesk или TeamViewer, но установка их довольно тривиальна и не нуждается в дополнительном пояснении. Утилиты подобного рода обладают рядом ограничений при бесплатном некоммерческом использовании, либо их функциональность не удовлетворяет тем или иным потребностям пользователя. Мы рассмотрим полностью бесплатные способы как подключится к Linux из Windows.
Удалённый доступ к Linux с помощью VNC
На сегодняшний день самое популярное удаленное подключение к Linux из Windows, с использованием привычный в Windows графического интерфейса, является VNC (Virtual Network Computing) — утилита, использующая протокол RFB (Remote FrameBuffer — удалённый кадровый буфер). Управление осуществляется путём передачи нажатий клавиш на клавиатуре и движений мыши с одного компьютера на другой и ретрансляции содержимого экрана через компьютерную сеть.
В качестве сервера VNC в данном примере будет использоваться TightVNC, установленный в Ubuntu 20.04. Для установки сервера VNC необходимо выполнить ряд действий:
Шаг 1. Установка рабочей среды XFCE
Xfce — одна из самых легковесных рабочих сред, используемых в Linux, она будет быстро работать даже при слабом и нестабильном сетевом подключении. Установите её с помощью команд:
sudo apt update
sudo apt install xfce4 xfce4-goodies
Шаг 2. Установка TightVNC
Далее установите TightVNC:
sudo apt install tightvncserver
Шаг 3. Настройка пароля
Перед началом выполнения всех действий необходимо задать пароль пользователя VNC. Выполните команду:
Вам будет предложено создать новый пароль, а также пароль только для просмотра. Откажитесь от второй опции:
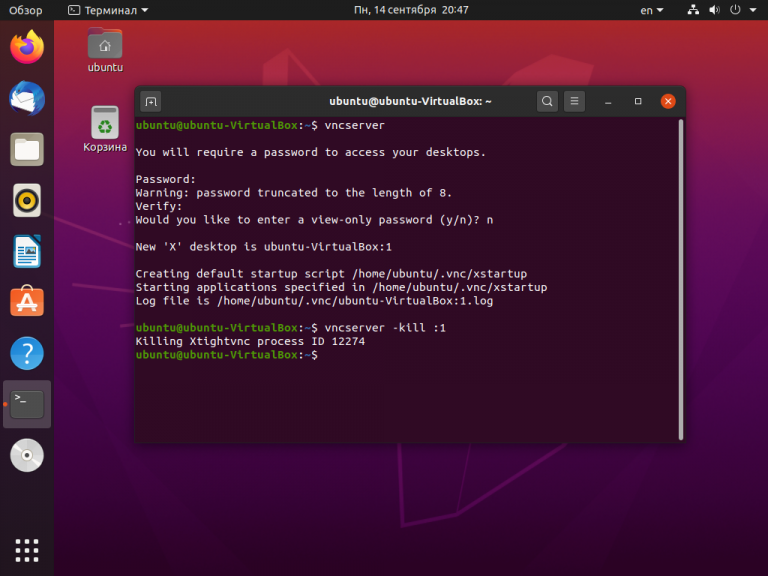
Завершите процесс vncserver:
vncserver -kill :1
Шаг 4. Настройка скрипта запуска
Отредактируйте скрипт, который выполняется после запуска VNC-сервера:
Он должен содержать такой текст:
#!/bin/sh
unset SESSION_MANAGER
unset DBUS_SESSION_BUS_ADDRESS
startxfce4 &
Сделайте файл исполняемым:
Шаг 5. Запуск VNC сервера
На этом этапе уже можно запустить VNC-сервер с помощью команды:
Шаг 6. Подключение из Windows
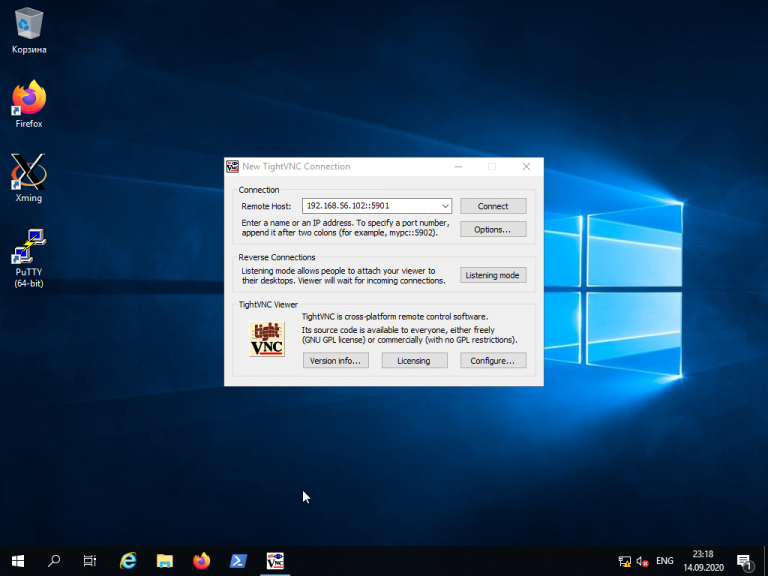
Для того, чтобы подключиться из Windows к вашему Linux-серверу, используйте TightVNC Viewer.
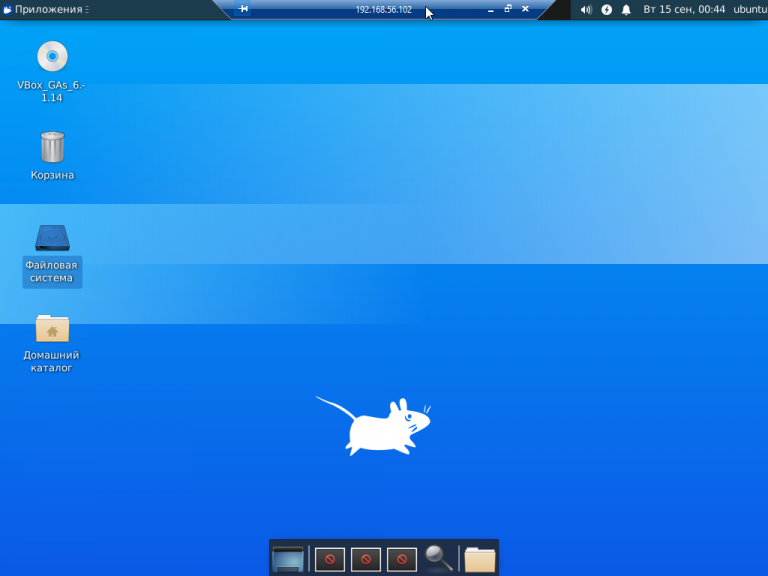
Укажите IP-адрес компьютера, к которому нужно подключиться, и номер порта в поле Remote Host. В данном примере — 192.168.56.102::5901:
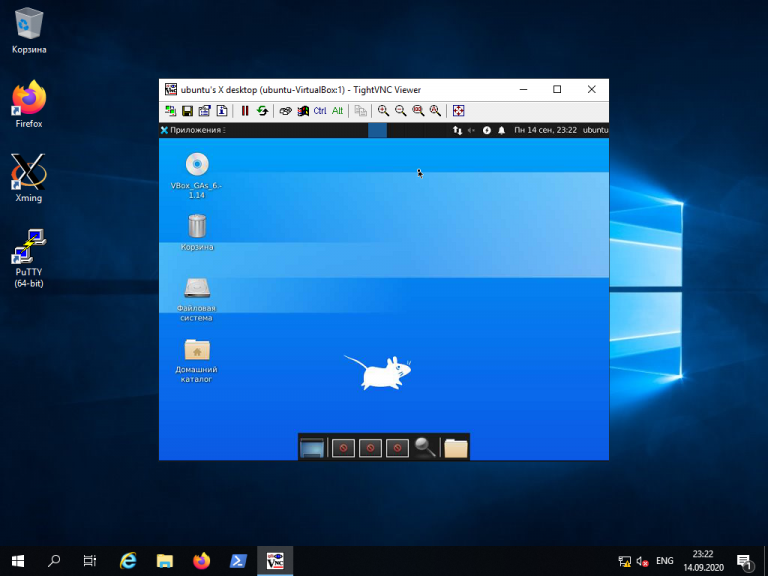
После того, как будет введён пароль, вы должны увидеть рабочий стол Xfce:
Шаг 8. Настройка systemd
Для того, чтобы запуск вашего VNC-сервера добавить в автозагрузку надо использовать systemd. Создайте новый файл сервиса systemd:
sudo nano /etc/systemd/system/vncserver@.service
Его содержимое должно быть следующим:
[Unit]
Description=Systemd VNC server startup script for Ubuntu 20.04
After=syslog.target network.target
[Service]
Type=forking
User=ubuntu
ExecStartPre=-/usr/bin/vncserver -kill :%i &> /dev/null
ExecStart=/usr/bin/vncserver -depth 24 -geometry 800×600 :%i
PIDFile=/home/ubuntu/.vnc/%H:%i.pid
ExecStop=/usr/bin/vncserver -kill :%i
[Install]
WantedBy=multi-user.target
Измените имя пользователя ubuntu и рабочего каталога ubuntu на нужные вам значения. Если у вас запущен VNC-сервер, остановите его:
vncserver -kill :1
Сообщите systemd о появлении нового сервиса:
sudo systemctl daemon-reload
Добавьте запуск вашего нового сервиса в список автозагрузки:
sudo systemctl enable vncserver@1.service
sudo systemctl start vncserver@1
Использование RDP для удалённого подключения
Помимо VNC, для управления Linux-сервером из Windows можно воспользоваться RDP (Remote Desktop Protocol). Для этого на компьютере с Ubuntu 20.04 установите утилиту xrdp:
sudo apt install xrdp
Для корректной работы сервиса необходимо добавить пользователя xrdp в группу ssl-cert:
sudo adduser xrdp ssl-cert
sudo apt-get install xfce4
Добавьте Xfce в сессии RDP в качестве рабочего стола по умолчанию:
Перезапустите сервис xrdp:
sudo systemctl restart xrdp.service
Процедура подключения из Windows к Linux-серверу по протоколу RDP почти ничем не отличается от подключения к удалённым Windows-серверам. Введите IP-адрес сервера, логин и пароль пользователя в Linux:
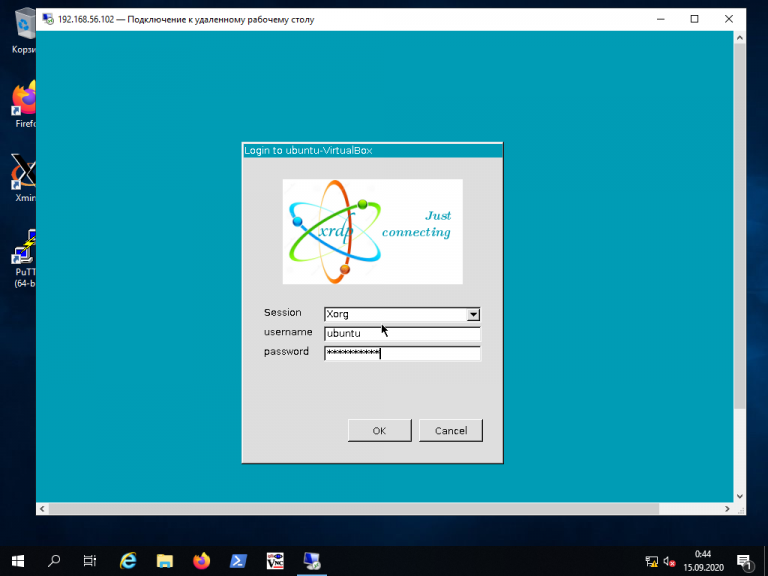
Если всё сделано правильно, вы увидите рабочий стол Xfce:
Подключение к Linux из Windows по SSH
Для подключения к компьютеру под управлением Linux по протоколу SSH из Windows можно воспользоваться PowerShell. Сначала становите OpenSSH Client, если ещё не установлен. Запустите на вашем компьютере PowerShell от имени администратора системы и выполните следующую команду:
Get-WindowsCapability -Online | ? Name -like ‘OpenSSH*’
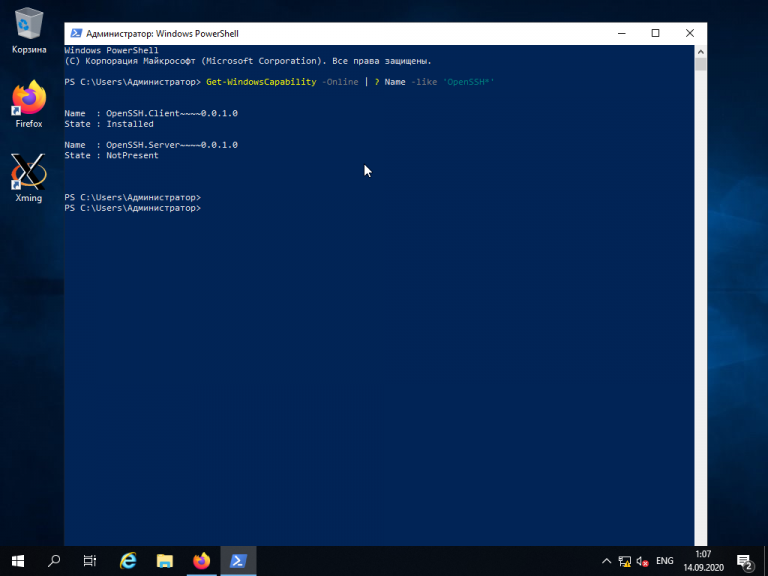
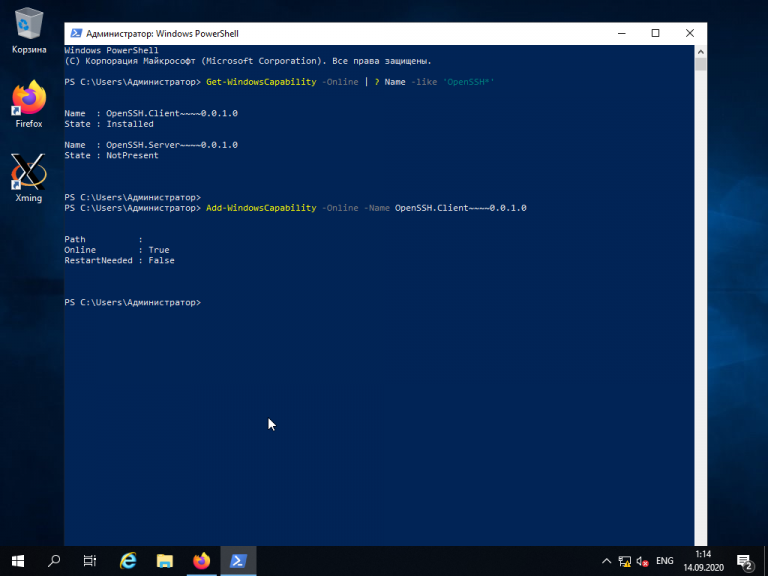
Это необходимо для того, чтобы узнать текущую версию SSH-клиента. В данном примере доступна версия OpenSSH.Client-0.0.1.0. Установите OpenSSH.Client с помощью команды:
Add-WindowsCapability -Online -Name OpenSSH.Client
Для того, чтобы подключиться к устройству, на котором запущен SSH-сервер, необходимо ввести имя пользователя и IP-адрес. Команда для подключения по SSH используя PowerShell выглядит так:
Здесь ubuntu — имя пользователя на удалённом компьютере, а 192.168.56.1 — IP-адрес Linux-сервера, на котором запущен демон SSH.
При первом подключении необходимо подтвердить использование специального персонального ключа для шифрованного соединения по SSH-протоколу (введите слово Yes), затем введите пароль пользователя (в данном случае для пользователя ubuntu):
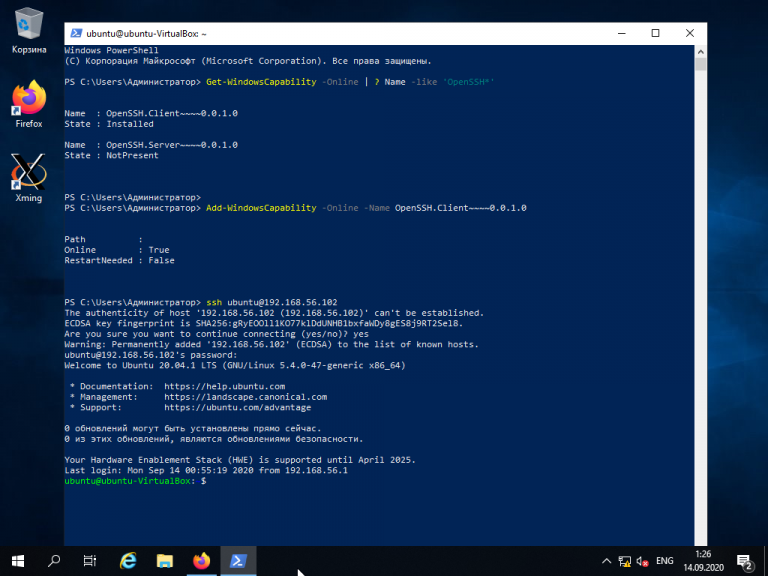
Как видите, соединение прошло успешно. Теперь можно выполнять все команды так же, как если бы вы их выполняли используя стандартный Linux SSH-клиент:
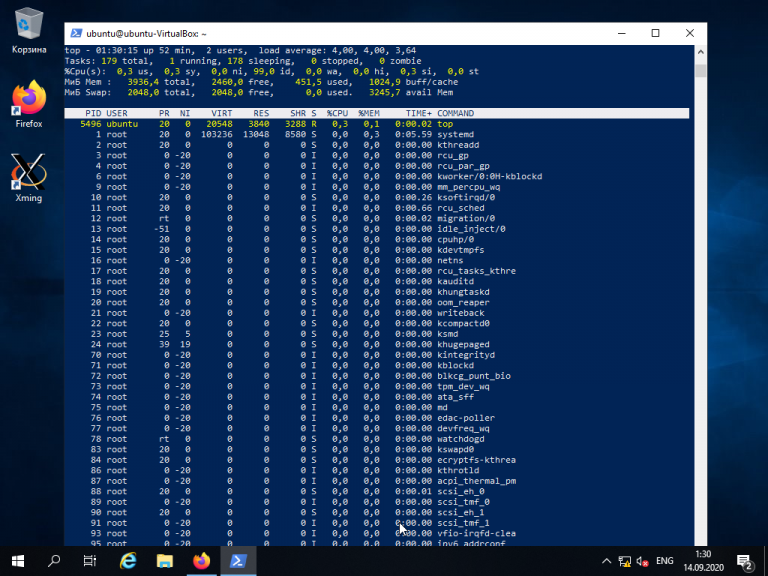
Для завершения терминальной сессии на удалённом компьютере введите команду exit. Теперь вы знаете как выполняется подключение к Linux из Windows по SSH.
Использование Putty для подключения к Linux
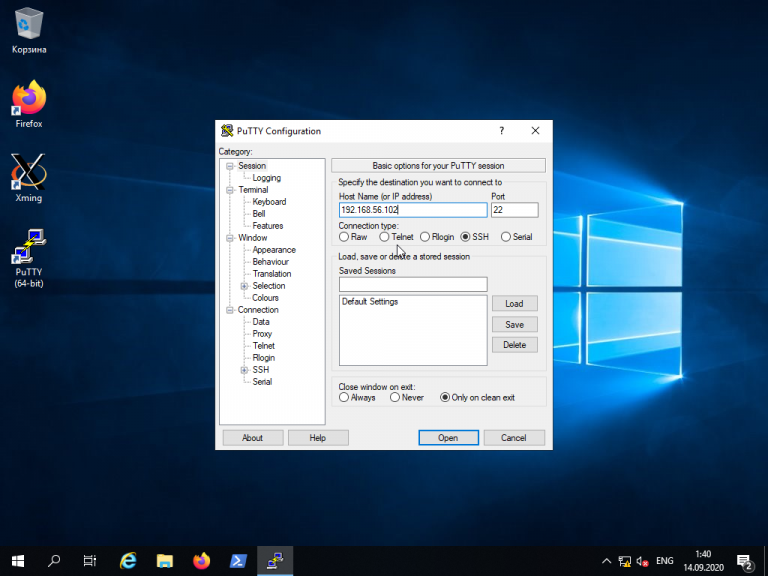
Пожалуй, одним из самых популярных способов подключения к Linux из Windows является кроссплатформенная утилита Putty — небольшая по размерам, но очень часто незаменима для подключения по таким протоколам как SSH, Telnet, rlogin и даже с помощью последовательных портов.
Для обычного подключения к Linux-серверу по протоколу SSH достаточно в поле Host Name (or IP—address) указать его IP-адрес и нажать кнопку Open (в данном примере Linux-сервер имеет IP-адрес: 192.168.56.102):
При первом подключении Putty предупредит, что используется специальный ключ безопасности и его нужно добавить в доверенные хосты. Нажмите кнопку Да:
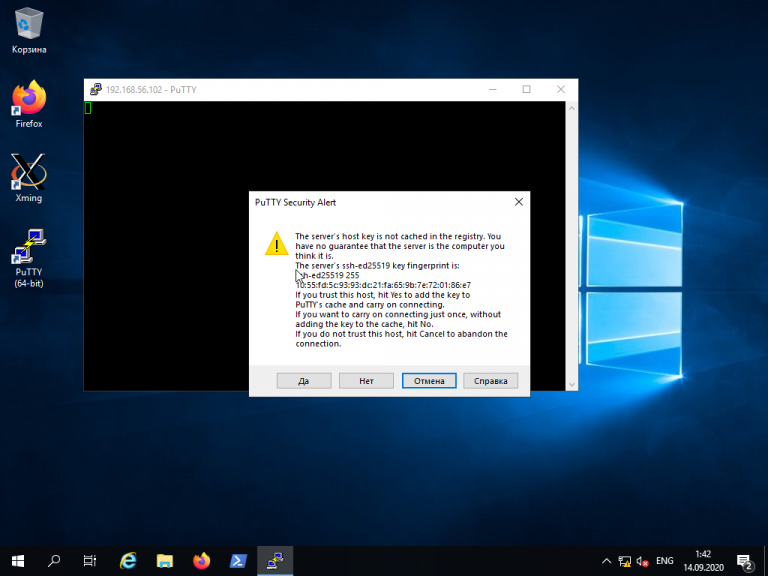
Далее нужно будет ввести логин и пароль. Если всё сделано правильно, запустится удалённая сессия терминала Linux:

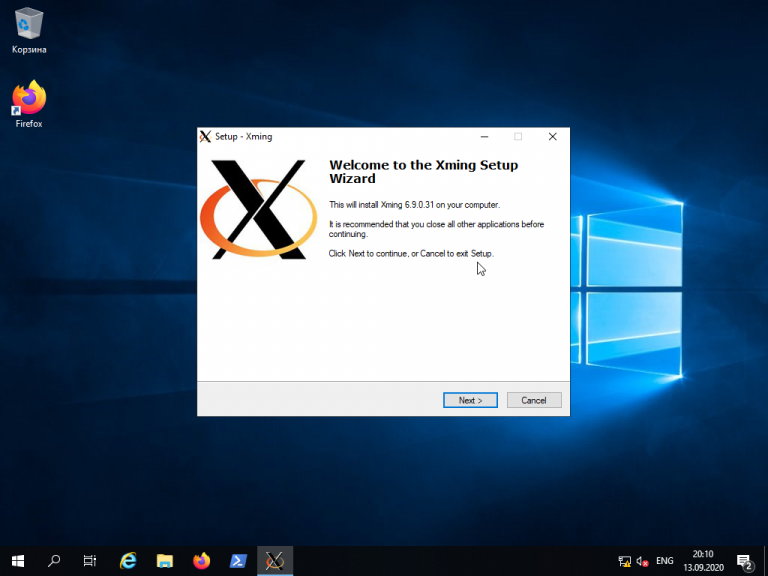
Мало кто знает, что Putty позволяет запустить почти любое приложение, установленное на компьютере с Linux, по сети в Windows. Для этого на компьютере с Windows нужно установить собственный X-сервер. В данном примере воспользуемся Xming.
Скачайте Xming с официального сайта. Установка довольно тривиальная, поэтому не будем на ней останавливаться. Ничего не меняйте в процессе установки. Просто нажимайте кнопку Next до тех пор, пока программа не установится и не запустится:
Когда установка Xming завершится, откройте Putty и в настройках сессии для вашего подключения в разделе SSH -> X11 включите флажок напротив опции Enable X11 forwarding, а также, в строке Отображение дисплея X впишите значение localhost:0, после чего откройте сессию подключения с помощью кнопки Open:

В открывшемся терминале Putty введите консольное название программы, обладающей графическим интерфейсом. В данном примере введено название графического редактора drawing:
(Знак & позволит запустить программу в фоновом режиме, в этом случае в окне Putty можно будет выполнять и другие команды):
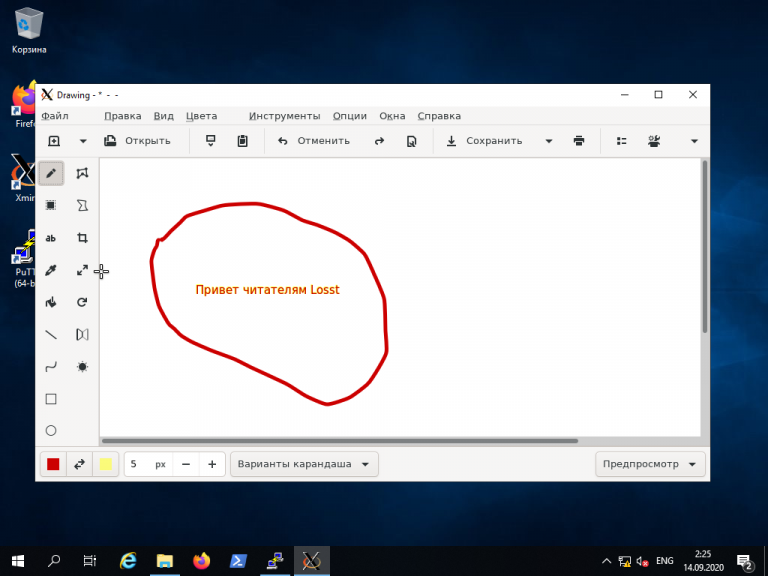
Как видите, Linux-приложение drawing успешно запустилось по сети на X-сервере, установленном в Windows. С ним можно работать так же, как и с локальным приложением.
Выводы
Сегодня не существует слишком уж больших проблем для подключения к Linux из Windows. Способов существует довольно много. Каждый из них обладает своими достоинствами и недостатками, например, скорость работы VNC, да и других тоже, существенно зависит от скорости сетевого соединения. Существуют также программные средства, позволяющие подключаться к Linux-серверам используя мессенджеры или браузеры.


