- Подключаем Windows Phone к вашему iMac/MacBook/Mac Mini
- Введение
- Заключение
- Connect windows phone with mac
- Share Mac files with Windows users
- Set up file sharing on the Mac
- Provide the information Windows users need
- Connect to a Windows computer from a Mac
- Connect to a Windows computer by browsing
- Connect to a Windows computer by entering its address
- Connect using an Ethernet cable
- Reconnect to recent computers or servers
- Sync content between your Mac and iPhone or iPad
- Sync all items of a content type
Подключаем Windows Phone к вашему iMac/MacBook/Mac Mini
Введение
В принципе, в Microsoft могли бы пойти по пути Google и просто сделать отдельное приложение, которое показывало бы папки в вашем смартфоне. Вот только на устройствах от Apple другая логика работы с контентом, здесь он сортируется не по папкам, а по категориям: музыка отдельно, видео отдельно, подкасты отдельно. В рамках сегодняшней статьи я не буду спорить о том, какой из подходов удобнее — от Apple или от Microsoft. Мне хотелось бы подробнее рассказать о приложении, с помощью которого осуществляется взаимодействие ваших Mac и Windows Phone.
Скачать приложение вы можете по этой ссылке.
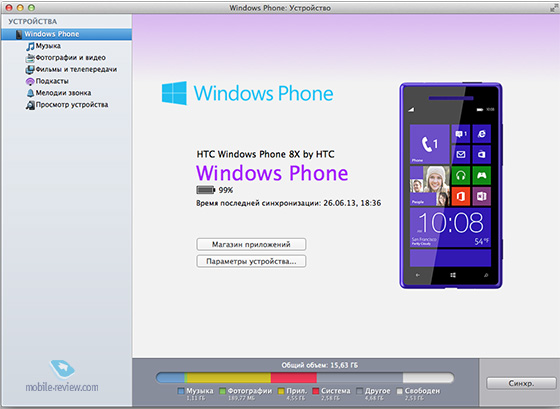
Начальный экран. При подключении вашего Windows Phone смартфона к Mac вы открываете соответствующее приложение и видите его стартовый экран. На нем отображается основная информация об устройстве: уровень заряда устройства, количество свободной памяти и возможность быстрой синхронизации между Mac и Windows Phone.
Музыка. Большинство пользователей OS X используют для прослушивания музыки iTunes, кто-то просто слушает музыку, кто-то составляет плейлисты, в данном случае это не имеет значения. В разделе «Музыка» вы можете выбрать соответствующие списки воспроизведения или жанры музыки, которые вы хотели бы синхронизировать. Интересно, что если вы выбрали несколько плейлистов, то можно настроить их автоматическую синхронизацию с телефоном в настройках. Например, у меня есть плейлист «Calm Mood», в который я периодически добавляю спокойную расслабляющую музыку. При подключении Windows Phone к моему iMac я всегда буду иметь актуальный плейлист на телефоне.
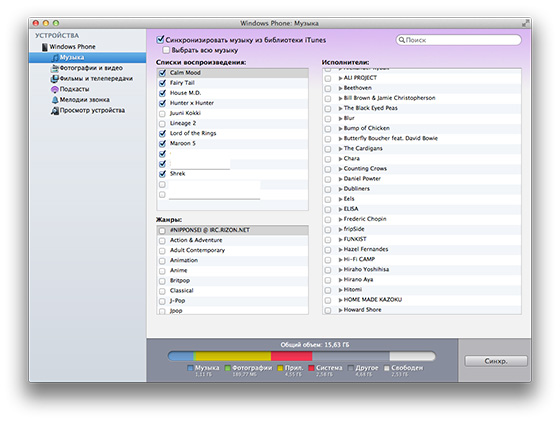
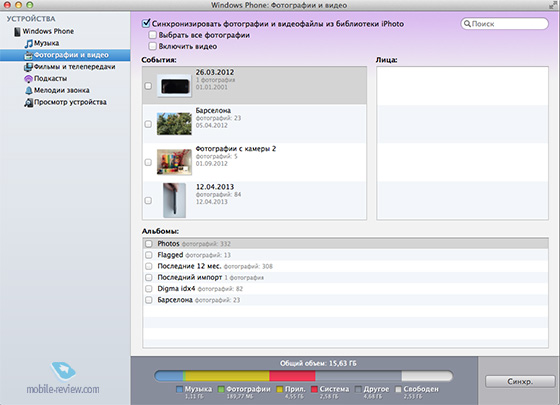
Фото и видео. Раздел для пользователей Aperture и iPhoto. Вы можете настроить импорт всех фотографий и видео с вашего Mac на телефон.
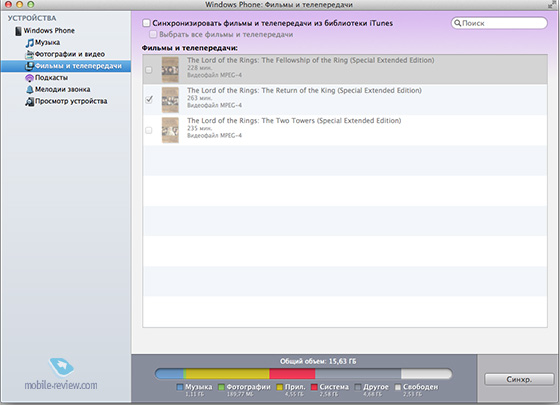
Фильмы и телепередачи. В этом разделе вы можете перенести купленные или добавленные в библиотеку iTunes фильмы на ваш Windows Phone. Отдельно отмечу, что просто так скопировать купленные в iTunes фильмы нельзя, поэтому эта опция — отличное решение для владельцев WP.
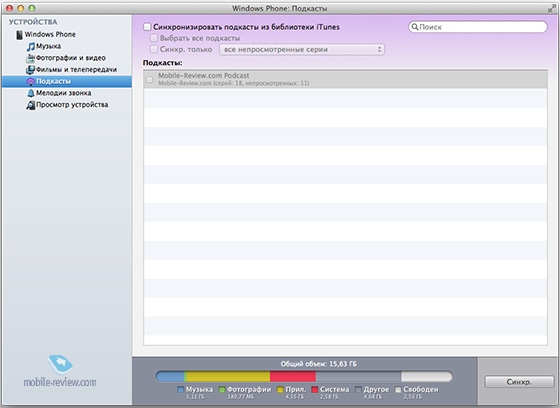
Подкасты. Отдельный раздел для ваших подкастов.
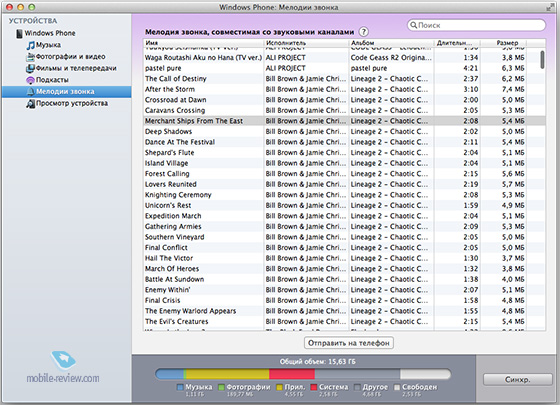
Мелодии звонка. Кроме обычного переноса, вы можете прямо через программу установить мелодию на звонок.
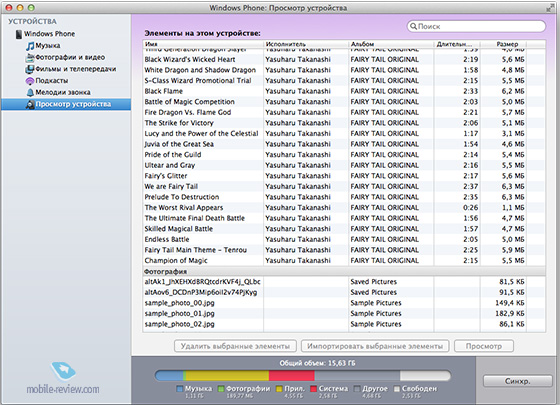
Просмотр устройства. Никуда не делся и обычный файловый менеджер, правда, здесь все файлы отсортированы по типу.
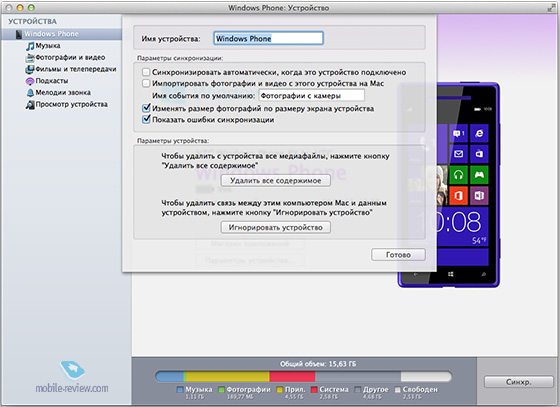
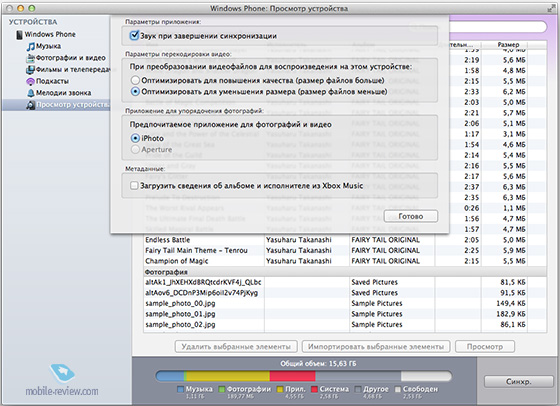
Настройки. В настройках можно изменить параметры для загрузки видео на устройство, а также выбрать приложение по умолчанию для импорта фотографий.
Заключение
Приятно, что в Microsoft сделали хорошее качественное приложение для владельцев компьютеров и ноутбуков от Apple с учетом особенностей этой операционной системы.
Программа тестировалась на HTC Windows Phone 8x.
Connect windows phone with mac

Описание:
Windows Phone for Mac — это простое и удобное в использовании приложение, предназначенное для синхронизации Ваших любимых медиа-файлов. Обсуждение ПО для синхронизации с Windows — Zune Software.
Возможности:
- Синхронизация фото
- Синхронизация видео
- Синхронизация музыки
- Обновления ПО Windows Phone
Совместность: Mac OS X 10.6 и новее
Сообщение отредактировал Uncle — 29.04.16, 09:30
Features:
• Full sync and import support for Apple Aperture software
• Drag and drop import of files from Browse Device
• Ringtone transfer support (for phones running Windows Phone 7.5 or later)
• Improved video conversion process with user configuration options
• Support for Windows Phone Marketplace (for phones running Windows Phone 7.5 or later)
• Localization support for 13 additional languages
• Improvements to backup and restore operations
• Improved configuration for podcast sync and photo import
• Improved iTunes import support in certain languages
• Improved metadata support for videos
Fixes:
• Added additional error codes and help references for device update
• Resolved connectivity issues with certain devices
• Resolved album art display issues for certain devices
Дайте ссылочку на скачку, плиз.
Сообщение отредактировал 888vital888 — 20.10.11, 21:07
В маркете есть новая версия 2.0.1 (111118)
Программа мягко говоря странная.
Запоминает галки синхронизации.
И, если я какое то время синхронизировался на другом компе.
Закидывал музыку, видео, фото.
И потом снова ткнулся через эту программу.
Привет!
Удаляет все, что не соответствует выбранным галкам, и устанавливает то,
что выбрано.
Сообщение отредактировал OrsoBear — 04.12.11, 11:17
Вот фајл, скачајте и установите. Apple ID не требуетса. Версија WPConnector 7 — 0.6
Сообщение отредактировал Blackfish — 09.08.12, 17:06
Share Mac files with Windows users
To let users connect to your Mac from a Windows computer, turn on file sharing and enable SMB sharing.
Set up file sharing on the Mac
On your Mac, choose Apple menu

> System Preferences, then click Sharing.
Select the File Sharing tickbox, then click Options.
Select “Share files and folders using SMB”.
In the Windows File Sharing list, select the tickbox next to the user account that will be used to share files with Windows users, enter the password for that user, then click OK.
Choose View > Network, select your active connection, then click Advanced.
Click the WINS tab, then enter the workgroup name used by the Windows computer.
If you don’t know the workgroup name, on the Windows computer open Control Panel > System and Security > System. (Windows computers normally use either WORKGROUP or MSHOME.)
Click OK, then click Apply.
Provide the information Windows users need
To connect to your Mac, Windows users need the network address for your Mac, and a username and password to use to log in to your Mac.
To find your Mac computer’s network address, choose Apple menu
> System Preferences, click Sharing, then select File Sharing. The address appears below the “File Sharing: On” indicator, and looks similar to this example: smb://17.212.167.33/.
Create an account on your Mac for each Windows user. To create accounts, choose Apple menu > System Preferences, then click Users & Groups.
If you want to use an account that existed before you installed the latest version of macOS, you may need to reset the password for the account in Users & Groups preferences.
Because the passwords of user accounts used for Windows sharing may be stored in a less secure manner, turn off the account when it’s not being used. Before you turn off Windows sharing, turn off all the accounts you enabled. Otherwise, the passwords are still stored less securely.
Connect to a Windows computer from a Mac
You can connect to Windows computers and servers on your network from your Mac.
For instructions on setting up the Windows computer, see Set up Windows to share files with Mac users.
Connect to a Windows computer by browsing
In the Finder  on your Mac, choose Go > Connect to Server, then click Browse.
Find the computer’s name in the Shared section of the Finder sidebar, then click it to connect. You may need to click All to see all the shared computers.
When you locate the shared computer or server, select it, then click Connect As.
In some cases you need the network area or workgroup for the shared computer. If you don’t have this information, contact the computer’s owner or your network administrator.
If necessary, enter your username and password, then select volumes or shared folders on the server.
Passwords for Windows computers and servers are often 14 characters or fewer. Check with the owner or administrator to be sure.
To make it easier to connect to the computer in the future, select “Remember this password in my keychain” to add your username and password for the computer to your keychain.
Connect to a Windows computer by entering its address
In the Finder on your Mac, choose Go > Connect to Server.
Type the network address for the computer in the Server Address field using one of these formats:
For information about the correct format for network addresses, see Network address formats for shared computers and servers.
Follow the onscreen instructions to type the workgroup name and a username and password, then choose the shared folder you want to access.
If you don’t know the workgroup name and the network name (called the computer name) for the Windows computer, contact the person who owns the computer or your network administrator.
If necessary, enter your username and password and select volumes or shared folders on the server.
Passwords for Windows computers and servers are often 14 characters or fewer. Check with the owner or administrator to be sure you have the correct password.
To make it easier to connect to the computer in the future, select “Remember this password in my keychain” to add your username and password for the computer to your keychain.
Connect using an Ethernet cable
Connect your Mac to the Windows computer using a standard Ethernet cable. If your Mac doesn’t have an Ethernet port, try using a USB-to-Ethernet adapter.
Connecting the two computers creates a small local network that consists of just the two computers.
On the Windows computer, turn on file sharing. Refer to the instructions that came with the Windows computer if you’re not sure how to do this.
Make sure the Internet Connection Firewall is turned off on the Windows computer, or if it’s on, make sure TCP port 445 is open to allow sharing connections.
For more information, refer to the user manual and onscreen help for the Windows computer.
On your Mac, choose Go > Connect to Server, then click Browse, or type the network address for the computer in the Server Address field.
Reconnect to recent computers or servers
Here are some ways to make it easy to reconnect to shared computers and servers you frequently use:
On your Mac, choose Apple menu
> Recent Items, then choose from the list of recent servers.
In the Finder on your Mac, choose Go > Connect to Server, click the pop-up menu to the far right of the Server Address field, then choose a recent server.
Add shared computers, network areas and workgroups to the Finder sidebar. Select the item, then choose File > Add To Sidebar or press Command-T.
Add a shared computer or server to your list of favourites. In the Finder on your Mac, choose Go > Connect to Server, enter the network address, then click the Add button  .
.
If you can’t locate a shared computer or server or connect to it, it may not be available, or you may not have permission to connect to it. Contact the person who owns the computer or the network administrator for help.
Sync content between your Mac and iPhone or iPad
The first time you set up syncing, you must connect your device to your Mac using a USB or USB-C cable. After you connect the device, the device icon appears in the Finder sidebar and selecting the icon displays syncing options. You then select which items to sync.
You can sync all items of a specific type (which is the quickest option) or select specific items to sync (which gives you more control) — or you can do both. For example, you can sync all your music to your device but sync only a selection of specific films.
After you select the content you want to sync, the items are updated whenever you sync your device to your Mac.
If you have an iPhone (with iOS 5 or later) or iPad, you can also set up to sync wirelessly when your Mac and device are connected to the same Wi-Fi network. See Sync content between your Mac and iPhone or iPad over Wi-Fi.
Sync all items of a content type
Connect your device to your Mac.
You can connect your device using a USB or USB-C cable or using a Wi-Fi connection. To turn on Wi-Fi syncing, see Sync content between your Mac and iPhone or iPad over Wi-Fi.
In the Finder on your Mac, select the device in the Finder sidebar.

If you connect your device to your Mac using a USB cable and can’t see the device in the Finder sidebar, see If your device doesn’t appear in the sidebar when syncing.
Select a type of content you want to sync in the button bar.

Note: If you use iCloud Photos and Apple Music, your photos and music are synced automatically using iCloud. When you click Music or Photos, no options appear for syncing.
Select the “Sync [content type] onto [device name]” tickbox to turn on syncing for that type of item. For example, select the “Sync films onto [device name]” tickbox to sync your films.

With the tickbox selected, syncing is set to transfer all items of that type to your device.
Repeat steps 3 and 4 for each type of content you want to sync.
The bar at the bottom of the window shows how much free space remains on your device after you sync. Move the pointer over the bar to view details about the content you’re syncing.
When you’re ready to sync, click Apply.
You can choose to sync your Mac and your device automatically whenever you connect them. To turn on automatic syncing, select General in the button bar, then select “Automatically sync when this [device] is connected”.
WARNING: If you delete an automatically synced item from your Mac, the deleted item is removed from your device the next time you sync.
If you want to sync individual items instead of all items of a content type, see the following:


