- Move your data from a Windows PC to your Mac
- Before you begin
- Move your data
- How to move your information from a PC to your Mac
- After you move your data
- If you have issues moving your data
- What data can I transfer?
- Connect to a Windows computer from a Mac
- Connect to a Windows computer by browsing
- Connect to a Windows computer by entering its address
- Connect using an Ethernet cable
- Reconnect to recent computers or servers
- Подключение компьютера Windows к компьютеру Mac
- Подключение к компьютеру с Windows, найденному в списке
- Подключение к компьютеру с Windows путем ввода его адреса
- Подключение с помощью кабеля Ethernet
- Подключение к недавно использованному компьютеру или серверу
Move your data from a Windows PC to your Mac
Use Windows Migration Assistant to transfer your pictures, documents, and other data from a Windows PC to your Mac.
Windows Migration Assistant transfers your contacts, calendars, email accounts, and more from a PC. It migrates this data to the appropriate places on your Mac. After migrating data to your Mac, authorize your computer for iTunes Store purchases. It’s important to authorize before you sync or play content that you download from the iTunes Store.
If you’re migrating from one Mac to another Mac, follow the steps to move your content to a new Mac.
Before you begin
To prepare for a smooth migration:
- Make sure that Windows is up to date. Migration Assistant works with Windows 7 and later.
- Make sure that you know the name and password of an administrator account on your PC.
- Connect your Mac and PC to the same network, such as your home Wi-Fi network. Or connect an Ethernet cable between the ports on your Mac and PC to create a direct network connection. Some Mac models require an Ethernet adapter, such as the Belkin USB-C to Gigabit Ethernet Adapter or Apple Thunderbolt to Gigabit Ethernet Adapter.
- If you’re using Microsoft OneDrive on your PC, follow Microsoft’s instructions for uninstalling OneDrive before continuing. You can reinstall OneDrive after migration is complete.
Then use the check disk (chkdsk) utility on your PC to make sure that your Windows hard drive doesn’t have any issues:
- Right-click the Start button, then click Run.
- Type cmd and press Enter. Command Prompt opens.
- At the prompt, type chkdsk and press Enter.
- If the utility reports that it found problems, type the following, where drive is the letter that represents your Windows startup disk, such as D:
- Press Enter.
- At the prompt, type Y , then restart your PC.
- Repeat this process until the check disk utility reports no issues. If the utility can’t fix every issue that it finds, you might need to have your PC serviced. Then migrate your data to your Mac.
Move your data
This section guides you through migration, post-migration, and what to do if the steps don’t work for you.
How to move your information from a PC to your Mac
- On your PC, download and install the appropriate Windows Migration Assistant, based on the version of macOS on your Mac:
- Windows Migration Assistant for macOS Big Sur
- Windows Migration Assistant for macOS Mojave and macOS Catalina
- Windows Migration Assistant for macOS Sierra and High Sierra
- Windows Migration Assistant for OS X El Capitan or earlier
- Quit any open Windows apps.
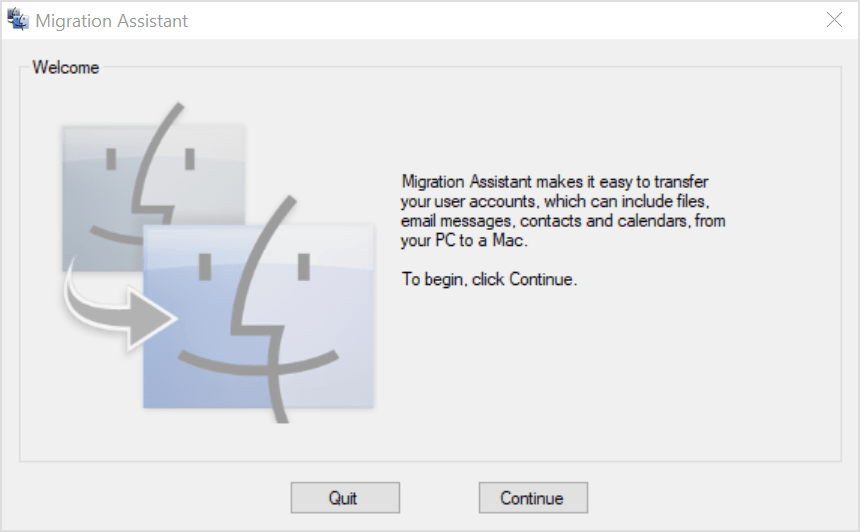
- Open Windows Migration Assistant, then click Continue.

- Start up your Mac. Setup Assistant automatically opens the first time you turn on your Mac. If you’ve already set up your Mac, open Migration Assistant, which is in the Utilities folder of your Applications folder.
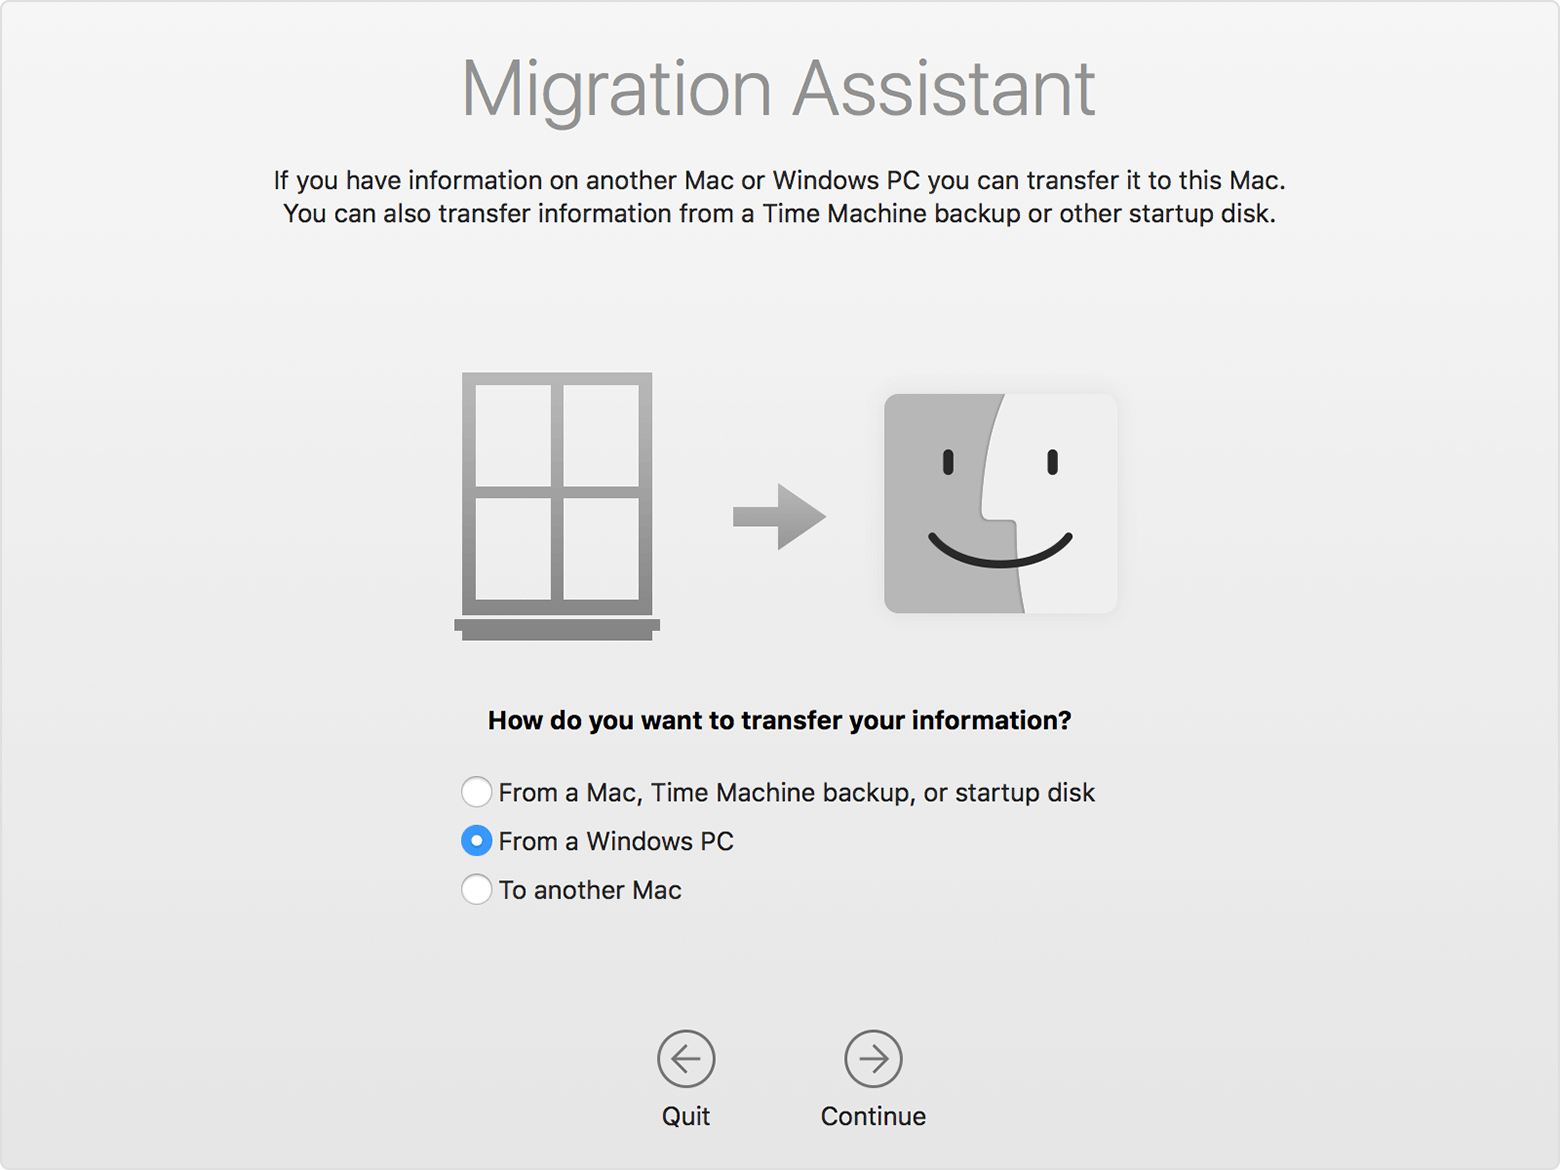
- On your Mac, follow the onscreen prompts until you get to the migration pane of the assistant. Select the option to transfer your information “From a Windows PC,” then click Continue.
- When prompted, enter an administrator name and password.
- Click Continue to close any other open apps.
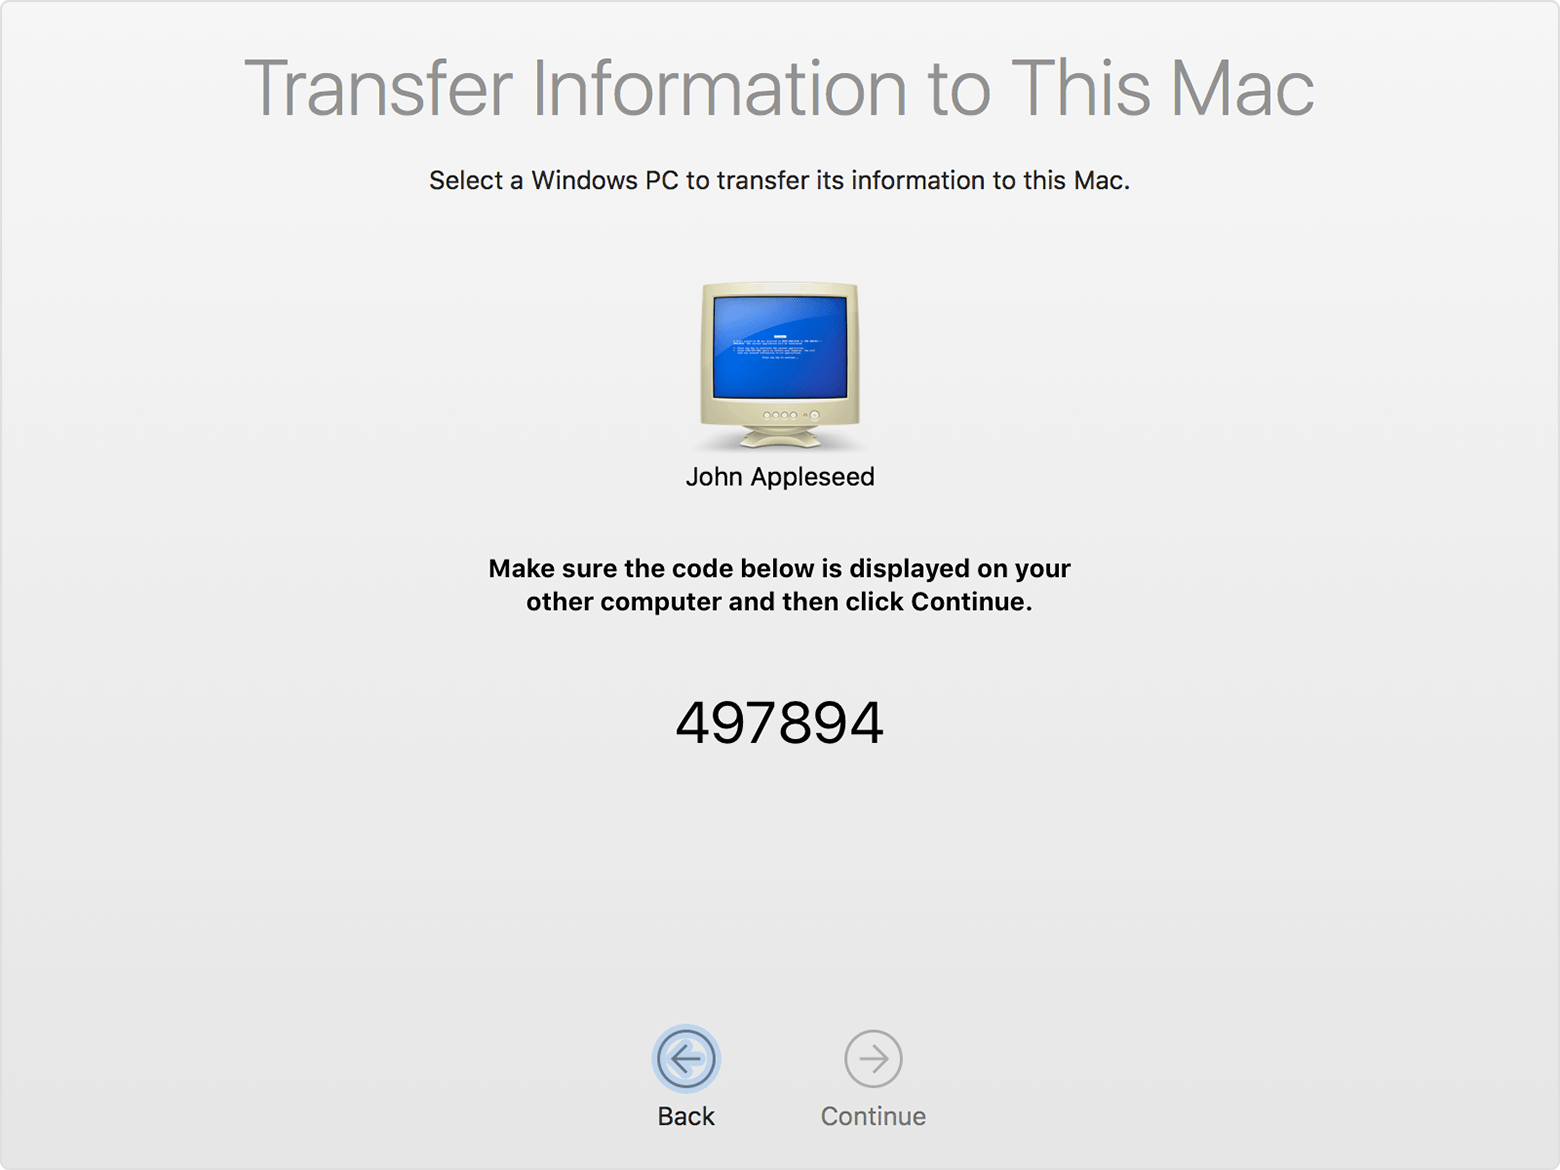
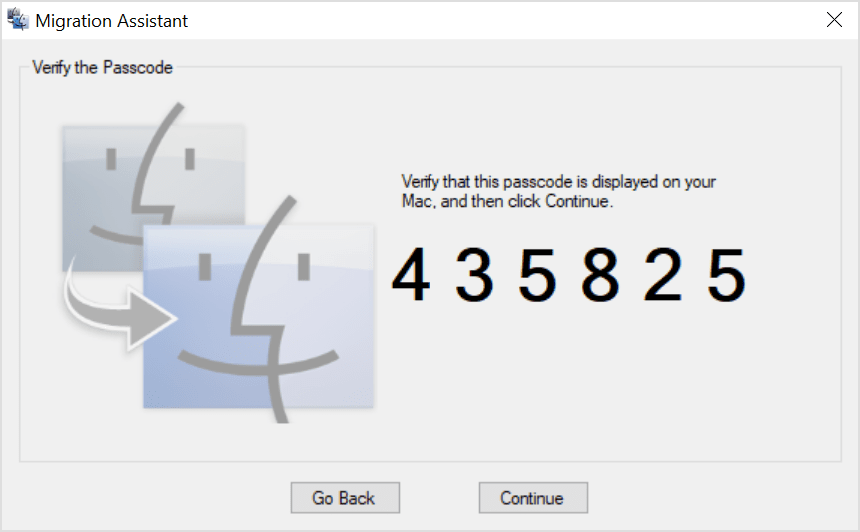
- In the migration window on your Mac, select your PC from the list of available computers. Then wait for the PC to show the same passcode that your Mac shows.
- When both computers display the same passcode, click Continue on your PC and Mac.
- Your Mac scans the drives on your PC to build a list of information to migrate. When the scan completes, select the information that you want to migrate to your Mac and click Continue. Learn about some of the data that you can transfer.
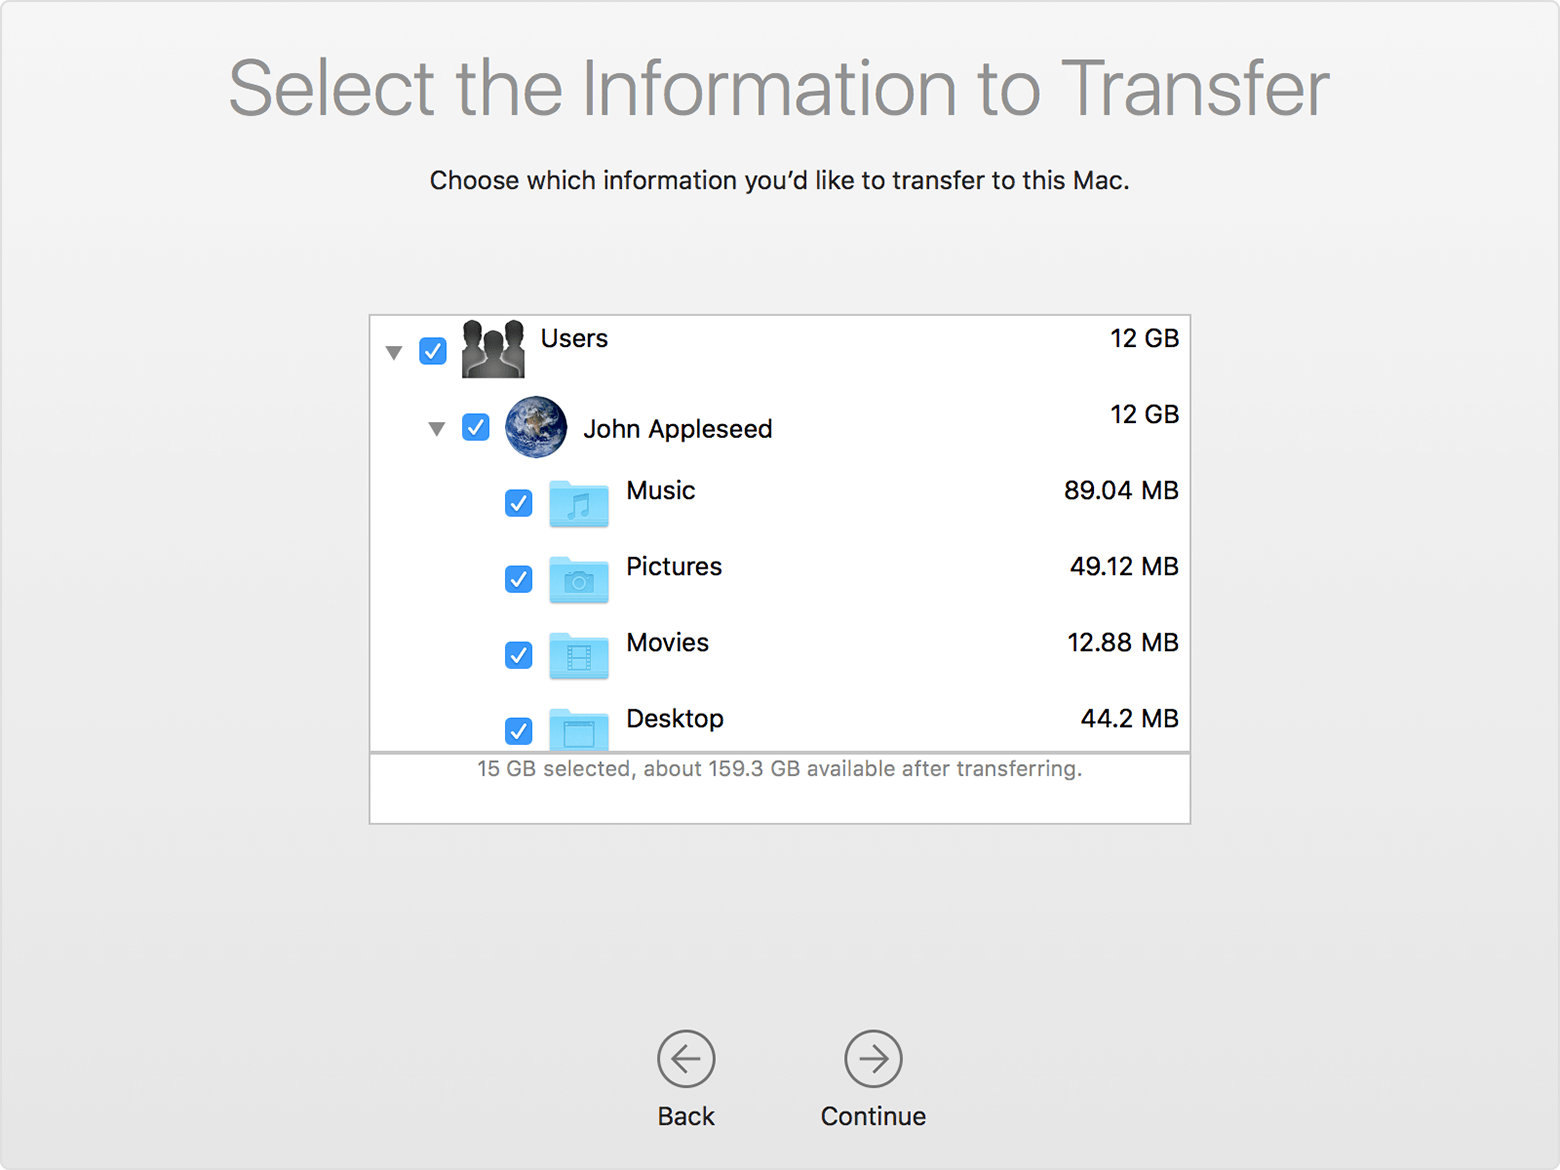
You can watch the progress and estimated time remaining on both the PC and your Mac. They tell you when migration is complete.
After you move your data
When migration completes, close Windows Migration Assistant on your PC. Then log in to the new user account on your Mac. The first time you log in to a user account migrated from your PC, you’re asked to set a password. You can use the same password that you used on your PC, or create a new password.
After logging in to the user account that you migrated, authorize your computer for iTunes Store purchases. It’s important to authorize before you sync or play content downloaded from the iTunes Store.
If you have issues moving your data
- Quit all open apps on your PC, then try migrating your content again. For example, you can press Alt-Tab to choose an open application, then press Alt-F4 to quit it.
- If your PC doesn’t appear in the Setup Assistant or Migration Assistant window on your Mac, make sure the computers are connected to the same network. You can create a network by connecting a single Ethernet cable between your Mac and PC. If that doesn’t help, check for firewall software on your PC and turn it off. After migration completes, you can turn firewall software on again.
- If Migration Assistant doesn’t open on your PC, turn off any antivirus software on your PC. Then try to open Migration Assistant again. After migration completes. You can turn that software on again.
- If you still can’t migrate your information successfully, you can use an external drive or file sharing to manually copy important data to your Mac.
What data can I transfer?
Migration Assistant lets you choose the data to move to your Mac. Here’s what moves over for specific apps and data types:
Email, contacts, and calendar information
Email messages, email-account settings, contacts, and appointments move based on which version of Windows you’re using and which accounts you have.
Outlook 1
Data from 32-bit versions of Outlook in Windows 7 and later move as follows:
- People move to Contacts 2
- Appointments move to the Calendar app
- IMAP and Exchange settings and messages move to the Mail app
- POP settings and messages move to Mail 2
Windows Live Mail
Data from Windows Live Mail in Windows 7 and later moves as follows:
- IMAP settings and messages move to Mail
- POP settings and messages move to Mail 2
Windows Mail
Data from Windows Mail in Windows 7 and later (excluding Windows 8) move as follows:
- IMAP settings and messages move to Mail
- POP settings and messages move to Mail 2
- People move to Contacts
Bookmarks
Bookmarks from Internet Explorer, Safari for Windows, and Firefox move to Safari.
System settings
Language and location settings, and custom desktop pictures move to System Preferences. Your web browser homepage moves to Safari preferences.
Pictures
Photos and other images move to your home folder. You can then add them to Photos, or open Photos and let it search your Mac for photos to import.
iTunes content
Migration Assistant transfers your iTunes media as follows: music to the Apple Music app, videos to the Apple TV app, podcasts to the Apple Podcasts app, and audiobooks to the Apple Books app.
Other files
Migration Assistant also moves these files:
- Files from the top-level folder of the currently logged-in user’s home directory
- Non-system files located in the Windows or Program Files folders
- Top-level folders located on the Windows system disk and other attached disks
1. Migration Assistant doesn’t support 64-bit versions of Outlook. You can manually migrate Mail, Contacts, or Calendars from Outlook 2013 or Outlook 2016 by signing in and entering the content on your Mac manually.
2. Migration Assistant transfers only the Mail or Contacts data that belongs to the logged-in Windows user. To transfer data from another user account, use Migration Assistant again while you’re logged in to another Windows account. Each time you migrate, your Mac creates a new user account.
Information about products not manufactured by Apple, or independent websites not controlled or tested by Apple, is provided without recommendation or endorsement. Apple assumes no responsibility with regard to the selection, performance, or use of third-party websites or products. Apple makes no representations regarding third-party website accuracy or reliability. Contact the vendor for additional information.
Connect to a Windows computer from a Mac
You can connect to Windows computers and servers on your network from your Mac.
For instructions on setting up the Windows computer, see Set up Windows to share files with Mac users.
Connect to a Windows computer by browsing
In the Finder  on your Mac, choose Go > Connect to Server, then click Browse.
Find the computer’s name in the Shared section of the Finder sidebar, then click it to connect. You may need to click All to see all the shared computers.
When you locate the shared computer or server, select it, then click Connect As.
In some cases you need the network area or workgroup for the shared computer. If you don’t have this information, contact the computer’s owner or your network administrator.
If necessary, enter your username and password, then select volumes or shared folders on the server.
Passwords for Windows computers and servers are often 14 characters or fewer. Check with the owner or administrator to be sure.
To make it easier to connect to the computer in the future, select “Remember this password in my keychain” to add your username and password for the computer to your keychain.
Connect to a Windows computer by entering its address
In the Finder on your Mac, choose Go > Connect to Server.
Type the network address for the computer in the Server Address field using one of these formats:
For information about the correct format for network addresses, see Network address formats for shared computers and servers.
Follow the onscreen instructions to type the workgroup name and a username and password, then choose the shared folder you want to access.
If you don’t know the workgroup name and the network name (called the computer name) for the Windows computer, contact the person who owns the computer or your network administrator.
If necessary, enter your username and password and select volumes or shared folders on the server.
Passwords for Windows computers and servers are often 14 characters or fewer. Check with the owner or administrator to be sure you have the correct password.
To make it easier to connect to the computer in the future, select “Remember this password in my keychain” to add your username and password for the computer to your keychain.
Connect using an Ethernet cable
Connect your Mac to the Windows computer using a standard Ethernet cable. If your Mac doesn’t have an Ethernet port, try using a USB-to-Ethernet adapter.
Connecting the two computers creates a small local network that consists of just the two computers.
On the Windows computer, turn on file sharing. Refer to the instructions that came with the Windows computer if you’re not sure how to do this.
Make sure the Internet Connection Firewall is turned off on the Windows computer, or if it’s on, make sure TCP port 445 is open to allow sharing connections.
For more information, refer to the user manual and onscreen help for the Windows computer.
On your Mac, choose Go > Connect to Server, then click Browse, or type the network address for the computer in the Server Address field.
Reconnect to recent computers or servers
Here are some ways to make it easy to reconnect to shared computers and servers you frequently use:
On your Mac, choose Apple menu

> Recent Items, then choose from the list of recent servers.
In the Finder on your Mac, choose Go > Connect to Server, click the pop-up menu to the far right of the Server Address field, then choose a recent server.
Add shared computers, network areas and workgroups to the Finder sidebar. Select the item, then choose File > Add To Sidebar or press Command-T.
Add a shared computer or server to your list of favourites. In the Finder on your Mac, choose Go > Connect to Server, enter the network address, then click the Add button  .
.
If you can’t locate a shared computer or server or connect to it, it may not be available, or you may not have permission to connect to it. Contact the person who owns the computer or the network administrator for help.
Подключение компьютера Windows к компьютеру Mac
Вы можете подключиться к компьютерам, работающим в ОС Windows, и серверам Вашей сети с компьютера Mac.
Подключение к компьютеру с Windows, найденному в списке
В Finder  на Mac выберите «Переход» > «Подключение к серверу» и нажмите «Просмотреть».
Найдите имя компьютера в разделе «Общий доступ» в боковом меню окна Finder и нажмите на него, чтобы установить подключение. В некоторых случаях для просмотра всех общих компьютеров нужно нажать кнопку «Все».
Когда Вы обнаружите компьютер или сервер с включенным общим доступом, выберите его и нажмите «Подкл. как».
В некоторых случаях Вам понадобится информация о сети или рабочей группе, к которой относится общий компьютер. Если Вы не располагаете данной информацией, свяжитесь с владельцем компьютера или обратитесь к сетевому администратору.
При необходимости введите имя пользователя и пароль, затем выберите тома или общие папки сервера.
Пароли для компьютеров и серверов, работающих с Windows, часто состоят из 14 символов или менее. Для надежности обратитесь к администратору или владельцу.
Чтобы облегчить подключение к компьютеру в дальнейшем, установите флажок «Запомнить пароль в связке ключей» для добавления Вашего имени пользователя и пароля в Вашу связку ключей.
Подключение к компьютеру с Windows путем ввода его адреса
В Finder на Mac выберите «Переход» > «Подключение к серверу».
В поле «Адрес сервера» введите сетевой адрес компьютера в одном из следующих форматов.
Дополнительную информацию о корректном формате сетевых адресов см. в Форматы сетевого адреса для общих компьютеров и серверов.
Чтобы верно ввести имя пользователя и пароль, следуйте инструкциям на экране, затем выберите нужную общую папку.
Если Вы не знаете имя рабочей группы и сетевое имя («имя компьютера») для компьютера с Windows, обратитесь к владельцу компьютера или к администратору сети.
При необходимости введите имя пользователя, пароль и выберите тома или общие папки сервера.
Пароли для компьютеров и серверов, работающих с Windows, часто состоят из 14 символов или менее. Уточните пароль у владельца или администратора компьютера.
Чтобы облегчить подключение к компьютеру в дальнейшем, установите флажок «Запомнить пароль в связке ключей» для добавления Вашего имени пользователя и пароля в Вашу связку ключей.
Подключение с помощью кабеля Ethernet
Подключите Mac к компьютеру с Windows, используя стандартный кабель Ethernet. Если Ваш Mac не оснащен Ethernet-разъемом, используйте адаптер «USB в Ethernet».
Соединение двух компьютеров создает небольшую локальную сеть, состоящую всего из двух компьютеров.
На компьютере с Windows включите общий доступ к файлам. Если Вы столкнулись с затруднениями, обратитесь к сопроводительной документации к компьютеру с Windows.
Убедитесь, что брандмауэр сетевого подключения на компьютере Windows выключен или, если он включен, убедитесь, что TCP-порт 445 открыт для разрешения общих подключений.
Дополнительную информацию см. в руководстве пользователя и экранной справке компьютера Windows.
На компьютере Mac выберите «Переход» > «Подключение к серверу», затем нажмите «Просмотреть» или введите сетевой адрес компьютера в поле «Адрес сервера».
Подключение к недавно использованному компьютеру или серверу
Вот несколько вариантов удобного подключения к общим компьютерам и серверам, которые Вы часто используете:
На Mac выберите меню «Apple»

> «Недавно использованные объекты», затем выберите сервер в списке недавно использованных серверов.
В Finder на Mac выберите «Переход» > «Подключение к серверу», нажмите всплывающее меню в правой части поля «Адрес сервера» и выберите недавно использованный сервер.
Добавьте общие компьютеры, сети и рабочие группы в боковое меню Finder. Выберите элемент, затем выберите «Файл» > «Добавить в боковое меню» или нажмите сочетание клавиш Command-T.
Добавьте общий компьютер или сервер в список избранных. В Finder на Mac выберите меню «Переход» > «Подключение к серверу», введите сетевой адрес, затем нажмите кнопку «Добавить»  .
.
Если Вы не можете обнаружить сервер или компьютер с включенным общим доступом или подключиться к нему, возможно, он недоступен, либо у Вас отсутствует разрешение на подключение к нему. Обратитесь за помощью к владельцу компьютера или администратору сети.


