- rdesktop – A RDP Client to Connect Windows Desktop from Linux
- Windows Settings
- Install rdesktop (Remote Desktop) in Linux
- Connecting to Windows Desktop Using Hostname
- Connecting to Windows Desktop Using IP Address
- If You Appreciate What We Do Here On TecMint, You Should Consider:
- Connecting to Windows Networks Shares from Ubuntu Desktop
- Access Windows Shares
- Connect to a file server
- Ethical hacking and penetration testing
- InfoSec, IT, Kali Linux, BlackArch
- How to connect to Windows remote desktop from Linux
- How to use freerdp
- How to connect with freerdp command
- Xfreerdp options
- How to create shared folders in freerdp
- How to bring remote desktop to another monitor
- How to set the size of the remote desktop window
- How to use rdesktop
- How to connect to remote desktop with rdesktop
- How to connect from Linux to another Linux via RDP
- Connect to a Windows PC from Ubuntu using Remote Desktop Connection
- Step 1: Enable Remote Desktop Connections on your Windows PC
- Step 2: Launch the Remmina Remote Desktop Client
- Step 3: Configure and establish the Ubuntu remote desktop session to Windows
- Do you use Ubuntu to remote control Windows PCs?
rdesktop – A RDP Client to Connect Windows Desktop from Linux
rdesktop is an open source software that enables you to connect and manage your remote Windows desktop from your Linux computer using RDP – Remote Desktop Protocol. In other words, while you are sitting in front of your Linux system at home or office, and access your Windows desktop as if you’re sitting in front of the Windows machine.
In this article, we will explain how to install rdesktop in Linux system to access the remote desktop of Windows computer using the Hostname and IP Address.
Windows Settings
To enable rdesktop to connect to any given Windows machine, you need to make few following changes on the Windows box itself.
- Enable RDP port no. 3389 in Firewall.
- Enable remote desktop under Windows Operating System.
- Require at least one user with a password.
Once you make all of the above Windows configuration settings, you can now move further to install rdesktop on your Linux system to access your Windows desktop.
Install rdesktop (Remote Desktop) in Linux
It is always preferable to use a default package manager such as yum, dnf or apt to install software to handle dependencies automatically during installation.
If rdesktop is not available to install from the default repositories, you can download the tarball from Github here or use the following wget command to download and install it as shown.
Connecting to Windows Desktop Using Hostname
To connect Windows host from Linux desktop type following command using -u parameter as username (narad) and (ft2) as the hostname of my Windows host. To resolve hostname make an entry at /etc/hosts file if you don’t have DNS Server in your environment.
![]() Use rdesktop using hostname
Use rdesktop using hostname
Connecting to Windows Desktop Using IP Address
To connect Windows host from Linux machine, use username as (narad) and IP Address as (192.168.50.5) of my windows host, the command would be as.
![]() Use rdesktop using IP Address
Use rdesktop using IP Address
Please execute man rdesktop in command prompt If you would like to know more about it or visit rdesktop project website. Kindly share it and let us know your comments through our comment box below.
If You Appreciate What We Do Here On TecMint, You Should Consider:
TecMint is the fastest growing and most trusted community site for any kind of Linux Articles, Guides and Books on the web. Millions of people visit TecMint! to search or browse the thousands of published articles available FREELY to all.
If you like what you are reading, please consider buying us a coffee ( or 2 ) as a token of appreciation.

We are thankful for your never ending support.
Connecting to Windows Networks Shares from Ubuntu Desktop
Remote users can connect over the network and access shared files and folders as if they were directly connected to the local machines. This is a convenient way to make files and folders available to other people on your local network.
This brief tutorial is going to show students and new users how to access Windows network shares from Ubuntu desktops. When you open Ubuntu file manager, it should find network shares that are automatically advertise across the network.
Ubuntu and other desktop computers should be able to view and connect to the shares… however, if the shares are not advertised, you will need to connect to the shares manually by typing the resource network address. To get started with access Windows shares across the network, follow the guide below:
Access Windows Shares
To browse Windows files over the network, open the Files application from the Activities overview (top left corner) or click File Manager on the dock and click Other Locations in the sidebar.

Connect to a file server
To connect to Windows shares, use the guide below:
In the file manager, click Other Locations in the sidebar.
In Connect to Server , enter the address of the server, in the form of a URL . Details on supported URLs are listed below .
If you have connected to the server before, you can click on it in the Recent Servers list.
Then click the Click Connect button . The files on the server will be shown. You can browse the files just as you would for those on your own computer. The server will also be added to the sidebar so you can access it quickly in the future.
Windows computers use a proprietary protocol to share files over a local area network. Computers on a Windows network are sometimes grouped into domains for organization and to better control access. If you have the right permissions on the remote computer, you can connect to a Windows share from the file manager.

A typical Windows share URL looks like this:
This how to connect to Windows shares from Ubuntu.
Ethical hacking and penetration testing
InfoSec, IT, Kali Linux, BlackArch
How to connect to Windows remote desktop from Linux
RDP (Remote Desktop Protocol) clients exist for many platforms, even for mobile phones, of course, there are RDP clients for Linux as well
We will look at 2 RDP clients for Linux
- freerdp is a free implementation of the Remote Desktop Protocol (RDP)
- rdesktop is an open source client for remote desktop windows services
How to use freerdp
To install freerdp on Debian, Kali Linux, Linux Mint, Ubuntu and derivatives, run the command:
If the freerdp2-x11 and freerdp2-shadow-x11 packages are not found, look for a package named freerdp.
To install freerdp on Arch Linux and derivatives, run the command:
How to connect with freerdp command
To connect to the remote desktop using xfreerdp, run a command of the form:
In this command:
- /f is option means to open the remote desktop in full screen mode
- /u:USERNAME is a name of the account on the computer to which we are connecting
- /p:PASSWORD is a password of the specified account
- /v:HOST[:PORT] is an IP address or name of the computer to which the remote table is connected. PORT optional (recommended: “Windows Computer name: how to change and use”)
For example, I want to open a remote computer desktop with IP address 192.168.0.101, on which there is a Tester user with a password of 1234, and I want to open a remote working collision in full screen mode, then the command is as follows:
To toggle between full-screen and windowed modes, use the keyboard shortcut Ctrl+Alt+Enter.
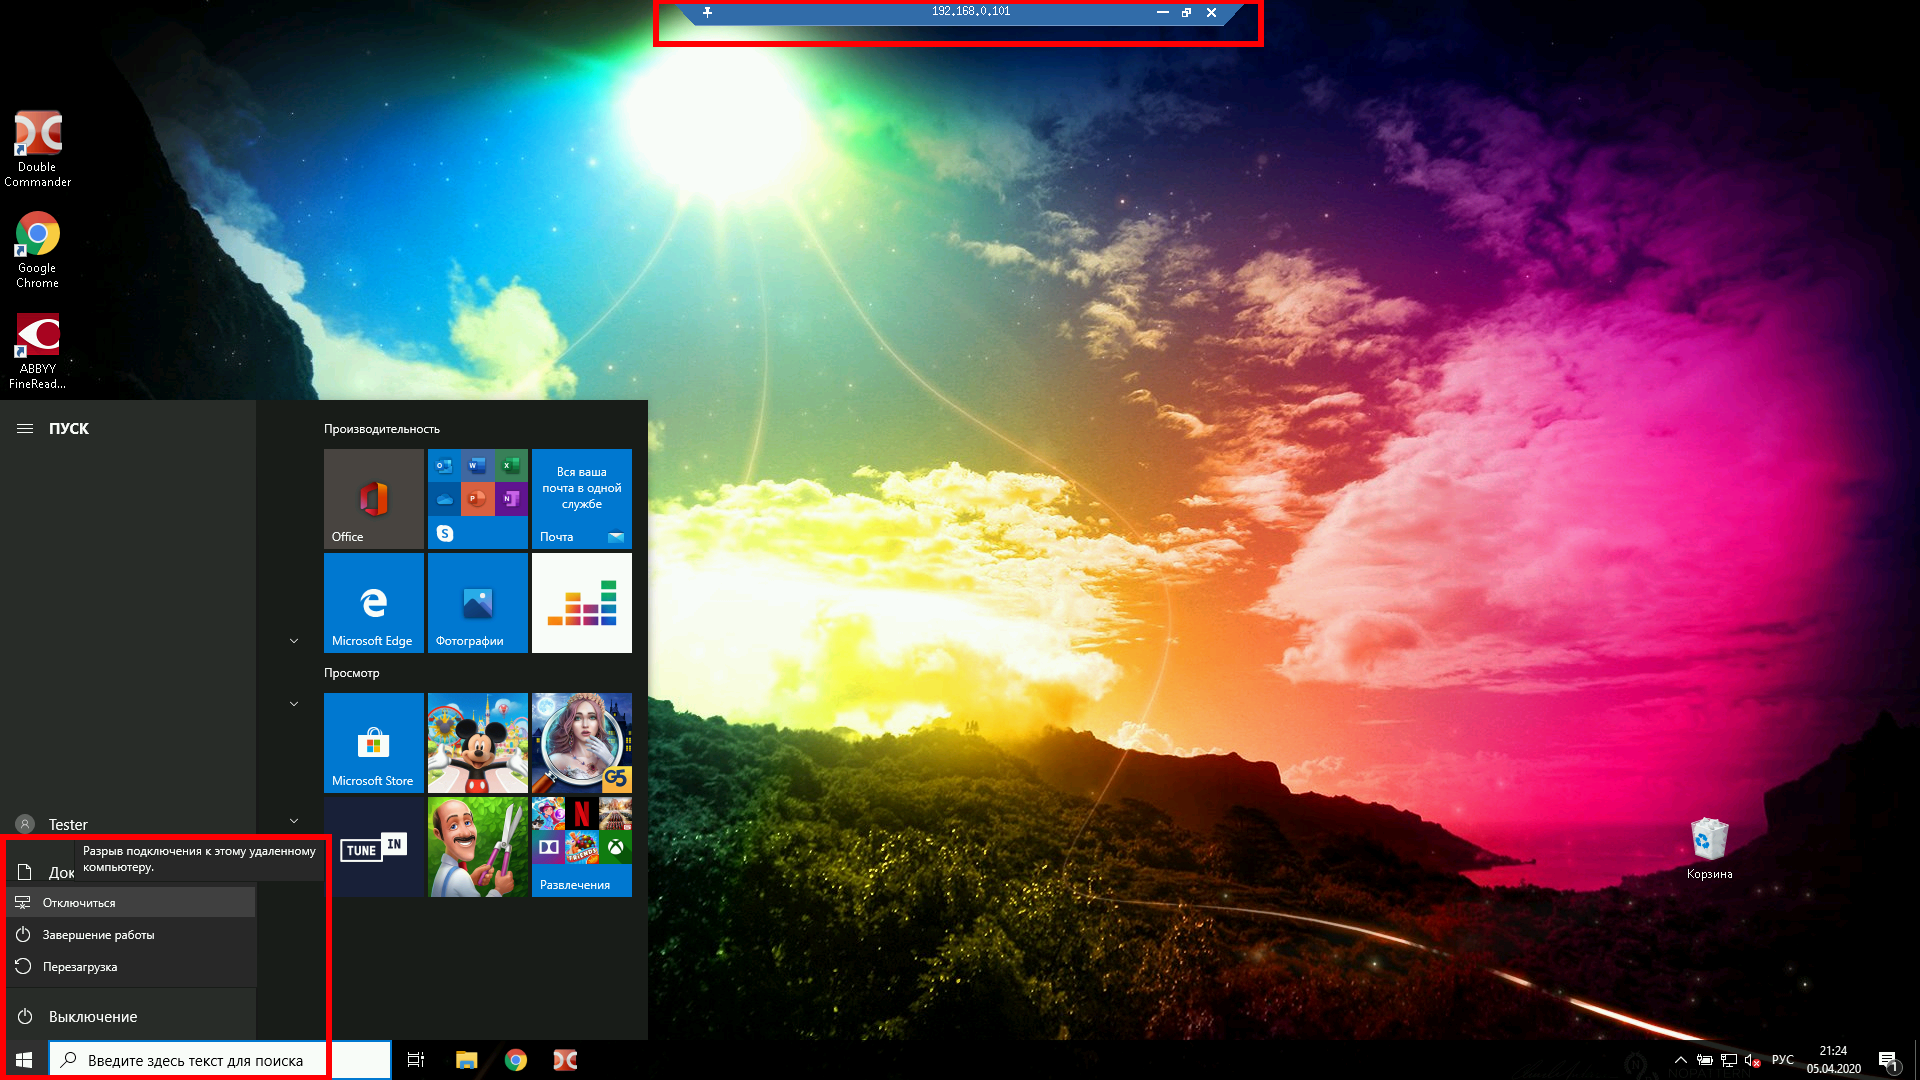
When connecting for the first time, the following message about the problem with the certificate appears:

Since self-signed certificates are used without a private CA (authentication center, certification authority) added to the store, the only choice is to agree to trust the specified certificate, enter Y for this.
In full screen mode, you can disconnect from the remote desktop in two ways:
- press the cross on the top panel
- Start button → Shutdown → Disconnect
To run in windowed mode, do not use the /f option:
Xfreerdp options
The xfreerdp program has many options,I picked up the most interesting of them:
How to create shared folders in freerdp
With remote desktop connected via RDP, you can have shared folders. Let’s look at a few examples.
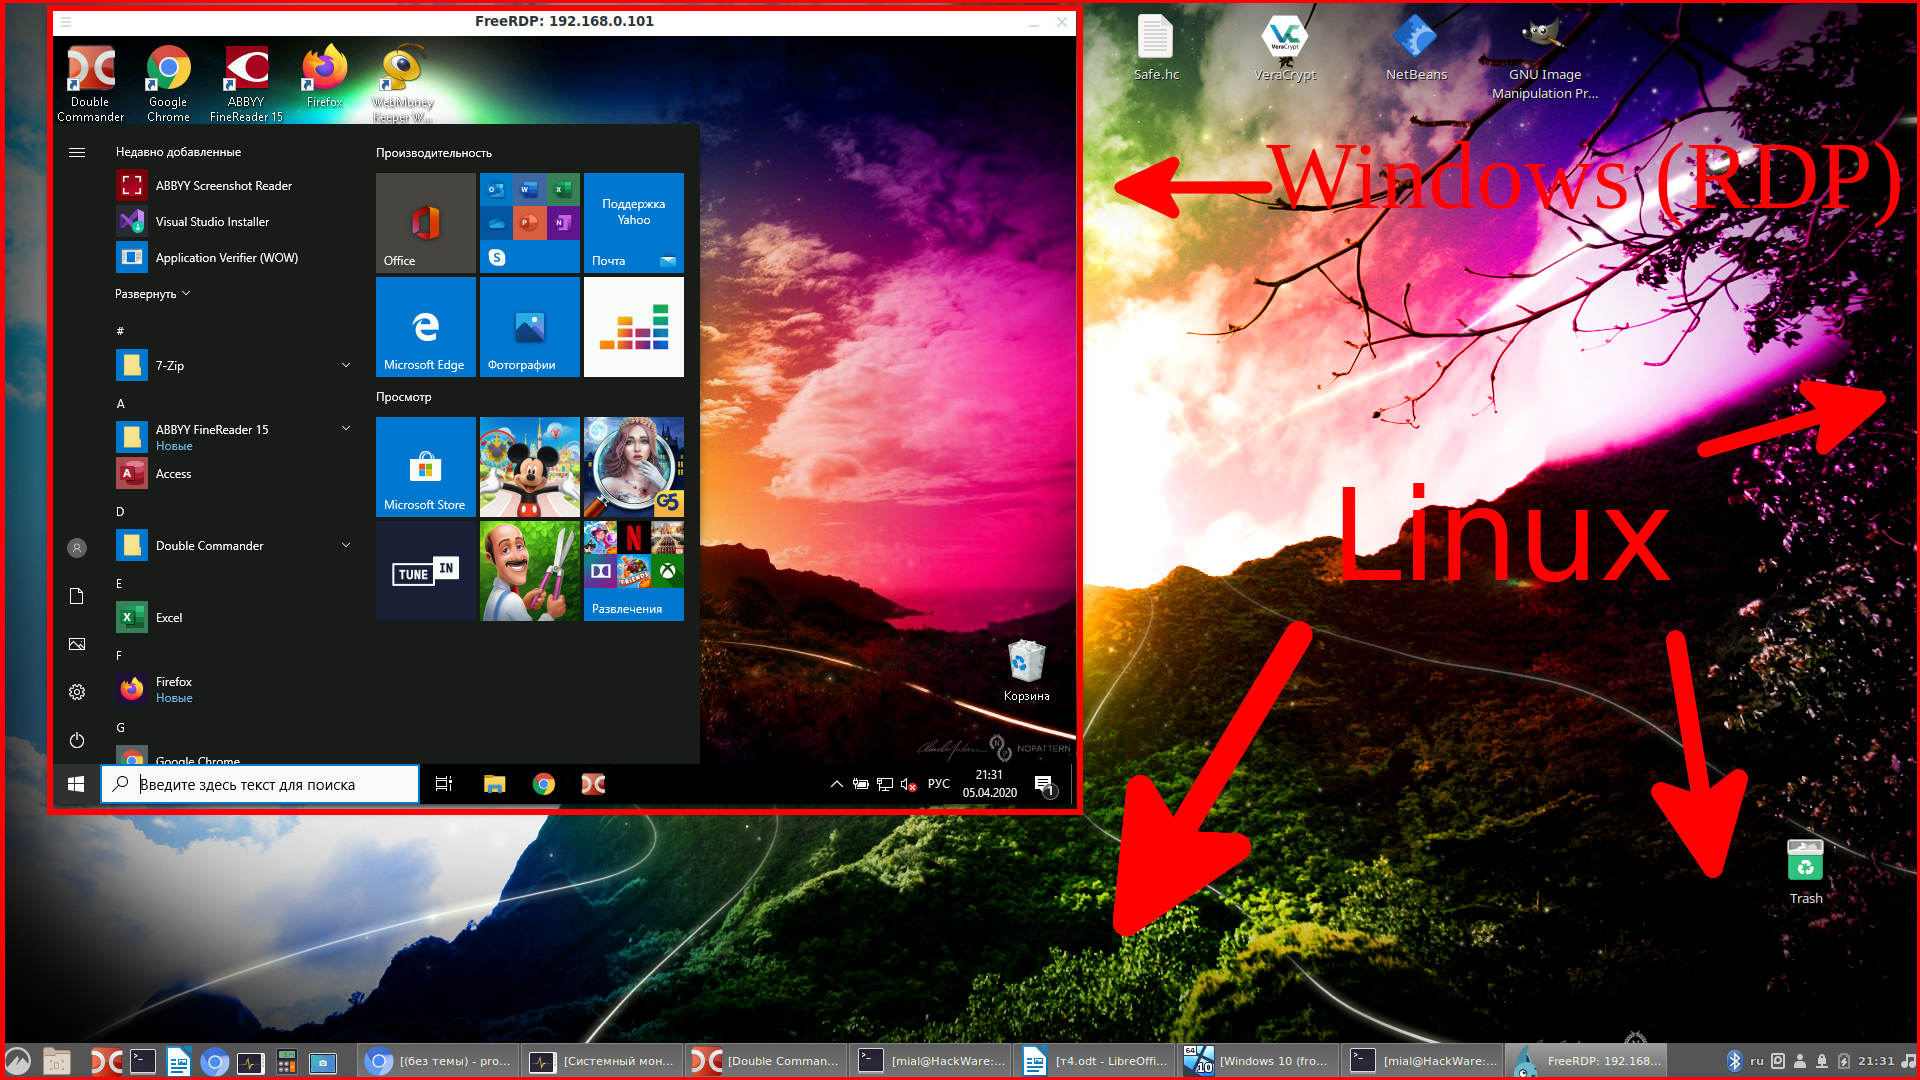
To connect all mount points in the current system as shared folders on the remote desktop, use the +drives option, for example:
The screenshot shows the remote Windows desktop, in which the Linux system folders are accessible:
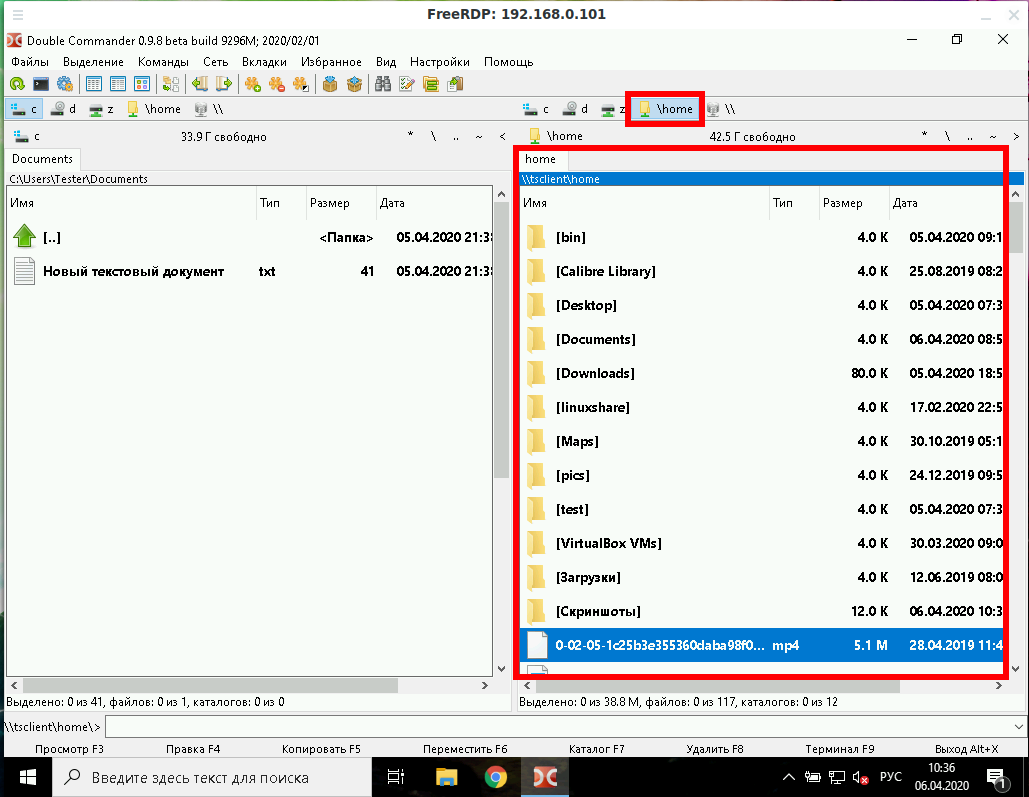
To connect only the home folder of the current Linux user as a network folder to the computer via RDP, specify the +home-drive option:
In this case, the home folder is mounted on a system connected via the remote desktop protocol:
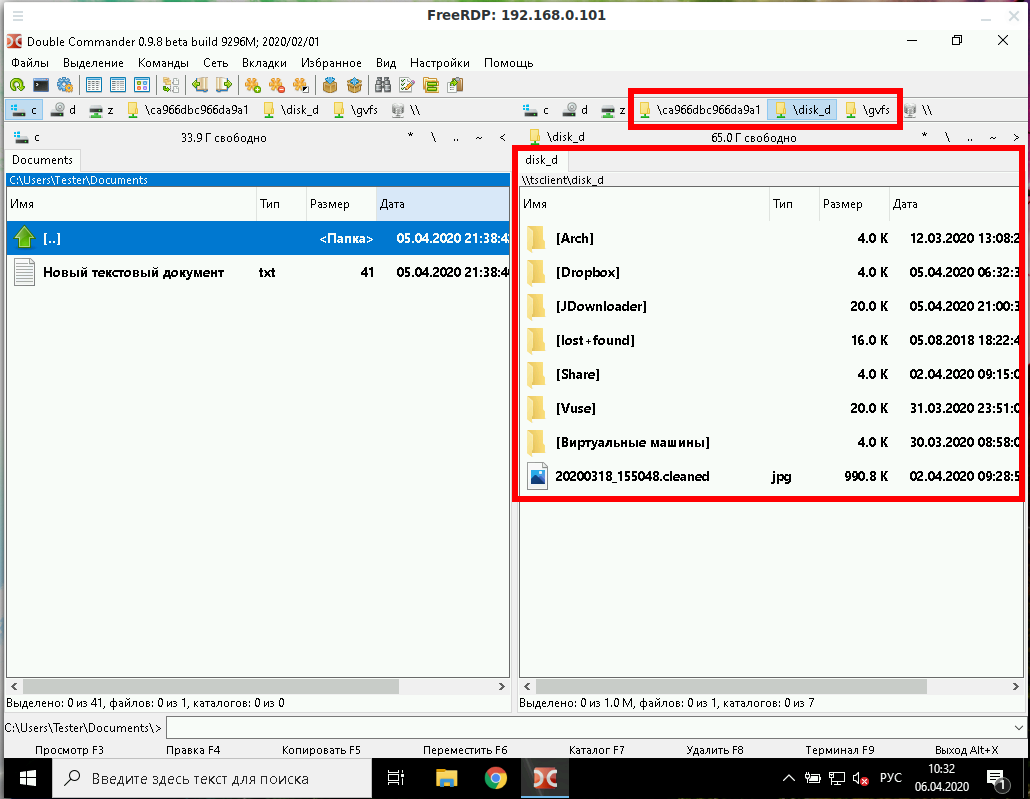
With the option /drive:NAME,/PATH/IN/LINUX, you can connect any folder with any name. The path in the current system must be specified as /PATH/IN/LINUX, and NAME is the name that will have the share in the remote system. For example, to connect the root folder of the current system (/) to the remote folder with the root name:
How to bring remote desktop to another monitor
If you have several monitors, then you can choose which one to use for the remote system. To list the monitors, run the command:
Select the monitor (or multiple monitors) identifier using the /monitors: [,[,…]] option.
How to set the size of the remote desktop window
The following example connects to the rdp.contoso.com host with the name USER and is 50 percent of the height.
If width (w) is set instead of height (h), something like /size:50%w, then 50 percent of the width will be used.
How to use rdesktop
To install rdesktop on Debian, Kali Linux, Linux Mint, Ubuntu and derivatives, run the command:
To install rdesktop on Arch Linux and derivatives, run the command:
How to connect to remote desktop with rdesktop
To connect to RDP with rdesktop, use a command of the form:
As usual, at the very beginning there will be a problem with the certificate:
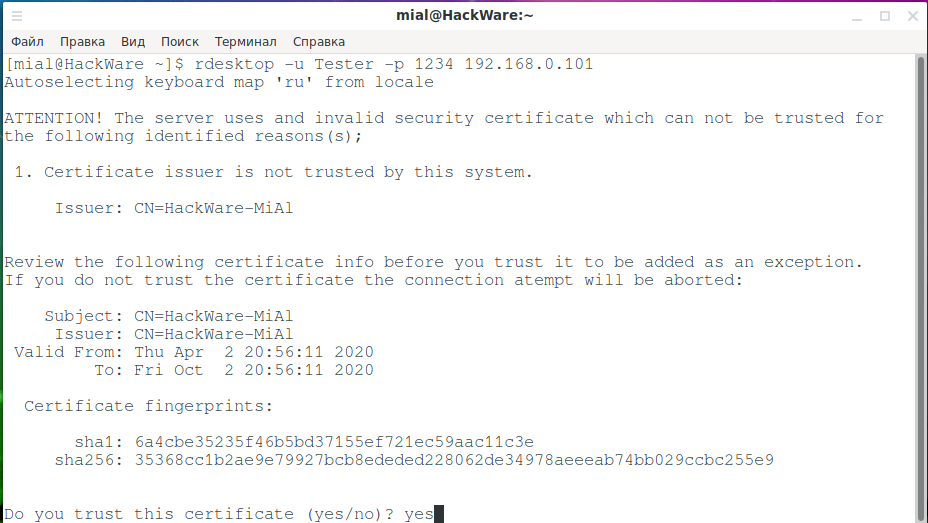
We type yes.
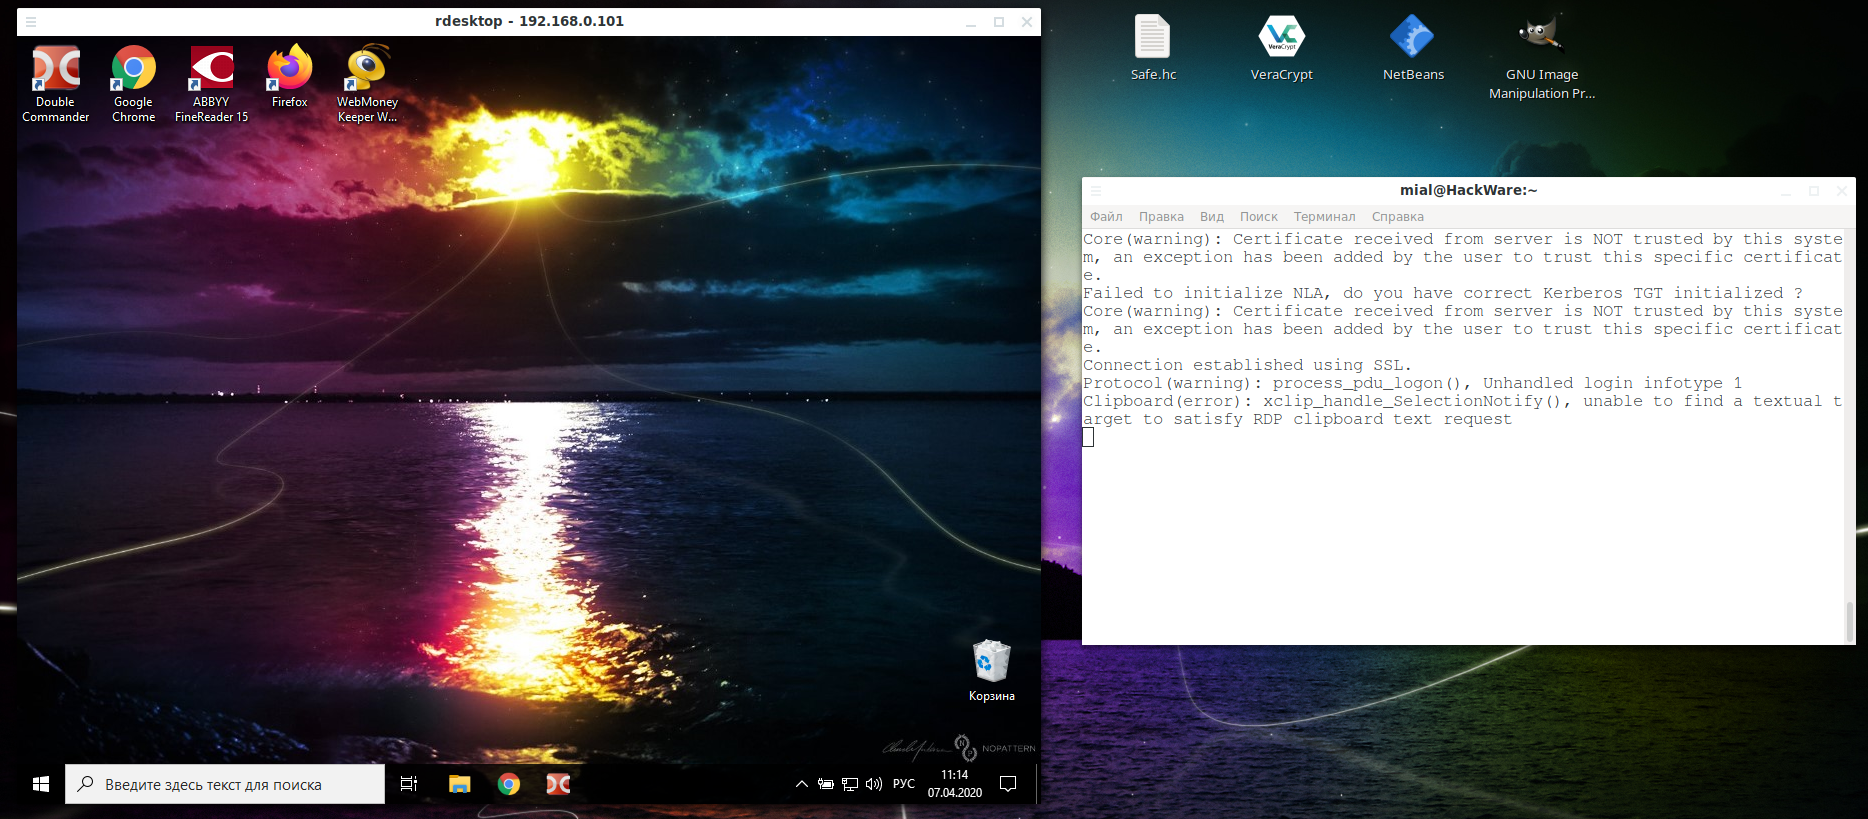
Then an error will occur:
This is because network-level authentication (Kerberos TGT) is not configured. Setup instructions at: https://github.com/rdesktop/rdesktop/wiki/Network-Level-Authentication-(NLA)
Another option that allows you to connect to Windows via RDP using rdesktop without setting up Network Level Authentication (NLA) is to disable network-level authentication in Windows. It is clear that this will weaken the security of RDP, therefore it is not recommended. But as a “quick dirty fix” this can be done as follows: Start menu → Settings → System → Remote Desktop → Advanced settings → Uncheck “Require computers to use Network Level Authentication at the to connect (recommended)”:

After that, rdesktop connection passes without errors:
In the Windows settings, you could see the link “Why allow connections with Network Level Authentication?”, It says the following:
If you want to restrict who can access your PC, choose to allow access only with Network Level Authentication (NLA). When you enable this option, users have to authenticate themselves to the network before they can connect to your PC. Allowing connections only from computers running Remote Desktop with NLA is a more secure authentication method that can help protect your computer from malicious users and software. To learn more about NLA and Remote Desktop, check out Configure NLA for RDS Connections. If you’re remotely connecting to a PC on your home network from outside of that network, don’t select this option.
How to connect from Linux to another Linux via RDP
There are no special features when connecting using the xfreerdp program, it is enough to start the RDP server, and if you use freerdp-shadow, then the /sam-file:SAM /sec:nla options are also needed:
Or run xrdp-sesman and xrdp as an RDP server.
And then the connection to Linux via RDP is the same as to Windows:
As for rdesktop, it could not be forced to work with any of the RDP servers under consideration under Linux – if you know how to do this, then write in the comments.
Connect to a Windows PC from Ubuntu using Remote Desktop Connection
One useful feature of Windows is that you can connect to your desktop from another location to remotely manage your computer. Fortunately, major Linux distributions also offer this feature and Ubuntu is one of them. If you want to connect to your Windows computers from Ubuntu remotely, you can use the default RDP client found in it, called Remmina. Here is how to create, configure and establish a remote desktop connection from Ubuntu to Windows:
NOTE: This tutorial was created on Ubuntu 18.04 LTS (Bionic Beaver). However, it works in other versions of Linux too.
Step 1: Enable Remote Desktop Connections on your Windows PC
If you want to allow other computers to connect remotely to your Windows PC, you must first configure it to accept remote desktop connections. To learn how to do it, read this tutorial: How to enable Remote Desktop Connections in all versions of Windows.
Step 2: Launch the Remmina Remote Desktop Client
By default, Ubuntu comes with a remote desktop client app that supports the Remote Desktop Protocol (RDP) used by Windows operating systems for remote connections. You can find it in Ubuntu’s Apps list.
If you prefer to search, you can find the default Ubuntu RDP client by using the RDP search term.
Step 3: Configure and establish the Ubuntu remote desktop session to Windows
Once you open the Remmina Remote Desktop Client, you should see something like this:
Click the “Create a new connection profile” button.
Its icon is a green plus sign which is easy to spot in the top-left corner of the window.
The previous action opens a window called Remote Desktop Preference. Here you can configure the remote desktop Ubuntu to Windows connection that you are going to establish.
In the Profile section, type the Name that you want to use for the connection. It can be anything you wish. Leave the other settings from the Profile section set to their defaults.
In the Server field from the Basic tab, type the IP address of the Windows PC to which you will connect. Enter the User name and User password for the user account that you want to use on the remote Windows PC. That user account needs to exist on the Windows PC.
If you are using a Microsoft account on your Windows PC, it is OK to fill in your email address and password. If your Windows PC is part of a domain, enter it in the Domain field, otherwise, leave this field empty.
Next, you can set the Resolution and the Color depth that you want to use for your remote desktop connection. By default, the remote desktop profile is set to use the “Use client resolution” which means that the connection uses the same resolution as the Windows computer to which you connect. The Color depth is also set at the highest quality possible. However, selecting a smaller desktop resolution and color depth can improve the performance of your Linux to Windows remote desktop session. If you experience lag when connected to the remote Windows desktop, try reducing the color depth or resolution.
If you want to share a folder from your Ubuntu computer with the Windows PC, check the Share folder box and select it.
Also, for more advanced settings, go to the Advanced tab. There you can turn the sound on or off, share printers, disable clipboard synchronization, and so on.
Once you finish configuring all the details, click Save and Connect. This saves your connection profile and then initiates an RDP connection to the Windows PC.
In a matter of seconds, you should have a running remote desktop connection established to your Windows PC.
You could also Connect to the remote Windows PC, without all the personalization steps shared earlier. However, that means that you have to reconfigure the remote desktop connection profile the next time you want to remote control your Windows PC.
Do you use Ubuntu to remote control Windows PCs?
As you can see, it is easy to establish a remote desktop connection from Linux to Windows. The Remmina Remote Desktop Client is available by default in Ubuntu, and it supports the RDP protocol, so connecting remotely to a Windows desktop is almost a trivial task. Did you use it? How did it work for you? Also, if you have any questions or if you need help, feel free to leave a comment below.


