- How to combine internet connections on Windows 10
- How to combine 2 internet connections on Windows 10
- Method 1 – Use system resources
- Method 2 – Use Connectify Hotspot
- Ethernet not working? Try these easy fixes
- How can I fix the Ethernet problems on Windows 10?
- 1. Check for viruses
- Bitdefender
- 2. Check your drivers
- To update your drivers manually follow these steps:
- 3. Check that the connection is enabled
- 4. Check the network cable
- Run a System Scan to discover potential errors
- 5. Check your connection details
- 6. Run the Internet connection troubleshooter
- 7. Roll back the network adapter driver
- 8. Turn off your antivirus/firewall and VPN software
- 9. Reset your network
- 10. Check your network hardware
How to combine internet connections on Windows 10

- Download Restoro PC Repair Tool that comes with Patented Technologies (patent available here).
- Click Start Scan to find Windows issues that could be causing PC problems.
- Click Repair All to fix issues affecting your computer’s security and performance
- Restoro has been downloaded by 0 readers this month.
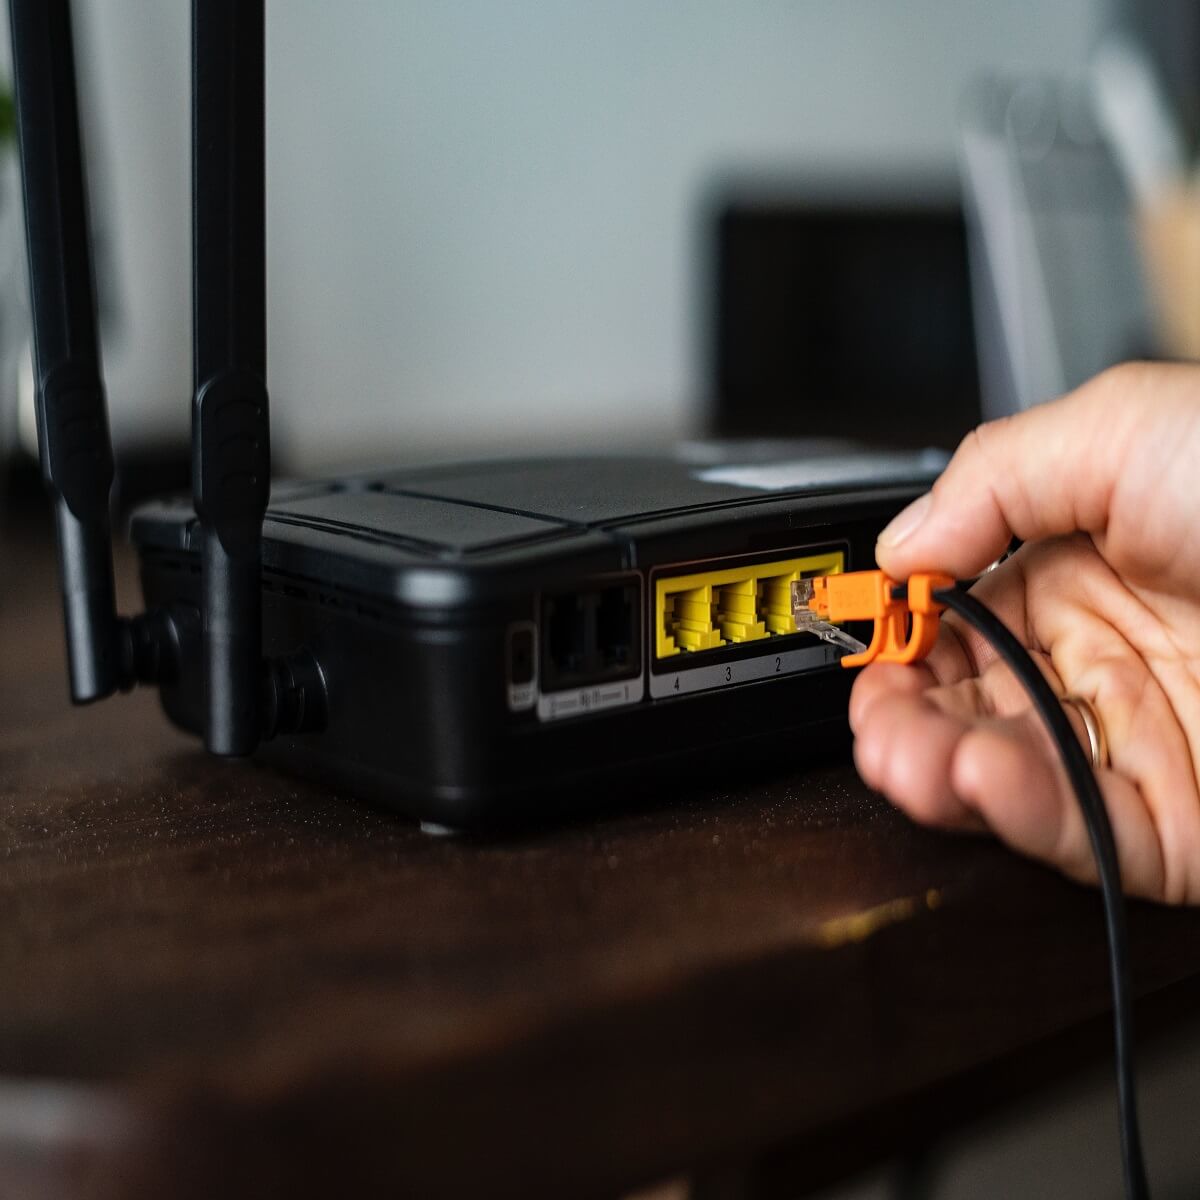
Let’s say you have two routers from two different ISPs and want to combine their bandwidth. Or, have a wireless and LAN network from two different sources and want them working as one. Well, that’s doable and it can come quite handy.
Possibilities are not limiting, but we the result is always the same: faster connection. There are various ways to do it, to combine two internet connections on Windows 10. We made sure to list them below, along with some explanations.
How to combine 2 internet connections on Windows 10
Method 1 – Use system resources
The first method to combine two internet connections requires no third-party software nor specific hardware. With a couple of tweaks, you can combine two separate internet connections or, alternatively, bridge them. So, there are actually two methods which can be used on any Windows computer to merge two connections in one.
The first method refers to avoiding the metric value computing done by the system. What does this mean? Well, if you have two connections at the same time, Windows will use the automatic metric value to determine what connection is more efficient and stick with it.
The second connection will stay as a backup, in case the primary disconnects or significantly drops down on metrics.
Here’s what you need to do to make it work:
- In the Windows Search bar, search for and open Control Panel.
- Choose Network and Internet.
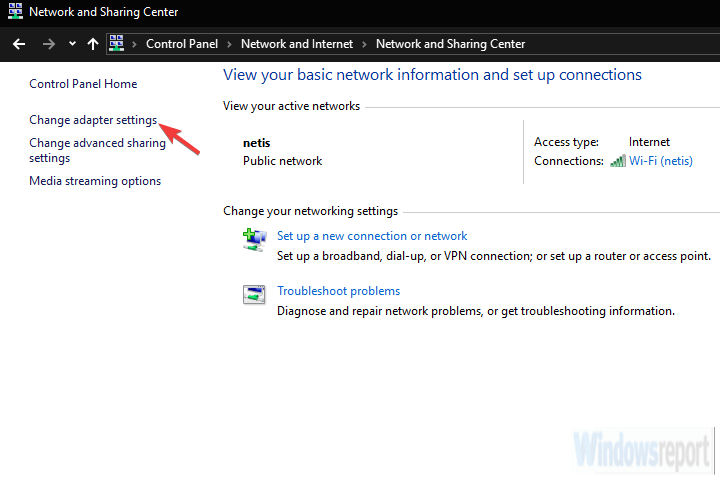
- Open Network and Sharing Center and select Change adapter settings.

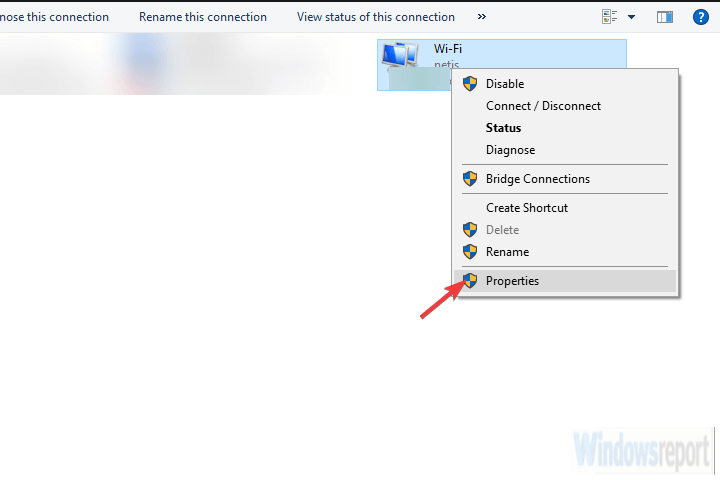
- Right-click on your active internet connection and open Properties.
- Highlight Internet Protocol TCP/IP Version 4 and click Properties.
- Click Advanced.
- Uncheck the Automatic metric box and enter 15 in the Interface metric field.
- Confirm changes and repeat this for all connections.
- Disconnect both connections and reboot your PC.
- Connect both connections and look for improvements.

The second method applies only to two LAN/WAN connections and it basically bridges both connections for dual-bandwidth. Here’s how to set it up:
- Navigate to Control Panel >Network and Internet >Network and Sharing Center >Change adapter settings.
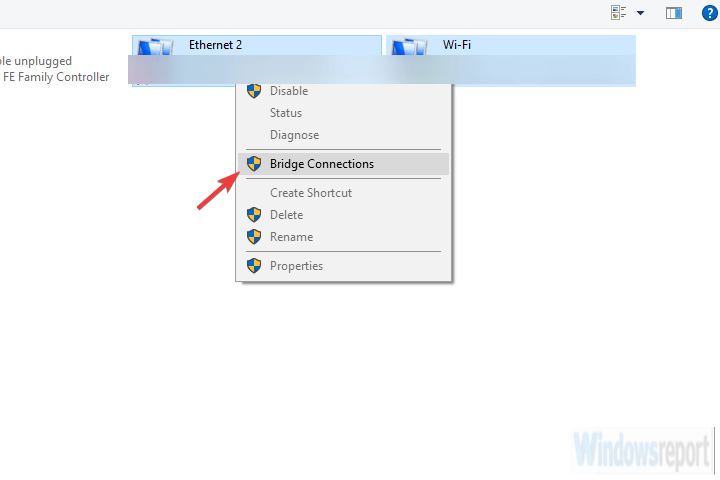
- Press and hold CTRL and click both connections to highlight them.
- Right-click on one of the connections and choose Bridge Connections.
Method 2 – Use Connectify Hotspot
Sometimes (read: often) system resources won’t comply and you’ll get stuck with a third-party app. Using a non-system software for something as simple as this might come off a bit strange, but a lot of users weren’t able to utilize neither of two ways from the first method.
Ethernet not working? Try these easy fixes

- The Ethernet is not working and that can be a huge problem when you’re working from home.
- A solution on how to fix the Ethernet connection is to check your network driver.
- Also, check if the connection is actually enabled and verify the network cable.
- You should also check the connection settings by following the steps from this guide.

- Download Restoro PC Repair Tool that comes with Patented Technologies (patent available here).
- Click Start Scan to find Windows issues that could be causing PC problems.
- Click Repair All to fix issues affecting your computer’s security and performance
- Restoro has been downloaded by 0 readers this month.
Even though the IT industry is slowly moving towards wireless connections there are still uses and advantages to having a wired network connection.
The main advantage would be stability. While wireless connections can be affected by external interference, its wired counterpart is less prone to such factors.
This is one of the reasons cable connections are still recommended for servers, download machines, media streaming, and gaming.
Although Ethernet connections are easier to install and manage than wireless connections, sometimes they can be a bit of a headache to troubleshoot.
In this article we will discuss how you can check the basics of an Ethernet connection on a machine running Windows 10.
How can I fix the Ethernet problems on Windows 10?
- Check for viruses
- Check your drivers
- Check that the connection is enabled
- Check the network cable
- Check your connection details
- Run the Internet connection troubleshooter
- Roll back the network adapter driver
- Turn off your firewall and VPN software
- Reset your network
- Check your network hardware
1. Check for viruses

Some viruses have the ability to block network connections on Windows machines. If you have antivirus software installed on your system you can use that to scan the whole system.
A great tool for removing viruses is Bitdefender. Due to its efficiency and protection features, it has been ranked as the best antivirus.
The great news is that the protective efficiency comes with no cost for your system stability and with almost zero errors when using Bitdefender.
Bitdefender
2. Check your drivers

After you have uninstalled your drivers, we recommend reinstalling them automatically. Downloading and installing drivers manually is a process that carries the risk of getting the wrong driver installed, which may lead to serious malfunctions of your system.
The safer and easier way to update drivers on a Windows computer is by using an automatic tool. We strongly recommend you use DriverFix.
It automatically identifies each device on your computer and matches it with the latest driver versions from an extensive online database.
Drivers can then be updated in batches or one at a time, without requiring the user to make any complex decisions in the process.
To update your drivers manually follow these steps:
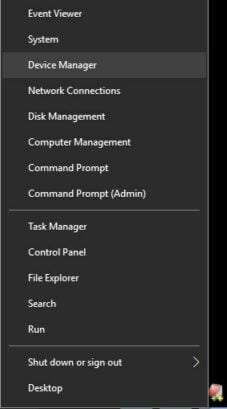
- Right-click on the Start button and select Device Manager.
- Expand the Network adapters list and check whether there are any issues with the devices.
- Identify the Ethernet card, in this case, it is a Marvell Yukon 88E8058 PCI Express gigabit controller.
- Right-click on it and select Properties.
- In the Device status window, it should say that your device is workingproperly.
- If your Ethernet controller icon has a question mark or an exclamation point then reinstall the correct driver for it.


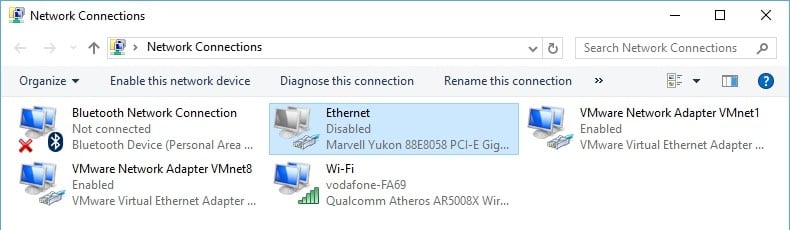
3. Check that the connection is enabled
- Right-click on the Start button and select Network Connections.
- All you have to do is right-click on it and select Enable.

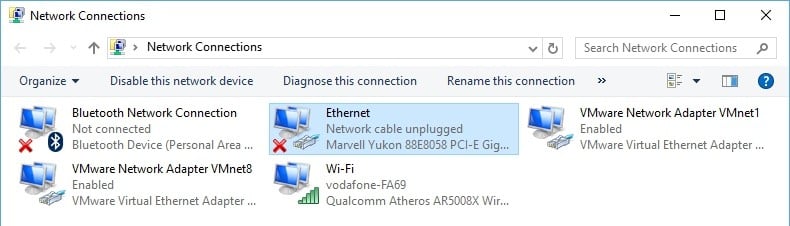
4. Check the network cable
Run a System Scan to discover potential errors


In the Network connections window, once the Ethernet connection is enabled, you can also check its status. As you can see in the image above, the status of this connection says Network cable unplugged.
This means that the network card cannot identify if a cable is connected to it.
Check that one end of the network cable is connected to the Ethernet port on your machine, and that the other end is connected to the network (router, switch, or modem).
If your cable appears to be connected try disconnecting it and connecting it back again.
Cables can deteriorate in time or from improper handling. If your Ethernet adapter still shows the network cable as unplugged try switching to a different cable.
You can also try a different port on the router, switch, or modem (if more are available) as sometimes these ports can malfunction.
5. Check your connection details
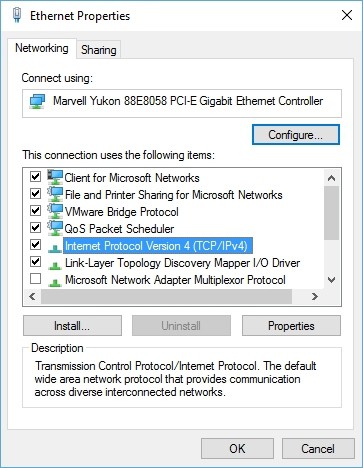
- Right-click on the Ethernet connection and selecting Properties.
- In the Ethernet Properties window double click on the Internet Protocol Version 4 (TCP/IPv4) option.
- This is where you can enter the correct details for your connection.
- In most cases, all you have to do is to enable Obtain an IP address automatically and Obtain DNS server address automatically but there are situations where you have to manually input the details.
For this, you’ll have to consult your router/switch/modem configuration manual or obtain the details from your ISP or network administrator.
Note: While most connections use IPv4, in the Ethernet Properties window you can also find an option called Internet Protocol Version 6 (TCP/IPv6).
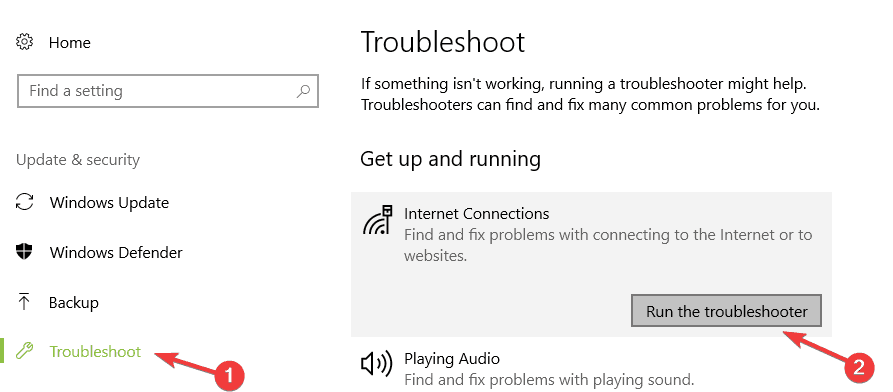
6. Run the Internet connection troubleshooter
- Go to Start and type settings.
- Go to Update & Security and select Troubleshooter.
- Select and launch the Internet connection troubleshooter.
- Check if your Ethernet connection is now available
- If this is not the case, restart your computer and test again.
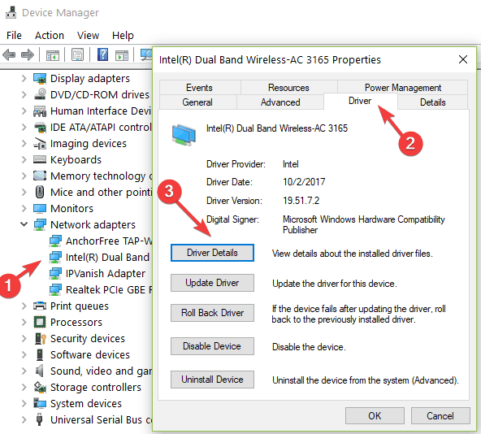
7. Roll back the network adapter driver
- Go to Search and launch Device Manager.
- Go to Network adapters and select the network adapter.
- Right-click the network adapter and go to Properties.
- In the Properties window select the Driver tab and go to Roll Back Driver.
- Follow the on-screen steps to install a previous driver version.
- If the button is unavailable, that means there’s no driver to roll back to.
8. Turn off your antivirus/firewall and VPN software
- Go to Start and launch Windows Firewall.
- On the left side panel, select Turn Windows Firewall on and off.
- Check the two options that allow you to disable the firewall.
- Check your Ethernet connection again.

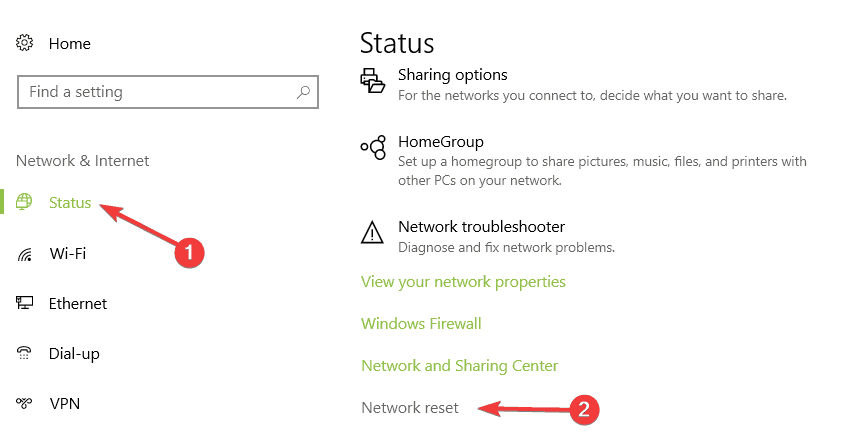
9. Reset your network
- Go to the Settings page, select Network & Internet, and go to Status.
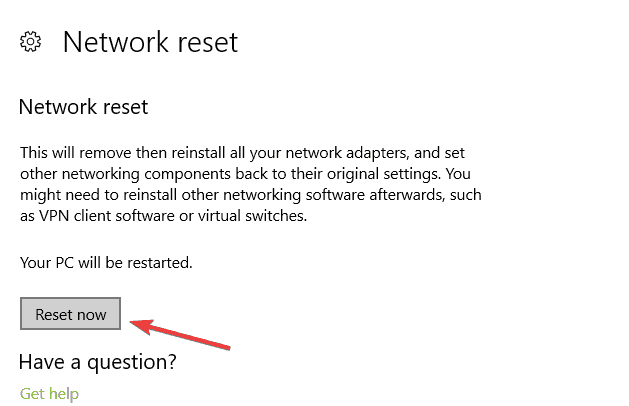
- Locate the Network reset option. This feature allows you to set your network component to default. You might need to reinstall certain network software afterward.
- Click on the Reset now button and click Yes.
10. Check your network hardware

If you follow these steps and still can’t connect to your wired network, then the problems might not be related to your computer but rather to the network you’re trying to connect to.
You can try connecting a different machine to the network and see if the problem is the same on it.
If this is the case, then you should consult your router/switch/modem manual or ask your network administrator for the network details.
We hope that your Ethernet connection has been restored by using one of our solutions presented in this article.
If you’re sure the network you’re trying to connect to is set up properly and still can’t connect to it, please use the comment section below to ask for further assistance.


