- Инсталляция и настройка клиента Cisco VPN на Windows 10
- Установка и настройка Cisco VPN Client
- Процесс инсталляции
- Конфигурация подключения
- Устранение ошибки подключения
- Connect to a VPN in Windows 10
- Create a VPN profile
- Connect to a VPN
- How to make Windows 10 automatically connect to VPN
- 5 Best VPNs we recommend
- How do I make Windows 10 automatically connect to VPN?
- Create a VPN connection
- Create a BAT file
- Add the BAT file to Windows 10 autostart
- How do I make Windows 10 automatically connect to a VPN client?
- How do I stop my VPN from automatically connecting?
- Why use Private Internet Access
- Private Internet Access
Инсталляция и настройка клиента Cisco VPN на Windows 10

Cisco VPN – весьма популярный софт, который предназначен для удаленного доступа к элементам частной сети, поэтому используется он в основном в корпоративных целях. Данная программа работает по принципу клиент-сервер. В сегодняшней статье мы рассмотрим подробно процесс установки и настройки клиента Cisco VPN на устройствах под управлением Windows 10.
Установка и настройка Cisco VPN Client
Для того чтобы установить ВПН клиент Cisco на Windows 10, потребуется выполнить дополнительные действия. Это связано с тем, что программа перестала официально поддерживаться еще с 30 июля 2016 года. Несмотря на данный факт, сторонние разработчики решили проблему запуска на Windows 10, поэтому программное обеспечение Cisco VPN актуально и по сей день.
Процесс инсталляции
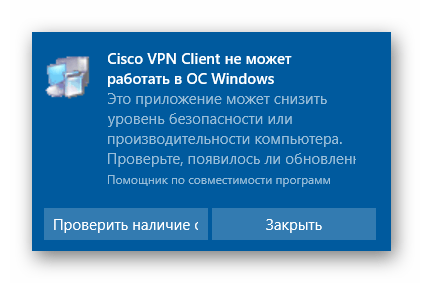
Если попытаться запустить программу стандартным способом без дополнительных действий, то появится вот такое уведомление:
Для корректной же установки приложения вам необходимо сделать следующее:
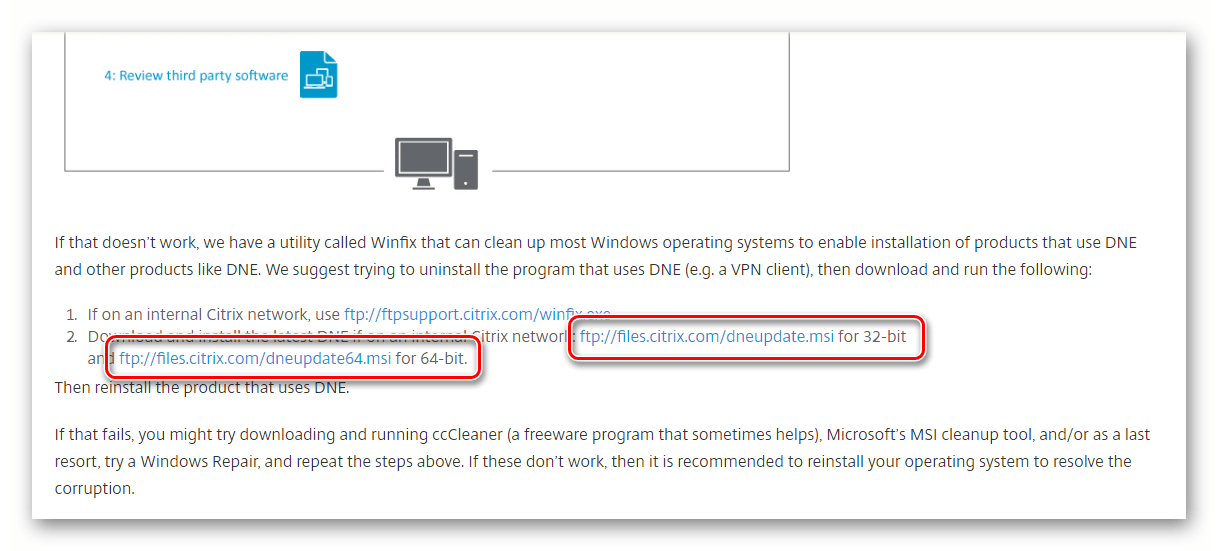
- Перейти на официальную страницу компании «Citrix», которая и разработала специальное ПО «Deterministic Network Enhancer» (DNE).
- Далее необходимо найти строки со ссылками на загрузку. Для этого опуститесь почти в самый низ страницы. Нажмите на том участке предложения, которое соответствует разрядности вашей операционной системы (х32-86 или х64).

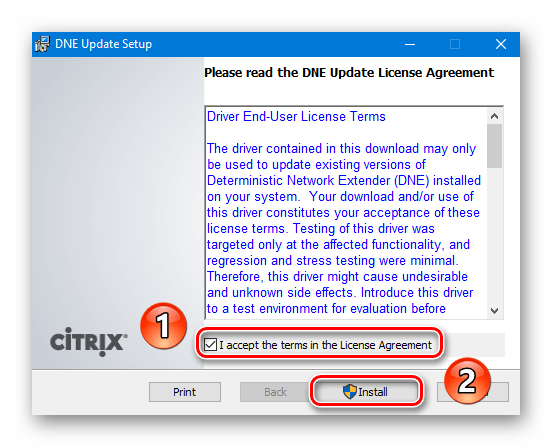
В главном окне «Мастера установки» нужно ознакомиться с лицензионным соглашением. Для этого поставьте галочку напротив строки, которая отмечена на скриншоте ниже, а потом нажмите кнопку «Install».
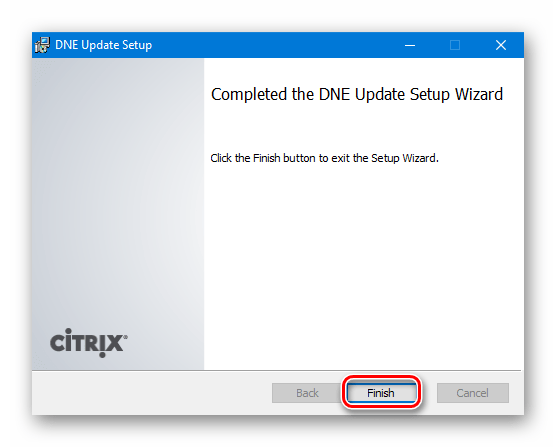
После этого начнется установка сетевых компонентов. Весь процесс будет выполняться автоматически. Вам нужно будет лишь немного подождать. Спустя некоторое время увидите окно с уведомлением об успешной установке. Для завершения нажмите кнопку «Finish» в этом окне.
Следующим шагом будет загрузка установочных файлов Cisco VPN. Сделать это можно на официальном сайте либо же перейдя по зеркальным ссылкам ниже.
В результате у вас на компьютере должен быть один из следующих архивов.
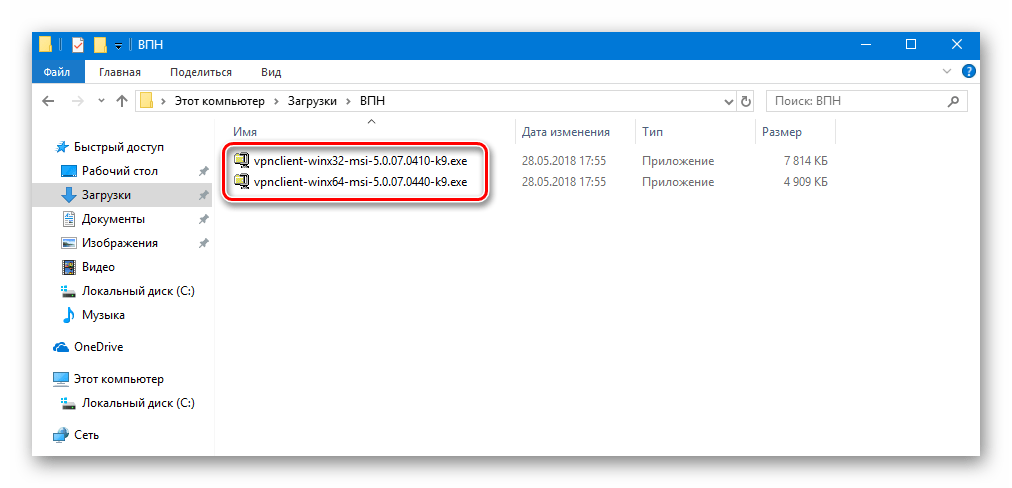
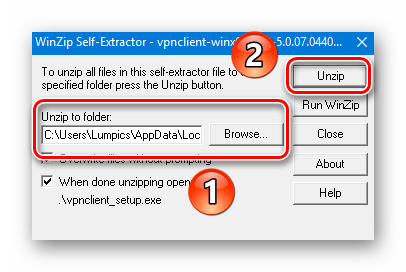
Теперь кликните по скачанному архиву два раза ЛКМ. В результате вы увидите небольшое окошко. В нем можно выбрать папку, куда будут извлечены установочные файлы. Нажмите на кнопку «Browse» и выберите нужную категорию из корневого каталога. Затем нажмите кнопку «Unzip».
Обратите внимание, что после распаковки система попытается автоматически запустить инсталляцию, но на экране появится сообщение с ошибкой, которое мы опубликовали в начале статьи. Дабы это исправить, необходимо зайти в папку, куда ранее были извлечены файлы, и запустить оттуда файл «vpnclient_setup.msi». Не перепутайте, так как в случае запуска «vpnclient_setup.exe» вы снова увидите ошибку.

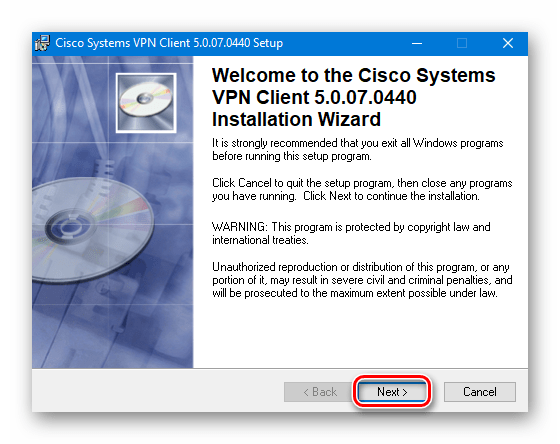
После запуска появится главное окно «Мастера установки». В нем следует нажать кнопку «Next» для продолжения.
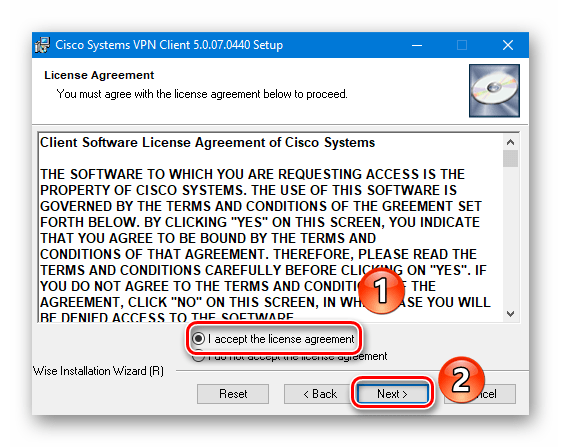
Далее необходимо принять лицензионное соглашение. Просто поставьте отметку возле строки с соответствующим названием и нажмите кнопку «Next».
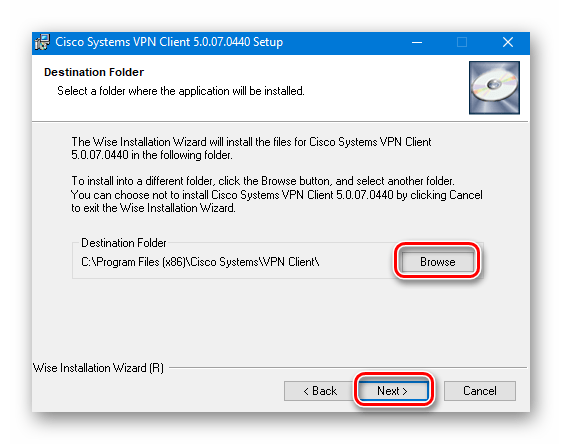
Напоследок остается лишь указать папку, куда программа будет инсталлирована. Мы рекомендуем оставить путь без изменений, но при необходимости можно нажать кнопку «Browse» и выбрать другой каталог. Затем нажмите «Next».
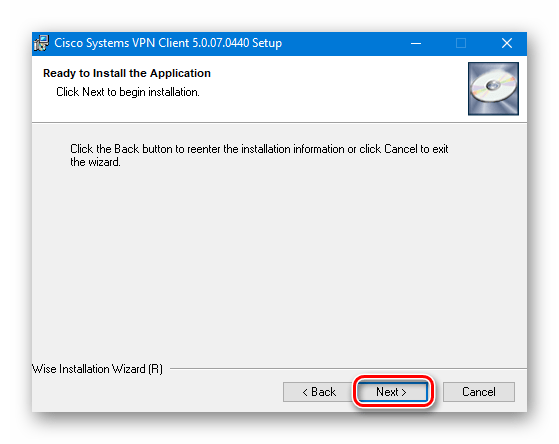
В следующем окне появится сообщение о том, что все готово к установке. Для начала процесса жмем кнопку «Next».
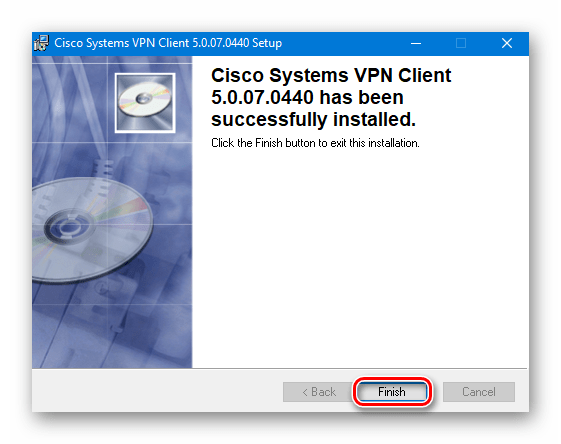
После этого начнется непосредственно установка Cisco VPN. По окончании операции на экране появится сообщение об успешном завершении. Остается лишь нажать кнопку «Finish».
На этом процесс инсталляции Cisco VPN Client подошел к концу. Теперь можно приступить к настройке подключения.
Конфигурация подключения
Настроить Cisco VPN Client легче, чем может показаться на первый взгляд. От вас потребуется лишь определенная информация.
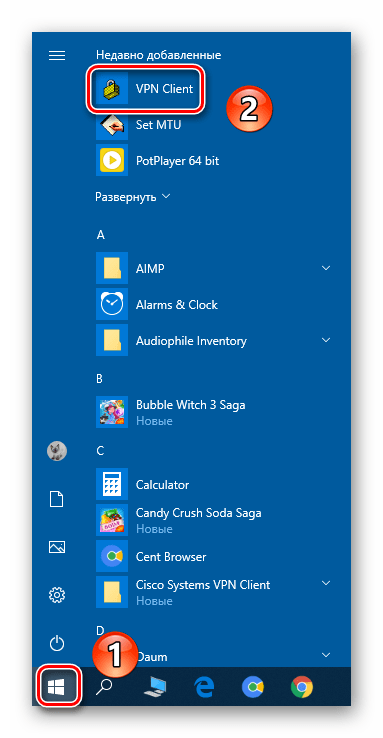
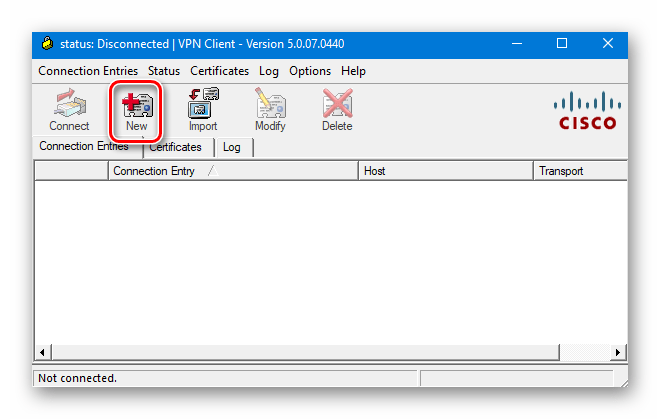
- Нажмите на кнопку «Пуск» и выберите из списка приложение Cisco.
Теперь нужно создать новое подключение. Для этого в открывшемся окне нажмите на кнопку «New».
В результате появится другое окно, в котором следует прописать все необходимые настройки. Выглядит оно следующим образом:

- «Connection Entry» – Имя подключения;
- «Host» – В данном поле указывается IP-адрес удаленного сервера;
- «Name» в разделе «Authentication» — Тут следует прописать имя группы, от лица которой будет происходить подключение;
- «Password» в разделе «Authentication» — Здесь указывается пароль от группы;
- «Confirm Password» в разделе «Authentication» — Сюда повторно пишем пароль;
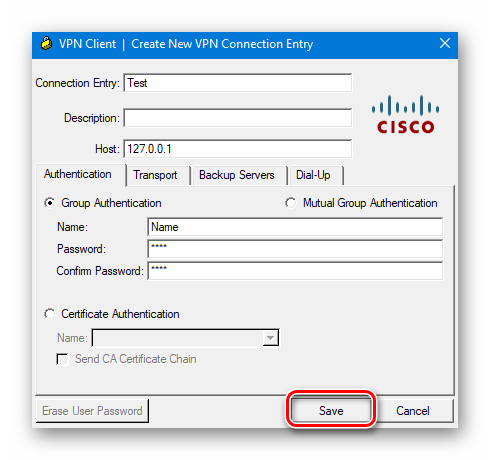
Обратите внимание, что всю необходимую информацию обычно предоставляет провайдер либо системный администратор.
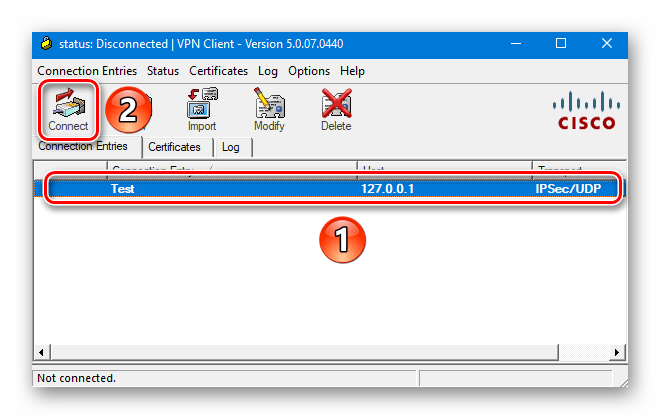
Если процесс подключения пройдет успешно, вы увидите соответствующее уведомление и иконку в трее. После этого VPN будет готов к использованию.
Устранение ошибки подключения
К сожалению, на Windows 10 попытка подключиться к Cisco VPN очень часто заканчивается следующим сообщением:
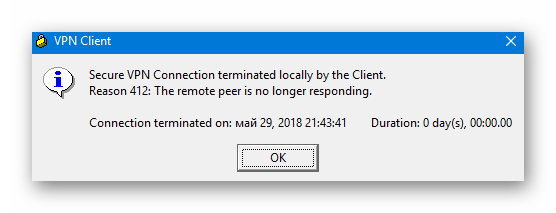
Чтобы исправить ситуацию, следует выполнить следующее:
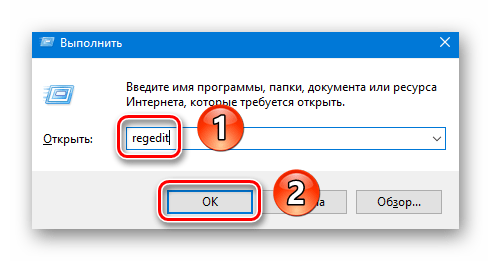
- Используйте сочетание клавиш «Win» и «R». В появившееся окно впишите команду regedit и нажмите кнопку «OK» немного ниже.
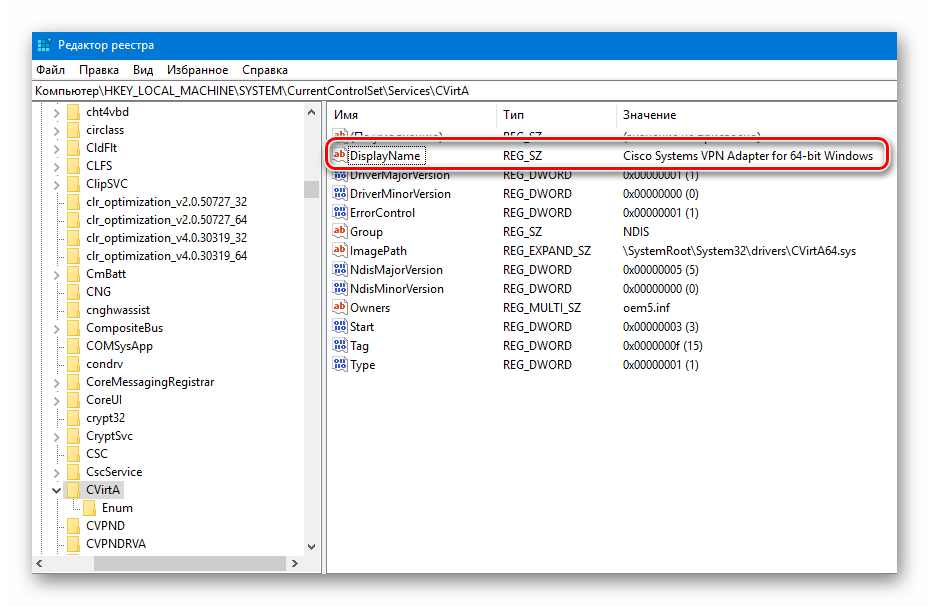
В результате увидите окно «Редактор реестра». В левой его части находится дерево каталогов. В нем нужно перейти по такому пути:
HKEY_LOCAL_MACHINE\SYSTEM\CurrentControlSet\Services\CVirtA
Внутри папки «CVirtA» следует найти файл «DisplayName» и нажать по нему дважды ЛКМ.

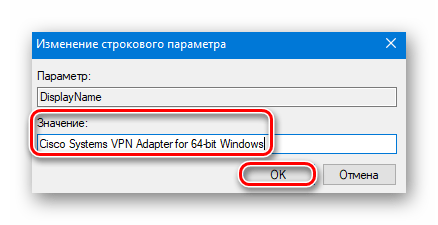
Откроется маленькое окошко с двумя строками. В графу «Значение» нужно вписать следующее:
Cisco Systems VPN Adapter — если у вас Windows 10 x86 (32 bit)
Cisco Systems VPN Adapter for 64-bit Windows — если у вас Windows 10 x64 (64 bit)
После этого нажмите кнопку «OK».
Убедитесь, что значение напротив файла «DisplayName» изменилось. Затем можете закрыть «Редактор реестра».
Проделав описанные действия, вы избавитесь от ошибки при подключении к VPN.
На этом наша статья подошла к своему завершению. Надеемся, у вас получится установить клиент Cisco и подключиться к нужному VPN. Отметим, что данная программа не подойдет для обхода различных блокировок. Для этих целей лучше использовать специальные браузерные расширения. Ознакомиться со списком таковых для популярнейшего браузера Google Chrome и ему подобных вы можете в отдельной статье.
Connect to a VPN in Windows 10
Whether it’s for work or personal use, you can connect to a virtual private network (VPN) on your Windows 10 PC. A VPN connection can help provide a more secure connection and access to your company’s network and the internet, for example, when you’re working from a coffee shop or similar public place.
Create a VPN profile
Before you can connect to a VPN, you must have a VPN profile on your PC. You can either create a VPN profile on your own or set up a work account to get a VPN profile from your company.
Before you start:
If it’s for work, look for VPN settings or a VPN app on your company’s intranet site while you’re at work, or contact your company’s support person.
If it’s for a VPN service you subscribe to for personal use, visit the Microsoft Store to see if there’s an app for that service, then go to the VPN service’s website to see if the VPN connection settings to use are listed there.
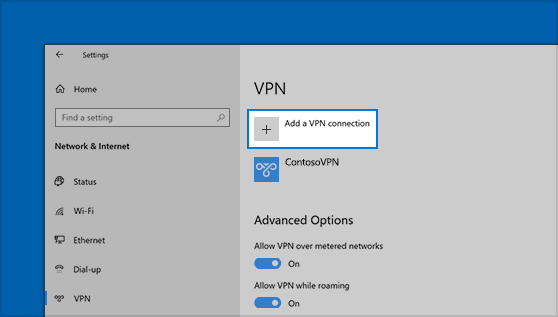
Select the Start button, then select Settings > Network & Internet > VPN > Add a VPN connection.
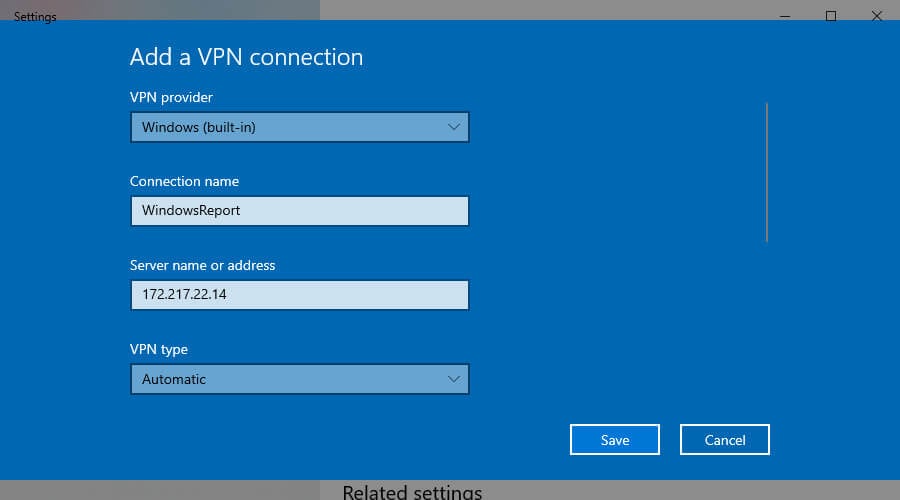
In Add a VPN connection, do the following:
For VPN provider, choose Windows (built-in).
In the Connection name box, enter a name you’ll recognize (for example, My Personal VPN). This is the VPN connection name you’ll look for when connecting.
In the Server name or address box, enter the address for the VPN server.
For VPN type, choose the type of VPN connection you want to create. You’ll need to know which kind of VPN connection your company or VPN service uses.
For Type of sign-in info, choose the type of sign-in info (or credentials) to use. This might be a username and password, one-time password, certificate, or a smart card if you’re connecting to a VPN for work. Enter your username and password in the respective boxes (if required).
If you need to edit the VPN connection info or specify additional settings, such as proxy settings, choose the VPN connection and then select Advanced options.
Connect to a VPN
When you have a VPN profile, you’re ready to connect.
On the far right of the taskbar, select the Network icon (either or ).
Select the VPN connection you want to use, then do either of the following depending on what happens when you select the VPN connection:
If the Connect button displays under the VPN connection, select Connect.
If the VPN section in Settings opens, select the VPN connection there, then select Connect.
If you’re prompted, enter your username and password or other sign-in info.
When connected, the VPN connection name will display Connected underneath it. To see if you’re connected to the VPN while you’re doing things on your PC, select the Network icon (either or ) on the far right of the taskbar, then see if the VPN connection says Connected.
How to make Windows 10 automatically connect to VPN

- If you’re a privacy-concerned user, you can make Windows 10 automatically connect to a VPN as soon as you turn on your PC. It’s also ideal for quickly connecting to your workplace through VPN.
- Although the Windows 10 built-in provider doesn’t have an option to auto-connect on system boot, you can make this happen by adding a BAT file to the Windows 10 startup folder. Find out how.
- Visit our Windows 10 area to learn how to fully take advantage of Microsoft’s operating system.
- If you’re having any VPN problems, bookmark our VPN Troubleshooting Hub .

If you’re wondering how to make Windows 10 automatically connect to VPN, we’ve got you covered. You just have to create a simple BAT file with your VPN connection details and add it to the Windows autostart sequence.
This way, the VPN connection you created using the Windows 10 built-in VPN provider will autostart every time you switch on your computer, just like Skype, Steam, or an antivirus.
However, if you have a VPN desktop client installed, things become significantly easier since you just have to find and activate the autostart and auto-connect options in the UI.
Follow our easy instructions below to find out how to make Windows 10 automatically connect to VPN using a manual VPN connection as well as a VPN desktop client.
We’re also showing you how to stop your VPN from auto-connecting if you need to turn off this feature temporarily or permanently.
5 Best VPNs we recommend
| 79% Off + 2 free Months |  Check offer! Check offer! | |
| 83% Off (2.25$/Month) + 3 free Months | Check offer! | |
| 68% Off + 1, 12 or 24 free Months (random prize) | Check offer! | |
| 83% Off (2.21$/Month) + 3 free Months | Check offer! | |
| 76% (2.83$) on 2 Years plan | Check offer! |
How do I make Windows 10 automatically connect to VPN?
Create a VPN connection
- Right-click the Start button and go to Network Connections.
- Select VPN and press Add a VPN connection.
- Add the required VPN connection details.
- Copy the Connection name, User name, and Password.
- Click Save.
Create a BAT file

- Open the Windows 10 Notepad (press Ctrl + R, type notepad, press Enter).
- Paste the following code: c:windowssystem32rasdial.exe YourConnectionName YourUsername YourPassword
- Replace the connection details with what you copied in the previous stage.
- Save the Notepad file and exit.
- Change the file extension of the Notepad file from TXT to BAT.
If you can’t see the format of your files, find out how to show file extensions in Windows 10.
Add the BAT file to Windows 10 autostart
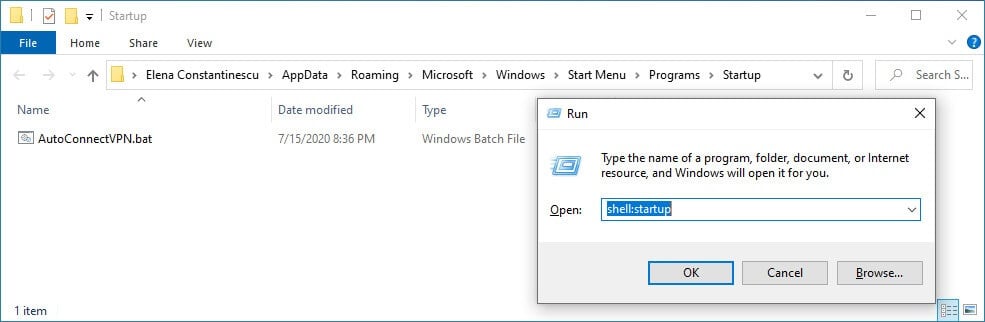
- Press Ctrl + R, type shell:startup, and press Enter.
- Copy the BAT file to this location.
- Restart your PC.
From this point on, Windows 10 will automatically connect to the VPN at every system startup. Command Prompt briefly opens a console window and shows how it verifies the username and password, registers your PC over the network, and connects to the VPN.
If you need to switch VPN servers, you only have to edit the VPN connection details in Windows 10. The changes will get automatically picked up by the BAT file.
However, if you also modify the VPN connection name, username, or password, then you will need to manually update the BAT file, too. Otherwise, Windows 10 won’t be able to automatically connect to the VPN.
How do I make Windows 10 automatically connect to a VPN client?

- Sign up for a Private Internet Access subscription.
- Download and install PIA on your PC.
- In the systray, click the PIA icon.
- Open Settings and go to the General tab.
- Enable Launch on System Startup and Connect on Launch.
- Restart your PC.
After making these changes, PIA will auto-launch every time you turn your PC and connect to the last used VPN server. As you can see, it’s a more convenient option than having to create a BAT file and add it to the Windows 10 startup.
Furthermore, it’s easier to change VPN servers in PIA in order for Windows 10 to automatically connect to the new VPN server, instead of editing the VPN connection info in the OS and manually updating the BAT file every time you do this.
How do I stop my VPN from automatically connecting?
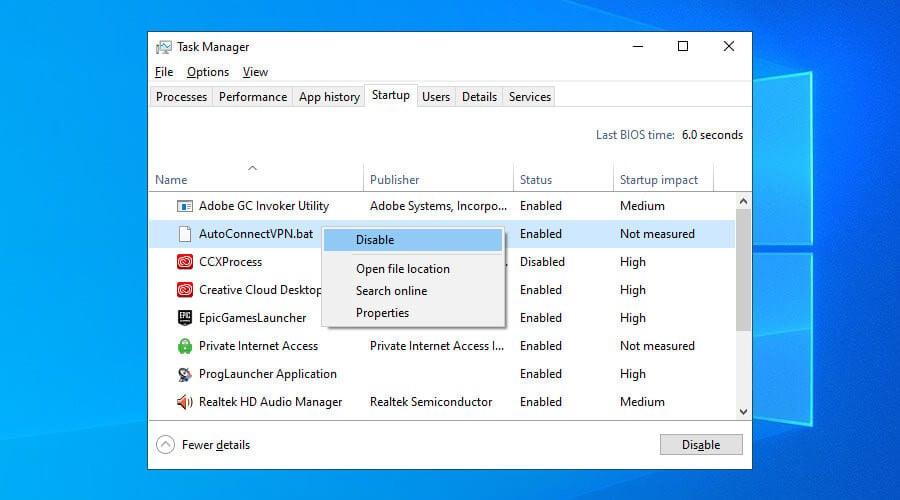
- Right-click the Windows taskbar and go to Task Manager.
- Go to the Startup tab.
- Right-click the VPN connection’s BAT file and click Disable.
If you change your mind and want to re-enable Windows 10 to automatically connect to the VPN, follow the same steps as above and click Enable on the disabled entry. To make a permanent change, head over to the startup folder using Ctrl+R and shell:startup to delete the BAT file.
If you used a VPN desktop client like PIA, simply find and disable the autostart and auto-connect options in the user interface. You can also use Task Manager to prevent PIA from autostarting at every Windows startup (same steps as disabling the BAT file).
Why use Private Internet Access

Developed by Kape Technologies, Private Internet Access (PIA) is the best VPN for Windows 10, thanks to high-speed VPN servers, military-grade encryption, and its user-friendly interface. It’s the reason why we used it in our example above.
Windows 10 has limited native support for VPN protocols, some of which are considered obsolete (PPTP, L2TP). On the other hand, PIA supports OpenVPN and WireGuard, which are safer and more versatile protocols.
Moreover, PIA comes with a bunch of security features that Windows 10 lacks, including a kill switch that cuts off Internet access in case the VPN connection drops, to protect you from IP leaks.
What else you should know about PIA:
- Quickly connect to more than 3,300 VPN servers in 48 countries
- Increase your security using private DNS
- Protects up to 10 devices at the same time
- No traffic logs, no IP or DNS leaks
- 24/7 live chat support
- 30-days money-back guarantee (no free trial)

Private Internet Access
Make Windows 10 automatically connect to PIA’s VPN servers fast and easy.
In conclusion, it’s a good idea to make Windows 10 automatically connect to a VPN as soon as you turn on your PC. This way, you can immediately connect to another computer over the Internet, like accessing your work PC from home.
However, using a premium VPN solution like PIA is significantly easier and unlocks more possibilities. For example, you can use PIA to access blocked websites, defeat government censorship, host game servers for you and your friends, and unlock Netflix catalogs.


