- Переносим контакты с Android на компьютер
- Процесс переноса контактов с Android
- Способ 1: Super Backup
- Способ 2: Синхронизация с Google
- Способ 3: Копирование с телефона
- How to transfer Android contacts to Windows phone
- How to move contacts from an Android to a Windows Mobile.
- Step 1: Export Google contacts.
- Step 2. Import Google contacts into Windows live (Hotmail, Outlook live).
- How to Sync Windows live Contacts to your Windows phone.
- How to Transfer Contacts from Windows Phone to Android
- Part 1: Transfer Winphone Contacts to Android via Outlook & Google Account
- Part 2: Easily Export Contacts from Windows Phone to Android
- Bonus Tips: Import Contacts from SIM Card to Windows Phone
- Related Articles
Переносим контакты с Android на компьютер
Телефонную книгу удобнее всего вести на смартфоне, но со временем номеров становится очень много, поэтому, чтобы не потерять важные контакты, рекомендуется перенести их на компьютер. К счастью, это можно сделать очень быстро.
Процесс переноса контактов с Android
Перенести контакты с телефонной книжки на Android можно несколькими способами. Для этих задач используются как встроенные функции ОС, так и сторонние приложения.
Способ 1: Super Backup
Приложение Super Backup разработано специально для создания резервных копий данных с телефона, в том числе и контактов. Суть данного способа будет заключаться в создании резервной копии контактов и последующий их перенос на компьютер любым удобным способом.
Инструкция по созданию самой резервной копии контактов выглядит следующим образом:
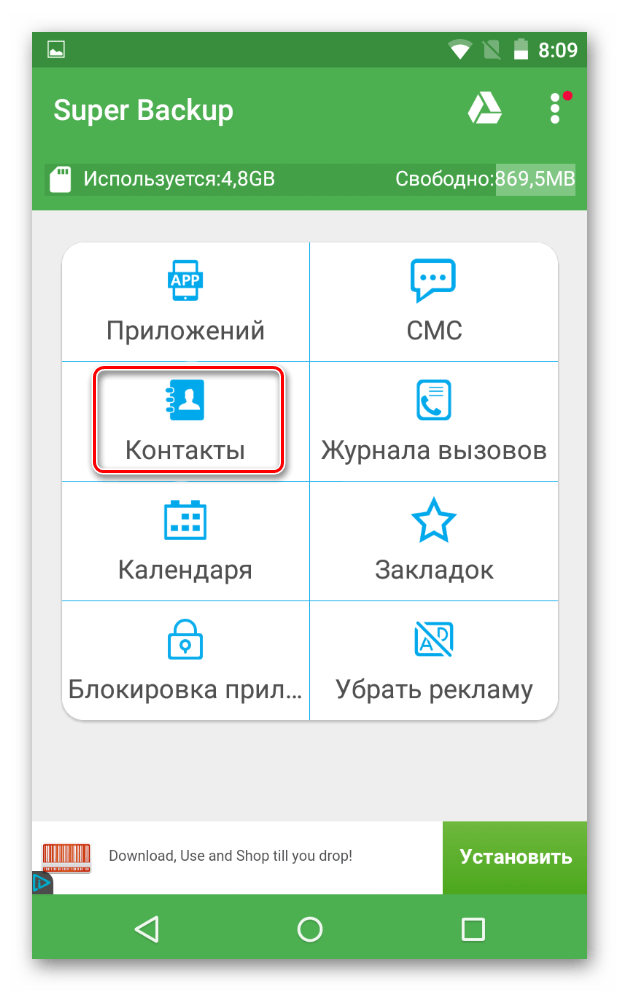
- Скачайте приложение в Play Market и запустите его.
- В открывшемся окне выберите пункт «Контакты».
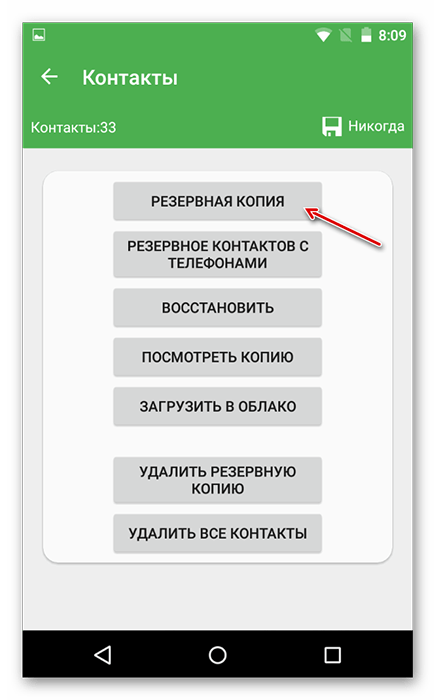
Теперь выберите вариант «Резервная копия» либо «Резервное копирование контактов с телефонами». Лучше использовать последний вариант, так как вам нужно создать копию только контактов с номерами телефонов и именами.
Теперь файл с вашими контактами готов, его осталось только перенести на компьютер. Сделать это можно при помощи соединения компьютера с устройством по USB, используя беспроводное Bluetooth или через удаленный доступ.
Способ 2: Синхронизация с Google
Android-смартфоны по умолчанию синхронизируются с аккаунтом Google, что позволяет использовать многие фирменные сервисы. Благодаря синхронизации вы можете загрузить данные со смартфона в облачное хранилище и выгрузить их на другом устройстве, например, компьютере.
Перед началом процедуры нужно настроить синхронизацию с устройством по следующей инструкции:
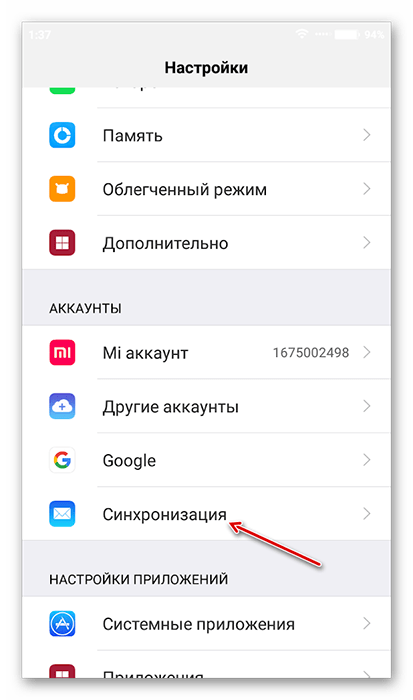
- Откройте «Настройки».
- Перейдите во вкладку «Аккаунты». В зависимости от версии Android она может быть представлена у вас как отдельный блок в настройках. В нём нужно выбрать пункт «Google» или «Синхронизация».

Обычно синхронизация уже включена по умолчанию. После её подключения можно перейти непосредственно к переносу контактов на компьютер:
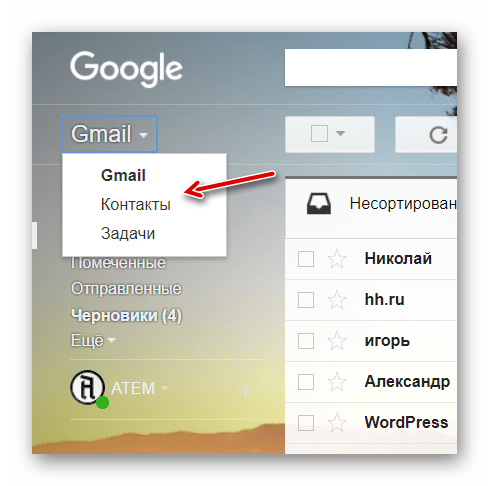
- Перейдите в свой почтовый ящик Gmail, к которому привязан ваш смартфон.
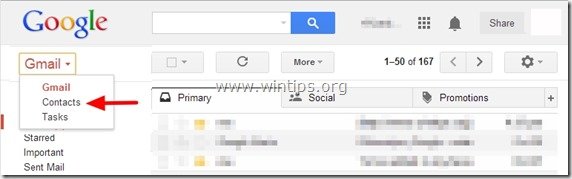
- Нажмите на «Gmail» и в выпавшем списке выберите пункт «Контакты».
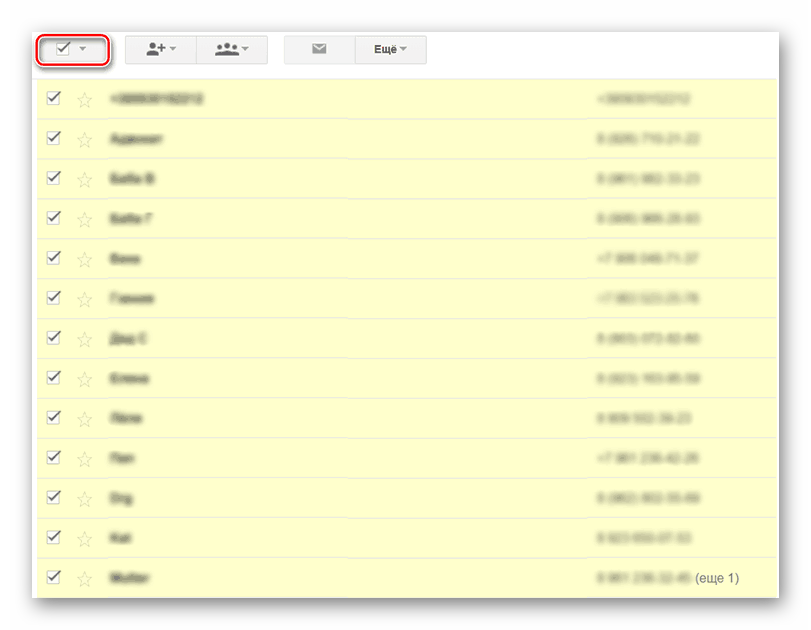
Теперь вам нужно выбрать все контакты. В верхней части окна нажмите на иконку квадратика. Она отвечает за выбор всех контактов в группе. По умолчанию открыта группа со всеми контактами на устройстве, но вы можете выбрать другую группу через меню слева.
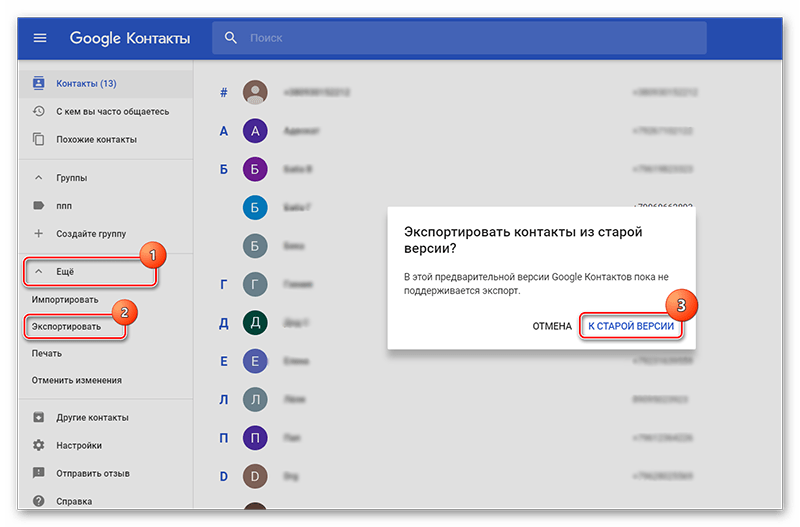
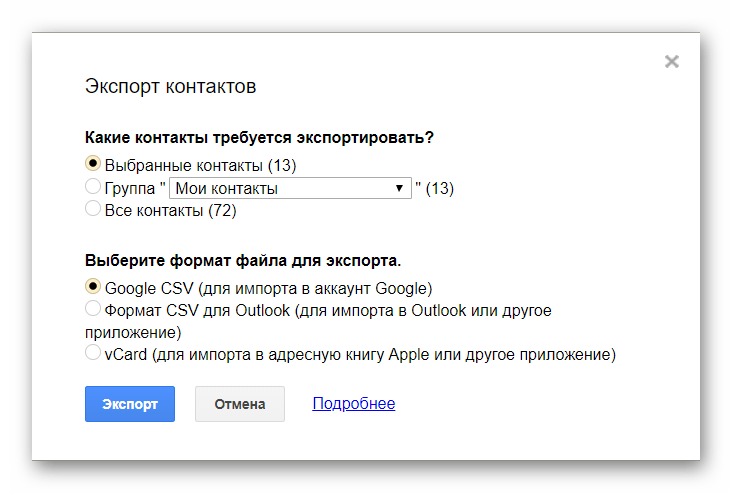
Настройте параметры экспорта под свои потребности и нажмите на кнопку «Экспорт».
Способ 3: Копирование с телефона
В некоторых версиях Android доступна функция прямого экспорта контактов на компьютер либо сторонний носитель. Обычно это касается «чистого» Android, так как производители, устанавливающие свои оболочки для смартфонов, могут урезать некоторые функции оригинальной ОС.
Инструкция для данного способа выглядит следующим образом:
- Перейдите в список контактов.
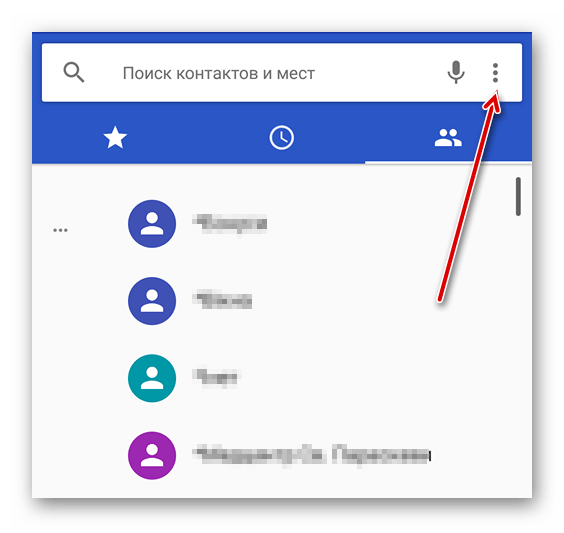
- Нажмите на иконку троеточия или плюса в верхнем правом углу.
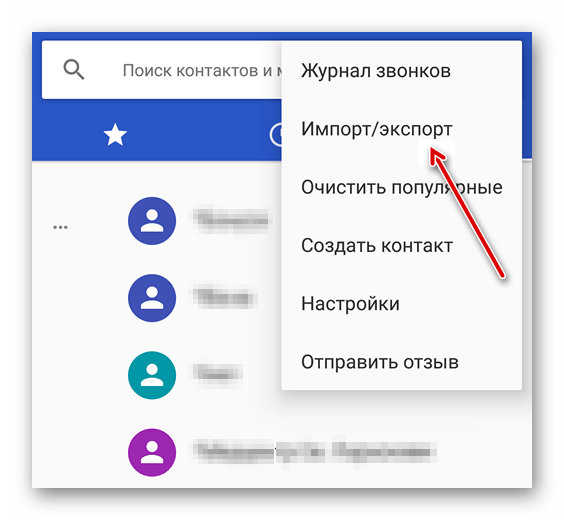
В выпавшем меню выберите пункт «Импорт/экспорт».
Откроется ещё одно меню, где нужно выбрать «Экспорт в файл…», либо «Экспорт во внутреннюю память».

Теперь вам останется перекинуть созданный файл на компьютер.
Как видите, нет ничего сложного в том, чтобы создать файл с контактами из телефонной книжки и перекинуть их на компьютер. Дополнительно вы можете использовать другие программы, которые не были рассмотрены в статье, однако перед установкой прочтите о них отзывы других пользователей.
How to transfer Android contacts to Windows phone
Last updated on March 7th, 2017
If you recently bought a new Windows phone to replace your old Android phone, then you will probably want to transfer all your contacts from the Android mobile to your Windows mobile. This tutorial is written for all users that want to migrate all (or specific) contacts from their Android Phone to their new Windows phone. The method described here is very simple and can be followed by everyone.
Before you continue to follow these steps, make sure that you already have a Google (Gmail) account and you have setup (Added) that account on your Android phone. If you don’t have a Google Account you can easily create one here (it’s free): Create Google Account.
The next thing that is required to transfer your contacts from your Android mobile device to your Windows mobile (by using this method) is to have a Microsoft Account (Windows Live, Hotmail, Outlook) and to have setup (Added) that account in your Windows Phone. If you don’t have a Microsoft account, then you can create a new one here: Sign-Up Microsoft Account.
How to move contacts from an Android to a Windows Mobile.
From your Android Phone, after you have added your Google account, synchronize your Android phone contacts with your Google account contacts. To do that:
- On the Android phone, go to “Settings” > “Accounts and Sync”.
- Under “Manage Accounts”, select (or “Add”) the Google account you used to import WLM contacts.
- Finally press “Sync Contacts”.
Info: When you are syncing your Android mobile with your Google account, then you also sync all your contacts, calendar & Google mail from your phone to that account and vice versa. So if you open your Google account from any computer or mobile device and navigate to e.g. Google contacts page, you can find that all your Android Phone contacts are also stored online.
The next step is to export your Google contacts:
Step 1: Export Google contacts.
From a desktop computer:
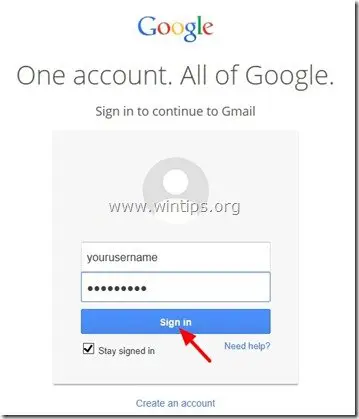
1. Sign-in to your Gmail account.
2. In the main Gmail window, press the drop-down arrow next to “Gmail” and choose “Contacts”.

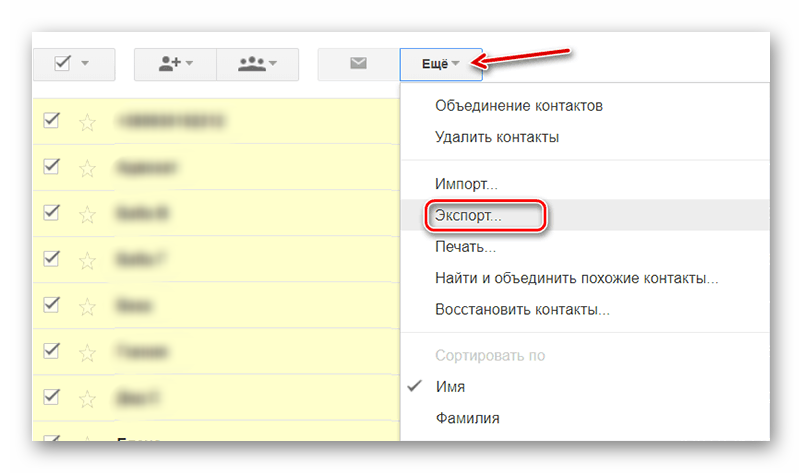
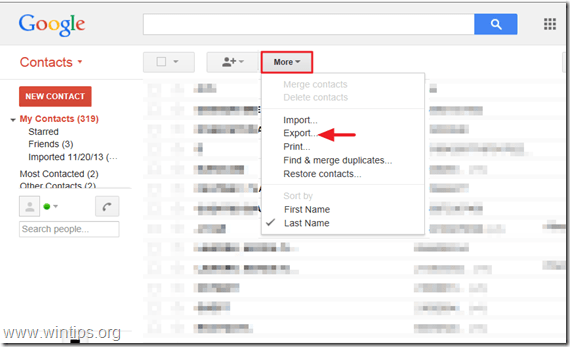
3. In “Contacts” page, press the “More” menu and select “Export”. *
* Note: By doing this you ‘re going to export (and transfer) all your Android contacts to your Windows Phone. In the case that you want to transfer specific contacts or (or Group(s)) then you must select these contacts (or Groups) before you select the “Export” option.
4. At “Export contacts” page, select the “Google CSV format (for importing into a Google account)” option and press “Export”.*
Note: At “Which contact do you want to export section” you have to select “Selected contacts” if you want to transfer only the selected contacts contacts to your Windows phone, or “The group (Group Name)” if you want to transfer a specific group or groups.

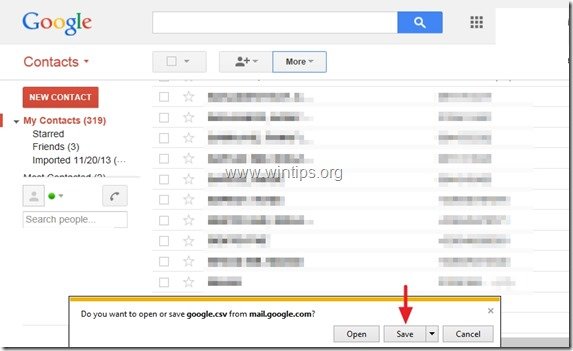
4. Finally press “Save” and store the exported contacts file “google.csv” on your computer (e.g. on your “Downloads” folder).
5. Close Google Mail.
Step 2. Import Google contacts into Windows live (Hotmail, Outlook live).
1. Sign-In to your Windows Live (Hotmail) account using a desktop computer: Windows Live (Hotmail) Login Page

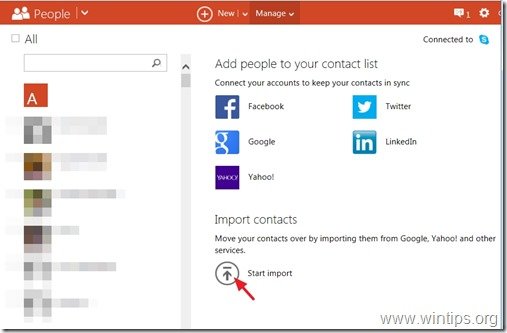
2. While on the main window, press the drop-down arrow next to “Outlook” and choose “People”.


3. In “People” page, click at “Start import” icon.
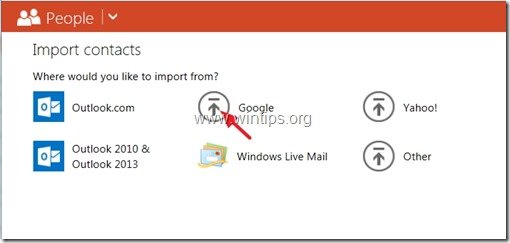
4. At “Import contacts” page, select import from “Google” (icon).
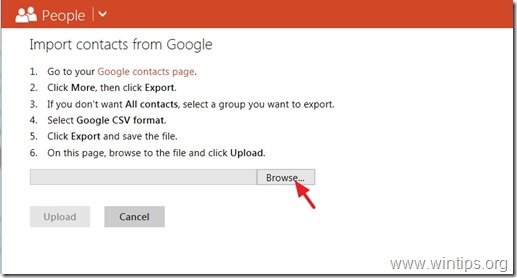
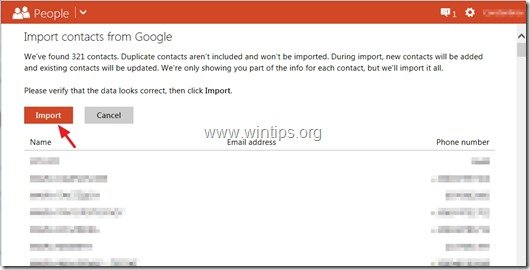
5. At “Import contacts from Google” page, select “Browse”.
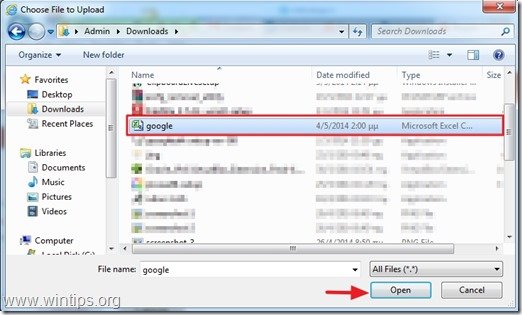
6. Navigate to the location where you saved the “google.csv” file, in the previous step, select the “google.csv” file and click “Open”.
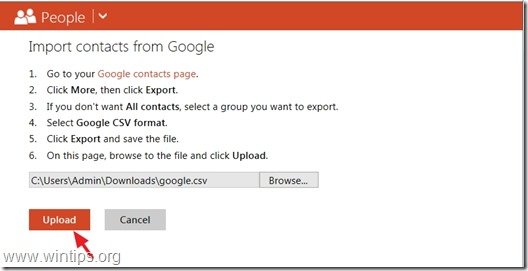
7. Press “Upload”.
8. Finally verify that all the imported contacts look correct and then press the “Import” button.
Close Windows live and sync your Windows phone with your Windows live Account.
How to Sync Windows live Contacts to your Windows phone.
Before continuing, first add your Microsoft account (if you haven’t already done that) to your Windows phone. <“Add an account” > “Microsoft account” (or “Windows Live”) > type your MS account username and password and press “Sign in”>.
1. From Windows phone “App list” go to “Settings” > “Email + accounts”.*
2. Tap and hold your finger at your Microsoft account until you see the “sync” option.
3. Tap “sync” to synchronize your Windows live contacts with your Windows phone .
How to Transfer Contacts from Windows Phone to Android
To transfer contacts from Windows phone to Android, you can follow the steps below: Sync contacts from Windows phone to Microsoft account > Export contacts from Microsoft account to computer > Import contacts from computer to Gmail account > Sync Gmail contacts to Android. Obviously, it is trouble to copy address from Windows phone to Android. In the guide below, there will be the other choice.
Note:
1. Things you need: a Windows phone (Lumia 830 for example), Android phone (Samsung Galaxy S6 for example), two USB cables, a computer, and an OneDrive account.
2. Internet access on your computer must be available.
3. Before transferring, please back up your contacts from Windows phone to OneDrive.
Part 1: Transfer Winphone Contacts to Android via Outlook & Google Account
To Transfer contacts from Windows phone to Android device, please follow the guide below in details:
Note: Before you start to transfer the contacts to Android, please make sure you have the Windows Live and Google accounts and you have connected these accounts to your WinPhone.
Step 1 Sign In Outlook Live on PC
Please firstly go to the Outlook Live page and sign in your Windows Live account on your computer.
Step 2 Export WinPhone Contacts to PC
On the main window, please click on «People» icon on the bottom of left pane. You need to continue to click on the drop-down menu of «Manager» and select «Export contacts».

After that, you would be able to see a pop-up window to export contacts to computer. Click on the «Export» button and it will automatically download contacts on your device in the form of .CSV file.

Step 3 Transfer Contacts to Google Account
After you save the contacts on your computer, you need to continue to sync them to your Google account. Please sign in your Gmail account on PC and on the interface, just press the drop-down arrow next to «Gmail» and then choose «Contacts». In this page, please navigate to «More > Import > Choose File» and select the csv file you create in the last step.

To transfer the contacts to your Google account, please just click on the «Import» button.
Step 4 Transfer Contacts from Google Account to Android
Please turn to your Android device and navigate to «Settings > Accounts > Contacts» to import contacts. But please note that different Android devices may be not the same for settings.

Part 2: Easily Export Contacts from Windows Phone to Android
You can transfer data with Phone Transfer, a powerful solution that allows you to copy data from Windows phone to Android. Even though they work with totally different OS, Phone Transfer can seamlessly copy complete address book to the destination phone. The whole process will be smooth so that it can be finished within several minutes.


Step 1 Connect Windows Phone and Android Phone to PC
Launch Phone Transfer on your computer. Choose the mode «Phone to Phone Transfer«. Then connect your Windows phone and Android phone to the computer with USB cables. Enable USB debugging on both phones.

Step 2 Back Up Contacts from Windows Phone to OneDrive
When both phones are connected successfully, you will see the window as below. Choose «Have backed up already» at the lower-right corner if you have created backup previously. Otherwise, you can click «how to back up» and follow the guide to back up contacts from Windows Phone to OneDrive.

Step 3 Sign in OneDrive
You are in the log-in page. Click the button «Sign in«. Then enter your Microsoft account (the account you used to back up contacts on OneDrive) and the password.
A note will occur and prompt you to authorize permission to OneDrive. Click the button «Yes«. Phone Transfer will analyze OneDrive information. This may take some time. Please wait.

Step 4 Select File Types to Transfer
Analysis succeeded. You can select data you want to transfer and start the process directly now. «Contacts» will be automatically selected by the program once contact backup on OneDrive is detected. Then click the button «Start Transfer«. This will enable the program to copy and transfer the phone book to the destination Android phone.

Step 5 Transfer Contacts from OneDrive to Android
Phone Transfer is copying data. Please do not disconnect either phone. You can even view contact’s name and status of it. And you can click the button «Cancel» to end the process if contacts you want have been copied.
When transmission is done, you will have a note that prompt you that you have copied the data completely and show you how many items have been moved. Then you can click the button «OK» to finish the process.
![]()
Bonus Tips: Import Contacts from SIM Card to Windows Phone
In the other hand, if you want own an old phone, for example, old Android, and want to transfer the contacts from that old phone to your new Windows phone, you can try the following guide:
1. Insert SIM card which stores your contacts to your new device
2. Tap on «More > Settings > Import from SIM»
3. Select the account you want and click on «Next»
4. You are allowed to import all of the contacts or import them selectively. Then tap on the «import» button
Now, the job is done! You can go to your Contact app and check if the contacts are imported or not.
Actually you can clone phone book from Windows phone to iOS devices by following the same steps. To transfer pictures, music, and videos, OneDrive account is unnecessary. You can transfer such media files directly from phone to phone.
Related Articles
 Ivy Bruce
Ivy Bruce is the Founder and Editorial Director at Recovery-Android Studio. You can also find her on Google+ and Twitter.

How to Transfer Videos from Computer to iPhone
![]()
User Guide of Phone to Phone Transfer Software

How to Recover Deleted File from Motorola Atrix

How to Transfer Music from Computer to Nexus


