- 5 best Windows 10 free screenshot-taking tools
- Here are the best screenshot-taking tools for Windows 10
- PicPick (recommended)
- TinyTake
- Lightshot
- Create a screenshot in Windows 8.1 / 10 and auto-save as a file!
- The new method to create a screenshot in Windows 10 and 8.1 and to auto-save it as a file!
- The 5 Best Screenshot Apps for Windows in 2021
- Capture what’s on your computer screen
- Best Overall Screenshot App: Snipping Tool
- How to change Print Screen Screenshots folder location in Windows 10
- Change Print Screen Screenshots folder location
- Copy screenshots in windows
- How to create a screenshot and automatically save it as a file in Windows 8
- Users who read this also read:
5 best Windows 10 free screenshot-taking tools


The easiest way to make a copy of an interesting article, a recipe, a how-to-guide or a funny image is to take a screenshot. You can simply use the dedicated keyboard key to take a screenshot, or you can use a specialized tool to help you get the job done better.
Using a screenshot-taking tool brings more advantages: your screenshots are clearer, especially when you’re taking screenshots of a video, you can quickly edit them, add comments, capture only a region of the screen, and more.
Here are the best screenshot-taking tools for Windows 10
PicPick (recommended)
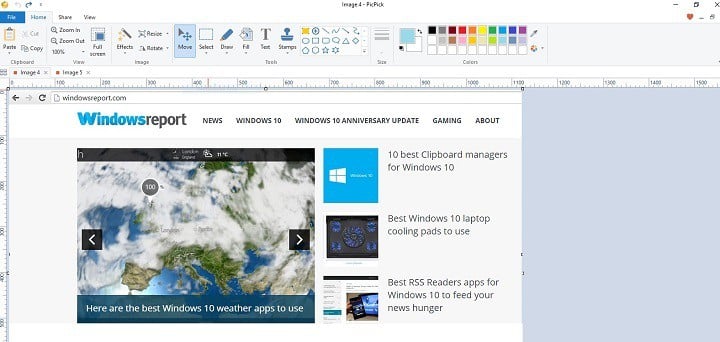
PicPick is a complex screenshot-taking software that brings many additional options to the table: an intuitive image editor, color picker, color palette, pixel-ruler, protractor, crosshair, whiteboard and more. Thanks to the plethora of features it offers, PicPick can be used by homeowners as well as graphic designers.
Other features include:
- Capture anything: take screenshots of an entire screen, an active window or any specific region of your desktop
- Enhance with effects: drop shadows, frames, watermarks, mosaic, motion blur, brightness control
- Edit your images: add text, arrows, shapes and more with the built-in image editor
- Share your screenshots everywhere: send your images via Web, email, Dropbox, Google Drive, Evernote, Facebook or Twitter.
The quality of the effects you can use is impressive and additional options, such as the stamps you can add, make PicPick one of the best Windows 10 screenshot-taking tools.
TinyTake
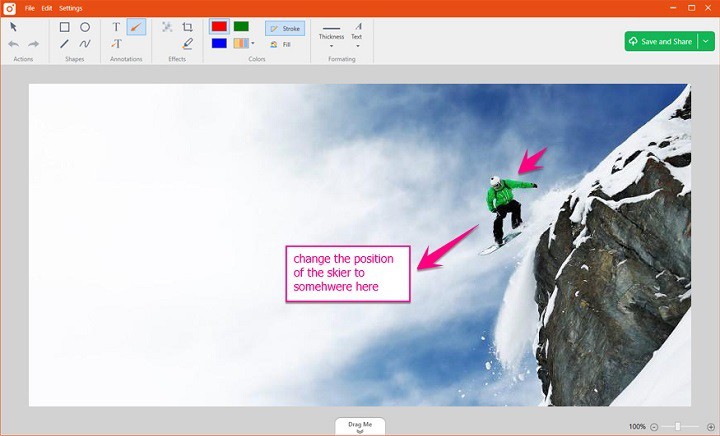
TinyTake developers boast about this tool as being the fastest way to take screenshots, record videos and share them with friends. You can also add comments, publish your screen captures online, get a shareable link, and reference your history. This tools is easy to use, it’s free and it’s very popular – more than 7500 companies use it worldwide.
TinyTake supports the following features:
- Record a video of your screen (upto 120 minutes)
- Record a video using your web-cam
- Capture a region, a window or entire screen
- Capture an image using your web-cam
- Open, annotate and share an existing image
- Copy to clipboard or save it locally
- Store screenshots & videos in the cloud
- Zoom in / zoom out
- Assign custom short-cut keys.
You can download TinyTake for free from the tool’s official page.
Lightshot
Key features include:
- Screenshot history: keep track of all your screenshots by signing in at www.prntscr.com
- Copy a screenshot to clipboard: you can then paste it into any suitable application such as Word, Paint or Photoshop
- Use hotkeys to speed up Lightshot: almost every task has its own hotkey.
You can download Lightshot for free from Skillbrains.
Editor’s Note: This article continues on the next page. If you’re interested in other screenshot software, check out our wide collection of guides.
Create a screenshot in Windows 8.1 / 10 and auto-save as a file!
The new method to create a screenshot in Windows 10 and 8.1 and to auto-save it as a file!
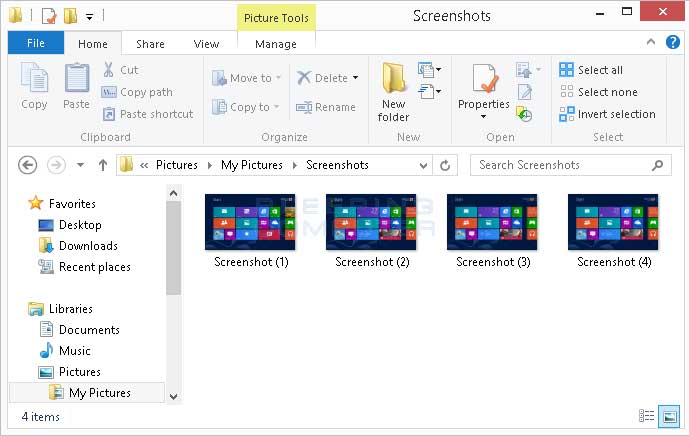
Via keyboard shortcut [Window-Logo + PrtScn] Windows-8 auto-saved inside the screenshot file in «Screenshots» folder, created in your My Pictures folder. This location is %UserProfile%\Pictures\Screenshots. ( . see Image-1 Arrow-1).
The old method to create a screenshot in Windows and copy a screenshot into the clipboard works also on Windows-8. [Alt+PrtScn] for the active Window or [PrtScn] for the complete Desktop. You can use mspaint.exe to save a screenshot to a file!
1. To start ms-paint in Windows 8, press the key combination [Win-Logo+R],
2. Then simply type the command mspaint.exe. ( . see Image-2 Arrow-1)
3. In MS-Paint press the key combination [CTRL+V] to paste the screenshot from the clipboard
( . see Image-2 Arrow-2)
Screenshots are suitable for a variety of purposes: to quickly send something funny from the Internet to friends, to show the colleague the preliminary design for the new web project — or to add explanatory material to a text like this. Taking such screenshots has never been a problem on Microsoft operating systems. And since Windows 8, it’s even easier than ever — thanks to the addition of keyboard shortcuts and the snipping tool.

Take a screenshot (print your screen)
Sometimes it’s easier to show someone what’s on your screen than it is to explain it. Windows makes it easy to take a picture of the screen so you can save, print, or share it. This is referred to taking a screenshot or screen capture.
You can take a screenshot and automatically save it as a file, take a screen shot without saving it as a file, or take a screenshot of only one window (instead of the whole screen).
The 5 Best Screenshot Apps for Windows in 2021
Capture what’s on your computer screen
:max_bytes(150000):strip_icc()/AnitaGeorge-d50ba5f507844f5ea2f54a1b1d9e7fd1.jpg)
There are a number of reasons you might want to preserve a visual image of what’s on your computer screen. Screenshot apps make it easy. If you’re a Windows user, you’re sure to find one on this list that will fit your needs.
Best Overall Screenshot App: Snipping Tool
:max_bytes(150000):strip_icc()/Snippingtoolscreenshot-5bda61fb46e0fb00516af1b0.jpg)
The simple design makes this tool easy and straightforward to use.
It may lack features some users are looking for.
Snipping Tool is easy to access and to use. Choose between several modes (Free-form, Rectangular, Window, and Screen), so you can capture exactly the elements on your screen that you want. Once you have your screenshot, use the Pen and Highlighter to call attention to certain areas. Then save the image, copy and paste it into another application, or send it directly to recipients via email. You can also use the Edit with Paint 3D button to open the file in Paint 3D and perform additional fine-tuning.
Snipping Tool is a free app that comes standard with most Windows computers running Windows Vista and later. To access it, type Snipping Tool into the Windows search bar.
How to change Print Screen Screenshots folder location in Windows 10
Windows 10/8/7, by default, saves screenshots to the Pictures folder. But if you wish, you can change the default save folder location for captured Print Screen image files to any other location, by following this tutorial. There are several ways you can take a desktop screenshot on Windows, including using the built-in Snipping Tool, PrtScr keyboard button, or other third-party Screen capture freeware.
Change Print Screen Screenshots folder location

To change the folder where the Windows operating system saves its screenshots, you will have to do the following. Navigate to the following location, where you will see a Screenshots folder:
If you do not see the Screenshots folder, you need to hit Win+PrtScr to take a screenshot first. This screenshot will then be saved in the Screenshots folder, which will get created by Windows to save your screenshots.
Right-click on the Screenshots folder and select Properties.
Under the Location tab, you will see the target or the folder path where screenshots are saved by default. You can change where files and folders are saved to another location on your computer – including the Desktop, another drive, another computer on your network.
To do this, click on the Move button, and navigate to the folder location which you want to save the screenshots, via the Select a Destination box which opens up. Select the folder and click Apply.
Once you have done this, your captured screenshots will be saved to this new location.
To restore the default folder path, you have to simply click on the Restore Default button and click Apply.
Date: September 20, 2018 Tags: Folder, Screen Capture
Copy screenshots in windows

- Home
- Tutorials & Tech Support Guides
- Windows 8 Tutorials
- How to create a screenshot and automatically save it as a file in Windows 8
How to create a screenshot and automatically save it as a file in Windows 8
Lawrence Abrams
- November 27, 2012
- Read 260,003 times
In the past, the built-in method to create a screenshot in Windows was to use + or to copy a screenshot into the clipboard. You would then have to paste that image into another program that has the ability to save it as an image file. Though this method works, it was inconvenient, required an extra program, and was confusing for less experienced computer users. With the release of Windows 8, Microsoft included a really useful feature where you can automatically take a screen shot and save it as a file. There is only one issue with this method and that is to automatically create a file you will be taking a screenshot of the entire screen and not just a particular Window.
To take a screenshot and automatically save it as a file in Windows 8 you can use the new Windows+PrintScreen ( + ) keyboard combination. When you hold those two keys down at the same time, Windows 8 will dim the screen to indicate that you took the screenshot. The file will then be saved inside a folder called Screenshots, which will be created in your My Pictures folder. This location is C:\Users\ \My Pictures\Screenshots .
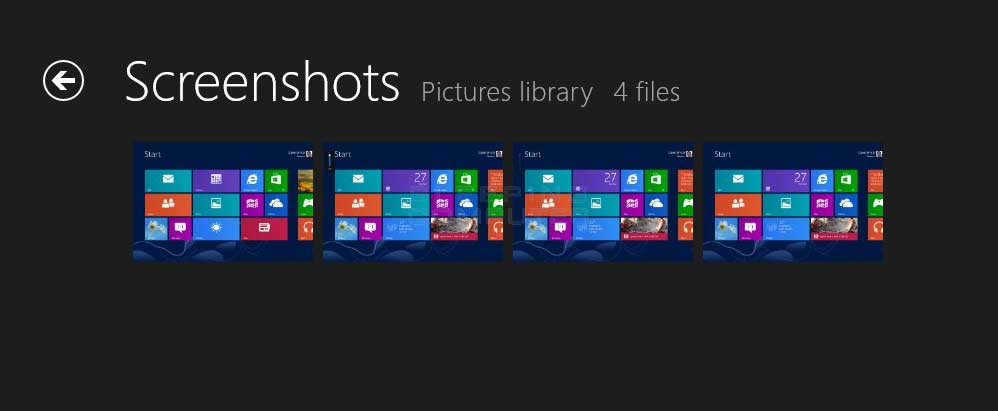
You can also access these screenshots from your Pictures library by navigating to the screenshots folder.
Now that you know how to quickly and easily create screenshots, you will be able to more effectively show off your Windows 8 computer online.
Users who read this also read:
How to take and share a screen shot in Windows
Windows gives you the ability to take a snapshot of what is shown on your computer screen and save it as a file. You can then view this image at a later date to see what your screen looked like or share this image with other people to view. You may be asking why this is important and why you would want to share screen shots of your computer.
How to create a start screen tile for a web site in Windows 8
In Windows 8 you are able to create a Start Screen tile, or pinned site, that is associated with a particular web site. You can then click on the pinned site tile and Internet Explorer will automatically open to that site. When launching a web site in this way, the Internet Explorer 10 Pin button may become a jump list button which contain common tasks for that web site that help you navigate the .
How to add Gmail to Windows 8 Mail
This tutorial will explain how to add Gmail to the Windows 8 Mail app. This tutorial will also walk you through troubleshooting issues you may encounter when using 2-step verification on your Google account.
How to download and create a bootable Windows 8 Upgrade DVD
If you had upgraded Windows 8 using the Windows8-Setup.exe executable, rather than through a DVD, it can be difficult to troubleshoot your computer in the event that it is not starting properly or you cannot access the Advanced Startup Options menu. This tutorial will walk you through creating a Windows 8 DVD on another computer that can be used to troubleshoot problems starting or using Windows .

How to add a Start Menu to Windows 8 using Classic Shell
Windows 8 no longer includes the traditional Start Menu that Windows users have become associated with using. Instead they replaced it with a new interface called the Windows Start Screen that many people find to be not as intuitive as the traditional Start Menu. This is especially the case if you are not using a touch screen. With this in mind, a free program called Classic Shell has been updated .


