- PuTTY SSH client for Mac OSX — download and tutorial
- Contents
- Using the built-in SSH client in Mac OS X
- Running SSH from the terminal command line
- Running SSH with a graphical user interface
- How to use PuTTY SSH keys with the built-in OpenSSH
- Ported PuTTY for Mac
- Installation using HomeBrew
- Installation using MacPorts
- Alternatives to PuTTY on the Mac
- Transferring Files with SSH
- Copy Files Remotely
- Remote-to-remote Copies
- Agent Forwarding
- Summary
- Как жить в Mac OS без Putty? Аналоги.
- Установка PuTTY на Mac OS
- Аналоги PuTTY на Мак
- Использование терминала для SSH соединения
- Move SSH Keys From One Computer to Another
- Moving SSH Keys Between Computers
- Copy SSH key to clipboard
- Looking for something else?
- Welcome to the developer cloud
PuTTY SSH client for Mac OSX — download and tutorial
PuTTY for Mac is a port of the Windows version of PuTTY . However, there are many options for SSH clients for Mac, and this page discusses several of them.
Contents
Using the built-in SSH client in Mac OS X
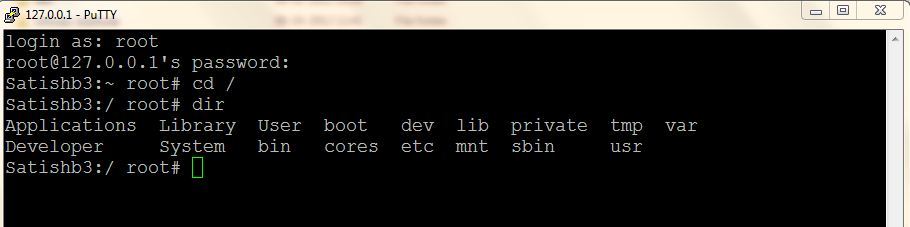
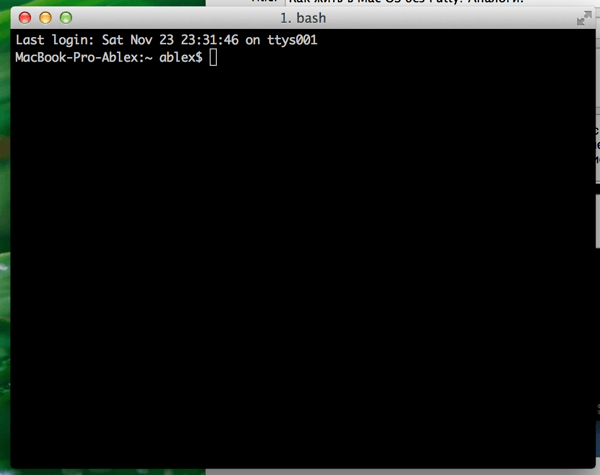
Mac OS X includes a command-line SSH client as part of the operating system. To use it, goto Finder, and selext Go -> Utilities from the top menu. Then look for Terminal. Terminal can be used to get a local terminal window, and also supports SSH connections to remote servers.
Running SSH from the terminal command line
Once you have the terminal window open, you have two alternatives. The first approach is to type ssh hostname or ssh user@hostname into the terminal window. This is more familiar for Linux and Unix users who are used to using a command line.
Running SSH with a graphical user interface
The second option is to select New Remote Connection. from the Shell menu of Terminal. This opens a graphical dialog asking for the host to connect to and the user name. This also allows saving connections. This is recommended for users who are not accustomed to using a command line.
How to use PuTTY SSH keys with the built-in OpenSSH
If you have a PuTTY .ppk format private key and want to use it with the built-in OpenSSH on Mac on the command line or in scripts, you can use the following commands.
First, install PuTTY for Mac using brew install putty or port install putty (see below). This will also install the command-line version of puttygen , the PuTTY key generator tool.
Then, use the following command to convert the .ppk format private key to a standard PEM format private key:
Make sure permissions on the private key file are set properly. It should only be readable by the user that owns it.
You can now use the key for logins from scripts and command line with:
Ported PuTTY for Mac
There is a port of PuTTY for Mac. It can be installed in several ways.
Installation using HomeBrew
If you already have the brew command installed, the best way to install PuTTY is to use the following command:
Installation using MacPorts
PuTTY is readily available via MacPorts. To see how to install MacPorts and PuTTY, see here .
Once you have MacPorts installed, you just need to give this command:
and to add a shortcut on the Desktop,
Alternatives to PuTTY on the Mac
A lot of people use Cyberduck on Mac. It is a solid, well-known SSH client that is quite popular.
Together with our customers, our mission is to secure their digital business on on-premises, cloud, and hybrid ecosystems cost-efficiently, at scale, and without disruptions to their operations or business continuity.
Источник
Transferring Files with SSH
So far in this series of posts on ssh on macOS:
In the previous posts we looked how to connect with ssh to a remote computer (host) and how to setup the keys necessary for a secure connection.
Despite the name ssh does not actually provide a shell or command line interface to the host itself. it ‘merely’ provides a secure connection to connect to the default shell on the host itself.
Even this basic use of ssh is already very useful and powerful. It allows to open one or more full command line sessions to remote computers as if we sat at their keyboard. You can also send individual commands and receive and process the results.
However, ssh has a few more powerful tools available.
Copy Files Remotely
You can also use the ssh connection to copy files to and from a remote host.
The command you use for this is scp (secure copy) and it use the same basic syntax as the cp command
But, since scp can copy from the local computer to a remote host or vice versa, you usually add a bit more information:
(The examples will use a file name hello.txt . To create one quickly, simply type echo «Hello SSH» > hello.txt in Terminal.)
To simplify this, a few examples:
This will copy the local file sample.txt from the current working directory to the remote host’s
/Documents/ directory. scp will show an ascii progress bar for every file copied. (though with these small files, you will not see much of it) You can suppress the progress display with the -q (quite) option.
For the destination, the colon : separates the hostname (DNS) from the file path.
This command will prompt for the user’s password on the remote host, unless you have added your public key to the remote host’s authorized_keys file.
Since no user name is given before the hostname (separated with an @ ) scp uses the username that you are logged in with on the local computer. If the remote user has a different name, use:
We do not want the local shell to evaluate the
to the local home directory, but want the remote computer to evaluate
to the remote user’s home directory, so we have to quote the remote path.
Like cp , when the source is a file and the destination is a directory, then the file will be placed into the destination directory.
If the remote path does not exist, then scp will present an error:
You can also rename the file while copying:
You can copy files from the remote host to your local machine:
In this case we passed . or the current working directory as the destination. You can also pass a local path:
Use the -r option to copy all the contents of a directory:
Remote-to-remote Copies
You can copy from one remote host to another.
There are two solutions for this. The first will copy the file to the local computer and then back up to the other remote host. You invoke this version of remote-to-remote with the -3 option.
(I am shortening the full domain names from primus.example.com and secundus.example.com to primus and secundus for simplicity.)
Under most circumstances copying a file down to your Mac and then back up to the other remote host is less than ideal. Imagine you are working from home with your laptop and want to copy a large file from one server at work to another.
The other option is to tell the source remote host to scp the to the other remote host. You could achieve this by ssh ing to the remote machine and running scp from there. Thankfully, scp is smart enough to attempt exactly that when you type
This command will probably fail right now. It requires a few things to be set up to work:
- either: client key authentication to be setup from primus to secundus
- or: client key authentication from your local computer to primus and secundus with agent forwarding enabled
The first option is fairly easy to understand. scp will connect to primus and authenticate with your local client key. Then it will tell primus to connect to secundus , authenticating using primus ’ client key and the copy the file. It basically works as if you ssh ed in to primus and ran scp without the extra typing.
There are drawbacks to this. If ssh-agent is not running on primus and does not have the passphrase stored yet, then primus cannot unlock its private key and authenticate to secundus .
Also you basically need to prepare all remote hosts to have keys exchanged between each other, which can be painful, if not impossible to manage.
Agent Forwarding
The second option, called ‘Agent Forwarding’, circumvents these problems. This will tell the first remote host ( primus ) to ask your local ssh-agent for a key to authenticate to secundus . The system does not actually transfer the private key, but asks ssh-agent on your local computer to encode the authentication challenge for primus .
That way you only need to manage the keys for all remote hosts on your local computer.
You can also use agent forwarding with normal ssh connections. It is not enabled by default, but you can enable it for an ssh session with the -o ForwardAgent=yes option:
Since this is hard to type, there is a shortcut:
When you are logged in to the remote host with agent forwarding enabled, you can then ssh from there to another remote host ( secundus ) and it will try to use the keys from your local computer’s ssh-agent to authenticate.
This can be a useful strategy if direct access to the second remote host ( other.mac.com ) is blocked with firewalls.
You can also use this for the scp remote-to-remote copy. Unfortunately, scp does not have a convenient -A option, so you have to use the long parameter form:
When you need agent forwarding regularly for a specific host, you can enable it by default for this particular host in your
/.ssh/config file. Add the following lines:
Note: There are some security concerns with agent forwarding. A user with root access on the intermediate system can gain access to the connection to your local ssh-agent, thus gaining the ability to encrypt with your private keys. Be aware of this in security sensitive environments.
If you have many files in a complex file structure , scp can be a little cumbersome. There is a special interactive mode that you can invoke with the sftp command (secure file transfer program).
Note: sftp (according to its man page) is ‘similar’ to ftp but not identical. It also should not be confused with ftps which is ftp over SSL.
Obviously, if you have key authentication setup, sftp will use that.
There are many interactive commands to navigate the local and remote file system and upload ( put ) and download ( get ) files. You can look at the details in the sftp man page. However, if you need to use sftp frequently, then you should use a graphical sftp application. There are a large number of SFTP client for macOS and iOS. Here is a list of some popular clients: (AppStore links are affiliate links.)
All of these tools connect to many other server protocols other than sftp . However, the advantage of sftp is not just the built-in security, but that you don’t need other software than sshd running on the server.
Summary
- you can use scp [[user@]host:]source [[user@]host:]destination to copy files from or to a remote host over ssh
- you can use agent forwarding to simplify key management in triangle setups
- sftp help managing/transferring multiple files over ssh , there are many UI applications
Источник
Как жить в Mac OS без Putty? Аналоги.
В Windows проблема подключения по SSH полностью решалась с помощью всем известной утилиты PuTTY. Пользователи Linux тоже не остаются в обиде, и на их платформе есть это приложение. Странно, но для Мак платформы разработчики PuTTY не сделали. Пришлось искать варианты.
Установка PuTTY на Mac OS
Во первых, для поклонников этой программы, есть вариант установки самой PuTTY на Мак, с помощью систем портирования Linux программ на Mac OS (Homebrew,Xcode, XQuartz). Подробно о такой установке написано в этой статье.
Аналоги PuTTY на Мак
Кроме этого есть аналоги программы для Мака.
Правда его цена немного «кусается». Программа предлагается по цене 80$! С сайта разработчика можно скачать Trial версию на 30 дней.
Apple Store при запросе «ssh client» показывает программу vSSH . Цена программы уже более гуманная — 169 рублей.
Использование терминала для SSH соединения
Но самым популярным в Mac OS является использование консольного терминала.
Тут рекомендуется вместо стандартного терминала платформы использовать приложение iTerm2 — пожалуй, самый популярный терминал для Мак Оси доступный бесплатно.
Для инициации SSH соединения используется команда:
ssh 192.168.1.1 -l user
В принципе, для большинства задач этого хватает.
Выбор за вами!
Поделиться «Как жить в Mac OS без Putty? Аналоги.»
Источник
Move SSH Keys From One Computer to Another

For those that rely on passwordless logins via ssh, rather than generating a new SSH key for a new client machine, you can easily move SSH keys from one computer to another. This is a quick and easy solution for a temporary machine or username or for use on an auxiliary workstation. You could also use this to copy SSH keys between user accounts on the same machine.
Moving SSH Keys Between Computers
If you’re already connected to a networked Mac, using the Finder is an easy way to copy the SSH keys. First you’ll want to show hidden files in OS X either through defaults write or a tool like DesktopUtility, then just open up the .ssh directory on both machines and do a drag and drop:
On the other hand, if you’re already in Terminal to enable hidden files, you may as well just use the command line to move them over.
Copying SSH Keys from the Command Line
Using the terminal is faster for many of us, you’ll obviously have to be connected to the other computer through a network for this to work.
cp .ssh/id_rsa* /Network/path/to/username/.ssh/
Simple enough, and will work for any version of OS X and most variations of unix or linux.
If you wanted to, you could also zip the key files and then transfer them through AirDrop, but that’s probably more work than necessary.
Because SSH keys allow for passwordless logins, you’ll want to securely delete or better yet securely format the hard drive before it goes to a new owner. This is especially true with temporary computers or loaner machines.
Источник
Copy SSH key to clipboard
By this command, in your terminal, you can copy your ssh key to your clipboard:
pbcopy
These answers are provided by our Community. If you find them useful, show some love by clicking the heart. If you run into issues leave a comment, or add your own answer to help others.
and copy terminal output
If you’re running Windows, using Git Bash you can do this:
thanks that worked
I figured it out. Instead of nano, I should have used the vi text editor. Doh! Such a simple solution. Thanks again for all of your help!
For anyone else that ran into this issue, follow these instructions:
/.ssh
2. sudo vi id_rsa.pub
3. Click and hold down the left mouse button to highlight the entire SSH key but do not highlight any spaces after your email address at the end of the SSH key.
4. Paste into Github 🙂
Really helpful. Many thanks. 🙂
Thanks, I am finally on github after 3 days of trying!
Easiest way I’m aware of is:
This is by far and away the easiest way to do this
You can also use xclip (assumes you’re running a Debian based distro):
install GIT GUI using : sudo apt-get install git-gui
open it using git citool to open git gui
click help > show ssh key > copy to clipboard
it worked for me after I tried all other options, credits to Bitbucket Support
I think the easiest way to copy the SSH keys is to open the public SSH key file (as you did) and manually copy and paste the key. This can be done in PuTTy by selecting your text with the left mouse button. Once it is selected, it should already be copied to your clipboard.
You cannot copy the text from the console viewer.
Please let me know if you continue having issues.
I really appreciate the assistance! Thanks for the reply. I am able to copy the SSH key to clipboard using PuTTY but GitHub doesn’t like the key. I have a feeling that I’m not copying the entire SSH key. Double clicking the left mouse button will highlight/copy the line but only what you see on your line, not the entire line. This is the problem because even if I stretch my Putty window as wide as it allows, it seems that I’m still not copying the entire SSH key.
Is there a way to copy the entire line in the file, even if my console doesn’t display it all?
Looking for something else?

Sign up for Infrastructure as a Newsletter.

Working on improving health and education, reducing inequality, and spurring economic growth? We’d like to help.

You get paid; we donate to tech nonprofits.
Welcome to the developer cloud
DigitalOcean makes it simple to launch in the cloud and scale up as you grow – whether you’re running one virtual machine or ten thousand.
© 2021 DigitalOcean, LLC. All rights reserved.
Источник


