- How to Create a New Folder in Windows 10
- Method 1: Create a New Folder with a Keyboard Shortcut
- Method 2: Create a New Folder by Right-Clicking
- Method 3: Create a New Folder from the Ribbon Menu
- Create an ISO File from a Folder in Windows
- Use AnyBurn To Create ISO From The Folders On Your PC
- Create An ISO In Windows 10 Using WinCDEmu
- Use ImgBurn To Create ISO Files From Folders On Windows
- Use a Portable Tool To Create An ISO From Folders
- Create, write, and read a file
- Prerequisites
- Creating a file
- Writing to a file
- Reading from a file
How to Create a New Folder in Windows 10

Do your files and documents need better organization? Group related files into distinct folders on your laptop or desktop and you’ll always easily find what you need. You can also change the icon size to make it more visually pleasing. Here are a few ways to quickly create a new folder in Windows 10, and after you master this, learn how to password protect a folder in Windows 10.
Method 1: Create a New Folder with a Keyboard Shortcut
The fastest way to create a new folder in Windows is with the CTRL+Shift+N shortcut.
1. Navigate to the location where you want to create the folder. You can create a new folder at any location on your hard drive or within another folder (creating a subfolder) in File Explorer. You can also create a new folder on your desktop with this method.
2. Hold down the Ctrl, Shift, and N keys at the same time. Windows will immediately create the new folder with the not-very-imaginative suggested folder name of «New folder.»
3. Enter your desired folder name. It takes just seconds to create a new folder this way, but be sure to immediately begin typing your folder name when the folder first appears, because if you click on the folder or click away from File Explorer, the folder name will be «New folder» and you’ll have to rename it.
Method 2: Create a New Folder by Right-Clicking
If you don’t remember the keyboard shortcut or you prefer using the mouse:
1. Navigate to the location where you want to create the folder.
2. Right-click on a blank space in the folder location. Take care with this: If you right-click on an existing item in the folder, you’ll get the wrong menu.
3. Select New then Folder from the contextual menu. Windows will create the new folder at your current location.
4. Enter your desired folder name to replace «New folder» and hit Enter.
You can create folders on the Desktop using this method too. Right-click on a blank space on the Desktop, then go to New > Folder.
Method 3: Create a New Folder from the Ribbon Menu
Another simple way to create a new folder is to use the New folder button in the File Explorer menu.
Just navigate to the place you want the folder and click or tap «New folder» in the Home tab
In addition to the methods above, you can create a new folder in Windows 10 by using the Command Prompt (navigate to the location you want your folder in and type mkdir foldername, replacing «foldername» with your folder name). These three methods, however, are the simplest and quickest ways to create a new folder, so you can get right to organizing your files.
Create an ISO File from a Folder in Windows
A great tool for distribution or backups
If you don’t already know, an ISO file is a container that can hold a number of files in it. It’s usually used to create backups of your CD and DVD discs. However, you can create an ISO from the folders on your Windows PC as well. There are actually multiple apps that help you do it on your machine.
There are many reasons why you may want to create an ISO on your Windows 10 PC. Maybe you want to keep all of your folders in a single place. Or maybe you want to keep some of your folders handy ready to burn to your discs.
Regardless of the reasoning, it’s pretty easy to create an ISO from folders on a Windows computer. Also, check out the video from our sister site where we walk you through the steps in a short video.
Use AnyBurn To Create ISO From The Folders On Your PC
One of the free apps you can use to create an ISO from your folders is AnyBurn. It’s actually an app that helps you burn your data to your discs but you can use it to create ISO files as well. It has an option on the main interface that helps add your chosen folders to an ISO which you can then save anywhere on your computer.
- Download, install, and launch AnyBurn on your computer.
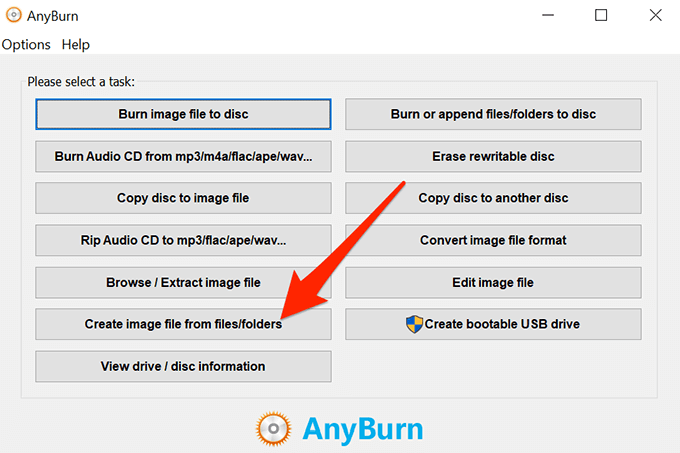
- You’ll find several options regarding creating ISOs on the main interface. Find the one that says Create image file from files/folders and click on it.
- The following screen will let you choose the folders that you want to add to your ISO. Click on the Add button at the top to add your folders.

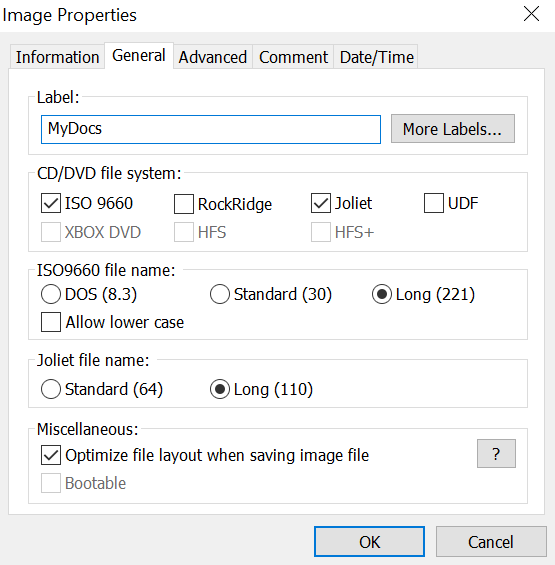
- If you want to specify any custom settings for your file, click on the Properties button at the top. It’ll then let you modify options like the file system for your ISO, file naming standard, compression level, and so on. Click on OK when you’ve configured them.
- Click on the Next button to go to the next screen of the ISO creation process.
- On the following screen, click on the folder icon to choose the folder where you want to save your ISO. You can also enter a name for your file on the same screen.
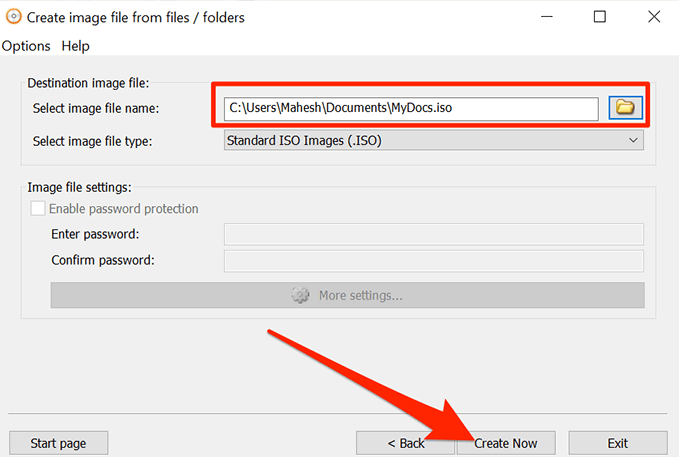
- Finally, click on Create Now to start creating an ISO out of your chosen folders.
Create An ISO In Windows 10 Using WinCDEmu
WinCDEmu is an open-source tool that lets you create virtual drives out of various image file formats on your computer. If you have downloaded an ISO file and you want to view its contents, this app can help you mount that as a drive on your machine.
You can use the app to create ISO files from folders in Windows as well, and it actually provides you with the easiest way to make an ISO from your folders. All you basically need to do is install the app and it’ll add an option to your context menu. You can then use that option to generate an ISO from your folders.
- Download and install the WinCDEmu app on your PC.
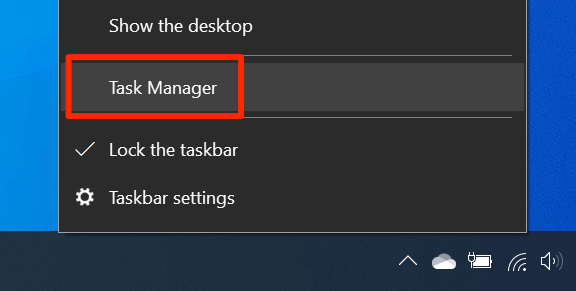
- Right-click on your taskbar and select Task Manager.
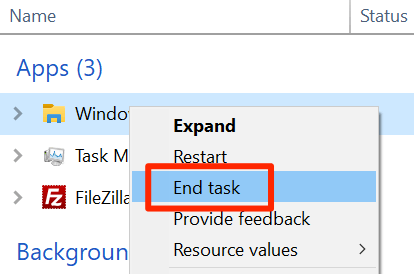
- Right-click on the process that says Windows Explorer and select End task. You need to close the Explorer before you can see the newly added item in the context menu.
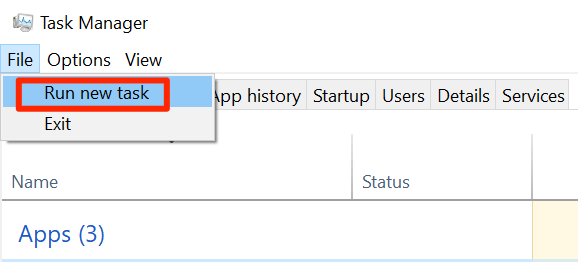
- Click on the File menu in Task Manager and select Run new task.
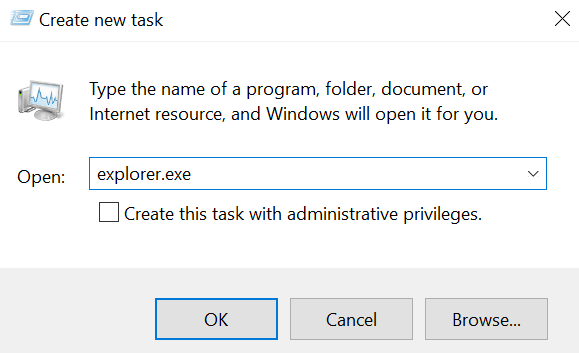
- Type in explorer.exe and hit Enter. It’ll relaunch the Windows File Explorer.
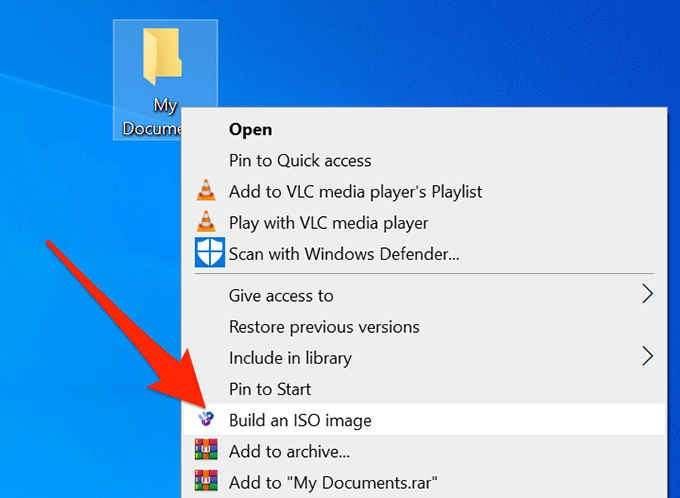
- Find the folder that you want to create an ISO for, right-click on it, and select Build an ISO image.
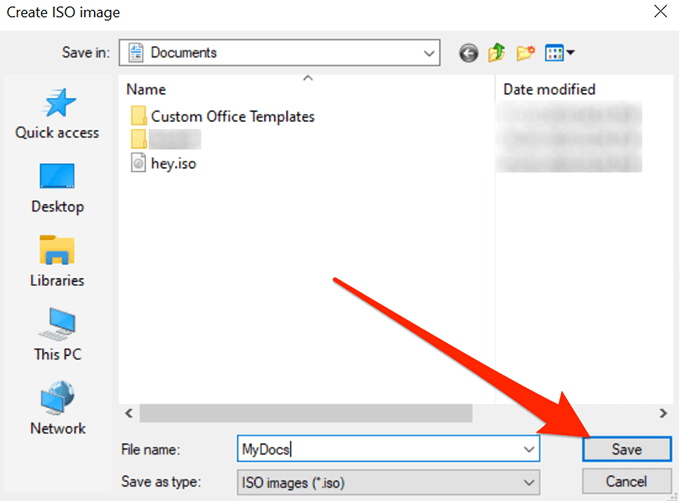
- It’ll ask you to enter a name for your ISO and the location where you want to save it. Enter these details and click on Save.
- It’ll quickly create the ISO for you and let you know when it’s fully built.
Use ImgBurn To Create ISO Files From Folders On Windows
ImgBurn has been a popular app to create and burn image files for a long time. If you’ve ever created a backup of your discs or you’ve burned a disc, you’ll likely recognize the app.
The app can be used to create ISO files from your folders as well.
- Download, install, and open the ImgBurn app on your computer.
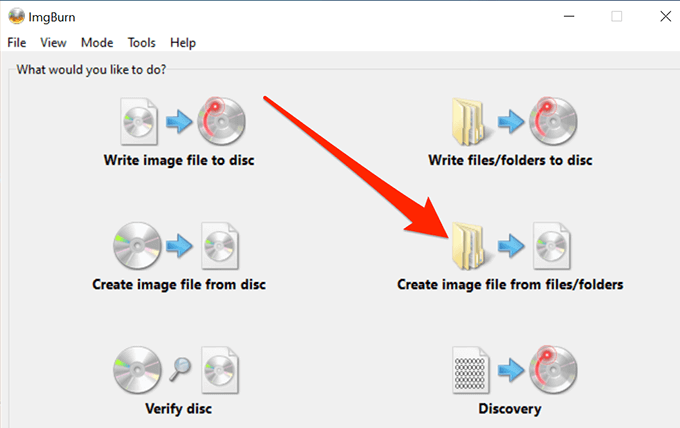
- On the main interface, find and click on the option that says Create image file from files/folders.
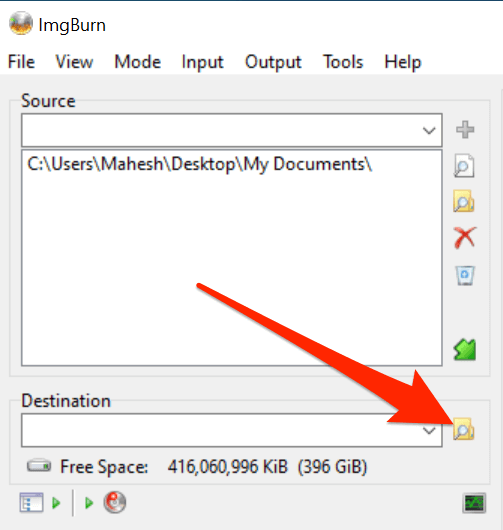
- You’ll see a screen that lets you add the folders you want to include in your ISO. Click on the little folder icon and add the folders for your ISO file.
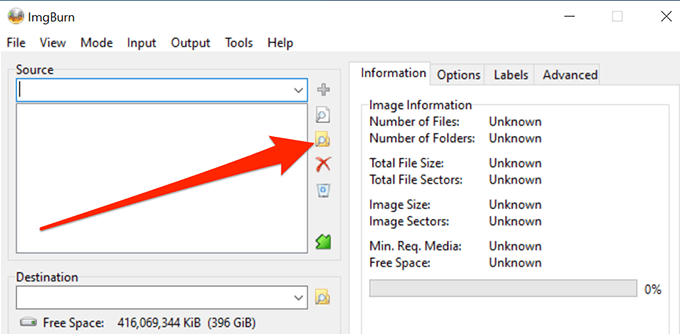
- Click on the tiny folder icon next to where it says Destination and select a name and target folder for your ISO file.
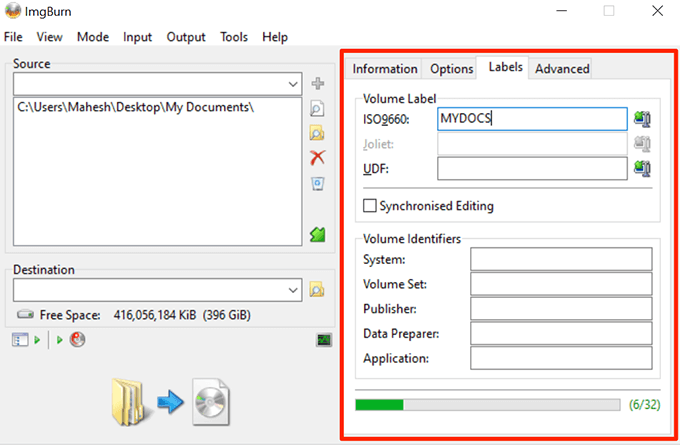
- On the right-hand side pane, you’ll find various options to configure for your ISO. With these options, you can change your image type, enter a label for your image, specify restrictions, and do a few other things.
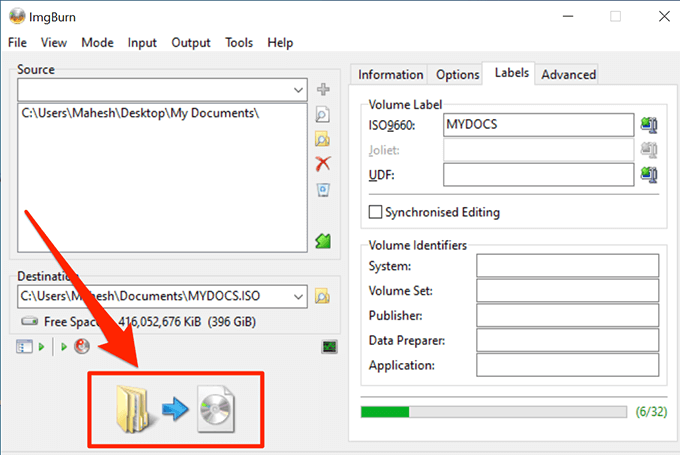
- Finally, click on the large Build button on your screen to start building an ISO file out of your selected folders.
Use a Portable Tool To Create An ISO From Folders
If it’s just a single ISO that you’ll be making and you don’t think you’ll be doing it again anytime soon, you might prefer something that doesn’t require an installation. Folder2Iso can actually help you out as it’s a free and portable tool that helps quickly create ISOs without any hassle.
It works on many versions of Windows including Windows 7, 8, 10, and Linux.
- Download the Folder2Iso app and double-click on it to extract the actual app contents.
- Run the executable file that you extracted from the archive.
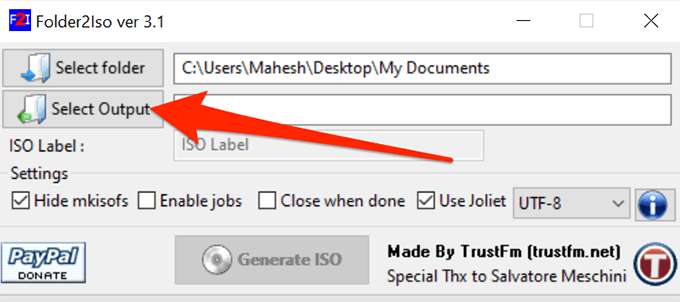
- You’ll see a simple interface with only a few options on it. Click on the Select Folder option and select the folder you want to add to your ISO.
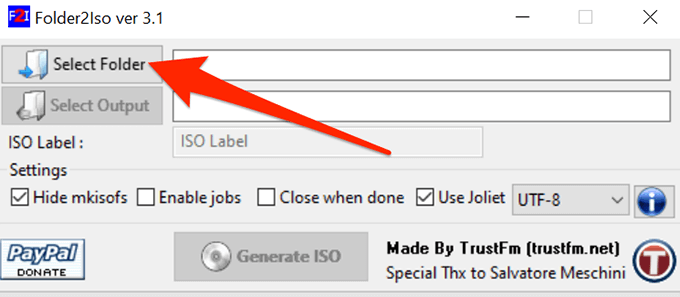
- Click on the Select Output button and choose the folder where you’d like to save your ISO file. Remember you can’t choose the folder that you’ve chosen to include in your ISO.
- You can then specify the extra options available on your screen, if you want.
- Click on the Generate ISO button to make an ISO out of your chosen folders.

- The progress bar will go all green when the ISO has been generated.
It’s a good idea to create an ISO from your folders in Windows so you can mount them all as a single drive on your PC. If you have done it on your computer already, let us know what app you chose to do it and why. We await your response in the comments below!
Mahesh has been obsessed with technology since he got his first gadget a decade or so ago. Over the last few years, he’s written a number of tech articles on various online publications including but not limited to MakeTechEasier and Android AppStorm. Read Mahesh’s Full Bio
Create, write, and read a file
Important APIs
Read and write a file using a StorageFile object.
В For a complete sample, see the File access sample.
Prerequisites
Understand async programming for Universal Windows Platform (UWP) apps
You can learn how to write asynchronous apps in C# or Visual Basic, see Call asynchronous APIs in C# or Visual Basic. To learn how to write asynchronous apps in C++/WinRT, see Concurrency and asynchronous operations with C++/WinRT. To learn how to write asynchronous apps in C++/CX, see Asynchronous programming in C++/CX.
Know how to get the file that you want to read from, write to, or both
You can learn how to get a file by using a file picker in Open files and folders with a picker.
Creating a file
Here’s how to create a file in the app’s local folder. If it already exists, we replace it.
Writing to a file
Here’s how to write to a writable file on disk using the StorageFile class. The common first step for each of the ways of writing to a file (unless you’re writing to the file immediately after creating it) is to get the file with StorageFolder.GetFileAsync.
Writing text to a file
Write text to your file by calling the FileIO.WriteTextAsync method.
Writing bytes to a file by using a buffer (2 steps)
First, call CryptographicBuffer.ConvertStringToBinary to get a buffer of the bytes (based on a string) that you want to write to your file.
Then write the bytes from your buffer to your file by calling the FileIO.WriteBufferAsync method.
Writing text to a file by using a stream (4 steps)
First, open the file by calling the StorageFile.OpenAsync method. It returns a stream of the file’s content when the open operation completes.
Next, get an output stream by calling the IRandomAccessStream.GetOutputStreamAt method from the stream . If you’re using C#, then enclose this in a using statement to manage the output stream’s lifetime. If you’re using C++/WinRT, then you can control its lifetime by enclosing it in a block, or setting it to nullptr when you’re done with it.
Now add this code (if you’re using C#, within the existing using statement) to write to the output stream by creating a new DataWriter object and calling the DataWriter.WriteString method.
Lastly, add this code (if you’re using C#, within the inner using statement) to save the text to your file with DataWriter.StoreAsync and close the stream with IOutputStream.FlushAsync.
Best practices for writing to a file
For additional details and best practice guidance, see Best practices for writing to files.
Reading from a file
Here’s how to read from a file on disk using the StorageFile class. The common first step for each of the ways of reading from a file is to get the file with StorageFolder.GetFileAsync.
Reading text from a file
Read text from your file by calling the FileIO.ReadTextAsync method.
Reading text from a file by using a buffer (2 steps)
Then use a DataReader object to read first the length of the buffer and then its contents.
Reading text from a file by using a stream (4 steps)


