- Image 2 icon
- Create and personalize icons from your pictures
- Easy Icon Creation
- Customize your icons
- Change icons for files or folders on Mac
- Use your own picture or a picture from the web
- Use an icon from another file or folder
- Restore the original icon for an item
- Создание иконок для приложений Mac OS X
- Image2icon — Make your icons 4+
- Folders, Documents and more
- Shiny Frog Ltd.
- Screenshots
- Description
- What’s New
- Ratings and Reviews
- A suggestion
- Simple and intuitive.
- Great, but only if you buy
Image 2 icon
Your Mac. Your Icons.
FREE ON
MAC APP STORE
Requires macOS 10.10+ —>
How it works?
Create and personalize icons from your pictures
Easy Icon Creation
Tired of your standard mac icons?
Do you want to personalize your files or folders?
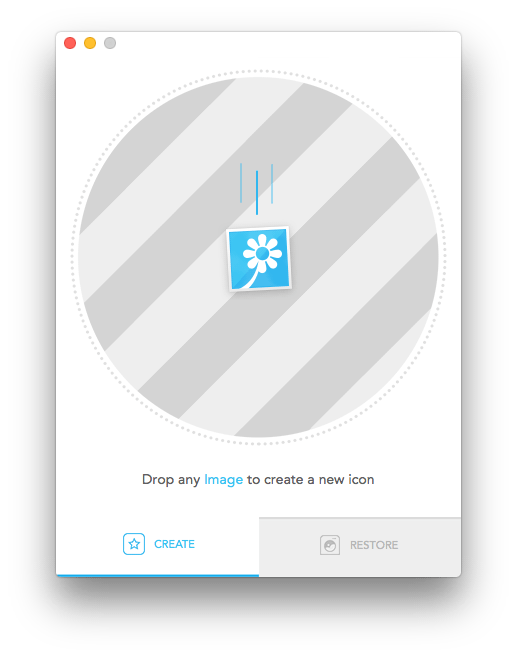
Image2icon provides the fastest way to customize your icons, easily and free.
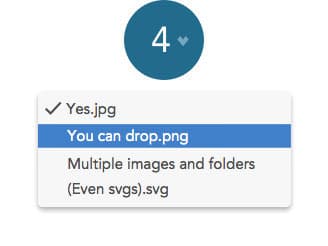
It’s easy as pie: drop an image to Image2icon, then drag your file or folder and drop it again to apply it.
Customize your icons
Unleash your creativity! The pro version provides 30 retina ready icon templates you can apply to your images
Go pro and export in icns, folder, windows ico, iconset, jpg, png, favicon ( for mobile and desktop ), iOS and Android formats.
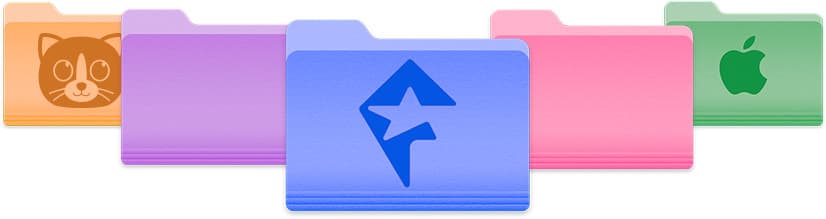
Color your icons Standard blue folders are fine but what if you add some colour?
Try changing the background colour of an icon template, you’ll be surprised.
Experiment and be creative, nothing can go wrong.
Learn how to create coloured folders
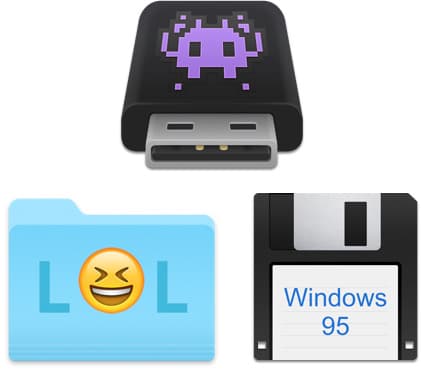
Text? Emoji? Why Not Both рџ±? Using text in your icon can be useful to tag files or folders.
Add emoji for a more playful result. Beware of the smiling poop! рџ’© Learn how to use text and emoji
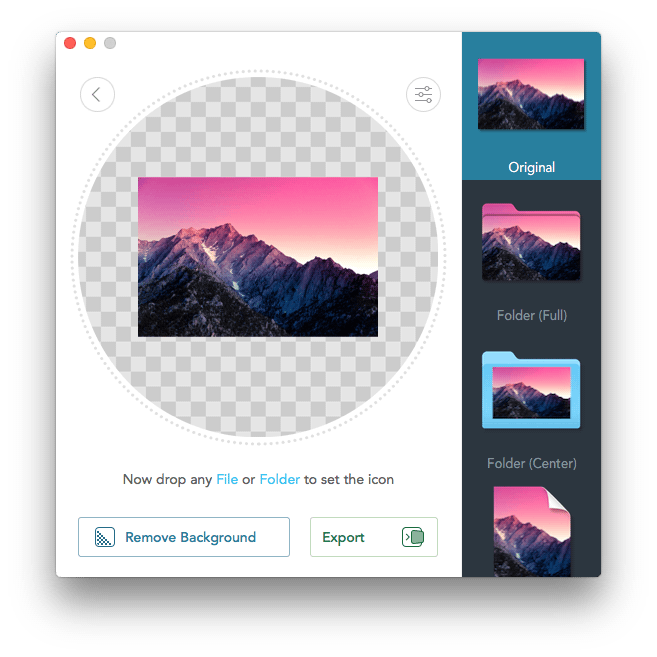
Background removal, icon restoration and much more Image2icon can make icons from any file or folder, not just images.
You can apply the icon to any file, use it in templates or convert it in png or jpeg.

Remove your image background in a few clicks for optimal results.
Watch Video

Wash your files to restore their default Mac OS X icon.
Watch Video
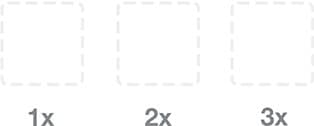
Batch export multiple icons in one single shot.
Watch Video
Tune your picture to obtain the best result.
Watch Video
Favicons and icons for the web? No problems! Image2icon pro features exporting in multiple favicon formats:
Multisize ico (16×16, 32×32), iPad and iPhone regular and retina, Android and IE10 Metro.
Watch all the favicon export options
 A handy tool for iOS/Android developers Are you a fellow iOS developer? We have some free features for you!
Image2icon can convert your images to all the icon formats needed for your iPhone, iPad or Apple Watch app.
Android developer? We can help you making launcher and Play Store icons.
Watch all iOS export options
 We speak many languages Image2icon is available in 7 different languages: English, German, French, Spanish, Italian, Japanese and Chinese.
Do you want image2icon to be localized in your language? Write us.
Do you want to Apply for translation? You guessed right, contact us.
Ok, but. What about the price ? Image2icon will convert your images into icons for free! Templates, background removal, Favicons,
windows ico (256×256 pixels with alpha channel), iconset, jpg and png export are available via In-App Purchases.
You can purchase buy everything for 9.99$.
«There’s a problem on the horizon. There is no horizon.»
K-2SO — Rogue One
Источник
Change icons for files or folders on Mac
You can choose a custom icon for any file or folder using your own pictures, icons downloaded from the web or the icon from another file or folder.
Use your own picture or a picture from the web
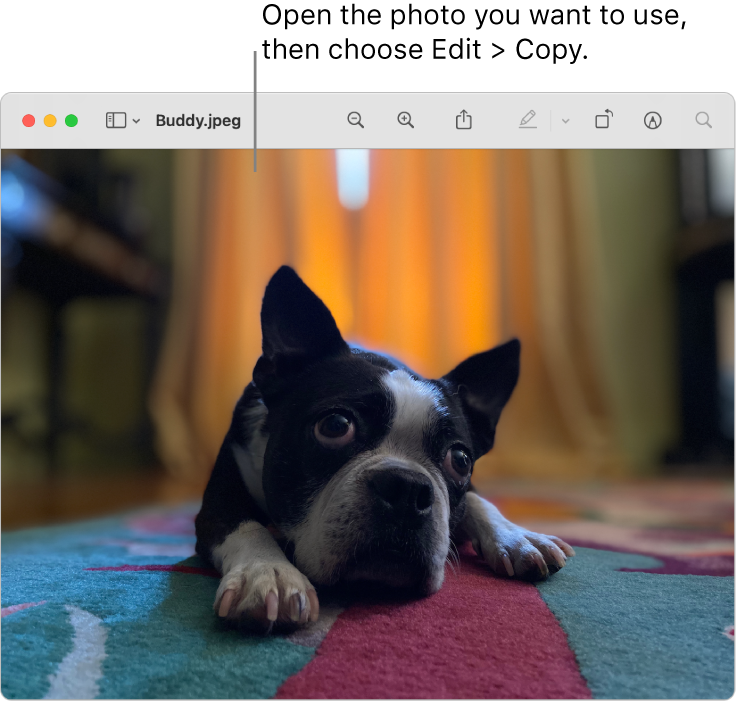
On your Mac, copy the picture you want to use to the Clipboard.
One way to do this is to double-click the picture file, which opens it in the Preview app  , then choose Edit > Copy.
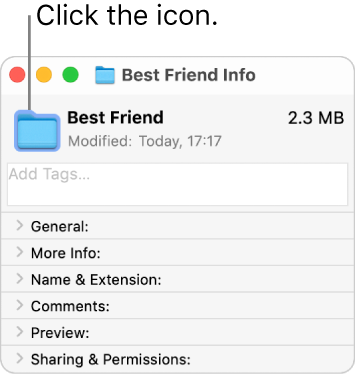
Select the file or folder whose icon you want to replace, then choose File > Get Info.
At the top of the Info window, click the icon.
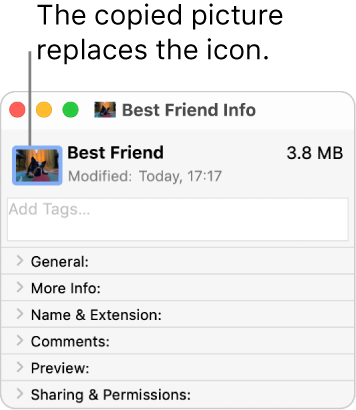
Choose Edit > Paste.
If Edit > Paste isn’t available, make sure you click the icon at the top of the Info window.
After you paste, if you see a generic JPEG or PNG image instead of your own picture, make sure you choose Edit > Copy before pasting.
Use an icon from another file or folder
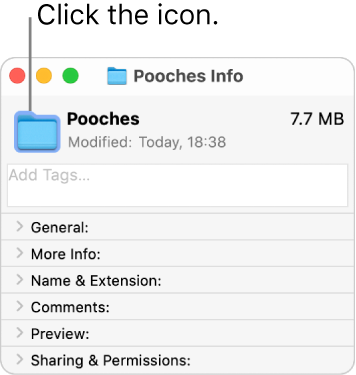
On your Mac, select the file or folder whose icon you want to use, then choose File > Get Info.
At the top of the Info window, click the icon, then choose Edit > Copy.

Select the other file or folder, then choose File > Get Info.
Click the icon at the top of the Info window.
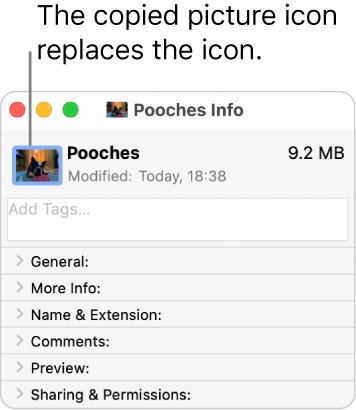
Choose Edit > Paste.
The folder icon is replaced with the picture you chose.
If Edit > Paste isn’t available, make sure you click the icon at the top of the Info window.
After you paste, if you see a generic JPEG or PNG image instead of your own picture, make sure you click the icon in the Info window before choosing Edit > Copy.
Restore the original icon for an item
On your Mac, select the file or folder, then choose File > Get Info.
At the top of the Info window, select the custom icon, then choose Edit > Cut.
Источник
Создание иконок для приложений Mac OS X

По роду деятельности я начинающий IOS кодер. Так случилось что недавно собрал совсем маленькую прогу под Mac и мне нужно было сделать иконку для своего же небольшого приложения. Узнав что установка иконки под эти две платформы сильно отличается решил опубликовать туториал для тех кому это может понадобиться.
Те кто писал под IOS знают что в минимальном случае для отображения приложения в симуляторе нужно всего две иконки — для старых и для ретиновских дисплеев (случай публикации где нужно больше размеров в этой статье мы рассматривать не будем). Существующие иконки в соответствующих размерах просто перетягиваются в соответствующие плейсхолдеры в Xcode 4. С четвертой версии их даже не нужно подписывать специальным образом — XCode делает это автоматически записывая их как icon.png и icon@2x.png. С приложениями для Mac OS X все не так просто, поэтому приступим.
Этап 1 — Подготовка размеров
И так для начала мы должны понимать что приложение в системе будет отображаться в разных местах и поэтому размеров только для отображения в системе (опять таки публикацию не рассматриваем) будет гораздо больше. Например иконка в доке, в списке программ, при отображении через Cover Flow или в строке Spotlight. И так стандартных размеров до появления ретиновских дисплеев необходимо было пять:
Здесь обратите внимание на то что если Ваша иконка имеет высокую детализацию то вам может понадобиться отдельно перерисовать иконку для размеров 32х32 и 16х16 для ее более адекватного отображения. Также с появлением ретины теперь Вам нужно представить 10 иконок для приложения.
Итак всего нам понадобится десять иконок. Пять под старые и пять с учетом ретина-дисплеев.
Обратите внимание на то что для того чтобы вы смогли завершить процесс Вам нужно верно подписать все иконки. Ретиновские иконки должны быть подписаны не их реальным размером а удвоенным от стандартного. Например ретиновская иконка размером 1024х1024 должна быть подписана как icon_512x512@2x.png. То есть название ретиновских совпадает со стандартными и содержит префикс @2x.
Хабраюзер Dreddikлюбезно предоставил информацию по радиусам иконок что может быть полезно интересующимся, за что ему большое спасибо!
1024×1024 = 160
512×512 = 80
144×144 = 23 (iPad retina)
114×114 = 18 (iPhone/iPod touch (Retina))
72×72 = 11 (iPad)
57×57 = 9 (iPhone/iPod touch)
Этап 2 — Собираем бандл.
Итак иконки всех размеров у Вас готовы, подписаны и лежат в одной папке. Вы не можете просто перетащить их в Xcode, сначала для это мы сделаем из всех этих иконок бандл. Для начала создайте (например на рабочем столе) новую папку и переименуйте ее в icon.iconset. Перед сохранением имени выскочит модальное окошко с уточнением действительно ли мы хотим сохранить эту папку с расширением .iconset, мы соглашаемся.
Далее перетаскиваем подготовленные иконки в этот новосозданный бандл. Если после перетаскивания вы кликнете на этом бандле и нажмете пробел Вы должны будете увидеть что Finder уже видит это как бандл а не папку. Двигая слайдер внизу Вы можете просмотреть все версии иконок находящиеся в папке.
Далее нам необходимо произвести конвертацию этого бандла в формат в котором Xcode сможет им воспользоваться. В этом нам поможет утилита iconutil. Открываем Terminal и идем в ту директорию где лежит наш бандл, в нашем случае на рабочем столе и вводим в Terminal следующее:
iconutil -c icns icon.iconset
После этой процедуры в этой же директории появляется файл icon.icns который нам и нужен. Обратите внимание что процедура пройдет успешно только если количество иконок было верным и они были подписаны правильно, иначе Вы получите предупреждение.
Завершающия стадия. Идем в Xcode, открываем рабочую область проекта и идем Project -> Targets -> Summary. На этой вкладке сверху видна область для иконки. Перетягиваем наш новосозданный .icns туда и все готово.
Всем добрых выходных!
Источник
Image2icon — Make your icons 4+
Folders, Documents and more
Shiny Frog Ltd.
-
- 4.8 • 1.6K Ratings
-
- Free
- Offers In-App Purchases
Screenshots
![]()
![]()
![]()
![]()
![]()
Description
* New Icon Templates for Big Sur: Folders, Document, Drive, App
* Support for Apple Silicon M1 Macs
Your Mac, your icons.
Image2icon is the easiest way to create your own mac icons and customize your folders and files.
Version 2.0 provides:
## Image to Icon Conversion ##
It’s easy as pie: drop an image to Image2icon, then drop a file or folder apply the icon.
## Icon Templates ##
Unleash your creativity! Choose between 20+ retina ready templates and apply them with just one click.
All the templates are available via In App Purchase.
## Text and Emoji ##
Have fun placing text and emoji on top of your icons
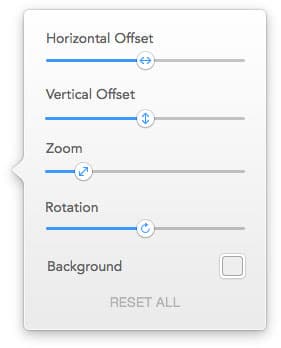
## Image Tuning ##
Zoom, move, rotate and change the background color of your icons to achieve the best final result.
## Exports ##
Save your icon in 9 different formats:
[Available in the free version]
° ICNS
° Folder
° iOS — Every format needed for your iPhone, iPad or Apple Watch App
° Iconset / appIconset
° Favicons — Multisize ico, different iOS formats, Android and IE10 Metro
[Available with In App Purchase]
° Windows ICO
° JPG
° PNG
## Background Removal ##
With Image2icon you can easily remove your picture background for best results.
## Restore Icon ##
Restore your original icon with just one drop.
## Batch Export ##
Drop a bunch of images and let Image2icon process them in a single shot.
## Icon Grabbing ##
Do you want to grab an application icon and use it in your projects?
With Image2icon is as easy as dropping a file.
For video tutorials, “how to” and general information
http://www.img2icnsapp.com
For every question
http://help.shinyfrog.net
Thanks To
Gershom Charig, Logoswish.com, Marcus Gellermark, Mauricio Estrella, Graphicburger.com, Bianca Yvonne, Dennis van Lith, Renato Ruškan, Paulo Neto.
Made By:
Shiny Frog and Nicola Armellini
What’s New
* Fixed a glitch causing some icon templates to disappear from the sidebar
* Fixed the CD icon template
Ratings and Reviews
A suggestion
I’d like to see a little more versatility in the basic folder adjustment for adding a picture on top of a folder. For example currently you can place a photo on top of a folder. Folder is in the shape of a horizontal box. Half of all images are portraits right? Let’s make a mask that you can adjust the size of so the picture doesn’t incorporate the whole folder, but a portion of it so you can still see the edges of the folder being whatever color you want (which is possible with your program thank you). I know you can make the photo be horizontal or anywhere on the folder icon, but if there is a window (a mask) you can see the folder color and see a nice horizontal box that would show the photo you chose as opposed to having a vertical photo just sitting with a large area of the folder ont he right and left side. I don’t know if I made myself clear. I wish I could upload an image so you see what I used to do with my folders manually, but got bored and found your awesome program.
Simple and intuitive.
I had this app back when it’s logo was a gecko and hadn’t used it in awhile. Just downloaded this version and am pleased that it is still a classic example of a great “speciality” app! It’s purpose is focused, it’s simple and intuitive to use, and it gives you a predictable end product that is both pleasing to the eye and of practical value.
My only mild negative would be that I think it’s “free” version is underpriced for such a great product, but it’s template and export options are a bit pricey for the additional functionality. If the “unlocks” were more around $5 for everything, I would have probably purchased them. But make no mistake, this is a well designed piece of software that can make you feel like an artist. Using it makes me happy. I can’t say that about all my computer experiences!
Great, but only if you buy
So I’ve been using another application for years and happened upon this one while looking to update my old one. I figured I’d give it a try and was really impressed by how it works. It was easy to load my image. It was REALLY neat to see all the options I had. I clicked on the one that would work the best for my folder view and bam — TO USE, PLEASE PURCHASE PRO VERSION (or something like that). That’s when I noticed that MOST of the folder options had little locks by them. Fine, we have free & not free. I’m fine with that. EXCEPT, most of them weren’t free, and MOST of the free ones were towards the bottom of the long list. There were a few sprinkled here and there. As far as I can see, there’s no way to remove the paid ones. There’s no way to organize them free to be on the top of the list. So basically every single time I need to make a preview icon, I’ll have to scroll forever just to find the one I want to use. Sorry, but this is meant to make my work flow easier, and the added annoyance of scrolling through itty-bitty previews is just not something I’m good with. I’ll stick to my free user-friendly app Img2Icns. Thanks anyways.
Источник


