- Ubuntu Documentation
- Introduction
- Determine Drive Information
- Partition The Disk
- Partitioning Using GParted
- Command Line Partitioning
- GPT vs MBR
- fdisk
- parted
- Command Line Formatting
- Modify Reserved Space (Optional)
- Create A Mount Point
- Mount The Drive
- Automatic Mount At Boot
- Manually Mount
- Need Additional Help?
- Подключение файловых систем. Команда mount в Linux
- Вывод списка смонтированных файловых систем(ФС)
- Монтирование файловой системы
- Примеры использования mount
- Монтирование USB-накопителя/жесткого диска
- Монтирование файлов ISO
- Монтирование NFS
- Размонтирование файловой системы
- Сохранение параметров mount после перезагрузки
- Заключение
Ubuntu Documentation
Introduction
While it’s not every day that you need to add a new hard drive to your computer, the task does not have to be complicated. Use this guide to help you install a new hard drive with an existing Ubuntu system, and partition it for use. Before beginning, you need to consider for what you will be using the hard drive.
- Will the drive be used only with Ubuntu?
- Will the drive need to be accessible from both Ubuntu and Windows?
- How do you want to divide the free space? As a single partition, or as several?
- Do you want any of the partitions to be larger than 2 TB?
This guide goes over procedures for a single partition drive install only. Multiple partition drive installations are not very hard, and you may very well figure it out by using this guide; however, make sure you add an entry in /etc/fstab for each partition, not just the drive.
A Note about File Systems:
Drives that are going to be used only under Ubuntu should be formatted using the ext3/ext4 file system (depending on which version of Ubuntu you use and whether you need Linux backwards compatibility). For sharing between Ubuntu and Windows, FAT32 is often the recommended file system, although NTFS works quite well too. If you are new to file systems and partitioning, please do some preliminary research on the two before you attempt this procedure.
Determine Drive Information
We assume that the hard drive is physically installed and detected by the BIOS.
To determine the path that your system has assigned to the new hard drive, open a terminal and run:
This should produce output similar to this sample:
Be sure to note the «logical name» entry, as it will be used several times throughout this guide.
Partition The Disk
If you have already formatted the drive and it contains data, skip this step and move on to «Mount Point.» If the drive is still blank and unformatted, then you have two options: formatting the drive using the command line, or installing GParted for a graphical approach. Decide whether you want the drive to contain one single partition, or if you want to divide the space up between two or more partitions.
Partitioning Using GParted
If System > Administration > GNOME Partition Editor (or ‘Partition Editor’) is not available, install «GParted» using «sudo apt-get install gparted» from the command line, «Add/Remove Software» (or «Add/Remove. «) from the Applications menu, or «Synaptic Package Manager» from the System > Administration menu. Open GParted and let’s get started.
Always use gksu or gksudo for graphical applications like gparted and sudo for command line applications, like apt-get.
In the top-right corner of the window, choose your new hard drive from the drop-down list, referring back to the «logical name» from earlier. The window should refresh and show you a representation of the new drive. Assuming that the drive has yet to have been used, a white bar will run across the window. Use these steps to partition the drive with a single partition.
1) Right-click on the white bar and choose «New.»
2) For «New Size» the number should be the maximum allowable, to fill the entire disk.
3) Choose «Primary Partition»
4) Now decide on a filesystem. Use «ext3» if the drive will only be used with Ubuntu. For file-sharing between Ubuntu and Windows, you should use «fat32.» If you are unsure, search around the wiki and forums for advice.
5) Now click Add to compute the partition. The graphical display should update to show a new partition covering the entire disk.
6) To finish, click «Apply,» or Edit > Apply. The disk will then be partitioned and formatted. You may now close GParted.
Command Line Partitioning
There are two commands that can be used in the command line to partition a new drive: fdisk and parted. fdisk is an older program, and its main downside is that it can only create MBR partitions. parted allows you to create MBR or GPT partitions.
GPT vs MBR
MBR (Master Boot Record) has two main limitations: you cannot have a partition larger than 2 TB and you cannot have more than 4 primary partitions. GPT (GUID Partition Table) can do both of these things, but it is part of the EFI standard. This means your kernel must support EFI. The latest version of the kernel supports EFI, and almost all the latest distros do too.
fdisk
Refer back to the logical name you noted from earlier. For illustration, I’ll use /dev/sdb, and assume that you want a single partition on the disk, occupying all the free space.
If the number of cylinders in the disk is larger than 1024 (and large hard drives always have more), it could, in certain setups, cause problems with:
- software that runs at boot time (e.g., old versions of LILO)
- booting and partitioning software from other OSs (e.g., DOS FDISK, OS/2 FDISK)
Otherwise, this will not negatively affect you.
1) Initiate fdisk with the following command:
2) Fdisk will display the following menu:
3) We want to add a new partition. Type «n» and press enter.
4) We want a primary partition. Enter «p» and enter.
5) Since this will be the only partition on the drive, number 1. Enter «1» and enter.
If it asks about the first cylinder, just type «1» and enter. (We are making 1 partition to use the whole disk, so it should start at the beginning.)
6) Now that the partition is entered, choose option «w» to write the partition table to the disk. Type «w» and enter.
7) If all went well, you now have a properly partitioned hard drive that’s ready to be formatted. Since this is the first partition, Linux will recognize it as /dev/sdb1, while the disk that the partition is on is still /dev/sdb.
parted
Refer back to the logical name you noted from earlier. For illustration, I’ll use /dev/sdb, and assume that you want a single partition on the disk, occupying all the free space.
1) Start parted as follows:
2) Create a new GPT disklabel (aka partition table):
3) Set the default unit to TB:
4) Create one partition occupying all the space on the drive. For a 4TB drive:
5) Check that the results are correct:
There should be one partition occupying the entire drive.
6) Save and quit «parted»:
Command Line Formatting
To format the new partition as ext4 file system (best for use under Ubuntu):
To format the new partition as fat32 file system (best for use under Ubuntu & Windows):
As always, substitute «/dev/sdb1» with your own partition’s path.
Modify Reserved Space (Optional)
When formatting the drive as ext2/ext3, 5% of the drive’s total space is reserved for the super-user (root) so that the operating system can still write to the disk even if it is full. However, for disks that only contain data, this is not necessary.
NOTE: You may run this command on a fat32 file system, but it will do nothing; therefore, I highly recommend not running it.
You can adjust the percentage of reserved space with the «tune2fs» command, like this:
This example reserves 1% of space — change this number if you wish.
Using this command does not change any existing data on the drive. You can use it on a drive which already contains data.
Create A Mount Point
Now that the drive is partitioned and formatted, you need to choose a mount point. This will be the location from which you will access the drive in the future. I would recommend using a mount point with «/media», as it is the default used by Ubuntu. For this example, we’ll use the path «/media/mynewdrive»
Now we are ready to mount the drive to the mount point.
Mount The Drive
You can choose to have the drive mounted automatically each time you boot the computer, or manually only when you need to use it.
Automatic Mount At Boot
Note: Ubuntu now recommends to use UUID instead, see the instructions here:https://help.ubuntu.com/community/UsingUUID
You’ll need to edit /etc/fstab:
Add this line to the end (for ext3 file system):
Add this line to the end (for fat32 file system):
- The defaults part may allow you to read, but not write. To write other partition and FAT specific options must be used. If gnome nautilus is being used, use the right-click, mount method, from computer folder. Then launch the mount command from terminal, no options. The last entry should be the FAT drive and and look something like: All of the parts between the parenthesis are the mount options and should replace «defaults» in the fstab file. The «2» at the end instructs your system to run a quick file system check on the hard drive at every boot. Changing it to «0» will skip this. Run ‘man fstab’ for more info here.
You can now run «sudo mount -a» (or reboot the computer) to have the changes take effect.
If you want to allow a normal user to create files on this drive, you can either give this user ownership of the top directory of the drive filesystem: (replace USERNAME with the username)
or in a more flexible way, practical if you have several users, allow for instance the users in the plugdev group (usually those who are meant to be able to mount removable disks, desktop users) to create files and sub-directories on the disk:
The last «chmod +t» adds the sticky bit, so that people can only delete their own files and sub-directories in a directory, even if they have write permissions to it (see man chmod).
Manually Mount
Alternatively, you may want to manually mount the drive every time you need it.
For manual mounting, use the following command:
When you are finished with the drive, you can unmount it using:
That’s it
Need Additional Help?
If you run into problems or need more help, search the wiki or forums at http://ubuntuforums.org. If you cannot find what you are looking for, simply ask for help.
InstallingANewHardDrive (последним исправлял пользователь runverzagt 2019-01-25 15:30:08)
The material on this wiki is available under a free license, see Copyright / License for details
You can contribute to this wiki, see Wiki Guide for details
Источник
Подключение файловых систем. Команда mount в Linux
В ОС Linux команда mount используется для подключения (монтирования) файловых систем и переносных накопителей (например, USB-флешек) к конкретным точкам монтирования в дереве директорий. Команда umount отключает (размонтирует) смонтированную файловую систему от дерева директорий. В данном руководстве мы рассмотрим основы подключения и отключения различных файловых систем при помощи команд mount и umount.
Вывод списка смонтированных файловых систем(ФС)
При выполнении без аргументов команда mount выведет все подключенные в данный момент ФС:
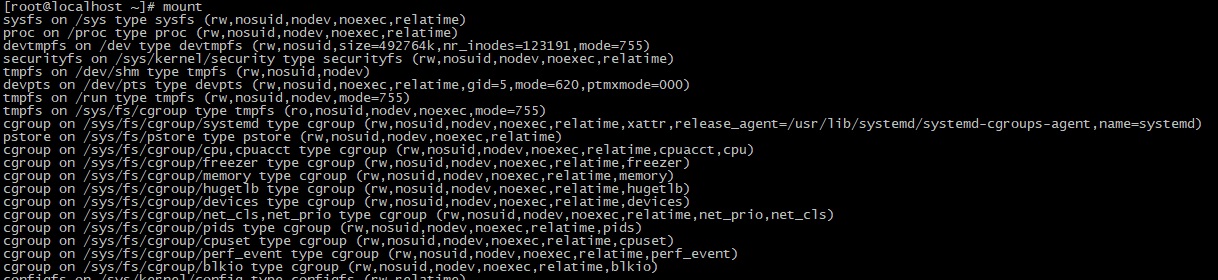
По умолчанию результат будет содержать все ФС, в том числе виртуальные, такие как cgroup, sysfs и т. д. Каждая строка содержит информацию об имени устройства, директории, в которой оно смонтировано, типе и опциях монтирования в следующей форме:
Для отображения только ФС определенного типа используется опция -t. Например, так можно отобразить только разделы ext4:

Монтирование файловой системы
Для подключения файловой системы к конкретному местоположению (точке монтирования) команда mount используется в следующей форме:
После подключения точка монтирования становится корневой директорией смонтированной ФС. Например, смонтировать жесткий диск /dev/sdb1 в директорию /mnt/media можно следующим образом:
Обычно при монтировании устройства с распространенной ФС, например, ext4 или xfs, команда mount автоматически определяет ее тип. Однако, некоторые ФС не распознаются. Их тип нужно указывать в явном виде. Для этого используется опция -t:
Чтобы указать дополнительные опции монтирования, используется флаг -o:
Можно указать несколько опций, разделенных запятыми (после запятых не должно быть пробелов). Ниже предоставлены основные опции команды
-V — вывести версию утилиты;
-h — вывести справку;
-v — подробный режим;
-a, —all — примонтировать все устройства, описанные в fstab;
-F, —fork — создавать отдельный экземпляр mount для каждого отдельного раздела;
-f, —fake — не выполнять никаких действий, а только посмотреть что собирается делать утилита;
-n, —no-mtab — не записывать данные о монтировании в /etc/mtab;
-l, —show-labels — добавить метку диска к точке монтирования;
-c — использовать только абсолютные пути;
-r, —read-only — монтировать раздел только для чтения;
-w, —rw — монтировать для чтения и записи;
-L, —label — монтировать раздел по метке;
-U, —uuid — монтировать раздел по UUID;
-T, —fstab — использовать альтернативный fstab;
-B, —bind — монтировать локальную папку;
-R, —rbind — перемонтировать локальную папку.
Полный список опций можно получить, выполнив команду man mount.
Примеры использования mount
Давайте рассмотрим несколько примеров использования утилиты. Как правило для монтирования нужно выполнить всего два действия
- Создать точку монтирования
- Примонтировать файловую систему
Монтирование USB-накопителя/жесткого диска
В большинстве современных дистрибутивов Linux, например, Ubuntu, USB-накопители автоматически монтируются при подключении, но иногда может потребоваться ручное монтирование устройства. Чтобы смонтировать USB-накопитель, выполните следующие действия.
Создайте точку монтирования
Если USB-накопитель использует устройство /dev/sdd1, его можно смонтировать в директорию /media/usb следующей командой:
Для поиска устройства и типа файловой системы можно воспользоваться любой из следующих команд:
Монтирование файлов ISO
Для монтирования файла ISO используется петлевое (loop) устройство — специальное виртуальное устройство, которое позволяет осуществлять доступ к файлу как к блочному устройству.
Сначала нужно создать точку монтирования в любой желаемой директории:
Смонтируйте файл ISO следующей командой:
Не забудьте заменить /path/to/image.iso на путь к вашему файлу ISO.
Монтирование NFS
Для монтирования системы NFS требуется установить клиент NFS. Установка клиента NFS в Ubuntu и Debian:
Установка клиента NFS в CentOS и Fedora:
Создайте директорию, которая будет точкой монтирования удаленной файловой системы:
Обычно требуется автоматическое монтирование удаленной директории NFS при загрузке. Для этого нужно изменить файл конфигурации /etc/fstab. Откройте его в любом текстовом редакторе, например:
Добавьте в файл следующую строку, заменив сервер:/директория на имя или IP-адрес сервера NFS и экспортируемую директорию:
Смонтируйте ресурс NFS следующей командой:
Размонтирование файловой системы
Для отключения смонтированной файловой системы используется команда umount, в качестве аргумента которой указывается директория, в которую она была смонтирована (точка монтирования) или имя устройства:
Если файловая система используется, umount не сможет ее отключить. В таких ситуациях можно воспользоваться командой fuser, чтобы выяснить, какие процессы осуществляют доступ к файловой системе:
Определив процессы, можно остановить их и размонтировать файловую систему. Также для отключения занятой файловой системы сразу после завершения ее использования можно воспользоваться опцией -l (—lazy, “ленивое” отключение):
Для принудительного размонтирования применяется опция -f (—force). Обычно она используется для отключения недостижимой системы NFS.
Во всех остальных случаях принудительное отключение нежелательно, так как может привести к повреждению данных в файловой системе.
Сохранение параметров mount после перезагрузки
Для того, что бы устройства при перезагрузки системы монтировались автоматически, необходимо прописать инструкции монтирования в файл /etc/fstab. Файл /etc/fstab содержит список записей в следующем формате:
Подключит устройство /dev/sdb1 (например жесткий диск) в директорию /home
После того как инструкция для mount прописаны в /etc/fstab, что бы проверить правильность написания дайте команду
Если команда отработает без ошибок, то все устройства прописанные в /etc/fstab будут подключены, а также изменения не потеряются после перезагрузки.
Заключение
Мы рассмотрели наиболее распространенные примеры подключения различных файловых систем к дереву директорий при помощи команды mount и их отключения командой umount. Для получения более подробной информации об опциях команд mount и umount можно обратиться к соответствующим man-страницам.
Если вы нашли ошибку, пожалуйста, выделите фрагмент текста и нажмите Ctrl+Enter.
Источник


