- Create and Run a Python Script Using the Command-line Only
- Getting Started
- Write Simple Code Using the Python Interpreter
- Create the Python File
- Vi Editor Commands
- Write Your Python Script
- Run Your Script
- Запуск python скрипта в Linux
- Запуск python скрипта в Linux
- Работа с файлами в Python с помощью модуля OS
- Вывод текущей директории
- Создание папки
- Изменение директории
- Создание вложенных папок
- Создание файлов
- Переименование файлов
- Перемещение файлов
- Список файлов и директорий
- Удаление файлов
- Удаление директорий
- Получение информации о файлах
- Python File Handling: How to Create Text File, Read, Write, Open, Append Files in Python
- How to Open a Text File in Python
- How to Create a Text File in Python
- Python Programming/Creating Python Programs
- Hello, World [ edit | edit source ]
- Windows [ edit | edit source ]
- Mac [ edit | edit source ]
- Linux [ edit | edit source ]
- Linux (advanced) [ edit | edit source ]
- Result [ edit | edit source ]
Create and Run a Python Script Using the Command-line Only
This post is part of the complete Guide on Python for SEO
Integrated Development Environment’s like VSCode are super useful because they take care of most of the difficulties around programming. But, what if you don’t want to use an IDE to work with Python, but use command-line instead?
I will show you how you can create and run a Python script using the command-line only.
If you don’t know what is the command-line, this post is probably too advanced for you. Just read the complete guide on Python for SEO.
Getting Started
Open the Terminal.
First, make sure that you have Python installed on your computer.
If Python is installed, you’ll have something like this:
Write Simple Code Using the Python Interpreter
If you just want to write simple code like print(‘Hello world!’) , you can use the python interpreter by typing python in the Terminal.
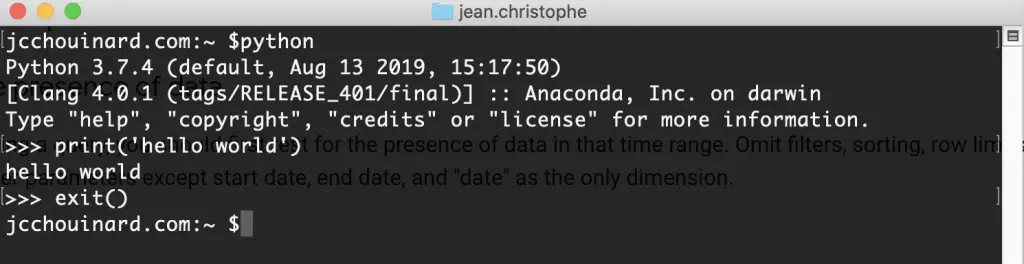
The python interpreter lets you write and execute code line by line.
As you write more complex code, you will want to pre-write your code in .py files. To do this without leaving the Terminal, you will need to use the vim editor to pre-write them.
Create the Python File
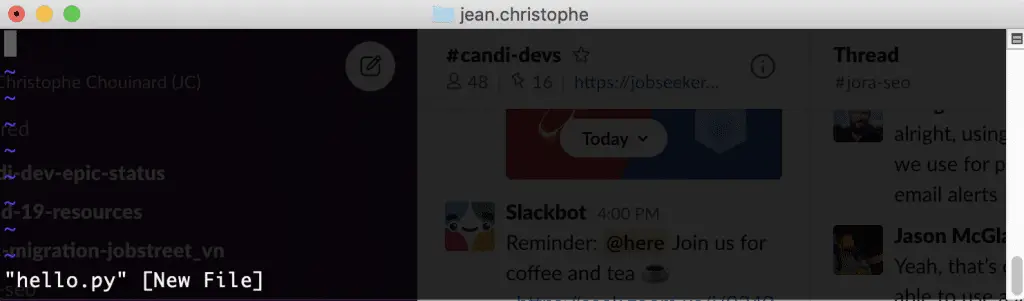
We will use vim to create a new Python file. Vim is a text editor that you can use from the command-line.
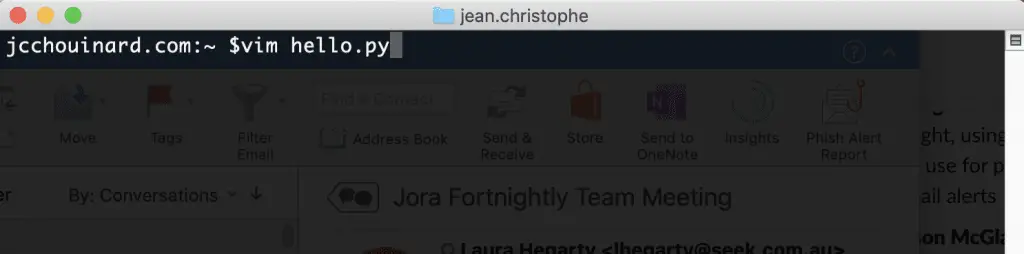
This will open the vim editor.
Vi Editor Commands
First, let’s look at the commands you can use in the vi editor.
| i | Switch to Insert mode (editing mode) |
| esc | Exit the editing mode |
| dd | Delete the current line |
| u | Undo the last change |
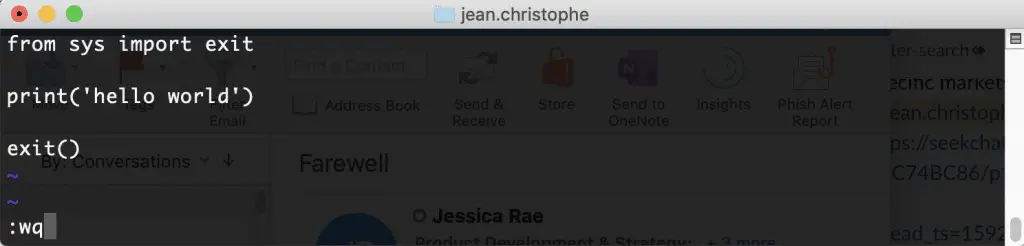
| :q! | Close the editor without saving changes. |
| :wq | Save the text and close the editor |
| → + Shift | Move Cursor Faster |
| $ | Move to end of line |
Write Your Python Script
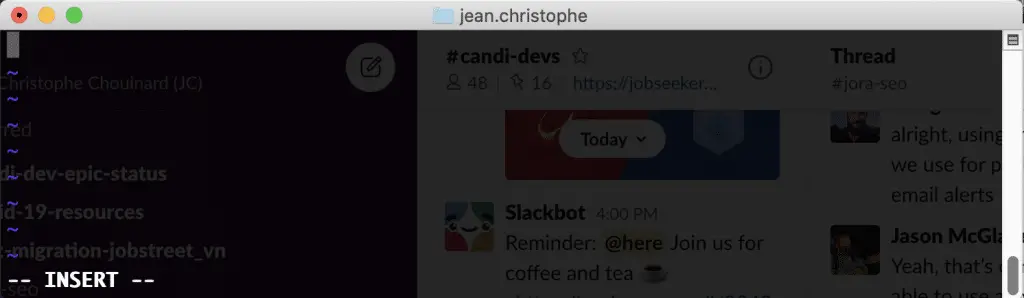
To write in the vim editor, press i to switch to insert mode.
Write the best python script in the world.
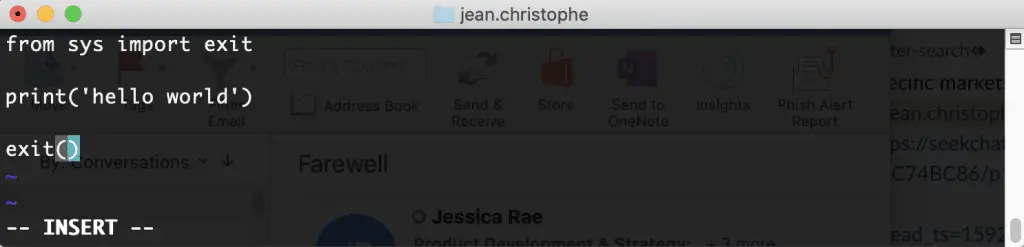
Press esc to leave the editing mode.
Write the command :wq to save and quite the vim editor ( w for write and q for quit ).
Run Your Script
Run your script by typing python hello.py in the Terminal.
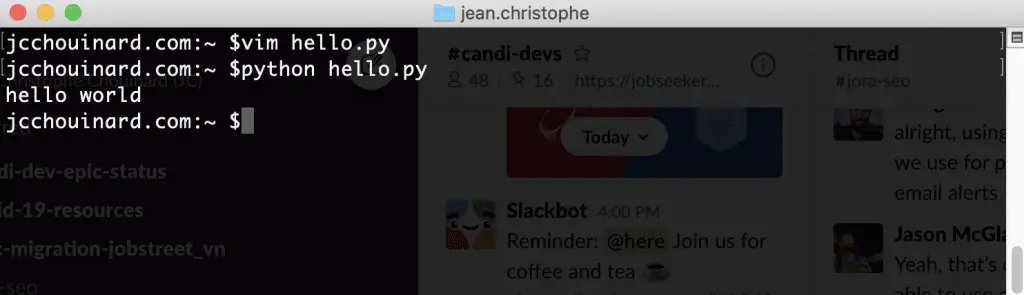
Congratulations, you now know how to create and run a Python script using the Command-line.
Источник
Запуск python скрипта в Linux
Python — очень популярный язык программирования для написания различных системных скриптов в Linux. В Windows, там где не хватает возможностей командной оболочки используется PowerShell. В Linux же, когда возможностей Bash не хватает используется язык Python.
На этом языке написано огромное количество системных программ, среди них пакетный менеджер apt, видеоредактор OpenShot, а также множество скриптов, которые вы можете установить с помощью утилиты pip. В этой небольшой статье мы рассмотрим как запустить Python скрипт в Linux с помощью терминала различными способами.
Запуск python скрипта в Linux
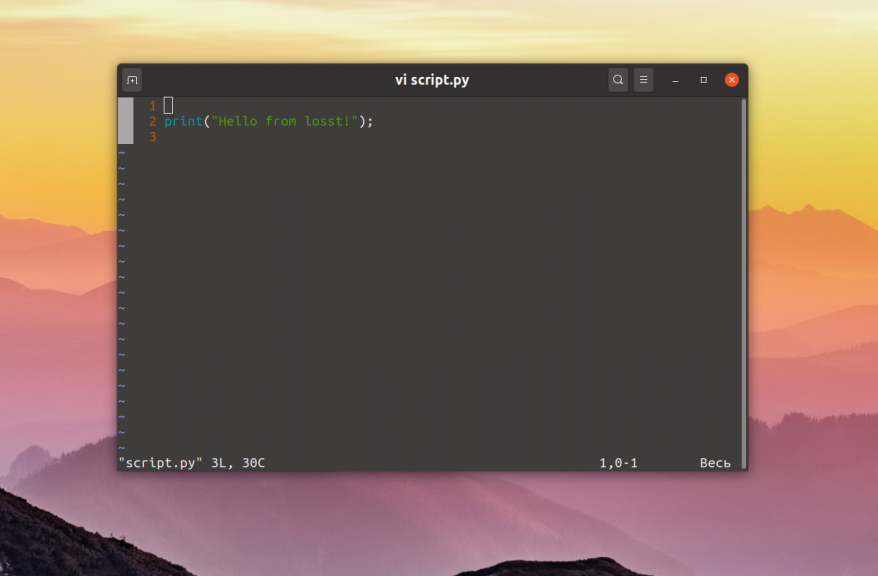
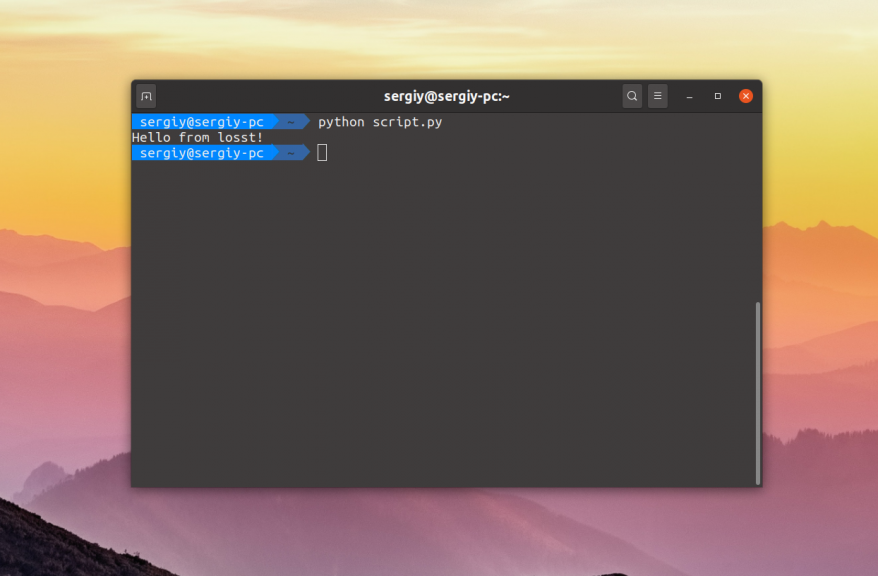
Для примера нам понадобится Python скрипт. Чтобы не брать какой-либо из существующих скриптов, давайте напишем свой:
print(«Hello from losst!»)
Для того чтобы запустить скрипт необходимо передать его интерпретатору Python. Для этого просто откройте терминал с помощью сочетания клавиш Ctrl + Alt + T, перейдите в папку со скриптом и выполните:
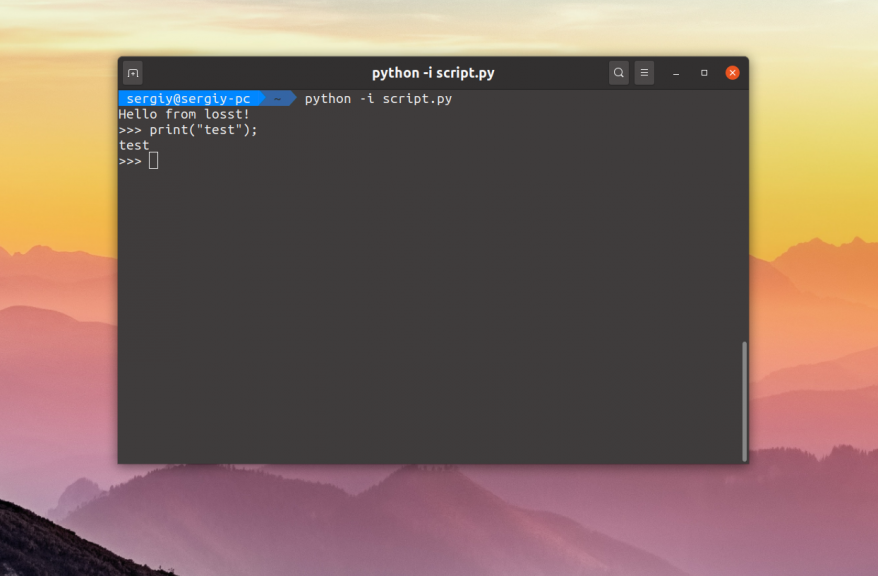
Если вы хотите, чтобы после выполнения скрипта открылась консоль, в которой можно интерактивно выполнять команды языка Python используйте опцию -i:
python -i script.py
Но как вы могли заметить, при запуске apt или openshot не надо писать слово python. Это намного удобнее. Давайте разберемся как это реализовать. Если вы не хотите указывать интерпретатор в командной строке, его надо указать в самом скрипте. Для этого следует в начало скрипта добавить такую строчку:
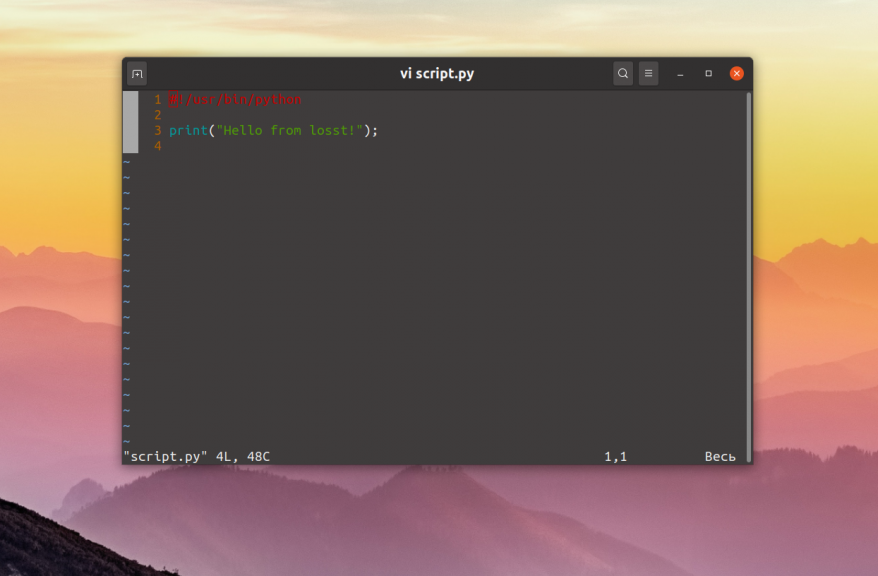
Сохраните изменения, а затем сделайте файл скрипта исполняемым с помощью такой команды:
chmod ugo+x script.py
После этого можно запустить скрипт Python просто обращаясь к его файлу:
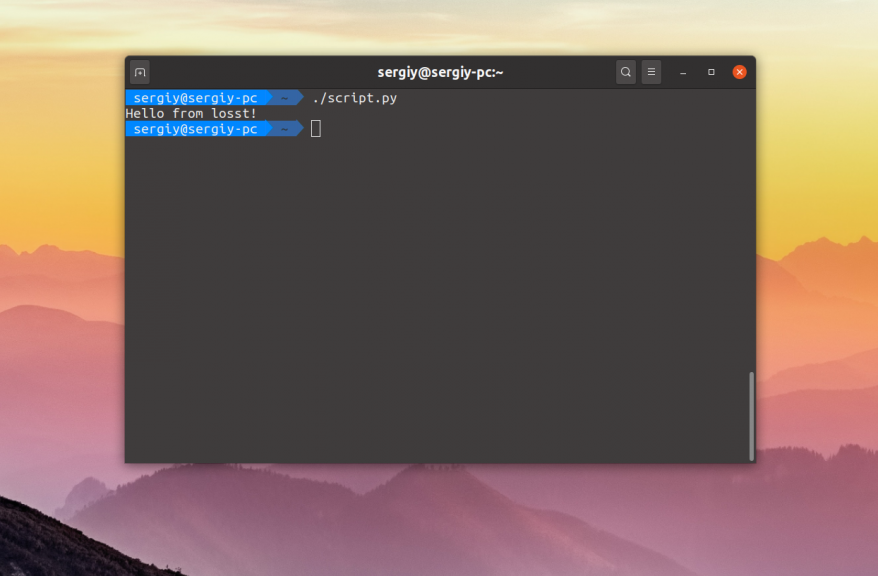
Если убрать расширение .py и переместить скрипт в каталог, находящийся в переменной PATH, например /usr/bin/, то его можно будет выполнять вот так:
Как видите, запуск команды python Linux выполняется довольно просто и для этого даже есть несколько способов. А каким способом пользуетесь вы? Напишите в комментариях!
Источник
Работа с файлами в Python с помощью модуля OS
Обработка файлов в Python с помощью модуля os включает создание, переименование, перемещение, удаление файлов и папок, а также получение списка всех файлов и каталогов и многое другое.
В индустрии программного обеспечения большинство программ тем или иным образом обрабатывают файлы: создают их, переименовывают, перемещают и так далее. Любой программист должен обладать таким навыком. С этим руководством вы научитесь использовать модуль os в Python для проведения операций над файлами и каталогами вне зависимости от используемой операционной системы.
Важно знать, что модуль os используется не только для работы с файлами. Он включает массу методов и инструментов для других операций: обработки переменных среды, управления системными процессами, а также аргументы командной строки и даже расширенные атрибуты файлов, которые есть только в Linux.
Модуль встроенный, поэтому для работы с ним не нужно ничего устанавливать.
Вывод текущей директории
Для получения текущего рабочего каталога используется os.getcwd() :
os.getcwd() возвращает строку в Юникоде, представляющую текущий рабочий каталог. Вот пример вывода:
Создание папки
Для создания папки/каталога в любой операционной системе нужна следующая команда:
После ее выполнения в текущем рабочем каталоге тут же появится новая папка с названием «folder».
Если запустить ее еще раз, будет вызвана ошибка FileExistsError , потому что такая папка уже есть. Для решения проблемы нужно запускать команду только в том случае, если каталога с таким же именем нет. Этого можно добиться следующим образом:
Функция os.path.isdir() вернет True , если переданное имя ссылается на существующий каталог.
Изменение директории
Менять директории довольно просто. Проделаем это с только что созданным:
Еще раз выведем рабочий каталог:
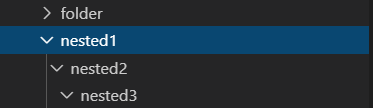
Создание вложенных папок
Предположим, вы хотите создать не только одну папку, но и несколько вложенных:
Это создаст три папки рекурсивно, как показано на следующем изображении:
Создание файлов
Для создания файлов в Python модули не нужны. Можно использовать встроенную функцию open() . Она принимает название файла, который необходимо создать в качестве первого параметра и желаемый режим открытия — как второй:
w значит write (запись), a — это appending (добавление данных к уже существующему файлу), а r — reading (чтение). Больше о режимах открытия можно почитать здесь.
Переименование файлов
С помощью модуля os достаточно просто переименовать файл. Поменяем название созданного в прошлом шаге.
Функция os.rename() принимает 2 аргумента: имя файла или папки, которые нужно переименовать и новое имя.
Перемещение файлов
Функцию os.replace() можно использовать для перемещения файлов или каталогов:
Стоит обратить внимание, что это перезапишет путь, поэтому если в папке folder уже есть файл с таким же именем ( renamed-text.txt ), он будет перезаписан.
Список файлов и директорий
Функция os.listdir() возвращает список, который содержит имена файлов в папке. Если в качестве аргумента не указывать ничего, вернется список файлов и папок текущего рабочего каталога:
А что если нужно узнать состав и этих папок тоже? Для этого нужно использовать функцию os.walk() :
os.walk() — это генератор дерева каталогов. Он будет перебирать все переданные составляющие. Здесь в качестве аргумента передано значение «.», которое обозначает верхушку дерева:
Метод os.path.join() был использован для объединения текущего пути с именем файла/папки.
Удаление файлов
Удалим созданный файл:
os.remove() удалит файл с указанным именем (не каталог).
Удаление директорий
С помощью функции os.rmdir() можно удалить указанную папку:
Для удаления каталогов рекурсивно необходимо использовать os.removedirs() :
Это удалит только пустые каталоги.
Получение информации о файлах
Для получения информации о файле в ОС используется функция os.stat() , которая выполняет системный вызов stat() по выбранному пути:
Это вернет кортеж с отдельными метриками. В их числе есть следующие:
-
- st_size — размер файла в байтах
- st_atime — время последнего доступа в секундах (временная метка)
- st_mtime — время последнего изменения
- st_ctime — в Windows это время создания файла, а в Linux — последнего изменения метаданных
Для получения конкретного атрибута нужно писать следующим образом:
Источник
Python File Handling: How to Create Text File, Read, Write, Open, Append Files in Python
Updated October 7, 2021
In this file handling in Python tutorial, we will learn:
How to Open a Text File in Python
To open a file, you need to use the built-in open function. The Python file open function returns a file object that contains methods and attributes to perform various operations for opening files in Python.
Syntax of Python open file function
- filename: gives name of the file that the file object has opened.
- mode: attribute of a file object tells you which mode a file was opened in.
More details of these modes are explained below
How to Create a Text File in Python
With Write to file Python, you can create a .text files (guru99.txt) by using the code, we have demonstrated here:
Step 1) Open the .txt file
- We declared the variable f to open a file named guru99.txt. Open takes 2 arguments, the file that we want to open and a string that represents the kinds of permission or operation we want to do on the file
- Here, we used “w” letter in our argument, which indicates Python write to file and it will create file in Python if it does not exist in library
- Plus sign indicates both read and write for Python create file operation.
Step 2) Enter data into the file
- We have a for loop that runs over a range of 10 numbers.
- Using the write function to enter data into the file.
- The output we want to iterate in the file is “this is line number”, which we declare with Python write file function and then percent d (displays integer)
- So basically we are putting in the line number that we are writing, then putting it in a carriage return and a new line character
Step 3) Close the file instance
- This will close the instance of the file guru99.txt stored
Here is the result after code execution for create text file Python example:

How to Create a Text File in Python
When you click on your text file in our case “guru99.txt” it will look something like this

Example of how to create a text file in Python
Источник
Python Programming/Creating Python Programs
Welcome to Python! This tutorial will show you how to start writing programs.
Python programs are nothing more than text files, and they may be edited with a standard text editor program. [1] What text editor you use will probably depend on your operating system: any text editor can create Python programs. However, it is easier to use a text editor that includes Python syntax highlighting.
Hello, World [ edit | edit source ]
The very first program that beginning programmers usually write or learn is the «Hello, World!» program. This program simply outputs the phrase «Hello, World!» then terminates itself. Let’s write «Hello, World!» in Python!
Open up your text editor and create a new file called hello.py containing just this line (you can copy-paste if you want):
The below line is used for Python 3.x.x
You can also put the below line to pause the program at the end until you press anything.
This program uses the print function, which simply outputs its parameters to the terminal. By default, print appends a newline character to its output, which simply moves the cursor to the next line.
Note:
In Python 2.x, print is a statement rather than a function. As such, it can be used without parentheses, in which case it prints everything until the end of the line and accepts a standalone comma after the final item on the line to indicate a multi-line statement. In Python 3.x, print is a proper function expecting its arguments inside parentheses. Using print with parentheses (as above) is compatible with Python 2.x and using this style ensures version-independence.
Now that you’ve written your first program, let’s run it in Python! This process differs slightly depending on your operating system.
Windows [ edit | edit source ]
- Create a folder on your computer to use for your Python programs, such as C:\pythonpractice , and save your hello.py program in that folder.
- In the Start menu, select «Run. «, and type in cmd . This will cause the Windows terminal to open.
- Type cd \pythonpractice to change directory to your pythonpractice folder, and hit Enter.
- Type hello.py to run your program!
If it didn’t work, make sure your PATH contains the python directory. See Getting Python.
Mac [ edit | edit source ]
- Create a folder on your computer to use for your Python programs. A good suggestion would be to name it pythonpractice and place it in your Home folder (the one that contains folders for Documents, Movies, Music, Pictures, etc). Save your hello.py program into it. Open the Applications folder, go into the Utilities folder, and open the Terminal program.
- Type cd pythonpractice to change directory to your pythonpractice folder, and hit Enter.
- Type python ./hello.py to run your program!
| Note: Linux [ edit | edit source ]
/pythonpractice , and save your hello.py program in that folder. /pythonpractice to change directory to your pythonpractice folder, and hit Enter.
/pythonpractice folder. /pythonpractice to change directory to your pythonpractice folder, and hit Enter. Note that this mainly should be done for complete, compiled programs, if you have a script that you made and use frequently, then it might be a good idea to put it somewhere in your home directory and put a link to it in /usr/bin. If you want a playground, a good idea is to invoke mkdir /.local/bin and then put scripts in there. To make /.local/bin content executable the same way /usr/bin does type $PATH = $PATH: /local/bin (you can add this line to your shell rc file, for example Note: Result [ edit | edit source ]The program should print: Congratulations! You’re well on your way to becoming a Python programmer. Источник |


