- Create ubuntu bootable usb from linux
- 2. Requirements
- 3. Launch Startup Disk Creator
- 4. ISO and USB selection
- 5. Confirm USB device
- 6. Installation complete
- Ubuntu Documentation
- Outline
- Introduction
- Prerequisites
- Dummy headlines
- Notes about speed
- Notes about size
- Notes about bootability
- The flash hardware
- Creating a bootable Ubuntu USB flash drive from Windows
- Rufus
- balenaEtcher
- Pendrivelinux’s Universal USB Installer
- UNetbootin
- Win32 Disk Imager
- Creating a bootable Ubuntu USB flash drive from Ubuntu
- Install and run Startup Disk Creator alias usb-creator
- UNetbootin
- mkusb — dd image of iso file to USB device safely
- Creating a bootable Ubuntu USB flash drive from Mac OSX
- Test if running in UEFI mode
- 5 Easy Ways To Create Bootable USB Media From ISO In Ubuntu Linux
- 1. Create Bootable USB Media in Ubuntu Using Startup Disk Creator
- 2. Create Bootable USB Media Using Unetbootin
- Install UNetbootin
- Using UNetbootin for Ubuntu Linux
- 3. Convert ISO to USB in Ubuntu Using ddrescue
- Install ddrescue
- 4. Create Bootable USB Using Etcher On Ubuntu
- 5. Create A Bootable USB Using Popsicle (Linux Only)
- Bootable USB Media from ISO in Ubuntu Linux
Create ubuntu bootable usb from linux
With a bootable Ubuntu USB stick, you can:
- Install or upgrade Ubuntu
- Test out the Ubuntu desktop experience without touching your PC configuration
- Boot into Ubuntu on a borrowed machine or from an internet cafe
- Use tools installed by default on the USB stick to repair or fix a broken configuration
Creating a bootable Ubuntu USB stick is very simple, especially from Ubuntu itself, and we’re going to cover the process in the next few steps.
Alternatively, we also have tutorials to help you create a bootable USB stick from both Microsoft Windows and Apple macOS.
2. Requirements
- A 4GB or larger USB stick/flash drive
- Ubuntu Desktop 14.04 or later installed
- An Ubuntu ISO file. See Get Ubuntu for download links
3. Launch Startup Disk Creator
We’re going to use an application called ‘Startup Disk Creator’ to write the ISO image to your USB stick. This is installed by default on Ubuntu, and can be launched as follows:
- Insert your USB stick (select ‘Do nothing’ if prompted by Ubuntu)
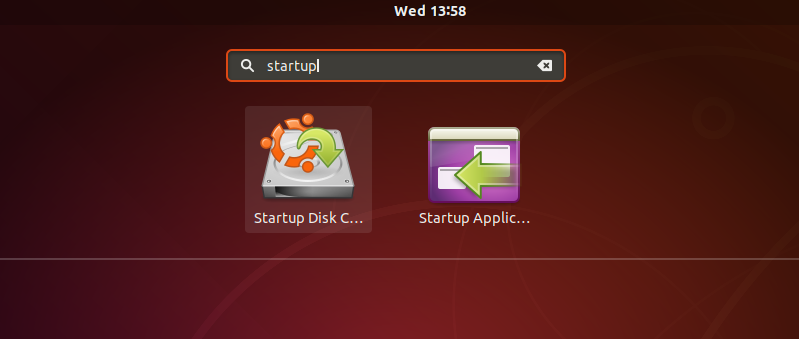
- On Ubuntu 18.04 and later, use the bottom left icon to open ‘Show Applications’
- In older versions of Ubuntu, use the top left icon to open the dash
- Use the search field to look for Startup Disk Creator
- Select Startup Disk Creator from the results to launch the application
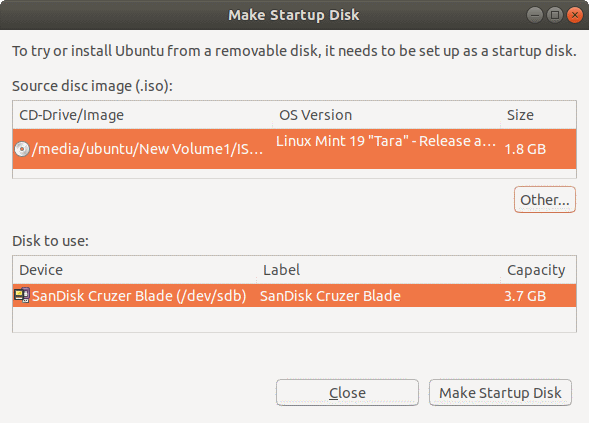
4. ISO and USB selection
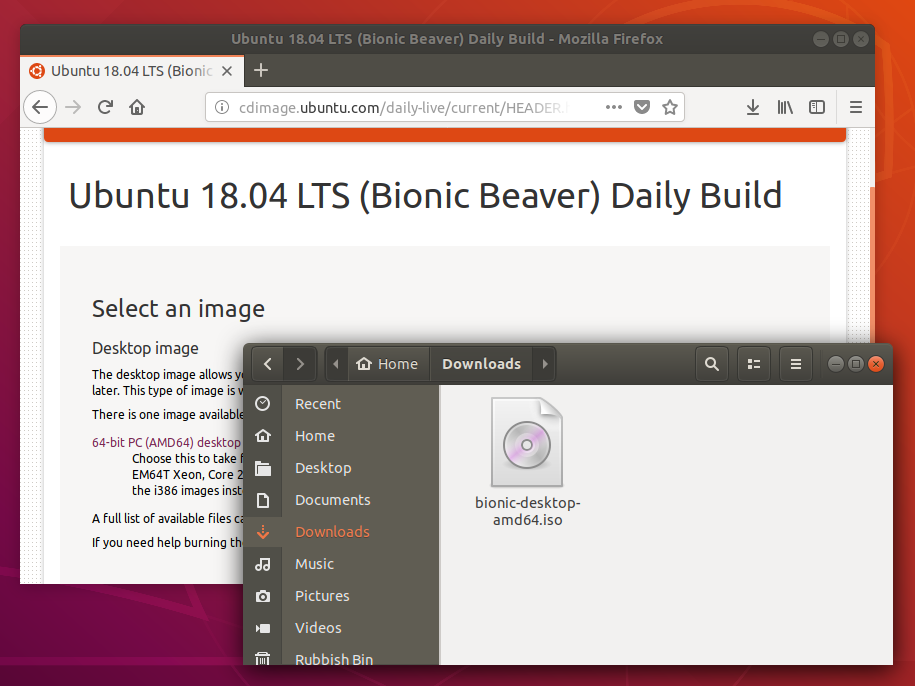
When launched, Startup Disk Creator will look for the ISO files in your Downloads folder, as well as any attached USB storage it can write to.
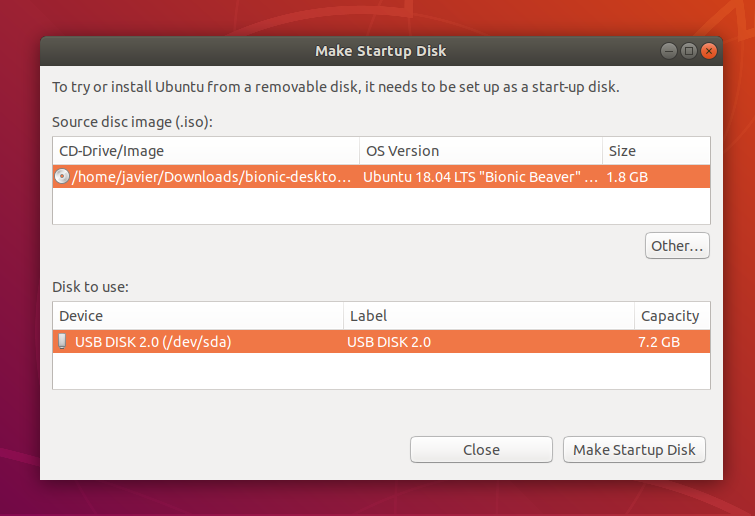
It’s likely that both your Ubuntu ISO and the correct USB device will have been detected and set as ‘Source disc image’ and ‘Disk to use’ in the application window. If not, use the ‘Other’ button to locate your ISO file and select the exact USB device you want to use from the list of devices.
Click Make Startup Disk to start the process.
5. Confirm USB device
Before making any permanent changes, you will be asked to confirm the USB device you’ve chosen is correct. This is important because any data currently stored on this device will be destroyed.
After confirming, the write process will start and a progress bar appears.
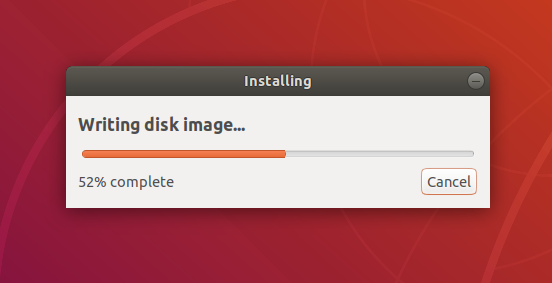
6. Installation complete
That’s it! You now have Ubuntu on a USB stick, bootable and ready to go.
If you want to install Ubuntu, take a look at our install Ubuntu desktop tutorial.
Источник
Ubuntu Documentation
Outline
The general procedure to install Ubuntu (or Ubuntu flavour, Kubuntu, Lubuntu, Xubuntu, . ) from a USB flash drive is:
Get the correct Ubuntu installation file, ‘the iso file’, via this link or Ubuntu flavour via this link. Download the iso file into your running computer (for example into the directory Downloads in the internal drive, not into the USB flash drive that you want to make into a USB boot drive).
Check with md5sum (or another checksum tool) that the download was good.
Try Ubuntu (Kubuntu, Lubuntu, Xubuntu, . ) before installing it.
See also: Installation/FromUSBStickQuick for beginners starting from Windows.
Introduction
Ubuntu can be installed from a USB flash drive. This may be necessary for most new portable computers without DVD drives and is handy for others because a USB flash drive is so convenient. Also, you can configure Ubuntu on the USB flash drive to save changes you make, unlike a read-only CD/DVD disk.
Booting from a USB flash drive created with usb-creator alias Startup Disk Creator and mkusb will behave just as if you had booted from the install CD. It will show the language selection and then the install menu, from which you can install Ubuntu onto the computer’s hard drive or launch the LiveCD environment. Other utilities, e.g. UNetbootin, may create slightly different boot drives or if on UEFI might not work at all with Debian iso files due to a bug
Note: This article uses the term «USB flash drive» alongside USB stick, USB drive, USB device, USB pendrive and thumb drive.
Prerequisites
To create a USB installation device, you will need:
a 4 GB USB flash device/drive/stick. If the iso file is smaller than 2 GB, it is possible to use a 2 GB USB device, at least with some of the methods. Files on this USB device will be erased, so backup the files you want to keep before making the device bootable. Some of the tools require that this USB device is properly formatted and mounted while other tools will overwrite whatever is on the target device. Please follow the instructions for each tool.
an Ubuntu flavour ISO file downloaded from an official web page, ubuntu.com/download or http://releases.ubuntu.com, stored in your running computer (for example in the directory Downloads in the internal drive, not in the USB flash drive that you want to make into a USB boot drive).
Check with md5sum (or another checksum tool) that the download was good. In Linux there is the tool ‘md5sum’. In Windows you can do it with Rufus: click on the circle with a tick mark (more about Rufus here.)
Dummy headlines
After a major remake of this help page the following headlines are kept here because they may be linked to from other web sites. Several other headlines further down in the page are also kept for this reason.
Notes about speed
Notes about size
Notes about bootability
The flash hardware
There is a detailed description at the sub-page /pre
Creating a bootable Ubuntu USB flash drive from Windows
There are various methods available for Windows to create a bootable Ubuntu USB flash drive.
NEVER try to use one of your hard disk drives or partitions in this process unless you really know what you are doing, as data will get erased.
Rufus
Rufus is the tool in Windows that is recommended officially by Ubuntu. A tutorial is available from here.
balenaEtcher
Pendrivelinux’s Universal USB Installer
UNetbootin
Win32 Disk Imager
There is a detailed description at /fromWindows including Rufus, balena Etcher, Universal USB Installer, Unetbootin and Win32 Disk Imager.
Creating a bootable Ubuntu USB flash drive from Ubuntu
Install and run Startup Disk Creator alias usb-creator
The Ubuntu Startup Disk Creator is dedicated to creating USB boot drives for Ubuntu and Ubuntu family flavours (Kubuntu, Lubuntu . Xubuntu).
You can find usb-creator-gtk by typing «Startup Disk Creator» (Ubuntu Desktop) or usb-creator-kde in K-Menu—>Applications—>System—>Startup Disk Creator (Kubuntu). If it is not there, then you can install it using the Ubuntu Software Center.
- Insert and mount the USB drive. Inserting the USB drive should auto-mount it.
- Start the Startup Disk Creator
- In the top pane of the Startup Disk Creator, pick the .iso file that you downloaded.
- If the .iso file isn’t listed, click «Other» to locate and select the .iso file that you downloaded.
- In the bottom pane of the Startup Disk Creator, pick the target device, the USB flash drive. If more than one choice, please check carefully, until you are sure that you will be writing to the correct device.
- After checking that you are pointing to the correct target device, the USB flash drive, you can start the action.
You must enter a password because this is a risky operation. Use the password of the current user ID (the same as for login and running tasks with 'sudo'. Password is not required when installing from a ‘live’ system (booted from a DVD disk or another USB flash drive).
The Startup Disk Creator clones the iso file, which means that you need neither erase nor format the target drive. It will be completely overwritten anyway by the cloning process. The Startup Disk Creator looks like this in Ubuntu 18.04 LTS:
Notes
NEVER try to use one of your hard disk drives or SSDs or partitions in this process unless you really know what you are doing, as data will get erased.
There are bugs that affect the Ubuntu Startup Disk Creator, when you run it in old Ubuntu versions in BIOS mode and try to create USB boot drives with other versions. In the Ubuntu Startup Disk Creator version 0.3.2 in Ubuntu 16.04 LTS, these bugs are no longer a problem, so you can install any version of the Ubuntu flavours from 16.04 LTS and newer versions.
UNetbootin
Download UNetbootin
mkusb — dd image of iso file to USB device safely
If you want to clone from a general image file to a drive, you can use mkusb. It lets you clone to any drive that is not busy, also an internal drive, and there are very obvious warnings to prevent mistakes.
- run in Debian and many linux distros that are similar to Ubuntu and Debian,
- clone from iso files of most Linux distros to create USB boot drives,
- create persistent live drives of the Ubuntu family and Debian, using all available drive space for persistence and/or data storage,
- restore a USB boot drive to a standard storage device.
There is a detailed description at /fromUbuntu including the Startup Disk Creator, UNetbootin and mkusb.
Creating a bootable Ubuntu USB flash drive from Mac OSX
There is a good wiki page about booting with UEFI, and a good tutorial thread, UEFI Installing — Tips.
Test if running in UEFI mode
You may want to test if your Ubuntu flavour is running in [U]EFI mode. An installed system and a live system too is using the directory /sys/firmware/efi, so you can run the following command line,
The following command line is more robust and also easier to understand, so you may prefer it (if you copy & paste and are not bothered by typing a long command line),
Источник
5 Easy Ways To Create Bootable USB Media From ISO In Ubuntu Linux
W e have already created the complete guide for using Rufus to create bootable USB media. Interestingly, RUFUS only supports Windows and Mac. So if you are using Linux distributions, RUFUS is not the way to go. But fear not. Like almost every other task, popular Linux distros such as Ubuntu have never failed to meet the user demands; the same is when you need to convert ISO to bootable USB Media in Ubuntu or Linux Mint.
Ubuntu and many major Linux distributions come preloaded with a set of essential utility tools. This includes Startup Disk Creator, which helps to create bootable USB Linux media . Different bootable Live USB creator applications can be installed in Ubuntu. In this article, let’s look at making a bootable USB drive in Ubuntu using different apps. So, let’s get started.
1. Create Bootable USB Media in Ubuntu Using Startup Disk Creator
Startup Disk Creator is a built-in application in many Linux Distros like Ubuntu. To use it,
- Open the dash menu. If you are using the latest version, use the left pane to open the show applications.
- Open the Startup Disk Creator application by typing or searching in the search box.
- Now, you will need to select the source ISO file and specific device for bootable media. If you have chosen the wrong device or ISO, click other to change your selection.
- After verifying the ISO file and, click on Make Startup Disk to create a new Bootable USB startup disk in UBUNTU Linux.
- Finally, a prompt will appear asking you to confirm your selection. Confirm the prompt to start the process.
2. Create Bootable USB Media Using Unetbootin
Unlike Startup Disk Creator, UNetbootin doesn’t come preinstalled in the Ubuntu Linux distribution. To install it, first, add the official PPA, update the repo base and then process with installing Unetbootin
Install UNetbootin
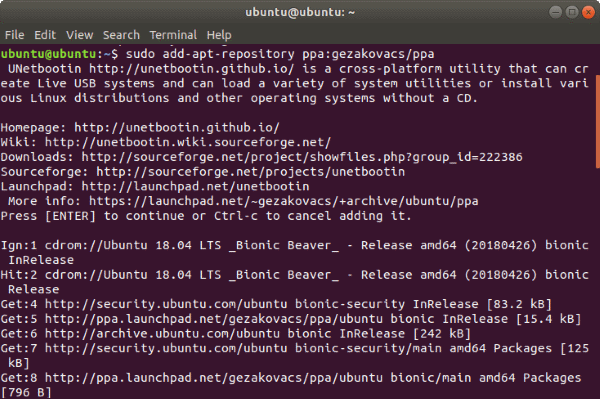
Now, UNetbootin will be installed and the bootable USB creator application will appear in your applications list.
Using UNetbootin for Ubuntu Linux
- Plug-in the USB drive and Unetbootin will automatically recognize it
- There are two options to make a bootable USB – using the Distribution dropdown menu or by selecting a disk image.
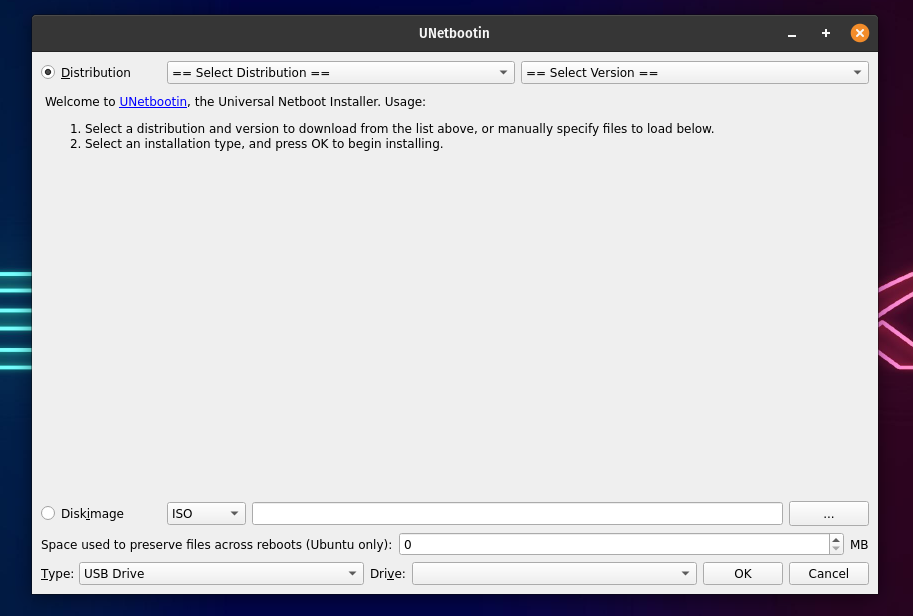
Selecting the distribution will automatically download the necessary files for the specific distribution from the internet. To install a distribution using the same method.
- Select both the distribution and the version.
- Now, choose the type as USB and select your USB drive from below and click OK.
- Once you click ok, UNetbootin will download the necessary files and install them on your USB.
If you are looking to create a Windows 10 USB installation media using UNetbootin, you will choose the disk image option. For doing so,
- Select disk image and choose ISO.
- Now, Browse the ISO that you want to make as an installation media.
- Again, choose the type as USB and select your USB drive. Once you click ok, UNetbootin will install the boot media to your USB.
3. Convert ISO to USB in Ubuntu Using ddrescue
Well, hang on. This is Ubuntu we are talking about. Apparently, the terminal is the top tool for a typical Linux user. So let’s say that we were saving the best for the last. This is the easiest way to convert ISO files to a USB disk if you are fond of using terminal commands.
For starters, ddrescue is a data recovery tool that can clone any storage device. We can use ddrescue to convert ISO files to USB sticks.
Install ddrescue
First things first. You will need a working internet connection to download and install ddrescue. (In case you already have it installed, you can skip this step).
You will need to know the exact block device name (something like dev/sd..). To do this, use the command fdisk. Enter the following command,
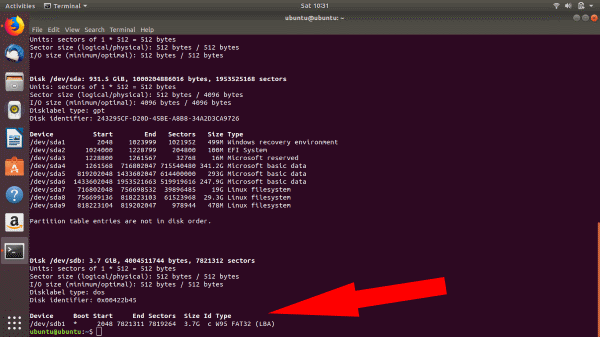
Once you enter the fdisk command, you can see all your devices connected. Here, you can see that the block device name for the USB is /dev/sdb1.
It is important to verify that the block device name you chose is the correct one, or you might end up with corrupt/destroyed data.
Once done, enter the command as follows:
Replace the x and path/to/.iso with your specific device block name and the path for the iso file.
When the process is finished, you can boot into your bootable Ubuntu USB stick.
4. Create Bootable USB Using Etcher On Ubuntu
Balena Etcher is another great tool for making bootable USBs. What makes it special is its speed and the amazing UI. Also, it is very easy to install and use.
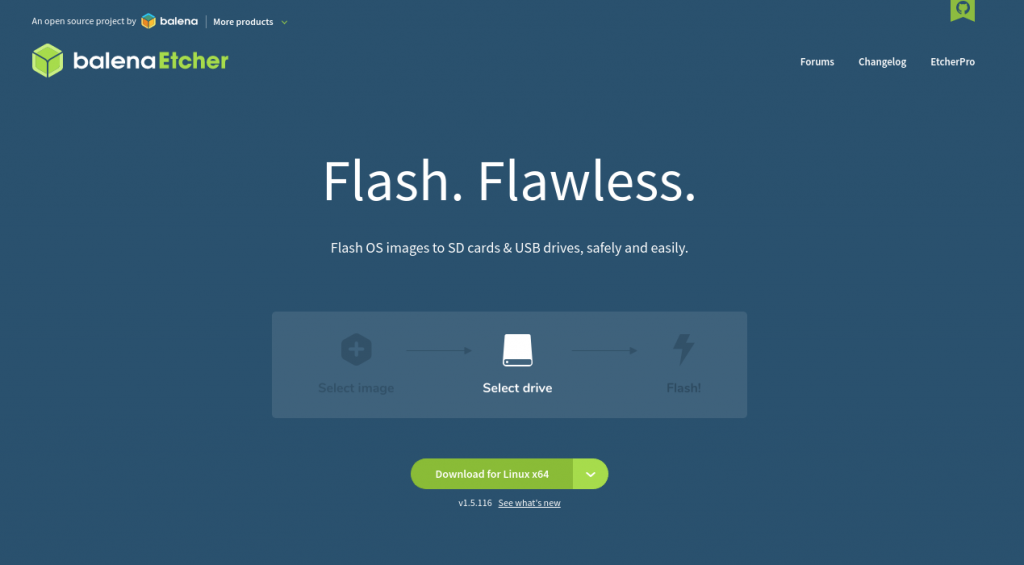
- Head over to the official Etcher website and download the zip for your OS.
- Now, extract the zip using the default archive manager on Linux. If you’re on Windows, all you need to do is download the .exe file and double-click to execute it.
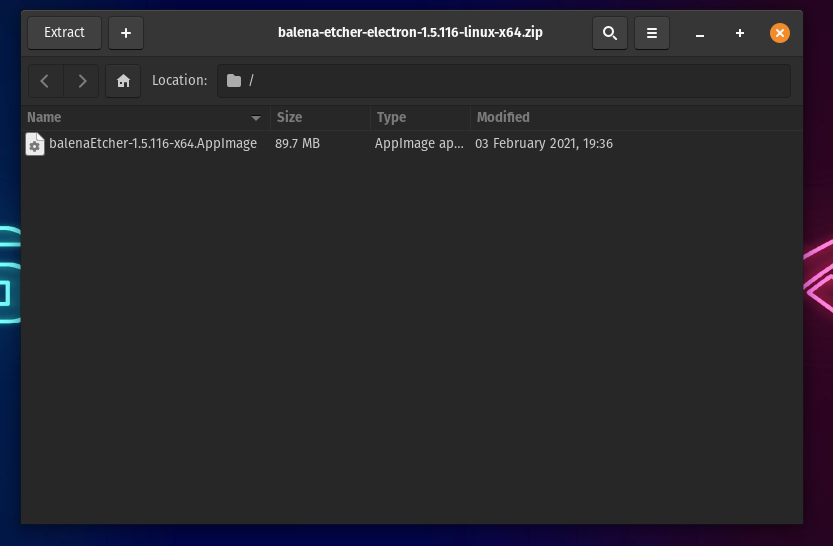
- After you’re done extracting it on Linux, right-click on the extracted app image and click on properties.
- In the permission tab, find and check the “Allow executing as a file program” option.
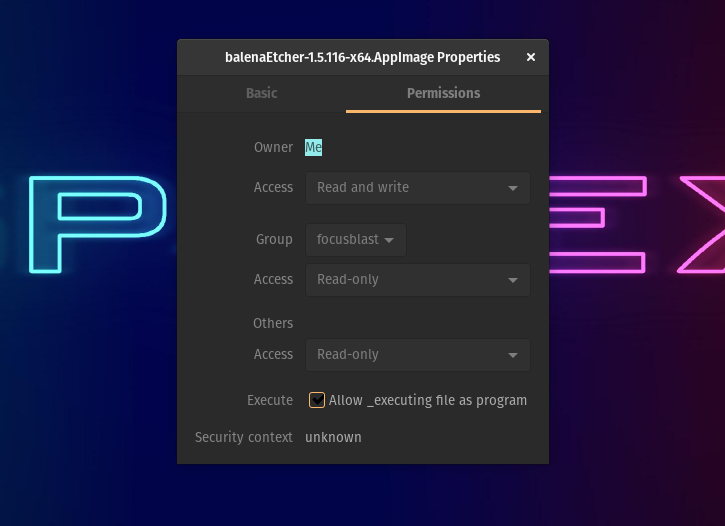
- Double-click on the App image to open Etcher. If nothing happens, fire up the terminal, head over to the directory where the app image is located, and run the following command.
Replace the x.x.xxx with the version that you have downloaded. For example, balenaEtcher-1.5.116-x64.AppImage. Wait for a couple of seconds until Etcher launches and when it does, here’s what you’ll see.
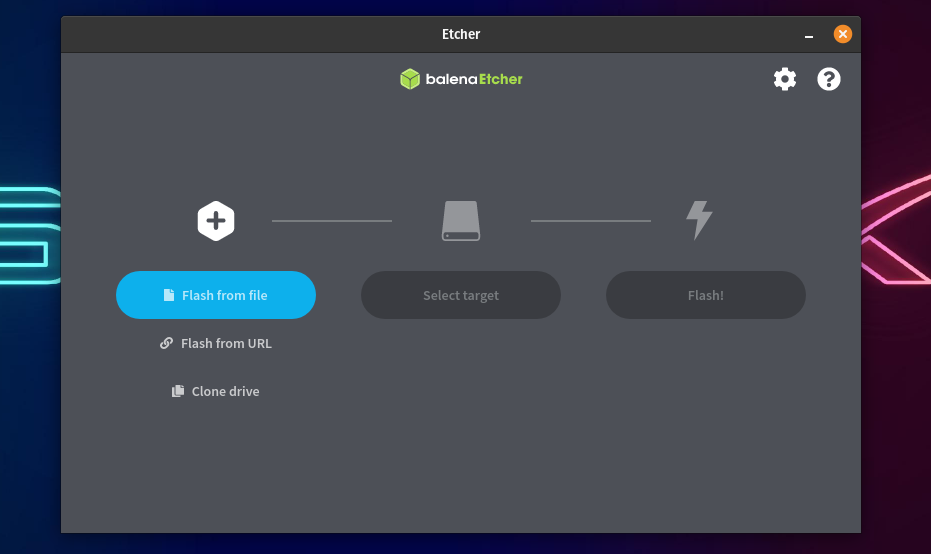
- To flash a USB drive, select the ISO that you’ve downloaded.
- Select the target USB device from the list of devices, and finally.
- Click on the Flash! Button.
5. Create A Bootable USB Using Popsicle (Linux Only)
Popsicle is a USB bootable media creation tool that comes preinstalled in Pop!_OS. It is a lightweight and fast USB flasher that also allows you to flash ISOs on multiple USB drives simultaneously. As Pop!_OS is based on Ubuntu, you can install Popsicle on Ubuntu. To do it.
- Open the terminal and add the System76 PPA where Popsicle resides, using the following command.
- Now, install Popsicle.
- To flash an ISO open the Popsicle application.
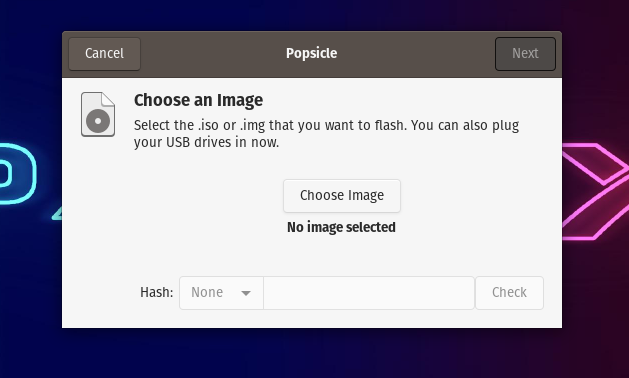
- Now, click on Choose Image and browse for the ISO that you want to flash.
- After selecting the ISO, click on Next.
- Plug-in the USB drive and select the target device on Popsicle.
- Finally, click on the Write button and wait for 5-15 minutes until the flashing is done.
- Voila! You now have a bootable USB. That was pretty easy, right?
Bootable USB Media from ISO in Ubuntu Linux
Now that pretty much sums up the necessary steps that you would need to do to Create a Bootable USB stick using Ubuntu Linux. Furthermore, if you are still having trouble booting into the USB stick, head over to BIOS/UEFI in your machine to configure the boot settings. Finally, as always, use the comment section to remind us of anything that we missed. Cheers!
Источник


