- Create a Data Image Using DISM
- Creating windows image file
- How do I create an ISO image file?
- Create an ISO File from a Folder in Windows
- Use AnyBurn To Create ISO From The Folders On Your PC
- Create An ISO In Windows 10 Using WinCDEmu
- Use ImgBurn To Create ISO Files From Folders On Windows
- Use a Portable Tool To Create An ISO From Folders
Create a Data Image Using DISM
To add applications, files, and other resources to Windows during an installation, you can create a data image. By using the Deployment Image Servicing and Management (DISM) tool, you can create additional Windows image (.wim) files that contain only files and applications that you intend to copy to the Windows installation.
Data images enable you to add:
Applications, files, scripts, and other resources to Windows during an installation.
Files, resources, and other data to a partition other than the operating system partition.
NoteВ В Data images must be used only to add new files to a Windows installation. Do not use data images to replace existing Windows files. Overwriting operating system data is unsupported.
Previous methods of transferring data to a Windows installation required the use of $OEM$ folders. These folder structures are still supported, but data images provide an easier and more efficient means of transferring additional data to Windows.
In unattended installations, the Windows image to install is specified by the OSImage setting in the Microsoft-Windows-Setup component. You can add one or more DataImage settings in the Microsoft-Windows-Setup component that represent additional data images that you add to the system. For more information, see the Windows Unattended Setup Reference.
To create a data image
Locate the data that you will create a data image for.
Open a command prompt as an administrator, or boot the computer to Windows PE to open the Windows PE command prompt.
Use DISM to compress your data files to a .wim file. For example:
In this example, everything under the C:\Data\DataFiles directory is added to the .wim file and the .wim file is given the label «MyData». All files and folders under C:\Data\DataFiles are extracted to the root of the drive specified in the answer file.
For more information about how to use DISM, see DISM Image Management Command-Line Options.
Copy the data image to an available location such as another partition or a network share during WindowsВ Setup.
To add a data image path to an answer file
Use WindowsВ System Image Manager (WindowsВ SIM) to create an answer file that contains the path to the data image to install and the location for the installation.
Add the Microsoft-Windows-Setup\ DataImage settings to the appropriate configuration pass for your environment. For example: windowsPE .
Save the answer file and close WindowsВ SIM.
The answer file must resemble the following example:
If you’re specifying a local folder in path , see Path in the Unattended Windows Setup Reference to learn about using relative or absolute paths.
Run Setup.exe, specifying the location of the answer file. For example:
All the files and folders specified in the data image are extracted to the root of the drive during installation. Executable files and scripts are not run when the data image is applied; they are only copied to the drive. You can use FirstLogonCommands to specify commands to run the first time a user logs on to the computer. For more information about FirstLogonCommands , see the Windows Unattended Setup Reference.
Creating windows image file

How do I create an ISO image file?
ISO Creator: To be precise, an ISO image is a copy of the data on an optical disc, such as a CD, DVD, or Blu-ray Disc. There are many occasions when you want to create an ISO image. For example, when you need make several copies with the game, you create an ISO image, when you modify a bootable disc, you create an ISO image, etc. And here, WinISO is the best choice due to its powerful and versatile features. Besides, its friendly UI enables you to make bootable ISO, convert ISO to BIN instantly!
Here we will show you how to create ISO image files with WinISO step by step.
Step 1: Getting Started
Free Download WinISO from our official website and install it. It will just take you several seconds.

Step 2: Create a new file
After running WinISO (which serve as an ISO Creator) and click the «New File» button on the toolbar.

Step 3: Add files
Add files or directory into WinISO by right-clicking or pressing the shortcut keys «F3» or «F4».

Step 4: Save
Click the «Save» button and enter in the ISO file name. Then click «Save» to create a new ISO. (Disk space can be saved by utilizing this function.)

With this function, you can save your disk space. WinISO is a CD/DVD/Blu-ray Disc utility tool. Except the function of creating ISO, you can also add, delete, extract ISO image file and burn it to CD, DVD, Blu-ray Disc.
Maybe you also want to find: How to make a bootable ISO?
For more guides, please take closer look here:
Create an ISO File from a Folder in Windows
A great tool for distribution or backups
If you don’t already know, an ISO file is a container that can hold a number of files in it. It’s usually used to create backups of your CD and DVD discs. However, you can create an ISO from the folders on your Windows PC as well. There are actually multiple apps that help you do it on your machine.
There are many reasons why you may want to create an ISO on your Windows 10 PC. Maybe you want to keep all of your folders in a single place. Or maybe you want to keep some of your folders handy ready to burn to your discs.
Regardless of the reasoning, it’s pretty easy to create an ISO from folders on a Windows computer. Also, check out the video from our sister site where we walk you through the steps in a short video.
Use AnyBurn To Create ISO From The Folders On Your PC
One of the free apps you can use to create an ISO from your folders is AnyBurn. It’s actually an app that helps you burn your data to your discs but you can use it to create ISO files as well. It has an option on the main interface that helps add your chosen folders to an ISO which you can then save anywhere on your computer.
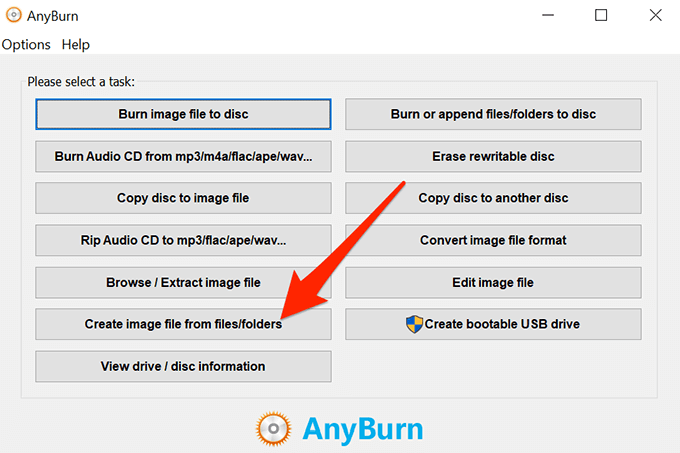
- Download, install, and launch AnyBurn on your computer.
- You’ll find several options regarding creating ISOs on the main interface. Find the one that says Create image file from files/folders and click on it.
- The following screen will let you choose the folders that you want to add to your ISO. Click on the Add button at the top to add your folders.

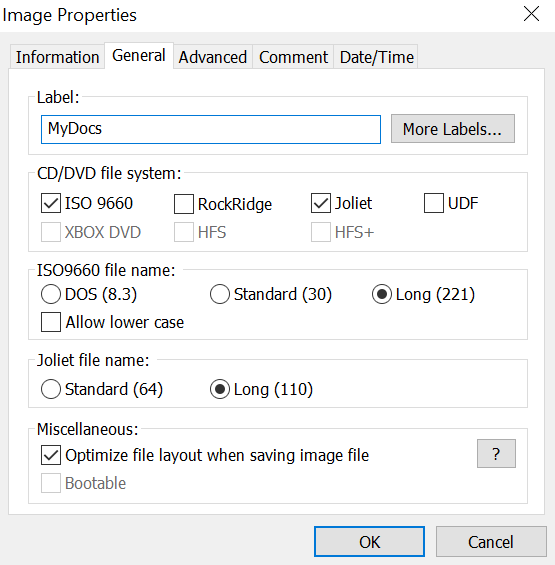
- If you want to specify any custom settings for your file, click on the Properties button at the top. It’ll then let you modify options like the file system for your ISO, file naming standard, compression level, and so on. Click on OK when you’ve configured them.
- Click on the Next button to go to the next screen of the ISO creation process.
- On the following screen, click on the folder icon to choose the folder where you want to save your ISO. You can also enter a name for your file on the same screen.
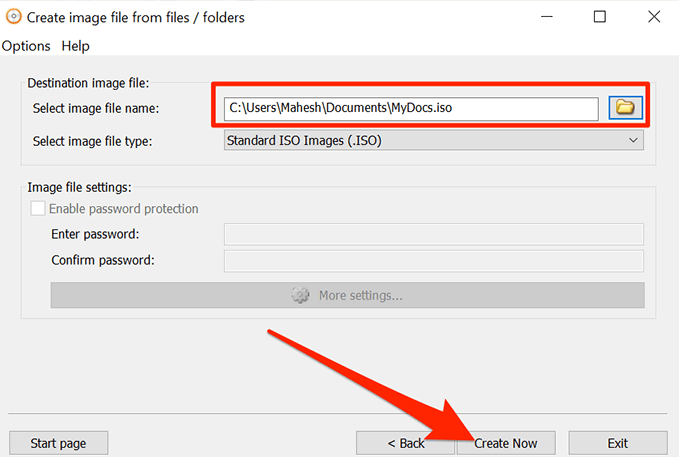
- Finally, click on Create Now to start creating an ISO out of your chosen folders.
Create An ISO In Windows 10 Using WinCDEmu
WinCDEmu is an open-source tool that lets you create virtual drives out of various image file formats on your computer. If you have downloaded an ISO file and you want to view its contents, this app can help you mount that as a drive on your machine.
You can use the app to create ISO files from folders in Windows as well, and it actually provides you with the easiest way to make an ISO from your folders. All you basically need to do is install the app and it’ll add an option to your context menu. You can then use that option to generate an ISO from your folders.
- Download and install the WinCDEmu app on your PC.
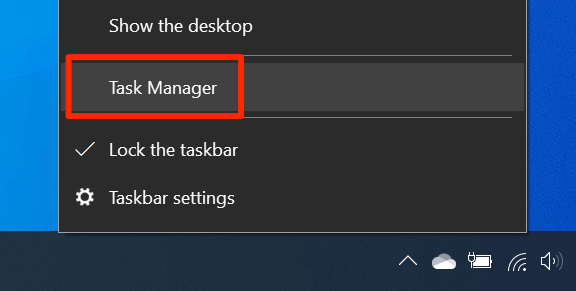
- Right-click on your taskbar and select Task Manager.
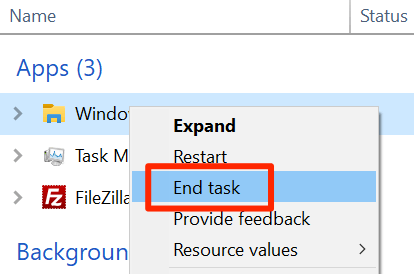
- Right-click on the process that says Windows Explorer and select End task. You need to close the Explorer before you can see the newly added item in the context menu.
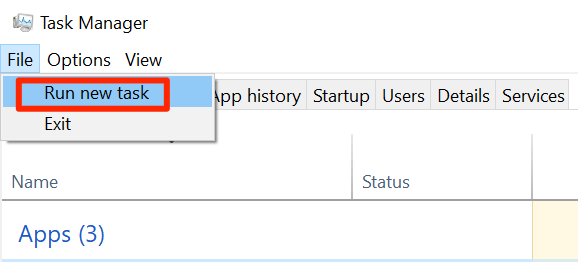
- Click on the File menu in Task Manager and select Run new task.
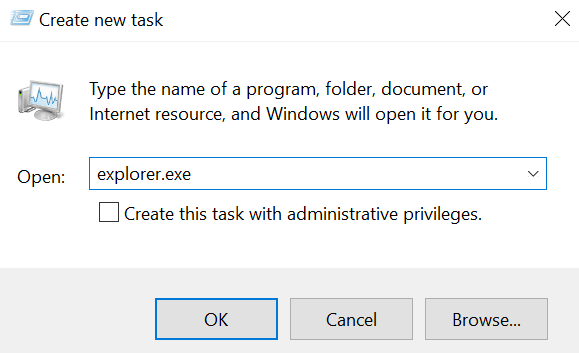
- Type in explorer.exe and hit Enter. It’ll relaunch the Windows File Explorer.
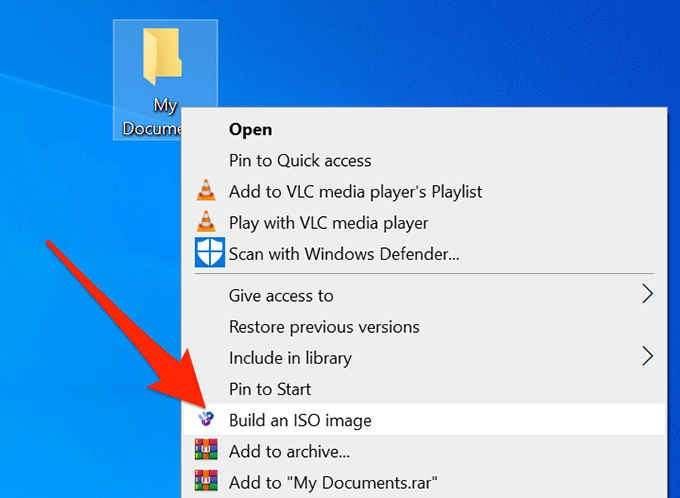
- Find the folder that you want to create an ISO for, right-click on it, and select Build an ISO image.
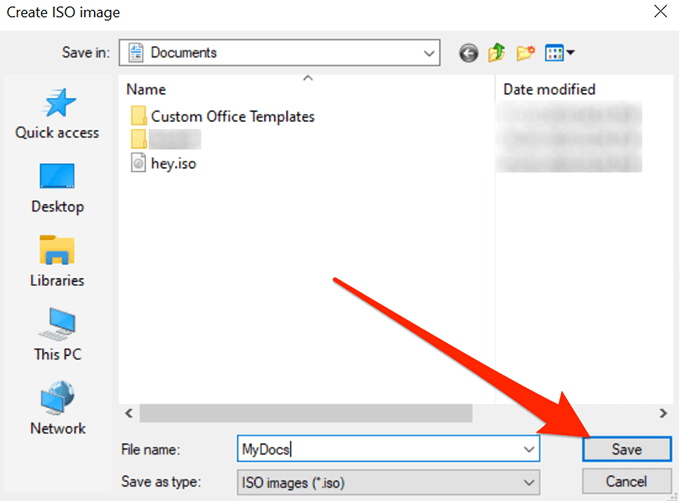
- It’ll ask you to enter a name for your ISO and the location where you want to save it. Enter these details and click on Save.
- It’ll quickly create the ISO for you and let you know when it’s fully built.
Use ImgBurn To Create ISO Files From Folders On Windows
ImgBurn has been a popular app to create and burn image files for a long time. If you’ve ever created a backup of your discs or you’ve burned a disc, you’ll likely recognize the app.
The app can be used to create ISO files from your folders as well.
- Download, install, and open the ImgBurn app on your computer.
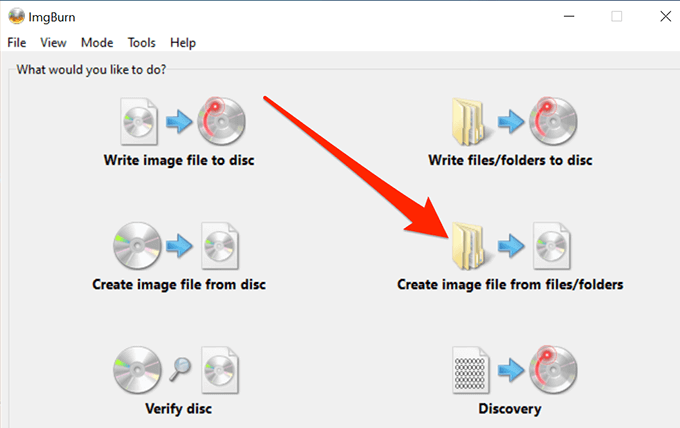
- On the main interface, find and click on the option that says Create image file from files/folders.
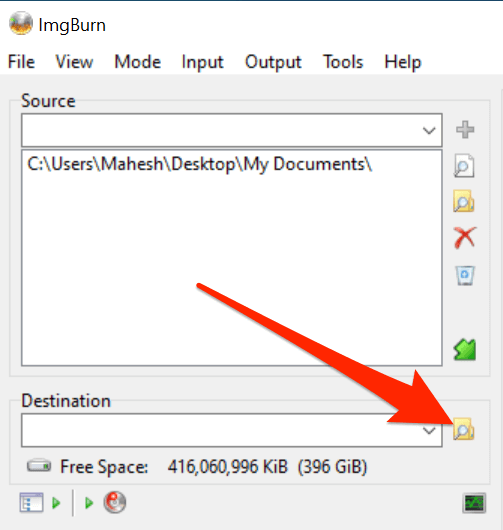
- You’ll see a screen that lets you add the folders you want to include in your ISO. Click on the little folder icon and add the folders for your ISO file.
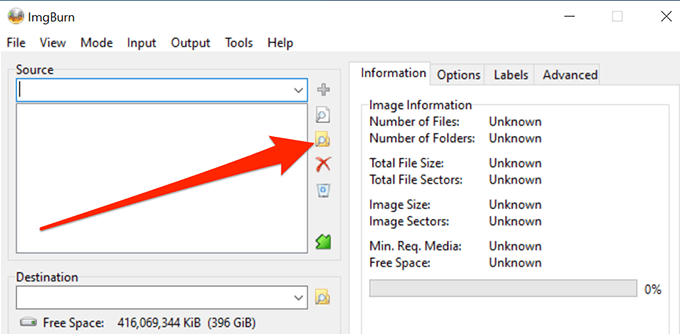
- Click on the tiny folder icon next to where it says Destination and select a name and target folder for your ISO file.
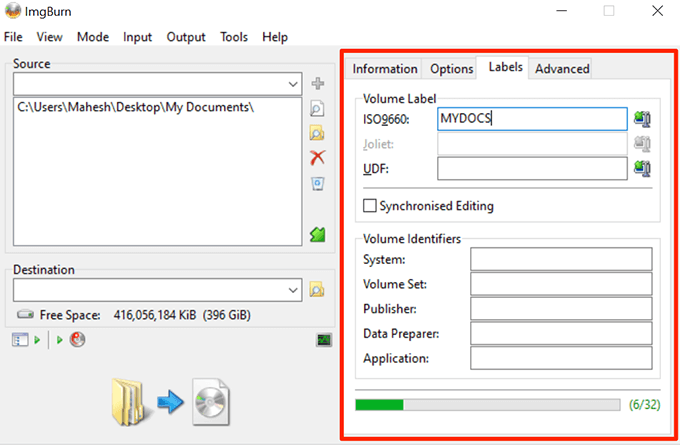
- On the right-hand side pane, you’ll find various options to configure for your ISO. With these options, you can change your image type, enter a label for your image, specify restrictions, and do a few other things.
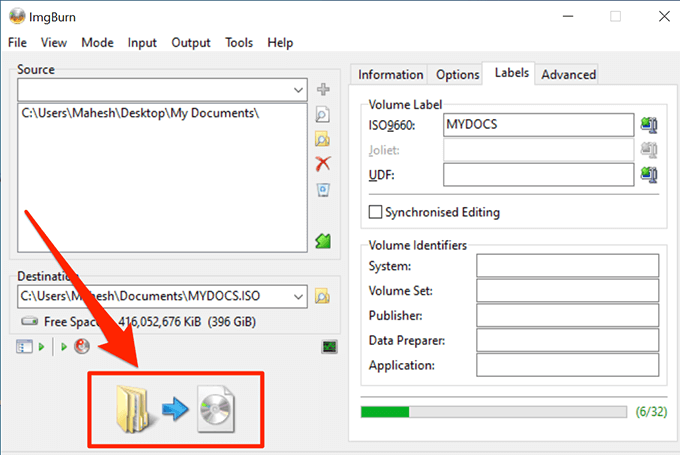
- Finally, click on the large Build button on your screen to start building an ISO file out of your selected folders.
Use a Portable Tool To Create An ISO From Folders
If it’s just a single ISO that you’ll be making and you don’t think you’ll be doing it again anytime soon, you might prefer something that doesn’t require an installation. Folder2Iso can actually help you out as it’s a free and portable tool that helps quickly create ISOs without any hassle.
It works on many versions of Windows including Windows 7, 8, 10, and Linux.
- Download the Folder2Iso app and double-click on it to extract the actual app contents.
- Run the executable file that you extracted from the archive.
- You’ll see a simple interface with only a few options on it. Click on the Select Folder option and select the folder you want to add to your ISO.
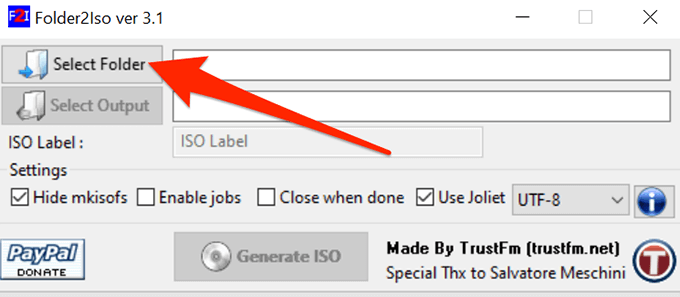
- Click on the Select Output button and choose the folder where you’d like to save your ISO file. Remember you can’t choose the folder that you’ve chosen to include in your ISO.
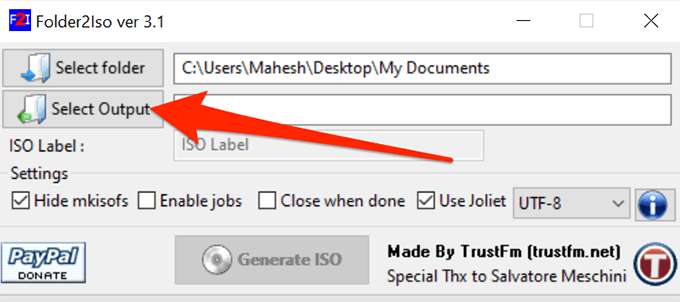
- You can then specify the extra options available on your screen, if you want.
- Click on the Generate ISO button to make an ISO out of your chosen folders.

- The progress bar will go all green when the ISO has been generated.
It’s a good idea to create an ISO from your folders in Windows so you can mount them all as a single drive on your PC. If you have done it on your computer already, let us know what app you chose to do it and why. We await your response in the comments below!
Mahesh has been obsessed with technology since he got his first gadget a decade or so ago. Over the last few years, he’s written a number of tech articles on various online publications including but not limited to MakeTechEasier and Android AppStorm. Read Mahesh’s Full Bio


