- Как настроить пользовательский интерфейс Firefox с userChrome.css
- Как это работает
- Где искать настройки
- Как создать файл userChrome.css
- Как отредактировать файл userChrome.css
- Просмотр и редактирование CSS
- Просмотр CSS правил
- Rule display
- Filtering rules
- Strict search
- Displaying pseudo-elements
- Setting :hover, :active, :focus
- Link to CSS file
- Get help for CSS properties
- Overridden declarations
- Examine computed CSS
- Edit rules
- Add rules
- Copy rules
- See also
Как настроить пользовательский интерфейс Firefox с userChrome.css

И нтерфейс Firefox Quantum по-прежнему настраивается благодаря файлу userChrome.css. Вы можете отредактировать этот файл, чтобы скрыть нежелательные элементы меню, переместить панель вкладок под панель навигации, отобразить несколько строк на панели закладок и сделать другие вещи, которые не были возможны.
Как это работает
Файл userChrome.css — это каскадный файл стилей (CSS), который использует Firefox. Хотя таблицы стилей обычно применяются к веб-страницам, эта таблица стилей применяется и к пользовательскому интерфейсу Firefox. Он позволяет изменять внешний вид и расположение всего, что окружает веб-страницу. Вы не можете добавлять какие-либо функции; Вы можете изменить только то, что уже есть (изменить, скрыть или переместить).
Это не имеет ничего общего с Google Chrome. «Chrome» относится к пользовательскому интерфейсу веб-браузера, от которого именовался Google Chrome.
Файл userChrome.css существует в Firefox уже достаточно долго, но он приобрел новое значение с помощью Firefox Quantum.
Множество настроек, которые ранее можно было выполнить с помощью надстроек браузера, теперь можно выполнить только путем редактирования файла userChrome.css.
Где искать настройки
Хотя Вы можете создать свои собственные настройки, если Вы понимаете CSS-код и как интерфейс Firefox был разработан, Вы также можете просто найти настройки в Интернете. Если Вы хотите внести определенные изменения, то кто-то еще, вероятно, уже выяснил, как это сделать и написал код.
Вот некоторые ресурсы, которые помогут Вам:
- Tweaks от userChrome.org: краткий список интересных настроек, которые демонстрируют силу userChrome.css.
- Классические CSS Tweaks: репозиторий настроек userChrome.css от автора расширения Classic Theme Restorer, который больше не работает в Firefox Quantum.
- userChrome Tweaks: коллекция интересных настроек Firefox.
- FirefoxCSS на Reddit: этот субреддит является сообществом для обсуждения настроек. Вы можете использовать субреддит, чтобы находить чужие твики, посмотреть, чем люди делятся, и даже попросить помощи, если Вы не можете найти нужную Вам настройку.
- Руководство по редактированию Вашего контекстного меню: инструкции по удалению элементов из контекстного меню Firefox и изменению их порядка в списке, взятых из CSS Firefox.
Имейте в виду, что более старые версии Firefox имели другой интерфейс. Старые userChrome.css твики, которые Вы найдете в Интернете, могут не работать на Firefox 57 и более поздних версиях, также известных как Firefox Quantum.
Если Вы знаете, что делаете с CSS, то Вы можете включить панель инструментов браузера для проверки браузера Firefox. Это предоставит вам информацию, необходимую для настройки различных элементов интерфейса браузера с помощью собственного кода CSS.
Как создать файл userChrome.css
Файл userChrome.css по умолчанию не существует, поэтому, если у Вас есть настройка или две, которые Вы хотите попробовать, то сначала Вам нужно создать файл в соответствующем месте в папке профиля Firefox.
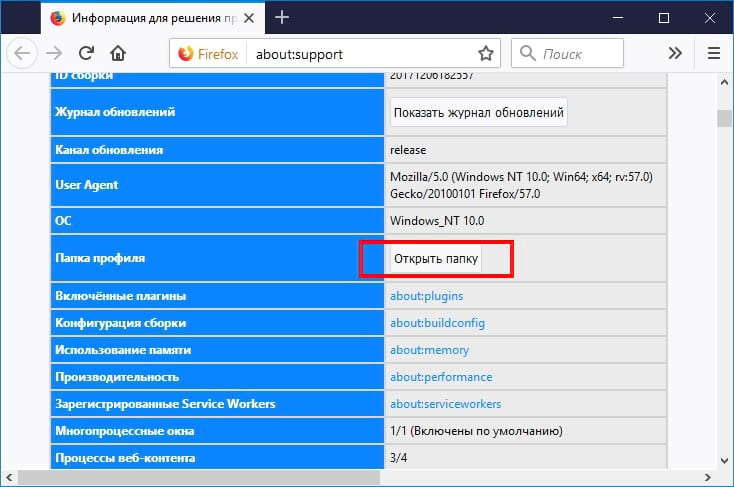
Чтобы запустить папку профиля Firefox, нажмите «Меню» > «Справка» > «Информация для решения проблем» в Firefox.

Нажмите кнопку «Открыть папку» справа от папки профиля, чтобы открыть ее. (Следующие инструкции показывают процесс в Windows, но в Mac OS и Linux они практически одинаковы: Вы просто используете другой файловый менеджер и текстовый редактор.)
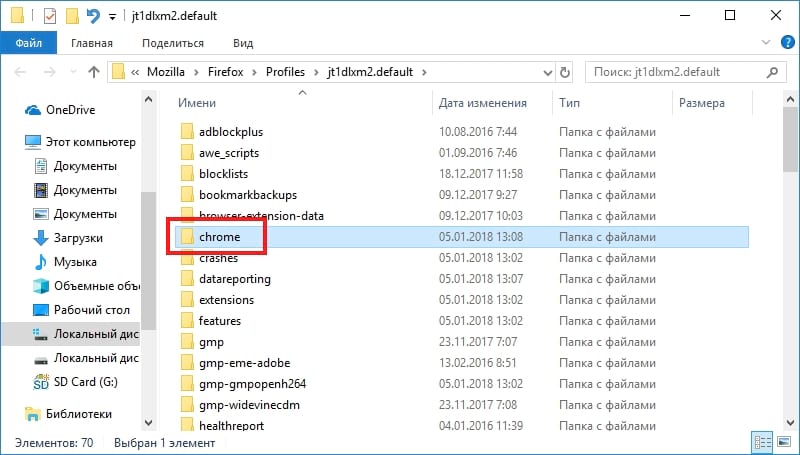
Если Вы увидите папку с именем «chrome» в появившейся папке профиля, дважды нажмите на нее. Однако Вы, вероятно, этого не сделаете, поскольку эта папка не создается современными версиями Firefox.
Чтобы создать папку, нажмите правой кнопкой мыши на свободном месте и выберите «Создать» > «Папку». Назовите ее «chrome», нажмите «Enter», а затем дважды нажмите на нее.
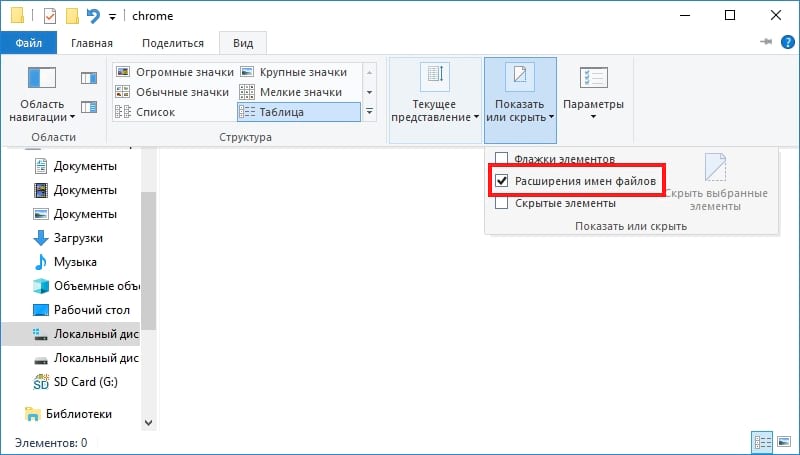
Вам нужно будет указать Windows, чтобы показать расширения файлов, если Вы еще этого не сделали. Windows скрывает расширения файлов по умолчанию, чтобы упростить работу. Этот шаг не требуется для macOS или Linux, которые показывают эту информацию по умолчанию.
В Windows 8 или 10 вы можете просто нажать на вкладку «Вид» и установить флажок «Расширения имен файлов», чтобы сделать их видимыми. В Windows 7 нажмите «Упорядочить» > «Параметры папки и поиска», перейдите на вкладку «Вид» и снимите флажок «Скрыть расширения для известных типов файлов».
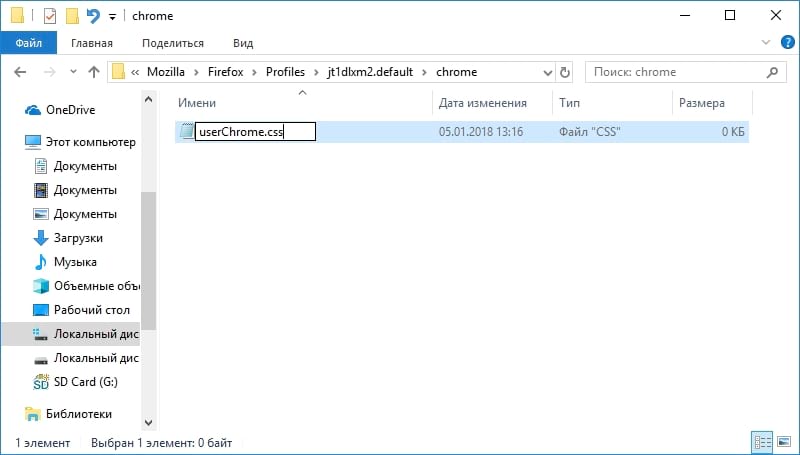
Теперь создайте файл userChrome.css, который на самом деле представляет собой просто пустой текстовый файл с расширением .css вместо расширения .txt.
Для этого нажмите правой кнопкой мыши на пустом пространстве и выберите «Создать» > «Текстовый документ». Назовите его «userChrome.css», удалив расширение .txt.
Windows предупредит Вас, что Вы меняете расширение файла, и это может быть проблемой для определенных типов файлов. Нажмите «Да», чтобы подтвердить изменения.
В MacOS или Linux создайте пустой текстовый файл с тем же именем.
Как отредактировать файл userChrome.css
Вы можете использовать любой текстовый редактор для редактирования файла userChrome.css. Текстовый редактор Блокнот, входящий в состав Windows, отлично работает. Если Вам нужен более мощный текстовый редактор с большим количеством функций, то попробуйте Notepad++.
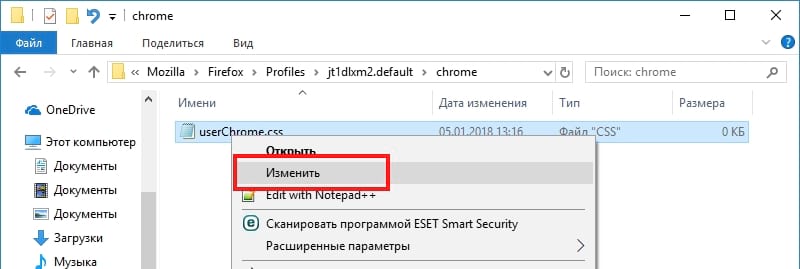
Чтобы отредактировать файл в «Блокноте», нажмите на файл правой кнопкой мыши и выберите «Изменить».
Добавьте все настройки, которые Вы хотите сохранить, копируя и вставляя их. Если Вы добавляете несколько настроек, обязательно добавьте их все в свои собственные строки.
Просмотр и редактирование CSS
Просмотр и редактирование CSS в панели CSS Инспектора.
Просмотр CSS правил
На панели Rules(Правила) отображаются все правила, применяемые к выбранному элементу, в порядке приоритета сверху-вниз:

В списке правил так же будут отображены и стили браузера (user-agent styles), если данная опция выставлена в настройках панели разработчика (developer tool settings). Заметьте, эта опция не зависит от опции «Browser styles» вкладки Computed view.
Начиная с Firefox 44 и выше, на панеле Rules отображаются все авторские стили, включая те, которые не поддерживаются или содержат ошибки. Это может помочь вам понять, почему определённые стили не применяются:

Rule display
It displays each rule as in a stylesheet, with a list of selectors followed by a list of property:value; declarations.

- Highlight matched elements: иконка цели сразу за селектором: кликнув по ней подсветятся все DOM-узлы на странице, совпадающие с этим селектором.
- Overridden declaration: declarations that are overridden by later rules are crossed out. See overridden declarations.
- Show cascade: next to overridden declarations is a magnifying glass: click this to see the cascade of rules containing the overridden property. See overridden declarations.
- Enable/disable: if you hover over a declaration, a checkbox appears next to it: you can use this to toggle the declaration on or off.
- Filename and line number: on the right-hand side is a link to the rule. See link to CSS file.
User-agent styles are displayed with a different background, and the link to the filename and line number contains the prefix (user agent) :

Filtering rules
Начиная с Firefox 40, это поле вверху вкладки Ruels подписан как «Filter Styles»:
 Как только вы что-нибудь напечатаете:
- все правила, которые не содержат напечатанную строку, будут скрыты.
- все объявления, которые содержат напечатанную строку, подсветятся
 Нажмите на «X» в конце поискового поля для сброса фильтра.
Strict search
New in Firefox 43
По умолчанию, блок поиска подсвечивает все объявления, которые содержат любую часть строки. К примеру, для «color» подсветятся объявления, содержащие border-bottom-color и background-color , а также просто color .:

Starting in Firefox 43, if you enclose the search query in ticks, like this: `color`, the search is restricted to exact matches:

Displaying pseudo-elements
From Firefox 41, the Rule view displays the following pseudo-elements, if they are applied to the selected element:
:after
:before
:first-letter
:first-line
:selection
:-moz-color-swatch
:-moz-number-spin-box
:-moz-number-spin-down
:-moz-number-spin-up
:-moz-number-text
:-moz-number-wrapper
:-moz-placeholder
:-moz-progress-bar
:-moz-range-progress
:-moz-range-thumb
:-moz-range-track
:-moz-selection
If the selected element has pseudo-elements applied to it, they are displayed before the selected element but hidden by a disclosure triangle:

Clicking the triangle displays them:

Setting :hover, :active, :focus
From Firefox 41, there’s a new button to the right of the filter box:
 Click the button to see three checkboxes, which you can use to set the :hover , :active and :focus pseudo-classes for the selected element:
 Although this button is new in Firefox 41, the feature existed in earlier versions of Firefox. It could — and still can — be accessed from the popup menu in the HTML view.
New in Firefox 43
Starting in Firefox 43, if you set one of these pseudo-classes for a node, an orange dot appears in the markup view next to all nodes to which the pseudo-class has been applied:

Link to CSS file
At the top right of each rule, the source filename and line number is displayed as a link: clicking it opens the file in the Style Editor.
From Firefox 41 you can copy the location of the source file: right-click the link and select «Copy Location».
The Inspector understands CSS source maps. That means that if you are using a CSS preprocessor that has support for source maps, and you’ve enabled source map support in the Style Editor settings, then the link will take you to the original source, not the generated CSS. Read more about CSS source map support in the Style Editor documentation.
Get help for CSS properties
Starting in Firefox 40, if you context-click on a CSS property name in the Rules view, you can open a popup displaying help for that property from MDN:
Note that for the moment, this doesn’t cache responses from MDN, so it requires network connectivity.
Overridden declarations
If a CSS declaration is overridden by some other CSS rule with a greater weight, then the declaration is shown with a line through it.
New in Firefox 43
Starting in Firefox 43, overridden declarations have a magnifying glass next to them. Click the magnifying glass to filter the rule view to show only the rules applying to the current node that try to set the same property: that is, the complete cascade for the given property.
This makes it easy to see which rule is overriding the declaration:
Examine computed CSS
To see the complete computed CSS for the selected element, switch to the Computed view. This shows the calculated value that each CSS property has for the selected element:

Clicking the arrow next to the property name shows the rule that set this value, along with a link to the source filename and line number:

By default, this view only shows values that have been explicitly set by the page: to see all values, click the «Browser styles» box.
Typing in the search box performs a live filtering of the list, so, for example, if you just want to see font-related settings, you can type «font» in the search box, and only properties with «font» in the name will be listed. You can also search for the values of properties: to find the rule responsible for setting the font to «Lucida Grande», type that in the search box.
Edit rules
If you click on a declaration or a selector in the Rules view you can edit it and see the results immediately. To add a new declaration to a rule, click on the last line of the rule (the line occupied by the closing brace). If you enter an invalid value for a property when editing it, or an unknown property name, a yellow alert icon appears under the declaration.
Any changes you make are temporary: reloading the page will restore the original styling.
You can use the arrow keys to increase/decrease numeric rules while editing. The Up arrow will turn «1px» to 2px, and Shift + Up / Down will increment by 10. Alt + Up / Down change values by 0.1, and Shift + Page up / Page down will add or subtract 100 from the value.
From Firefox 44, edits that you make in the Rules view are reflected in the Style Editor, and vice versa.
Add rules
You can add new rules in the Rules view. Just right-click to show the context menu and select «Add rule». This will add a new CSS rule whose selector matches the currently selected node.

Starting in Firefox 41, there’s a button that enables you to do the same thing:
Copy rules
Starting in Firefox 41, there are extra context menu items in the Rules view to copy rules, and pieces of rules, to the clipboard:
- Copy Rule
- Copy Selector
- Copy Property Declaration
- Copy Property Name
- Copy Property Value

See also
The Inspector also includes a number of specialized tools for working with particular CSS features, such as colors, fonts, and animations. To read about these see the list of how to guides.


