- Fix: Right Click Not Working on Windows 10
- 1. Turn off the Tablet Mode
- Method 1: Turn off Tablet Mode in Action Center
- Method 2: Turn off Tablet mode Through Settings
- Method 3: Use System Registry Editor to Turn Off Tablet Mode (Advanced Users Only)
- 2. Use Shell Extension Manager Application for Windows
- 3. Executing DISM Commands
- 4. Run the SFC Scan
- 5. Remove Registry Items
- 6: Uninstall/Disable Conflicting Applications
- 7: Update Drivers
- Мышь: клики, кнопка, координаты
- Типы событий мыши
- Простые события
- Комплексные события
- Порядок срабатывания событий
- Получение информации о кнопке: which
- Правый клик: oncontextmenu
- Модификаторы shift, alt, ctrl и meta
- Координаты в окне: clientX/Y
- Относительно документа: pageX/Y
- Особенности IE8-
- Двойной клик
- Свойство which/button
- Свойства pageX/pageY
- Итого
- Задачи
- Дерево: проверка клика на заголовке
- Подсказка
- Подсказка 2
Fix: Right Click Not Working on Windows 10
In Windows 10, you may encounter an issue whereby the right click does not work (or rather, the context menu doesn’t appear). In some cases right-clicking on the mouse works erratically; sometimes responding and others just remain still.
 Mouse
Mouse
However, if you take a look at the WinX folder all the shortcuts in there will work seamlessly when directly clicked. You can even see the event viewer.
But before moving on with the solutions, make sure the mouse is properly working, to do so, plug the mouse into another system (laptop/ desktop) and check if the right-click is working. For a wireless mouse, replace its batteries and then try the undermentioned solutions. Moreover, disable any network drives/cards during the troubleshooting process. It will be a good idea to unplug all the USB devices except the Mouse. Make sure there is no disk in the CD/DVD ROM. To be sure if the problem is hardware or software related, boot the system in Safe Mode and check if right-click is working. If you are using the PC in a corporate environment, then check with your IT administrator if any group policy is restricting the right-click.
Repair Corrupt System Files
Download and run Restoro to scan and restore corrupt and missing files from here, once done proceed with the solutions below. It is important to ensure that all system files are intact and not corrupt before proceeding with the solutions below.
1. Turn off the Tablet Mode
The failure of the right-click function can be directly attributed to TABLET mode being activated on your computer. You cannot do most of the right-click operations while in this mode. There are many ways to turn off the tablet mode on your Windows 10 PC.
Method 1: Turn off Tablet Mode in Action Center
- For this option, press the combination keys WINDOWS + A, or click on the system icon for Action Center which is usually located in the taskbar notification zone.
- Navigate to the bottom of the Action Center and then click or tap on Tablet Mode. It is a two – way toggle between ON and OFF, so do it according to your preference. Once done, test to see if the right-click now works.
 Turn Off Tablet Mode in Action Center
Method 2: Turn off Tablet mode Through Settings
- Go to Settings and click on System.
- On the left-hand side, you will see the line Tablet Mode. Click on it.
- Now on the right side identify the phrase “Make Windows more touch-friendly when using your device as a tablet”. Turn it off.
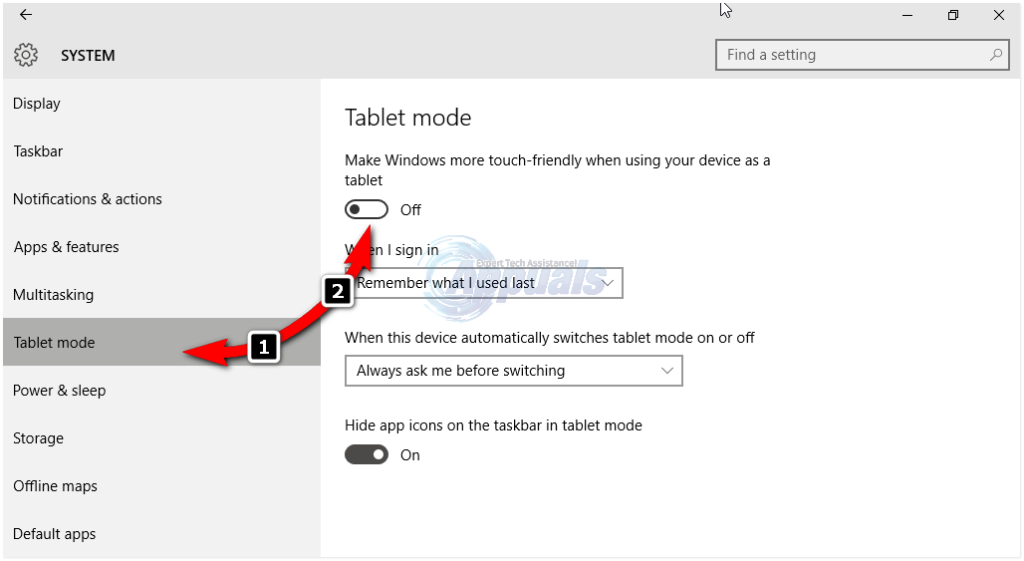 Turn Off Tablet Mode in Settings
In case you need to enable Tablet mode, just do the same thing as above but this time turn the button ON.
Take note of the options just under this instruction; they may come in handy for future interactions. There are options for the mode that initiates immediately after you sign in. You can let the system automatically switch to tablet mode on signing in, go to the desktop, or just use the last signing in mode. There are also some more options for how the system notifies you when tablet mode is on automatic mode.
Method 3: Use System Registry Editor to Turn Off Tablet Mode (Advanced Users Only)
- Go to “Run”. In Run, key in the word Regedit.exe or just Regedit. The registry editor appears.
 Opening the Registry Editor
 - Navigate to the path
- When you click on the folder ImmersiveShell, on the right-hand side locate the DWORD/entry TabletMode. To turn off tablet mode, change its value to 0.
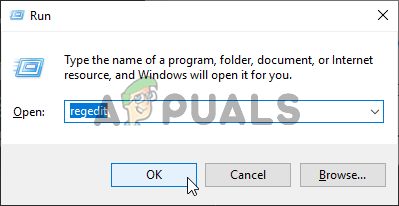 Opening the Registry Editor
2. Use Shell Extension Manager Application for Windows
The right-click problem is sometimes also caused by third party extensions on context menus. There is a utility that can help you get rid of these extensions effectively without much struggle.
- DownloadShell Extension Manager.
- After completion of the download, launch the application using your keyboard (Shift+F10) and then select “run as administrator”. No installation is required here.
- On the menu that appears select Options. Click Filter by Extension Type and then opt for Context Menu.
- A list will be shown. Take note of the items having a pink background. They are the entries installed by 3 rd party software.
- Press and hold the CTRL key and then click on all the entries having a pink background. On the left corner, click the red button to disable them all.
- Again under Options, Restart Explorer.
- Right-click on your desktop now and see if the problem has been resolved. If so, start enabling the 3 rd party extensions one by one.
- If once again the right click problem occurs, it is most certainly the last 3 rd party extension you enabled. Disable it, or just completely uninstall its parent software or program if necessary.
3. Executing DISM Commands
The Disk health may be damaged due to which the right-click is not working on the computer. Therefore, in this step, we will be checking and repairing the Disk Health. For that:
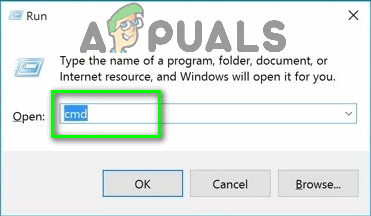
- Press “Windows” + “R” keys simultaneously and type in cmd. Type “cmd” into the Run dialog
- Press the “Shift” + “Ctrl” + “enter” keys simultaneously to open an elevated command prompt.
- Type in the following commands one by one and press “enter” after each
- After the process finishes, check to see if the issue persists.
 Type “cmd” into the Run dialog
4. Run the SFC Scan
It is possible that a certain driver or “.dll” file is missing or has been corrupted. Therefore, in this step, we will be initiating an SFC scan to check and repair this issue. For that:
- Press “Windows” + “R” keys simultaneously and type in cmd. Type “cmd” into the Run dialog
- Press the “Shift” + “Ctrl” + “enter” keys simultaneously to open an elevated command prompt.
- Type in the following command and press “Enter” to execute it Running SFC scan
- Wait while the system is being scanned and check to see if the issue persists after the scan is completed.
 Running SFC scan
5. Remove Registry Items
Sometimes, the error is fixed simply by deleting certain registry entries. If the registry configurations have been corrupted or are wrongly configured they can prevent certain elements of the operating system from functioning correctly. To fix that:
- Press “Windows” + “R” to open the run prompt. Opening Run Prompt
- Type in “Regedit” and press “Enter”.Running the Registry Editor
- Navigate to the following path Navigate to the indicated path
- Delete all the Folders in EXCEPT the following
- Right-click on any folder except for the ones indicated above and select “Delete” from the list to remove them. Delete Entries like these
 Opening Run Prompt
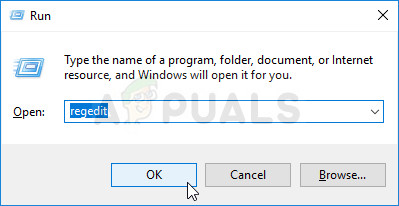 Running the Registry Editor
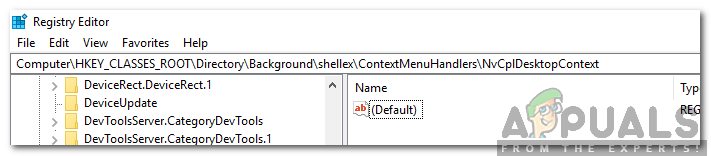 Navigate to the indicated path
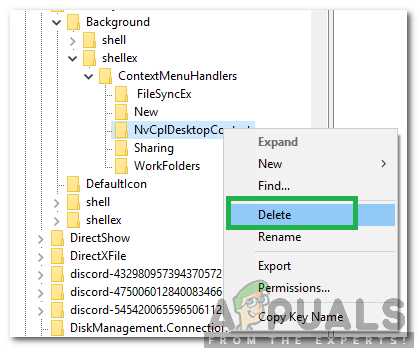 Delete Entries like these
WARNING: During the above steps, you may lose your desktop after disabling stuff and you will be left with nothing to work on for the rest of the processes. If this occurs, just press Ctrl-Alt-Del. In the task manager, select the file tab, run a new task and then key in explorer.exe. Your desktop will come up immediately.
6: Uninstall/Disable Conflicting Applications
There are known applications that cause the mouse error under discussion. These third-party applications usually take control of your HID and then sometimes, they go in an error state which causes the loss of functionality. In that case, uninstalling/disabling these applications may solve the problem. Following is a list of such applications:
- HP Display Control (PdiShellExt.dll )
- Symantec System Recovery
- 7zip
- WinZip
If you have installed any of these applications then either disable them or uninstall/reinstall them. This list might not be complete so keep a lookout for these type of applications. You can also consider starting your computer in safe mode to diagnose the problem.
7: Update Drivers
Drivers are the main components connecting your system hardware and operating system. If any of the drivers are corrupted or outdated, then updating to the latest version may solve the problem. Drivers get corrupt usually because of a bad Windows update and get outdated if they are not updated alongside a Windows update.
- Press Windows key and type Device Manager. Then in the results, click on Device Manager. Device Manager in Windows Search Box
- Now in the device Manager, expand your Display Adapters and right-click your Graphics Driver and then click on Update Driver. Update Graphics Driver
- Then select “Search Automatically For Updated Driver Software” Searching automatically for newer driver software
- You can also use your graphics card manufacturer website to update the driver. This is a known issue for Laptops with Dual GPU and Optimus technology. If you are using such a laptop, then download the official Intel driver to fix the issue.
- Also, Nvidia applications and drivers are known to create this issue. Uninstall all Nvidia applications/drivers and use Microsoft’s driver for your Graphics card to check if the problem is solved.
- Repeat the same process to update the driver of your mouse located under Mice and Other Pointing Devices.
- A good idea would be to update Windows, so that, all drivers are updated.
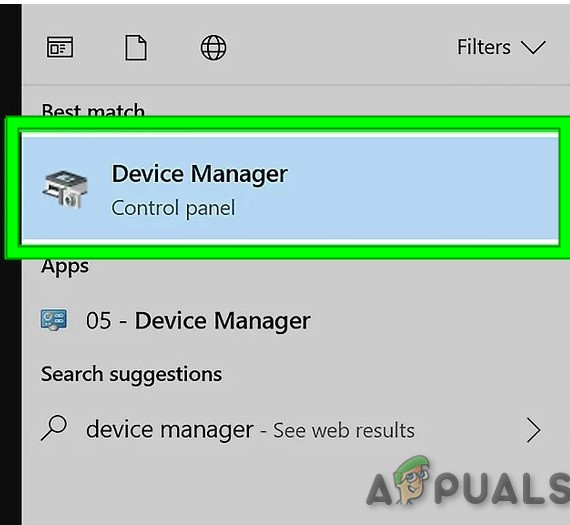 Device Manager in Windows Search Box
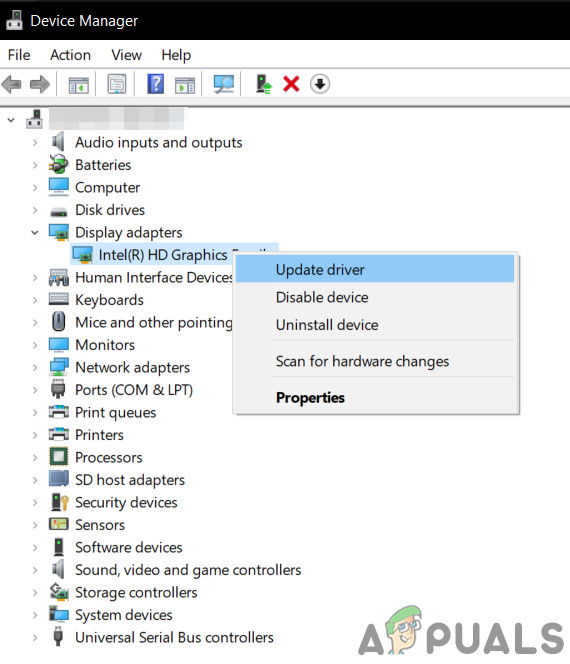 Update Graphics Driver
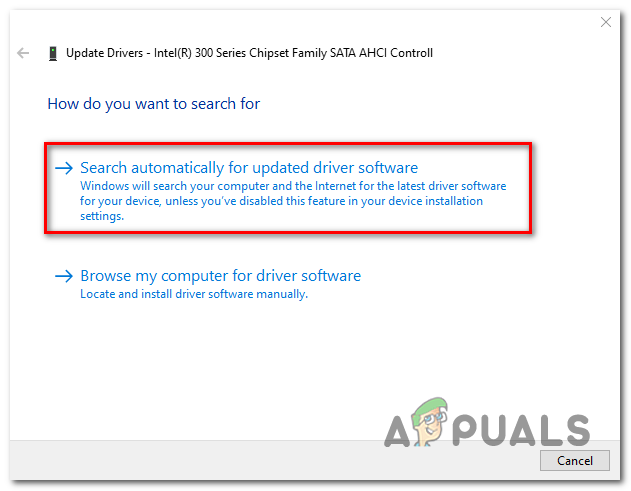 Searching automatically for newer driver software
If nothing has helped you so far, then either perform a system restore or reset Windows. But before doing any, make sure the mouse is not faulty.
Мышь: клики, кнопка, координаты
Материал на этой странице устарел, поэтому скрыт из оглавления сайта.
Более новая информация по этой теме находится на странице https://learn.javascript.ru/mouse-events-basics.
В этой главе мы глубже разберёмся со списком событий мыши, рассмотрим их общие свойства, а также те события, которые связаны с кликом.
Типы событий мыши
Условно можно разделить события на два типа: «простые» и «комплексные».
Простые события
Комплексные события
Комплексные можно составить из простых, поэтому в теории можно было бы обойтись вообще без них. Но они есть, и это хорошо, потому что с ними удобнее.
Порядок срабатывания событий
Одно действие может вызывать несколько событий.
Например, клик вызывает сначала mousedown при нажатии, а затем mouseup и click при отпускании кнопки.
В тех случаях, когда одно действие генерирует несколько событий, их порядок фиксирован. То есть, обработчики вызовутся в порядке mousedown → mouseup → click .
Кликните по кнопке ниже и вы увидите, какие при этом происходят события. Попробуйте также двойной клик.
На тест-стенде ниже все мышиные события записываются, и если между событиями проходит больше 1 секунды, то они для удобства чтения отделяются линией. Также присутствуют свойства which/button , по которым можно определить кнопку мыши. Мы их рассмотрим далее.
Каждое событие обрабатывается независимо.
Например, при клике события mouseup + click возникают одновременно, но обрабатываются последовательно. Сначала полностью завершается обработка mouseup , затем запускается click .
Получение информации о кнопке: which
При обработке событий, связанных с кликами мыши, бывает важно знать, какая кнопка нажата.
Для получения кнопки мыши в объекте event есть свойство which .
На практике оно используется редко, т.к. обычно обработчик вешается либо onclick – только на левую кнопку мыши, либо oncontextmenu – только на правую.
Возможны следующие значения:
- event.which == 1 – левая кнопка
- event.which == 2 – средняя кнопка
- event.which == 3 – правая кнопка
Это свойство не поддерживается IE8-, но его можно получить способом, описанным в конце главы.
Правый клик: oncontextmenu
Это событие срабатывает при клике правой кнопкой мыши:
При клике на кнопку выше после обработчика oncontextmenu будет показано обычное контекстное меню, которое браузер всегда показывает при клике правой кнопкой. Это является его действием по умолчанию.
Если мы не хотим, чтобы показывалось встроенное меню, например потому что показываем своё, специфичное для нашего приложения, то можно отменить действие по умолчанию.
В примере ниже встроенное меню показано не будет:
Модификаторы shift, alt, ctrl и meta
Во всех событиях мыши присутствует информация о нажатых клавишах-модификаторах.
Например, кнопка ниже сработает только на Alt+Shift+Клик:
На компьютерах под управлением Windows и Linux есть специальные клавиши Alt , Shift и Ctrl . На Mac есть ещё одна специальная клавиша: Cmd , которой соответствует свойство metaKey .
В большинстве случаев там, где под Windows/Linux используется Ctrl , на Mac используется Cmd . Там, где пользователь Windows нажимает Ctrl + Enter или Ctrl + A , пользователь Mac нажмёт Cmd + Enter или Cmd + A , и так далее, почти всегда Cmd вместо Ctrl .
Поэтому, если мы хотим поддерживать сочетание Ctrl +click или другие подобные, то под Mac имеет смысл использовать Cmd +click. Пользователям Mac это будет гораздо комфортнее.
Более того, даже если бы мы хотели бы заставить пользователей Mac использовать именно Ctrl +click – это было бы затруднительно. Дело в том, что обычный клик с зажатым Ctrl под Mac работает как правый клик и генерирует событие oncontextmenu , а вовсе не onclick , как под Windows/Linux.
Решение – чтобы пользователи обоих операционных систем работали с комфортом, в паре с ctrlKey нужно обязательно использовать metaKey .
В JS-коде это означает, что для удобства пользователей Mac нужно проверять if (event.ctrlKey || event.metaKey) .
Координаты в окне: clientX/Y
Все мышиные события предоставляют текущие координаты курсора в двух видах: относительно окна и относительно документа.
Пара свойств clientX/clientY содержит координаты курсора относительно текущего окна.
При этом, например, если ваше окно размером 500×500, а мышь находится в центре, тогда и clientX и clientY будут равны 250.
Можно как угодно прокручивать страницу, но если не двигать при этом мышь, то координаты курсора clientX/clientY не изменятся, потому что они считаются относительно окна, а не документа.
Проведите мышью над полем ввода, чтобы увидеть clientX/clientY :
В той же системе координат работает и метод elem.getBoundingClientRect() , возвращающий координаты элемента, а также position:fixed .
Относительно документа: pageX/Y
Координаты курсора относительно документа находятся в свойствах pageX/pageY .
Так как эти координаты – относительно левого-верхнего узла документа, а не окна, то они учитывают прокрутку. Если прокрутить страницу, а мышь не трогать, то координаты курсора pageX/pageY изменятся на величину прокрутки, они привязаны к конкретной точке в документе.
В IE8- этих свойств нет, но можно получить их способом, описанным в конце главы.
Проведите мышью над полем ввода, чтобы увидеть pageX/pageY (кроме IE8-):
В той же системе координат работает position:absolute , если элемент позиционируется относительно документа.
Некоторые браузеры поддерживают свойства event.x/y , event.layerX/layerY .
Эти свойства устарели, они нестандартные и не добавляют ничего к описанным выше. Использовать их не стоит.
Особенности IE8-
Двойной клик
Все браузеры, кроме IE8-, генерируют dblclick в дополнение к другим событиям.
- mousedown (нажал)
- mouseup+click (отжал)
- mousedown (нажал)
- mouseup+click+dblclick (отжал).
IE8- на втором клике не генерирует mousedown и click .
- mousedown (нажал)
- mouseup+click (отжал)
- (нажал второй раз, без события)
- mouseup+dblclick (отжал).
Поэтому отловить двойной клик в IE8-, отслеживая только click , нельзя, ведь при втором нажатии его нет. Нужно именно событие dblclick .
Свойство which/button
В старых IE8- не поддерживалось свойство which , а вместо него использовалось свойство button , которое является 3-х битным числом, в котором каждому биту соответствует кнопка мыши. Бит установлен в 1, только если соответствующая кнопка нажата.
Чтобы его расшифровать – нужна побитовая операция & («битовое И»):
- !!(button & 1) == true (1-й бит установлен), если нажата левая кнопка,
- !!(button & 2) == true (2-й бит установлен), если нажата правая кнопка,
- !!(button & 4) == true (3-й бит установлен), если нажата средняя кнопка.
Что интересно, при этом мы можем узнать, были ли две кнопки нажаты одновременно, в то время как стандартный which такой возможности не даёт. Так что, в некотором смысле, свойство button – более мощное.
Можно легко сделать функцию, которая будет ставить свойство which из button , если его нет:
Свойства pageX/pageY
В IE до версии 9 не поддерживаются свойства pageX/pageY , но их можно получить, прибавив к clientX/clientY величину прокрутки страницы.
Более подробно о её вычислении вы можете прочитать в разделе прокрутка страницы.
Мы же здесь приведём готовый вариант, который позволяет нам получить pageX/pageY для старых и совсем старых IE:
Итого
События мыши имеют следующие свойства:
- Кнопка мыши: which (для IE8-: нужно ставить из button )
- Элемент, вызвавший событие: target
- Координаты, относительно окна: clientX/clientY
- Координаты, относительно документа: pageX/pageY (для IE8-: нужно ставить по clientX/Y и прокрутке)
- Если зажата спец. клавиша, то стоит соответствующее свойство: altKey , ctrlKey , shiftKey или metaKey (Mac).
- Для поддержки Ctrl + click не забываем проверить if (e.metaKey || e.ctrlKey) , чтобы пользователи Mac тоже были довольны.
Задачи
Дерево: проверка клика на заголовке
Есть кликабельное JavaScript-дерево UL/LI (см. задачу Раскрывающееся дерево).
При клике на заголовке его список его детей скрывается-раскрывается. Выглядит это так: (кликайте на заголовки)
Однако, проблема в том, что скрытие-раскрытие происходит даже при клике вне заголовка, на пустом пространстве справа от него.
Как скрывать/раскрывать детей только при клике на заголовок?
В задаче Раскрывающееся дерево это решено так: заголовки завёрнуты в элементы SPAN и проверяются клики только на них. Представим на минуту, что мы не хотим оборачивать текст в SPAN , а хотим оставить как есть. Например, по соображениям производительности, если дерево и так очень большое, ведь оборачивание всех заголовков в SPAN увеличит количество DOM-узлов в 2 раза.
Решите задачу без обёртывания заголовков в SPAN , используя работу с координатами.
Исходный документ содержит кликабельное дерево.
P.S. Задача – скорее на сообразительность, однако подход может быть полезен в реальной жизни.
Подсказка
У события клика есть координаты. Проверьте по ним, попал ли клик на заголовок.
Самый глубокий узел на координатах можно получить вызовом document.elementFromPoint(clientX, clientY).
…Но заголовок является текстовым узлом, поэтому эта функция для него работать не будет. Однако это, всё же, можно обойти. Как?
Подсказка 2
Можно при клике на LI сделать временный SPAN и переместить в него текстовый узел-заголовок.
После этого проверить, попал ли клик в него и вернуть всё как было.
На шаге 3 текстовый узел вынимается обратно из SPAN , всё возвращается в исходное состояние.


