- Design Agony: 3 Awkward Window Problems Solved + Shoppable Solutions
- Design Agony #1: Awkward Corner Windows
- Option #1: Frame Both Windows With Long Panels
- Option #2: Two Sets of Panels with Roman Shades
- Option #3: Rethink Separate Drapery Rods
- Drape Rod Corner Clips
- Drapery Rod Corner Connector
- Iron Curtain Rod Elbow 90 Degree
- Cambria Complete Corner Connector
- Option #1: Use Bay Window-Specific Drapery Rods
- Option #2: Try Separate Rods
- Option #3: Think Outside the Corners
- Option #4: Skip the Panels Altogether
- Curtains
- Easily create and add additional style modes to Windows 10.
- Features
- Apply
- Create
Design Agony: 3 Awkward Window Problems Solved + Shoppable Solutions
Hello friends, it’s Ginny—former EHD team member—here with the first installment of Design Agony 2.0. If you are a longtime Em Hendo reader, you might remember the Design Agony posts that we used to do a few years ago (take a walk down blog memory lane here to see what I mean). Well, we’re back by popular demand. In Emily’s post from February announcing the blog’s upcoming relaunch (and a handful of other great news), we made a call out for reader submissions with design problems that needed expert solutions.
We had a bunch of great Qs come in, and, not surprisingly, most of the questions revolved around window treatment challenges. Off the back of this post in March, it was evident that people really struggle with how to tackle awkward window placement within their homes, and rightly so…can we just stop building weird homes with weird window locations. Architects out there…do you hear me?
Anyhow, let’s dive in. I picked through the emails to pluck out problems I thought might be the most universal. For each, I’ll give you insight as to what I’d do to solve the issue and hopefully help more than just the readers that submitted the questions.
Design Agony #1: Awkward Corner Windows
From reader Emily Redding: “Our house is laid out so that many of the windows are bunched into the corners. Small windows next to larger windows, and they’re so close to the corners that figuring out how to dress them properly has been tough. I can’t decide if we should do Roman shades, a mix of Roman shades and double panels, or a curtain rod that bends through the corners and covers all the windows, with panels for both.”

Option #1: Frame Both Windows With Long Panels
Emily (Reading, not Henderson) has this issue in pretty much all of the bedrooms in her house and for me, she has the right idea by adding shades and drapery. I’m personally not the biggest fan of having one drapery panel for a window, though, because (I think) drapery should frame out a window on both sides. That being said, there are cases where it does work better and is necessary for functional purposes. I remember Emily (Henderson) and I going back and forth deciding whether to do one or two panels in her old family room and guest bedroom. In this case, functionality won because of how close the doors were to the wall and it would be super annoying to have to keep going behind the drapery to open the door.
In the case of Emily Reading’s question, I would add two drapery panels to each window. That will not only give good light coverage when needed but also, it will feel super cozy. I would also raise the drapery rod so that it’s a couple of inches lower than the ceiling since there isn’t a lot of header space above the window. This will help the room feel taller, as well. Hot tip: Using clip-on rings helps the drapes gather more closely so there isn’t a big bunch of fabric on each side of the window (considering how tight that corner is).

Option #2: Two Sets of Panels with Roman Shades
With this scenario, I would take advantage of the deep window recesses and add a Roman shade to each. This will not only block out the light really well, it will also help to soften the windows, detracting from the different sizes. You could do this with either a fabric Roman shade or woven shade.

Option #3: Rethink Separate Drapery Rods
When doing off-the-shelf drapery and rods, one way to help it feel seamless is to use an elbow connector for the corner. These screw into rods and can be angled up to 90 degrees for cases like this. These are perfect for tight corners where there isn’t much room to affix rods to the wall, so your panels end up right at the edge of the window instead of a few inches out (like they should be). Elbow connectors can also be used for bay windows (which I’ll touch upon later). As far as where to put the panels, Emily could still use two-panel sets, collecting two of them in the corner.

The only instance where I would avoid doing drapery in the corner is if the window was a full wraparound, like this bedroom below from Amber Interiors. This would end up blocking the light and view. A wall or ceiling track will be your best bet for what to use in this fix.
 image source
Here are a few different types of elbow connectors. You’ll have to match up the diameter of your curtain rod with these (some are thinner than others), but they are also rather standard. Also, these come in multiple finishes:

Drape Rod Corner Clips
Drapery Rod Corner Connector
Iron Curtain Rod Elbow 90 Degree
Cambria Complete Corner Connector
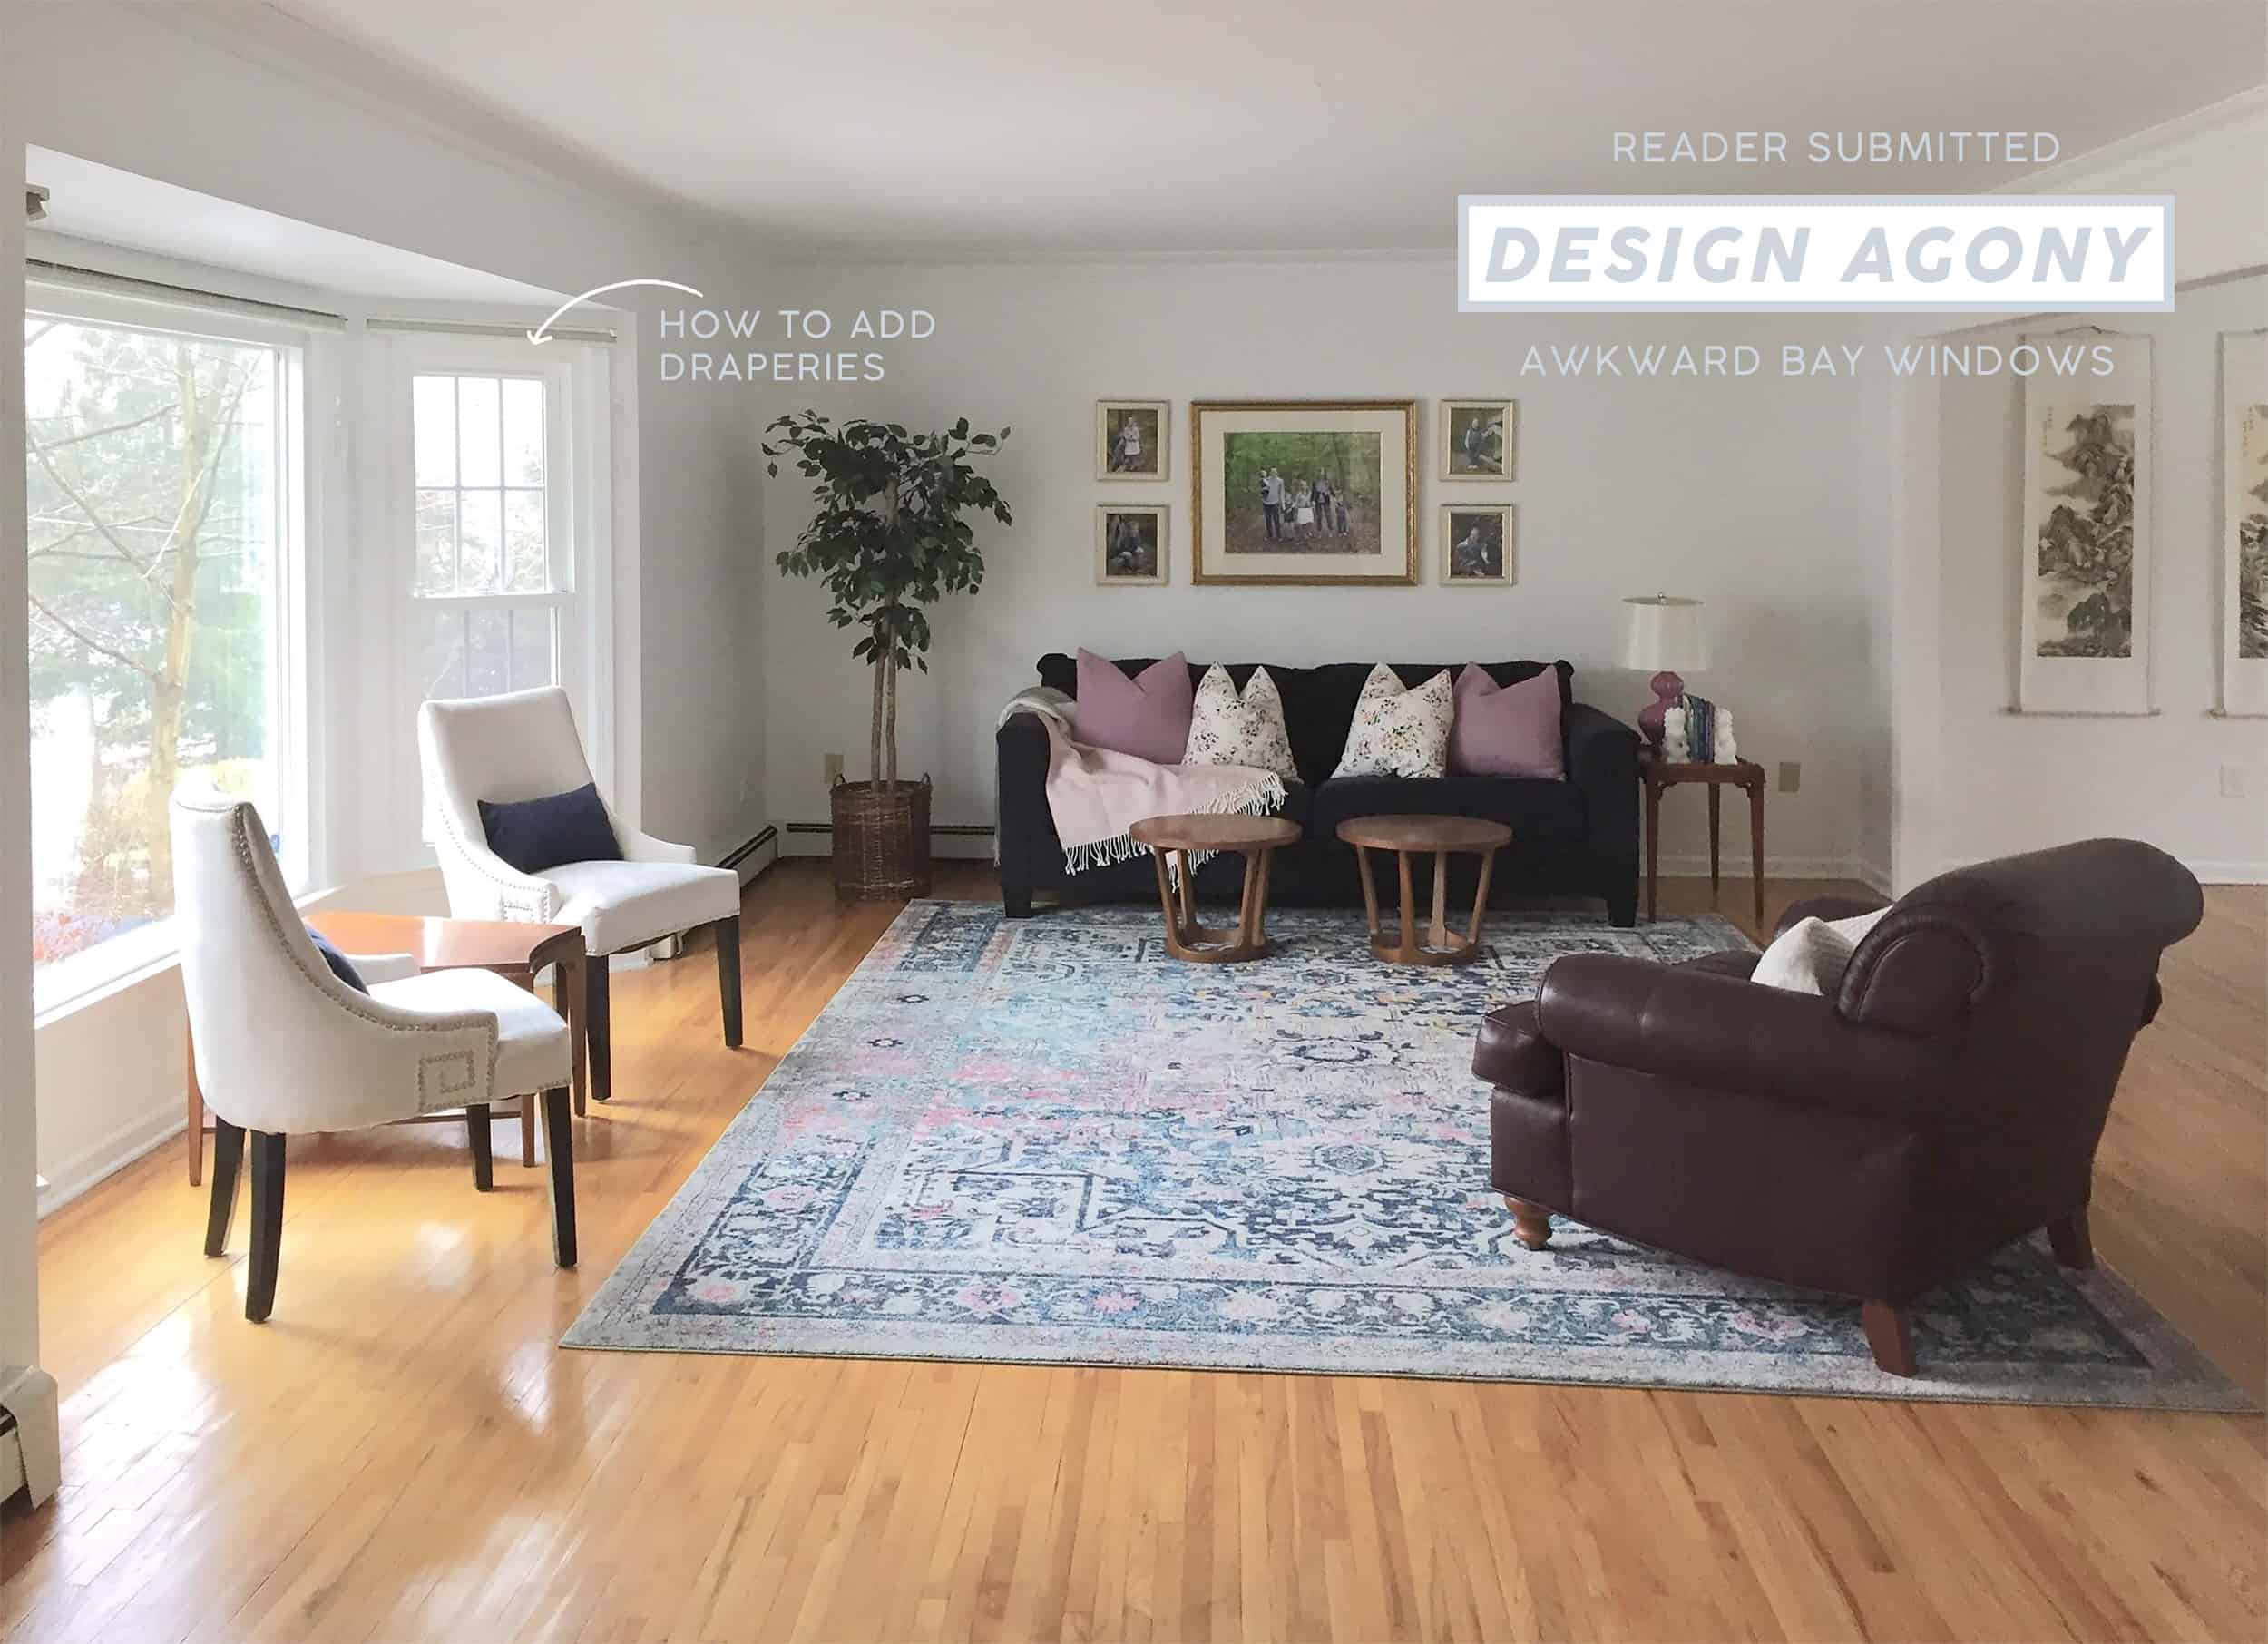
Design Agony #2: How to Add Drapes to Bay Windows
 Photo by Tessa Neustadt for EHD
From reader Nicole Rowland: “Your post today on window treatments inspired me to send you some pictures of my living room. I’ve been searching for and researching some affordable curtain options for a long time. Then in your blog post, you recommended hanging Roman shades with no mention of curtains. Are curtains always a ‘no’ when it comes to bay windows? I have attached a picture and link of the curtains and rods I purchased. I am planning to hang a bay window rod with four curtains—one on each side of the three windows. Do you think these will work or is it better to do a Roman shade in my situation? The living room also opens up into the dining area where there is another normal window, so I was going to hang a matching rod and the same curtains in a longer length to match. Would love to know if I’m doing the right thing!”
Now, Em wrote about bay windows in the last post addressing what to do with awkward windows but she only touched on adding shades as a solution and didn’t talk about how to work panels in. Nicole (who submitted this question) was curious about our thoughts to installing drapery. Growing up in the UK with Victorian-style houses, we have a lot of bay windows which I absolutely love! For Nicole’s window, I would suggest going with what she already had planned and use a readymade bay window rod and drapery panels. She has the space for them to gather well without reducing the light and it’ll be a nice, soft backdrop for her sitting area. But let’s talk through her other options in case they happen to work for another one of you readers.
Option #1: Use Bay Window-Specific Drapery Rods
We can’t take full credit for the bay window treatment in the dining room at the lead of this section, because they were installed before we started working on the project, but it’s a good example of how drapery can work. This rod was a custom piece to fit the space, which you can tell because it’s only attached in the center and the ends. This makes it so you only have to have two end drapes that close in the middle, but that’s not the only way. Did you know that there are readymade options specifically for bay windows? These are great because you’re not having to splurge too much, but the drawback is they have several wall attachments, meaning you have to have a drapes where the corner angles meet.

Option #2: Try Separate Rods
If Nicole didn’t want to bother with a super niche solution, she could also just use three separate rods. The rod would have to be free of any large finials (or else they’d butt into each other), and will likely hit just at the edge of the window, but it’s doable.

Option #3: Think Outside the Corners
There’s always the option to simply not deal with the several corners of a bay window at all and just put draperies straight across the wall outside of the bay window. This only really works if you have little to no furniture in the window nook (or have a built-in bench). For Nicole (should she want to go this route), I’d recommend moving the chairs and table out from that area and onto the rug. That way the curtains could close she they need to.

Option #4: Skip the Panels Altogether
Lastly, f or a cleaner look, another option is to use shutters. This is not uncommon in the UK and mainly done because we have radiators underneath our windows, so adding drapery might not be the best solution there. That’s also why you might see half-height drapery done so often over there…I know, we’re nuts!

While you could definitely use the elbow connectors in the roundup above, there are also rod systems made specifically for the bay window, as I mentioned. Here are four of the most common styles (each comes in a handful of finishes):
Curtains
Easily create and add additional style modes to Windows 10.


- Add new «modes» to Windows® 10
- Create and share your own styles
- Customize the Start button, title bar buttons, and title bar
- Adjust hundreds of other small elements in Windows
Features
Apply
Curtains works similarly to the modes that Microsoft has implemented. Any app that already supports the existing dark and light modes will automatically benefit from Curtains.
Stardock Curtains includes several new styles, like Crystal, Sky and Midnight. It also includes styles that let you change Windows to look like previous versions (XP, Windows 95, etc.) as well as alternative operating systems.


Create
Using the built-in style editor, you can easily create and share your own styles. A Curtains style can change everything that Light and Dark mode can change, including the Start button, title bar buttons, and title bar coloring. It also supports tweaking gradients, shadows opacity, and hundreds of other small elements of the Windows GUI.
Curtains makes it very easy for people to create their own styles. There are a lot of customization features that have been buried in recent years, such as font faces and sizes, detailed color choices, and much more.


