Custom URI Schemes On Windows
Have you ever wondered how entering mailto:blah@spam.com into the URL field in your web browser automatically brings up your mail app (i.e. Outlook for most Windows users)? Well you’re in luck because this article explains it all. Enjoy!
Ok, now that you’ve read that article let’s take a closer look at how you, as a Xojo developer, can handle this. Well, as you’ve diligently read in the above article, the first step is to register your application to handle a particular URI scheme by modifying the registry. The preferred approach is to do this as part of your Application’s installation process because at that point the user has given access rights to install your app and access rights therefore to modify the registry. This is the general structure as discussed in the MSDN article:
Where “alert” is your URI scheme, so if you navigate to a URI like alert:Hello, your web browser will launch your application with an extra command line argument: “alert:Hello”
The MSDN article goes into detail about how spaces, quotes, or backslashes affect your command line arguments depending on how the URI is invoke (i.e. Web Browser vs. ShellExecute/Run command). The take home message is just to avoid spaces, quotes, or backslashes in your URI if possible.
If you simply want to create a quick test to see how this works, you could execute the following Xojo code to add this URI scheme to the registry:
Because you’re modifying the registry, you will need to run your application as administrator (i.e. contextual/right click your app and select “Run as administrator” in the menu). This will add the necessary registry entries.

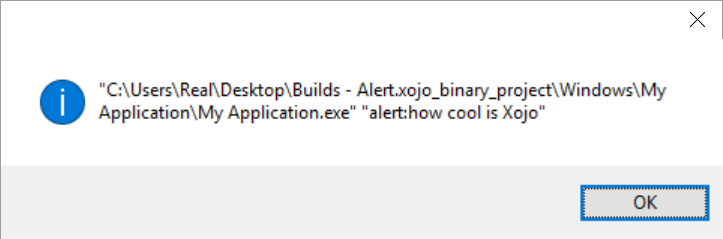
After this is done, your URI scheme is ready to be tested. Launch Internet Explorer and enter “alert:hello” in the URL field. After pressing Enter, your Application that added those registry entries will be launched. Now all you need to do is check the System.CommandLine property to see what alert message was passed. For example, if I added a MsgBox System.CommandLine to my App.Open event, I’d get something like this after entering “alert:how cool isXojo” in the URL field in Internet Explorer.
As you can see it’s very easy to set this up and handle the custom URI schemes in your application. Just be aware of the potential security issues that malicious people could be passing to your command line and handle those appropriately.
To use custom URIs on Mac OS X visit this post: Let Your OS X Desktop App React to Custom URIs
Custom url scheme windows
Custom URL scheme Cordova/PhoneGap Plugin
launch your app by a link like this: mycoolapp://


— This Apache Cordova issue causes problems with Cordova-iOS 3.7.0: the handleOpenURL function is not invoked upon cold start. Use a higher or lower version than 3.7.0.
— As of iOS 9.2, the dialog Open in «mycoolapp»? no longer blocks JS, so if you have a short timeout that opens the app store, the user will be taken to the store before they have a chance to see and answer the dialog. See below for available solutions.
This plugin allows you to start your app by calling it with a URL like mycoolapp://path?foo=bar
- Compatible with Cordova Plugman
- Submitted and waiting for approval at PhoneGap Build (more information)
- Forget about using config.xml to define a URL scheme. This plugin adds 2 essential enhancements:
- Uniform URL scheme with Android (for which there is no option to define a URL scheme via PhoneGap configuration at all).
- You still need to wire up the Javascript to handle incoming events. This plugin assists you with that.
- Tested on iOS 5.1, 6 and 7.
- Unlike iOS, there is no way to use config.xml to define a scheme for your app. Now there is.
- Tested on Android 4.3, will most likely work with 2.2 and up.
- If you’re trying to launch your app from an In-App Browser it opened previously, then use this In-App Browser plugin fork which allows that.
- In case you have a multi-page app (multiple HTML files, and all implementing handleOpenURL), set the preference CustomURLSchemePluginClearsAndroidIntent to true in config.xml so the function won’t be triggered multiple times. Note that this may interfere with other plugins requiring the intent data.
Automatically (CLI / Plugman)
LaunchMyApp is compatible with Cordova Plugman. Replace mycoolapp by a nice scheme you want to have your app listen to:
Latest release on npm:
Bleeding edge master version from Github:
(Note that the Phonegap CLI didn’t support —variable before version 3.6.3, so please use the Cordova CLI as shown above in case you’re on an older version)
The LaunchMyApp.js file is brought in automatically.
Note for iOS: there was a bug in CLI which caused an error in your *-Info.plist . Please manually remove the blank line and whitespace (if any) from NSMainNibFile and NSMainNibFile
ipad (or your app won’t start at all).
Don’t shoot yourself in the foot — use the CLI! That being said, here goes:
1. Copy www/ios/LaunchMyApp.js to www/js/plugins/LaunchMyApp.js and reference it in your index.html :
2. Add this to your *-Info.plist (replace URL_SCHEME by a nice scheme you want to have your app listen to, like mycoolapp ):
1. Copy www/android/LaunchMyApp.js to www/js/plugins/LaunchMyApp.js and reference it in your index.html :
2. Add the following xml to your config.xml to always use the latest version of this plugin:
3. Copy LaunchMyApp.java to platforms/android/src/nl/xservices/plugins (create the folders)
4. Add the following to your AndroidManifest.xml inside the /manifest/application/activity node (replace URL_SCHEME by a nice scheme you want to have your app listen to, like mycoolapp ):
5. In AndroidManifest.xml set the launchMode to singleTask to avoid issues like [#24].
Using LaunchMyApp with PhoneGap Build requires you to add the following xml to your config.xml to use the latest version of this plugin (replace mycoolapp by a nice scheme you want to have your app listen to):
The LaunchMyApp.js file is brought in automatically.
NOTE: When Hydration is enabled at PGB, this plugin may not work.
Restoring cordova plugin settings on plugin add or update
In order to be able to restore the plugin settings on cordova plugin add , one need to add the following feature into config.xml. Note that if you added the plugin with the —save param you will find this in your config.xml already, except for the variable tag which is likely a param tag. Change that.
Please notice that URL_SCHEME is saved as variable , not as prop . However if you do cordova plugin add with a —save option, cordova will write the URL_SCHEME as a prop , you need to change the tag name from param to variable in this case.
These plugin restore instructions are tested on: cordova-cli 4.3.+ and cordova-android 3.7.1+
1a. Your app can be launched by linking to it like this from a website or an email for example (all of these will work):
mycoolapp is the value of URL_SCHEME you used while installing this plugin.
1b. If you’re trying to open your app from another PhoneGap app, use the InAppBrowser plugin and launch the receiving app like this, to avoid a ‘protocol not supported’ error:
2. When your app is launched by a URL, you probably want to do something based on the path and parameters in the URL. For that, you could implement the (optional) handleOpenURL(url) method, which receives the URL that was used to launch your app.
If you want to alert the URL for testing the plugin, at least on iOS you need to wrap it in a timeout like this:
A more useful implementation would mean parsing the URL, saving any params to sessionStorage and redirecting the app to the correct page inside your app. All this happens before the first page is loaded.
A common method of deeplinking is to give the user the URL of a webpage (for instance http://linker.myapp.com/pathfoo) that opens the app if installed or the app store if not. This can be done in the following ways, depending on the desired UX:
- The page content has a button that says «Install app» and when clicked opens the app store by doing location.href = ‘itms-apps://itunes.apple.com/us/app/mycoolapp/idfoo’ . On page load, do location.href = ‘mycoolapp://pathfoo’ . If the user has the app, they will see a dialog that says Open in «mycoolapp»? [Cancel] [Open] . If the user does not have the app, they will see an alert that says Cannot Open Page: Safari cannot open the page because the address is invalid . Once they dismiss the alert, they see the button that opens the app store, and they tap it.
- The page has two buttons: one that opens the app, and one that opens the app store.
- On page load, open a Universal Link using cordova-universal-links-plugin. (A Universal Link either opens the app or the app store.) Then fall back to one of the above methods if Univeral Links is not supported.
You can also use a service that provides pages that do #3 for you, such as Branch.
CSP — or: handleOpenURL doesn’t work
The Whitelist plugin will prevent inline JS from executing, unless you whitelist the url scheme. Please see this SO issue for details.
Meteor / getLastIntent (Android only)
When running a meteor app in the cordova environment, handleOpenURL doesn’t get called after a cold start, because cordova resets the javascript world during startup and our timer waiting for handleOpenURL gets vanished (see #98). To get the intent by which the app was started in a meteor cordova app you need to ask for it from the meteor side with getLastIntent like this.
4. URL Scheme hints
Please choose a URL_SCHEME which which complies to these restrictions:
- Don’t use an already registered scheme (like fb , twitter , comgooglemaps , etc).
- Use only lowercase characters.
- Don’t use a dash — because on Android it will become underscore _ .
- Use only 1 word (no spaces).
TIP: test your scheme by installing the app on a device or simulator and typing yourscheme:// in the browser URL bar, or create a test HTML page with a link to your app to impress your buddies.
Permission is hereby granted, free of charge, to any person obtaining a copy of this software and associated documentation files (the «Software»), to deal in the Software without restriction, including without limitation the rights to use, copy, modify, merge, publish, distribute, sublicense, and/or sell copies of the Software, and to permit persons to whom the Software is furnished to do so, subject to the following conditions:
The above copyright notice and this permission notice shall be included in all copies or substantial portions of the Software.
THE SOFTWARE IS PROVIDED «AS IS», WITHOUT WARRANTY OF ANY KIND, EXPRESS OR IMPLIED, INCLUDING BUT NOT LIMITED TO THE WARRANTIES OF MERCHANTABILITY, FITNESS FOR A PARTICULAR PURPOSE AND NONINFRINGEMENT. IN NO EVENT SHALL THE AUTHORS OR COPYRIGHT HOLDERS BE LIABLE FOR ANY CLAIM, DAMAGES OR OTHER LIABILITY, WHETHER IN AN ACTION OF CONTRACT, TORT OR OTHERWISE, ARISING FROM, OUT OF OR IN CONNECTION WITH THE SOFTWARE OR THE USE OR OTHER DEALINGS IN THE SOFTWARE.
Launching applications using custom browser protocols
Contents
A very practical version of an Action Menu Item (AMI) is a variant that will run an application or a script on your local computer. For this to work you need to set up a connection between your browser and the script or application you wish to run. This link is called a custom browser protocol.
You may want to set up a type of link where if a user clicks on it, it will launch the [foo] application. Instead of having ‘http’ as the prefix, you need to designate a custom protocol, such as ‘foo’. Ideally you want a link that looks like:
foo://some/info/here .
The operating system has to be informed how to handle protocols. By default, all of the current operating systems know that ‘http’ should be handled by the default web browser, and ‘mailto’ should be handled by the default mail client. Sometimes when applications are installed, they register with the OS and tell it to launch the applications for a specific protocol.
As an example, if you install RV, the application registers rvlink:// with the OS and tells it that RV will handle all rvlink:// protocol requests to show an image or sequence in RV. So when a user clicks on a link that starts with rvlink:// , as you can do in Shotgun, the operating system will know to launch RV with the link and the application will parse the link and know how to handle it.
Registering a protocol
Registering a protocol on Windows
On Windows, registering protocol handlers involves modifying the Windows Registry. Here is a generic example of what you want the registry key to look like:
The target URL would look like:
Windows QT/QSetting example
If the application you are developing is written using the QT (or PyQT / PySide) framework, you can leverage the QSetting object to manage the creation of the registry keys for you.
This is what the code looks like to automatically have the application set up the registry keys:
Windows example that starts a Python script via a Shotgun AMI
A lot of AMIs that run locally may opt to start a simple Python script via the Python interpreter. This allows you to run simple scripts or even apps with GUIs (PyQT, PySide or your GUI framework of choice). Let’s look at a practical example that should get you started in this direction.
Step 1: Set up the custom “shotgun” protocol
Using Windows Registry Editor:
This setup will register the shotgun:// protocol to launch the python interpreter with the first argument being the script sgTriggerScript.py and the second argument being %1 . It is important to understand that %1 will be replaced by the URL that was clicked in the browser or the URL of the AMI that was invoked. This will become the first argument to your Python script.
Note: You may need to have full paths to your Python interpreter and your Python script. Please adjust accordingly.
Step 2: Parse the incoming URL in your Python script
In your script you will take the first argument that was provided, the URL, and parse it down to its components in order to understand the context in which the AMI was invoked. We’ve provided some simple scaffolding that shows how to do this in the following code.
Python script
Step 3: Connect the Shotgun interface with your custom protocol and ultimately, your script
Finally, create an AMI in Shotgun whose URL value will be shotgun://processVersion . You can assign this AMI to any entity type you wish, but this example uses the Version entity.
Go to a Version page, right-click on a version and select your AMI from the menu. This should make your browser open a shotgun:// URL which will be redirected to your script via the registered custom protocol.
In the output.txt file in the same directory as your script you should now see something like this:
Possible variants
By varying the keyword after the // part of the URL in your AMI, you can change the contents of the action variable in your script, all the while keeping the same shotgun:// protocol and registering only a single custom protocol. Then, based on the content of the action variable and the contents of the parameters, your script can understand what the intended behavior should be.
Using this methodology you could open applications, upload content via services like FTP, archive data, send email, or generate PDF reports.
Registering a protocol on OSX
To register a protocol on OSX you need to create a .app bundle that is configured to run your application or script.
Start by writing the following script in the AppleScript Script Editor:
Pro tip: To ensure you are running Python from a specific shell, such as tcsh, you can change the do shell script for something like the following:
In the Script Editor, save your short script as an “Application Bundle”.
Find the saved Application Bundle, and Open Contents. Then, open the info.plist file and add the following to the plist dict:
You may want to change the following three strings:
The third string is the protocol handler; therefore a URL would be:
shotgun://something
Finally, move your .app bundle to the Applications folder of your Mac. Then double click on it—that will register your protocol with the operating system.
The data flow looks like this: once you click the AMI in Shotgun, or click a URL that starts with shotgun:// , the .app bundle will respond to it and pass the URL over to your Python script. At this point the same script that was used in the Windows example can be used and all the same possibilities apply.
Registering a protocol on Linux
Use the following code:
Then use the settings from your local GConf file in the global defaults in:
/etc/gconf/gconf.xml.defaults/%gconf-tree.xml
Even though the change is only in the GNOME settings, it also works for KDE. Firefox and GNU IceCat defer to gnome-open regardless of what window manager you are running when it encounters a prefix it doesn’t understand (such as foo:// ). So, other browsers, like Konqueror in KDE, won’t work under this scenario.


