- 3.7. Cutting Tools
- 3.7.1 Polygon Cut
- 3.7.2 Inverse Polygon Cut
- 3.7.3 Delete Area
- 3.7.4 Delete All Areas except Selected Area
- 3.7.5 Cutting Tools Parameters
- 3.7.6 Sphere Cut, Sphere Restore and Restore by Mask Tools
- 3.7.7 Tools for intelligent volume editing
- 3.7.8 Remove Table
- Free Video Cutter Software in 2021
- 12 Free Video Cutters and Joiners for Windows and Mac
- Desktop Apps
- Free Video Cutter
- Gihosoft Free Video Cutter
- Weeny Free Video Cutter
- iTech Video Cutter
- Free Video Cutter Joiner
- MediaFreeware Free Video Cutter
- Bandicut Video Cutter
- MP4Tools
- Online Tools
- Online Video Cutter
- Clipchamp
- Kapwing
- Ezgif Video Cutter
- How to Choose a Video Cutter and Joiner
- Frequently Asked Questions
3.7. Cutting Tools
There are several cutting tools on the right toolbar.
3.7.1 Polygon Cut
The tool allows you to build a polygon or an area with smooth borders that the cut area is projected on.
To build a polygon:
- Activate the Polygon Cut tool by clicking the left/right/middle mouse button. To continue work with this tool, use the button with which the tool was activated. To learn more about tool control, see Section 1.14 .
- Click the mouse button to set the apices of the polygon marking the figure to be cut, except the last point.
- Fix the last point by double-clicking the mouse.
- To cancel an incomplete building, press Esc .
To build an area with smooth borders (Lasso mode):
- Activate the Polygon Cut tool by clicking the left/right/middle mouse button. To continue work with this tool, use the button with which the tool was activated. To learn more about tool control, see Section 1.14 .
- Press and hold the Shift key on the keyboard.
- Circle the area to be cut, holding down the mouse button.
- To complete the building, release the mouse button or click another mouse button.
- To cancel an incomplete building, press Esc .
The part of the model to be projected on the area will be cut.
3.7.2 Inverse Polygon Cut
The tool is similar to the previous one, except that the part of the model not to be projected on the area will be cut. To activate/deactivate the tool, use the  button on the toolbar.
3.7.3 Delete Area
The tool allows you to delete an area of a 3D model not associated with its other parts.
Activate/deactivate the  tool by clicking the left/right/middle mouse button. To continue work with this tool, use the button with which the tool was activated. To learn more about tool control, see Section 1.14 .
3.7.4 Delete All Areas except Selected Area
The tool is similar to the previous one, except that all areas excluding the selected area are deleted. To activate/deactivate the tool, use the  button on the toolbar.
3.7.5 Cutting Tools Parameters
For the Delete Area and Delete All Areas except Selected Area tools, the following parameters can be set:
- Grow from surface (mm) . The tissue surrounding the deleted area will be deleted too. This parameter specifies the distance from the surface on which the tissue will be deleted. If this parameter is set to zero, the model surface may look rough, so use a value of zero only if necessary.
- Min object thickness (mm) . If the value is greater than zero, the tissue with a thickness less than the set value will be ignored during deletion.
The parameters for each tool are set separately.
To set these parameters, click on the arrow on the right side of the appropriate tool button and select the Parameters. item and in the dialog box that appears, specify the required values.
3.7.6 Sphere Cut, Sphere Restore and Restore by Mask Tools
The Brush cut , Brush restore  and Restore by mask
  tools allow to remove tissue within a sphere or cylinder and restore the tissue deleted by cutting tools. To select one of these tools ( Brush cut , Brush restore , Restore by mask ) and modes ( Sphere , Cylinder ), click the arrow on the right side of the tool buttons. The button will look different depending on the tool that was used last:
The Brush restore and Restore by mask tools are assigned to the same button. To select a tool, click on the arrow on the right side of the tool selection button. The button looks different, depending on the tool selected:
| | Brush restore (is selected by default) |
| | Restore by mask |
To select one of modes ( Sphere , Cylinder ), click the arrow on the right side of the tool buttons. The same mode is chosen for Brush restore and Restore by mask tools.
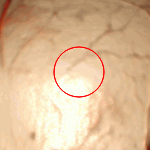
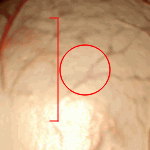
The cursor will look different depending on the mode that is selected. The cursor for the Sphere mode is shown in Fig. 3.3 , and the cursor for the Cylinder mode is shown in Fig. 3.4 .
To activate/deactivate the tool, click on the left side of the tool button. If any tool is activated, the button is highlighted.
- Activate the
 Brush cut tool by clicking the left/right/middle mouse button. To continue work with this tool, use the button with which the tool was activated. To learn more about tool control, see Section 1.14 .
 - Set the tool diameter, moving the mouse while holding the Alt key.
- For the Cylinder mode, set the height if it is necessary. To do it, click the arrow on the right side of the tool button and select the Cylinder settings. item. In the dialog box that appears, set the cut height.
- Click the mouse button in the place where you want to cut tissue. Part of the tissue will be cut. The green dot indicates where the great circle of the sphere (the base area of the cylinder) touches the surface of the model. The great circle passes through the center of the sphere and is parallel to the plane of the screen.
- Repeat steps 3 and 4 if necessary.
 Brush cut tool by clicking the left/right/middle mouse button. To continue work with this tool, use the button with which the tool was activated. To learn more about tool control, see Section 1.14 .
The Brush restore tool allows you to perform the reverse process of brush cutting.
The Restore by mask tool allows you to restore tissue by mask (this tool is used for segmentation). If mask is not set, this mode is analogous to the Brush restore mode. For details how to set mask, see Section 6.2.3 .
3.7.7 Tools for intelligent volume editing
Functionality is available in the Pro edition
____________________________________________________________________________________________
The Grow (dilation) , Shrink (erosion) , Fill and Cut invisible volume tools allow to edit tissue within special algorithms. The Multi-segment growing tool allows you to edit segmented structures. To select one of these tools, click the arrow on the right side of the tool buttons. The button will look different depending on the tool that was used last:
 | Grow (dilation) (set by default) |
 | Shrink (erosion) |
 | Remove noise (opening) |
 | Remove holes (closing) |
 | Multi-segment growing |
 | Fill |
 | Cut invisible volume |
The Grow (dilation) tool allows you to increase the volume by a certain value from the surface in one iteration. This value is specified in the Settings menu of this tool (parameter Growing radius ). The increase is possible only within the original volume, for example, after the use of cutting tools. When you use this tool to edit a segmented structure, an increase is possible only within the mask. The tool is used to fine-tune the structure if, initially, the required volume was not obtained.
The Shrink (erosion) tool performs the opposite action. The reduction value is specified by the parameter Growing/Shrinking radius .
The Remove noise (opening) tool allows to remove noise from the volume. This tool is equivalent to the consistently applied tools Shrink (erosion) and Grow (dilation) .
The Remove holes (closing) tool allows to remove little holes from the volume. This tool is equivalent to the consistently applied tools Grow (dilation) and Shrink (erosion) .
The Multi-Segment Growing tool allows you to simultaneously build several structures and base volume. It is used to edit segmented structures (see Section 6.4.6 ). If the tool is applied only to the base volume, then it works like the Grow (dilation) tool.
The Fill tool allows you to fill the voids in the volume. If you are working with segmented structures, the tool is used to improve structures, built on a «grainy» mask. Such masks are typical, for example, for kidneys.
The Cut invisible volume tool sets the mask according to the visible volume.
3.7.8 Remove Table
The tool allows you to delete areas resembling the medical equipment table. To delete, click the  button on the toolbar.
 | Some objects that have been misrecognized as the modality table may be deleted by mistake. |
To undo or redo the last action associated with cutting, use the Undo  and Redo
  buttons.
Free Video Cutter Software in 2021
Whether you’re making videos for social sharing or just making home movies, free video cutter software can be really useful. With a free video cutter and joiner, you can remove mistakes, make your video punchier or combine multiple clips into one. Free video cutter software can also be a creative tool: you can make fast-cutting music videos or make talking heads more dramatic by cutting from camera to camera or clip to clip.
In this guide, we’ve looked at the best free video cutter software for PCs and Macs.
| Software | Supported Formats | OS |
|---|---|---|
| Movavi Video Editor Plus | 3GPP, ASF, AVI, VOB, FLV, MP4, M2TS, WMV, MPG, MOV, MKV, M2T, MPG, MP4, MOV, WTV, WebM, VP8 | Windows, Mac |
| Gihosoft Free Video Cutter | AVI, MP4, MOV, M4V, WMV, MKV, MPEG, MPG, FLV, ASF, WebM | Windows, Mac |
| Weeny Free Video Cutter | 3GP, ASF, AVI, FLV, MP4, MPG, RM, RMVB, VOB, WMV | Windows |
| Online Video Cutter | Almost every video format | Web browser |
12 Free Video Cutters and Joiners for Windows and Mac
Desktop Apps
Free Video Cutter
Free Video Cutter supports key video formats including MPEG1/2, MPEG4, DivX, Xvid, AVI, WMV, MOV and more. Open the video you want to cut, tell Free Video Cutter where you’d like it to start and finish the cut, and then select the output format. You can also use Free Video Cutter to extract audio from a video file and output to MP3. It’s very straightforward and very effective, and if you dig into the settings you can change the defaults to make more precise cuts or disable its thumbnail feature, which can slow things down with really big video files.
- It’s very easy to use.
- It’s very good for straightforward cutting.
- It doesn’t have any other editing features.
- You may need to turn its thumbnails off.
Gihosoft Free Video Cutter
Gihosoft claims that this is the easiest two-in-one free video trimmer and joiner software, but this app only does cutting: if you want to join videos you’ll need its free sibling, Gihosoft Free Video Joiner. You can download this video cutter software for Windows or Mac.
One of the key attractions here is that Gihosoft Free Video Cutter is lossless: if you’re not converting from one format to another it doesn’t need to re-render the video after you’ve made your cut(s).
This video trimmer is easy to use. Open the file you want to trim, set the desired start and end times, and then click on OK to make the cut. And that’s it.
- Support for all the key video and audio formats.
- No need to re-render the video when you’re done.
- Video joining isn’t in this app; that’s a separate download.
- Cutting is this app’s sole function.
Weeny Free Video Cutter
As with other free video cutters Weeny Free Video Cutter covers essentials such as MP4 and WMV, but it also includes older formats that aren’t so widely supported such as 3GP and RM. The app is for Windows 7 or later.
Weeny can cut videos into segments and then re-order them, which is useful if you’re dealing with really big original files and want to make subsequent editing easier. It’s also handy if you want to cut massive files into more manageable chunks.
It’s very straightforward and works well enough, but you might find that the scroll bar is a little fiddly: it can be tricky getting it to the perfect position.
- You can change the order of your clips.
- The app supports many older file formats.
- The video scroll bar can be a bit fiddly.
- It’s quite basic.
iTech Video Cutter
iTech Video Cutter has been around for years and it’s still in version 1.0, so don’t expect regular updates. The interface looks much like a video player and that’s essentially what it is: the interface is a large video window with a few buttons at the bottom. Like other free video cutter apps iTech Video Cutter keeps it simple: set the start and end points for your clip, hit the button and it’ll do the rest. The app will save in the same format as the original file: there are no conversion options here.
- There’s a wide range of supported formats including audio.
- It’s very simple to use.
- There are no video conversion options.
- It hasn’t been updated for a long time.
Free Video Cutter Joiner
Free Video Cutter Joiner is a Windows app that enables you to join your clipped clips and save the result as a single file. It works on PCs running any version of Windows since Windows XP, and while there’s a Mac version available for download that one is very old and has been replaced by another app, Video Scissors for Mac.
Free Video Cutter Joiner offers a tabbed interface: one for cutting and one for joining. It supports AVI, MP4 and MOV as well as some older file formats, and we love the developer’s lack of hype: on their website they say that cutting video is “quite fast”.
- It can join clips together as well as cut them.
- It works on pretty much any PC.
- The Mac version is obsolete, replaced by Video Scissors.
- Cutting is quick but re-encoding can be slow.
MediaFreeware Free Video Cutter
MediaFreeware Free Video Cutter includes a preview so you can make sure everything is just-so before saving it.
The interface is a simple one-window affair with timing, output options and playback controls below the video preview. You can drag and drop files into it, and it supports the key AVI, MPG and MP4 formats. There are no joining features or other video editing features here: preview aside this is a stripped-down, no-frills tool that’s designed to do one thing with the minimum of fuss.
- You can preview the video without saving it.
- It’s very simple and straightforward to use.
- It’s purely a cutter: it doesn’t join or otherwise edit video.
- It doesn’t support as many file formats as other apps.
Bandicut Video Cutter
Bandicut is a video cutting and joining app for Windows. The free version limits the supported files to AVI, MP4 and MOV and watermarks the results; unfortunately some of the best features of the paid-for version, such as video joining, fast cutting and high speed encoding, aren’t available to free users.
- The video cutter is nice and friendly.
- It runs on any version of Windows from Vista to Windows 10.
- The free version is very limited.
- Free users’ videos are watermarked.
MP4Tools
MP4Tools is two apps: a video joiner app, MP4Joiner, and a free MP4 cutter, MP4Splitter. MP4Splitter makes it easy to split a video file into multiple ones, and MP4Joiner makes it easy to join clips into a single file without quality loss or re-encoding.
Although MP4Tools is available for the Mac, you’re likely to encounter issues: you’ll need to override your Mac’s security to install it, and while exporting is quick the app’s interface is very slow even on a powerful Mac.
- Simple and effective MP4 file splitting and joining.
- You can choose whether or not to re-encode video.
- It’s only for MP4 files.
- The interface is very slow on a Mac.
Online Tools
Online Video Cutter
Online Video Cutter makes it easy to cut, trim, crop and rotate videos, and you can also change the playback speed. It should work in any browser – we tested it in Safari on the Mac, which isn’t always supported by online apps, and it worked just fine – and the only limit is that your file size can’t exceed 500MB. The app enables you to export in MP4, MKV or MOV format and you can choose a fast no-encode option if your source and destination formats are the same.
- It’s really straightforward to use.
- It works in any web browser.
- It only exports in a few file formats.
- You can’t use files bigger than 500MB.
Clipchamp
Clipchamp is a freemium service: it offers a free tier, but the best stuff is reserved for paying customers. If you don’t subscribe the free video trimmer is easy to use and includes some useful editing features, but your video output is limited to standard definition at 480p resolution. If you’re on a Mac you’ll need to use the Chrome or Edge browser: Safari isn’t supported.
- It’s great for social media sharing.
- You can add video and audio from its stock library.
- The free version is limited to 480p standard definition.
- It doesn’t work on Apple’s Safari.
Kapwing
Kapwing is a simple video cutter. It shows a preview of your video at the left of the screen, and you can then use the sliders or timestamps to select the start and end times for your cut. It then previews the results before you save your video clip. Kapwing is freemium: free users are limited to files of 250MB and exports are limited to 7 minutes long.
- It’s simple and effective.
- It previews your clip before you export it.
- Free users are limited to 250MB files and seven minutes of exported video per clip.
- Free users can only publish 3 hours of video per month.
Ezgif Video Cutter
Ezgif.com offers a collection of animation and video tools on its website, and like those tools this is a simple video cutter for people who don’t need tons of options. Simply upload your file or paste its URL into the form, set the cutting points and Ezgif Video Cutter will then cut and export the file. It supports MP4, WebM, AVI, FLV, MOV and others, but uploads are limited to 100MB. If you need to resize or crop videos, there are tools here for that too.
- Video cutting doesn’t get much simpler than this.
- You can paste URLs as well as upload video files.
- Your upload file size is limited to 100MB.
- Cutting video can take some time.
How to Choose a Video Cutter and Joiner
- Desktop or Online. If you want to cut a short video and don’t need other features, choose an online video cutter.
- Supported formats. Make sure the app supports the video format(s) you’re using.
- Editing features. Some video editors can join clips or add filters, transitions, text and titles. Think about the features you might want to use in your video.
Frequently Asked Questions
- Shotcut
- OpenShot
- VSDC Video Editor
- VideoPad Video Editor
- AVS Video Editor
To check the full list of the best video editors, click the link below.
You can cut a video using a video editor or an online tool. We recommend you using a video editor, for example Movavi Video Editor Plus, since online tools usually have limited file size and functionality. To learn how to cut a video with Movavi Video Editor Plus, check the guide below.
Yes, you can trim videos using VLC media player. Read the step-by-step guide to learn how to trim videos with VLC:


