- Installing OpenCV for Python on Windows using Anaconda or WinPython
- Step 1: Installing Anaconda
- Step 2: Installing OpenCV
- Installing through WinPython
- Step 1: Install WinPython
- Step 2: Installing OpenCV
- Install OpenCV-Python in Windows
- Goals
- Installing OpenCV from prebuilt binaries
- Building OpenCV from source
- Шпаргалка по OpenCV — Python
- Что такое OpenCV?
- Содержание
- Установка
- Импорт и просмотр изображения
- Кадрирование
- Изменение размера
- Поворот
- Перевод в градации серого и в чёрно-белое изображение по порогу
- Размытие/сглаживание
- Рисование прямоугольников
- Рисование линий
- Текст на изображении
- Распознавание лиц
- Contours — распознавание объектов
- Сохранение изображения
- Заключение
Installing OpenCV for Python on Windows using Anaconda or WinPython
Pranav sreedhar b
Mar 10, 2019 · 6 min read
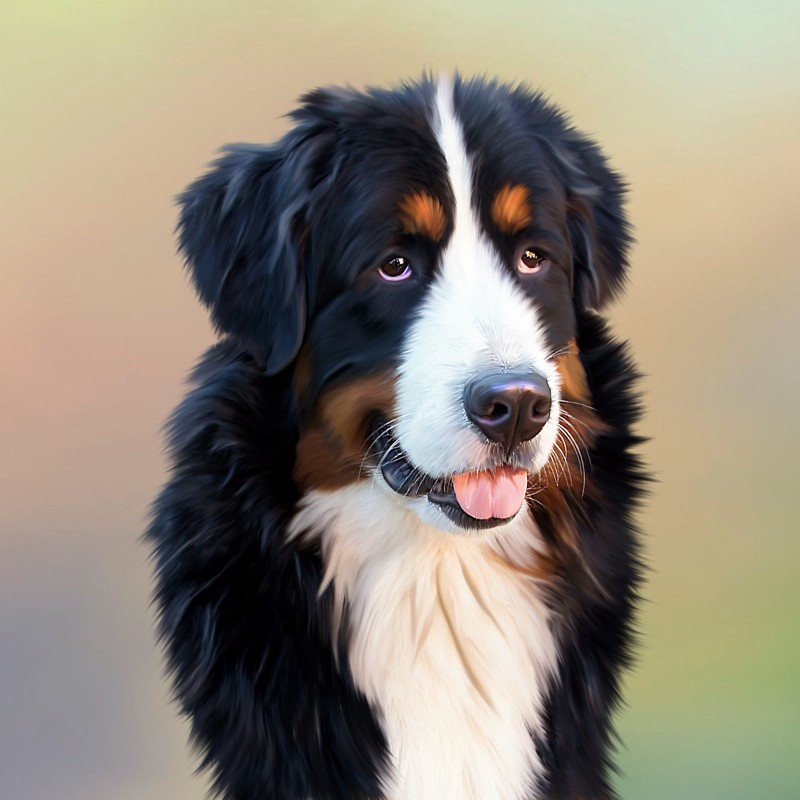
OpenCV is a popular library for Image processing and Computer Vision. Using python with OpenCV combines the simplicity of python with the capabilities of the versatile OpenCV library.
Using the Windows platform to foray into data science and computer visio n is a popular choice especially among beginners. Anaconda is the first choice distribution for scientific python particularly on Windows. If a more portable setup is required to say run on a pendrive then I recommend using the WinPython distribution. Both setups allow for installing OpenCV in a straightforward way although it could be misleading for an absolute beginner. The first part explains the step-by-step process of installing OpenCV on Anaconda, the second part explains installing OpenCV on WinPython.
Step 1: Installing Anaconda
Download the latest Anaconda graphical installer for Windows from https://www.anaconda.com/distribution/ and check for the Windows architecture on your computer. If its 64-bit then choose the 64 bit graphical installer or else choose the 32-bit installer. Choose Python 3.7 for working with Python 3. This is the preferred option as python 2.7 is reaching its End-Of-Life by 2020.

By default the website prompts us to download the macOS installer so click Windows before clicking Download.
Launch the graphical installer and we will be prompted to choose for which user to install.
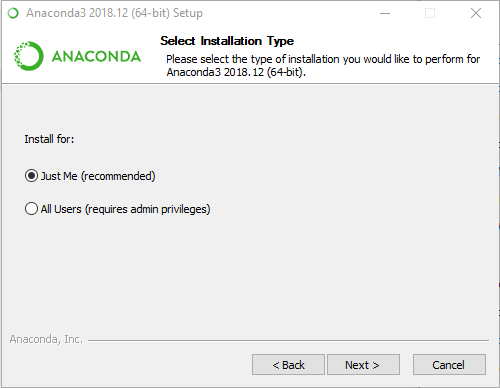
Choosing “Just Me” is recommended as choosing All Users would require administrator privileges whenever we are modifying Anaconda(as will be illustrated later).

If we chose “Just Me” then the above dialog will be displayed with the default location being “C:\Users\ \Anaconda3” whereas choosing “All Users” would display the following dialog:

The key is to use a path without spaces between folder names as this can create conflicts for Anaconda later( as it will prompt us when we try to choose such a name).

Continue to install with the default option of “Register Anaconda as the system Python 3.7” if we don’t have other versions of python or other distributions installed.
It takes a few minutes for installation to complete. Once completed we may be prompted to optionally install VSCode as an IDE. We may skip this option if we wish to do so.
Step 2: Installing OpenCV
Right. Lets now come to the actual goal of installing OpenCV for python.
Launch the Anaconda prompt from the start menu:

We should see a similar prompt if we went according to instructions.

if you chose “All users” while installing then you have to launch the prompt by Right-clicking and choosing “ Run as Administrator” to execute with administrator privileges. This is critical.
If we wish to install OpenCV in a separate environment, we need to create an new environment( replace opencv with any name in the command below, note the symbol “ — ” is a double hyphen, best to copy-paste followed by editing “opencv” to a name you prefer):
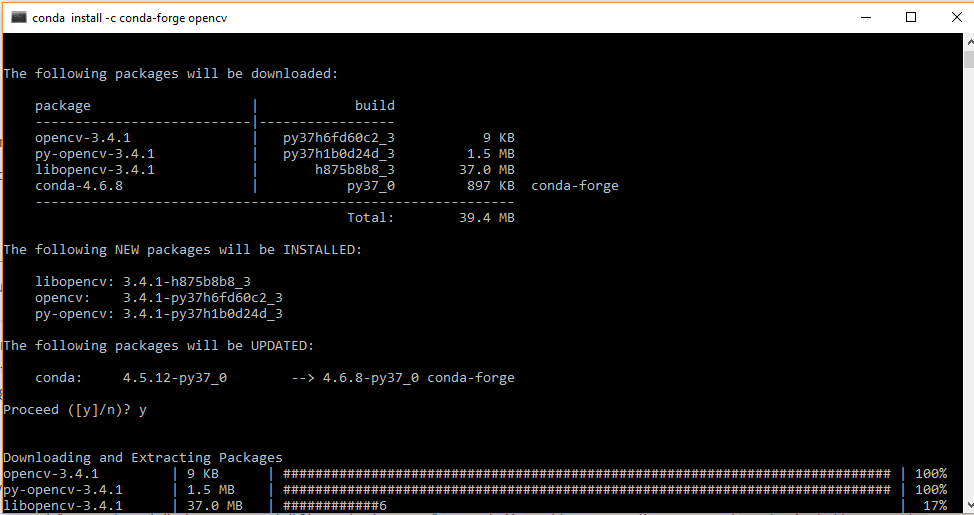
To install the OpenCV we need to type the following command at the prompt:

We can alternatively choose to install through anaconda navigator graphical interface. type in “ opencv” in search packages search bar. choose to install all the listed packages.
The prompt will show that it is “solving environment”. It takes quite a bit of time if you are on slower Internet connection.

Try to use faster Internet, preferably a wired connection for uninterrupted and best results. if you are in a work or institution based Internet connection then it is likely that an HTTP timeout will occur and we need to enter the command once again and restart the procedure.

Once the environment is resolved by conda it will list the packages that will be installed, namely: opencv, libopencv, py-opencv.
Enter y to proceed with the installation.

If you chose “All Users” then “executing transaction” will fail with the message “PermissionError(13,’Access is denied’)”


We can verify if the installation was successful by launching the python interpreter. opencv is referred to as cv2 in python. Type at the prompt:
if the prompt is displayed then opencv then python has successfully imported the opencv library. But we should also verify the version of opencv so we need to type:
as of March 2019 the version displayed is 3.4.1 which is the officially supported version of opencv by anaconda environment. If we want to work with a different version then while installing we can specify the version as “opencv=3.4.1″ as shown below

Similar steps can be followed to install OpenCV on anaconda for MacOS.
Installing through WinPython
Step 1: Install WinPython
Winpython is a more portable way to work with python projects on windows. We can visit the homepage at http://winpython.github.io . We can download the latest release for up to date packages.
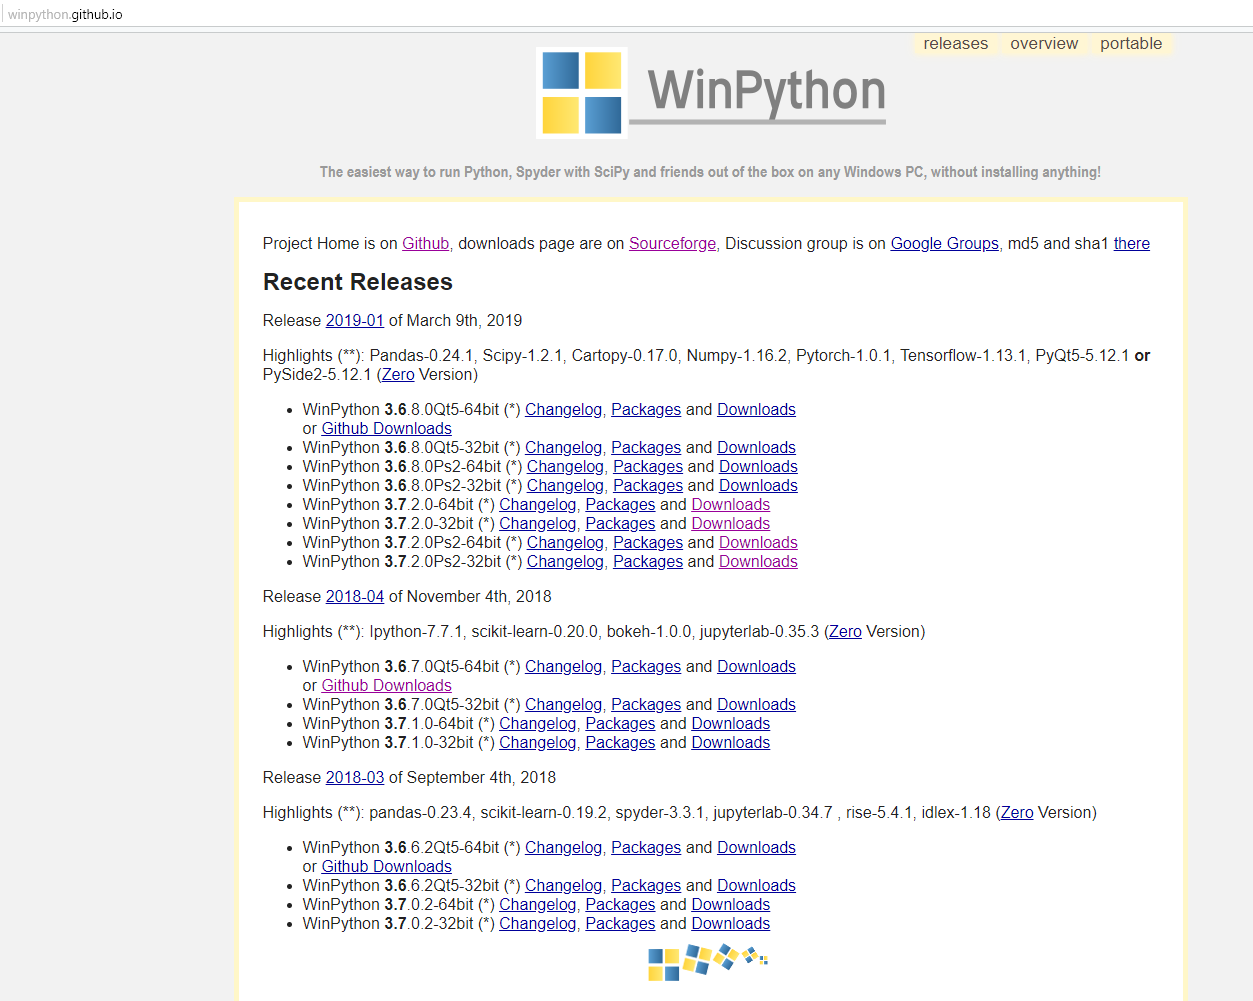
It is preferable to download from the github Releases page of WinPython: https://github.com/winpython/winpython/releases. The reason being the default link from the homepage redirects to sourceforge.net which restricts the download speed quite considerably(around 200KBps). like in Anaconda choose the correct version for the target architecture(64 bit vs 32 bit). The Zero version is the minimalistic version with pretty much bare python without most of the other extra packages( no Spyder, Jupyter etc.)


Step 2: Installing OpenCV
Installing OpenCV in WinPython is quite easy. launch the WinPython Command Prompt.exe to get the prompt. Enter the command.
verify the installation like in anaconda with
Thats it! We have successfully installed openCV for python on Windows using Anaconda as well as WinPython.
Hoping this helps you to explore different computer vision algorithms available in OpenCV!
To install Tensorflow especially for GPU I found an article by Harveen Singh which was helpful for me :
Install OpenCV-Python in Windows
Goals
Below steps are tested in a Windows 7-64 bit machine with Visual Studio 2010 and Visual Studio 2012. The screenshots shows VS2012.
Installing OpenCV from prebuilt binaries
Below Python packages are to be downloaded and installed to their default locations.
1.3. Matplotlib (Matplotlib is optional, but recommended since we use it a lot in our tutorials).
Install all packages into their default locations. Python will be installed to C:/Python27/.
After installation, open Python IDLE. Enter import numpy and make sure Numpy is working fine.
Download latest OpenCV release from sourceforge site and double-click to extract it.
Goto opencv/build/python/2.7 folder.
Copy cv2.pyd to C:/Python27/lib/site-packeges.
Open Python IDLE and type following codes in Python terminal.
If the results are printed out without any errors, congratulations . You have installed OpenCV-Python successfully.
Building OpenCV from source
Download and install Visual Studio and CMake.
Download and install necessary Python packages to their default locations
2.3. Matplotlib (Matplotlib is optional, but recommended since we use it a lot in our tutorials.)
In this case, we are using 32-bit binaries of Python packages. But if you want to use OpenCV for x64, 64-bit binaries of Python packages are to be installed. Problem is that, there is no official 64-bit binaries of Numpy. You have to build it on your own. For that, you have to use the same compiler used to build Python. When you start Python IDLE, it shows the compiler details. You can get more information here. So your system must have the same Visual Studio version and build Numpy from source.
Another method to have 64-bit Python packages is to use ready-made Python distributions from third-parties like Anaconda, Enthought etc. It will be bigger in size, but will have everything you need. Everything in a single shell. You can also download 32-bit versions also.
Make sure Python and Numpy are working fine.
Download OpenCV source. It can be from Sourceforge (for official release version) or from Github (for latest source).
Extract it to a folder, opencv and create a new folder build in it.
Open CMake-gui (Start > All Programs > CMake-gui)
Fill the fields as follows (see the image below):
7.1. Click on Browse Source. and locate the opencv folder.
7.2. Click on Browse Build. and locate the build folder we created.
7.3. Click on Configure.

7.4. It will open a new window to select the compiler. Choose appropriate compiler (here, Visual Studio 11) and click Finish.

7.5. Wait until analysis is finished.
You will see all the fields are marked in red. Click on the WITH field to expand it. It decides what extra features you need. So mark appropriate fields. See the below image:

Now click on BUILD field to expand it. First few fields configure the build method. See the below image:

Remaining fields specify what modules are to be built. Since GPU modules are not yet supported by OpenCV-Python, you can completely avoid it to save time (But if you work with them, keep it there). See the image below:

Now click on ENABLE field to expand it. Make sure ENABLE_SOLUTION_FOLDERS is unchecked (Solution folders are not supported by Visual Studio Express edition). See the image below:

Also make sure that in the PYTHON field, everything is filled. (Ignore PYTHON_DEBUG_LIBRARY). See image below:

Finally click the Generate button.
Now go to our opencv/build folder. There you will find OpenCV.sln file. Open it with Visual Studio.
Check build mode as Release instead of Debug.
In the solution explorer, right-click on the Solution (or ALL_BUILD) and build it. It will take some time to finish.
Again, right-click on INSTALL and build it. Now OpenCV-Python will be installed.

Open Python IDLE and enter import cv2 . If no error, it is installed correctly.
We have installed with no other support like TBB, Eigen, Qt, Documentation etc. It would be difficult to explain it here. A more detailed video will be added soon or you can just hack around.
Шпаргалка по OpenCV — Python
Что такое OpenCV?
Библиотека компьютерного зрения и машинного обучения с открытым исходным кодом. В неё входят более 2500 алгоритмов, в которых есть как классические, так и современные алгоритмы для компьютерного зрения и машинного обучения. Эта библиотека имеет интерфейсы на различных языках, среди которых есть Python (в этой статье используем его), Java, C++ и Matlab.
Содержание
Установка
Инструкцию по установке на Windows можно посмотреть здесь, а на Linux — здесь.
Импорт и просмотр изображения
Примечание При чтении способом выше изображение находится в цветовом пространстве не RGB (как все привыкли), а BGR. Возможно, в начале это не так важно, но как только вы начнёте работать с цветом — стоит знать об этой особенности. Есть 2 пути решения:
- Поменять местами 1-й канал (R — красный) с 3-м каналом (B — синий), и тогда красный цвет будет (0,0,255) , а не (255,0,0) .
- Поменять цветовое пространство на RGB:
И тогда в коде работать уже не с image , а с rgb_image .
Примечание Чтобы закрыть окно, в котором отображается изображение, нажмите любую клавишу. Если использовать кнопку закрытия окна, можно наткнуться на подвисания.
На протяжении статьи для вывода изображений будет использоваться следующий код:
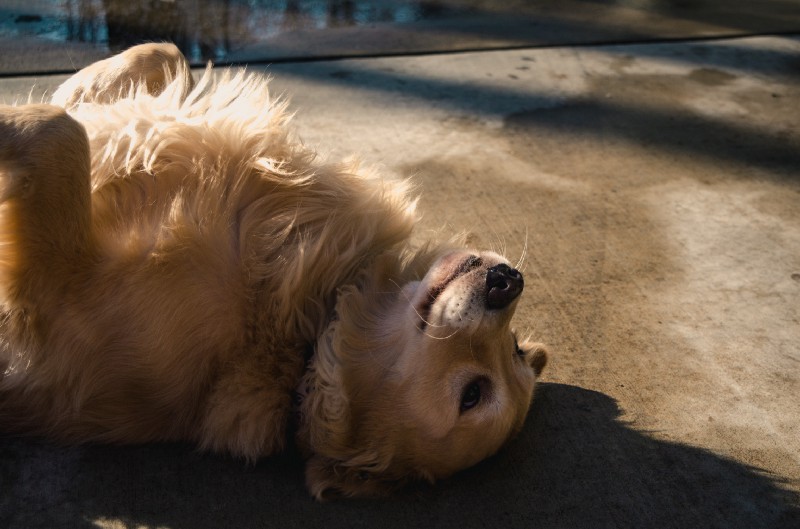
Кадрирование


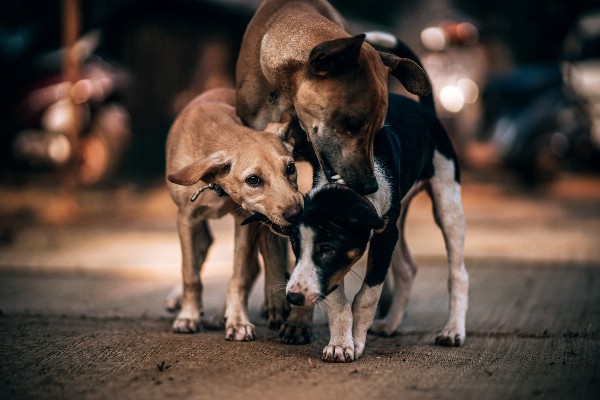
Пёсик после кадрирования
Где image[10:500, 500:2000] — это image[y:y + высота, x:x + ширина] .
Изменение размера


После изменения размера на 20 %
Эта функция учитывает соотношение сторон оригинального изображения. Другие функции изменения размера изображений можно увидеть здесь.
Поворот

Пёсик после поворота на 180 градусов
image.shape возвращает высоту, ширину и каналы. M — матрица поворота — поворачивает изображение на 180 градусов вокруг центра. -ve — это угол поворота изображения по часовой стрелке, а +ve , соответственно, против часовой.
Перевод в градации серого и в чёрно-белое изображение по порогу

Пёсик в градациях серого
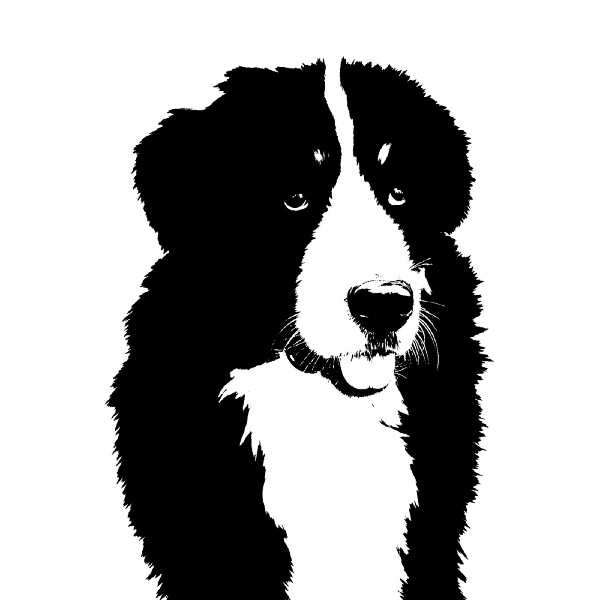
gray_image — это одноканальная версия изображения.
Функция threshold возвращает изображение, в котором все пиксели, которые темнее (меньше) 127 заменены на 0, а все, которые ярче (больше) 127, — на 255.
19–21 апреля, Онлайн, Беcплатно
Для ясности другой пример:
Здесь всё, что темнее, чем 150, заменяется на 10, а всё, что ярче, — на 200.
Остальные threshold-функции описаны здесь.
Размытие/сглаживание

Функция GaussianBlur (размытие по Гауссу) принимает 3 параметра:
- Исходное изображение.
- Кортеж из 2 положительных нечётных чисел. Чем больше числа, тем больше сила сглаживания.
- sigmaX и sigmaY. Если эти параметры оставить равными 0, то их значение будет рассчитано автоматически.
Больше про размытие здесь.
Рисование прямоугольников

Обводим прямоугольником мордочку пёсика
Эта функция принимает 5 параметров:
- Само изображение.
- Координата верхнего левого угла (x1, y1) .
- Координата нижнего правого угла (x2, y2) .
- Цвет прямоугольника (GBR/RGB в зависимости от выбранной цветовой модели).
- Толщина линии прямоугольника.
Рисование линий


2 пёсика, разделённые линией
Функция line принимает 5 параметров:
- Само изображение, на котором рисуется линия.
- Координата первой точки (x1, y1) .
- Координата второй точки (x2, y2) .
- Цвет линии (GBR/RGB в зависимости от выбранной цветовой модели).
- Толщина линии.
Текст на изображении
Изображение с текстом
Функция putText принимает 7 параметров:
- Непосредственно изображение.
- Текст для изображения.
- Координата нижнего левого угла начала текста (x, y) .
- Используемый шрифт.
- Размер шрифта.
- Цвет текста (GBR/RGB в зависимости от выбранной цветовой модели).
- Толщина линий букв.
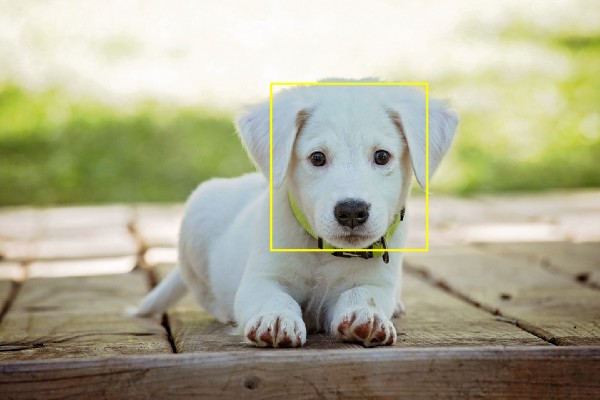
Распознавание лиц
На этот раз без пёсиков.

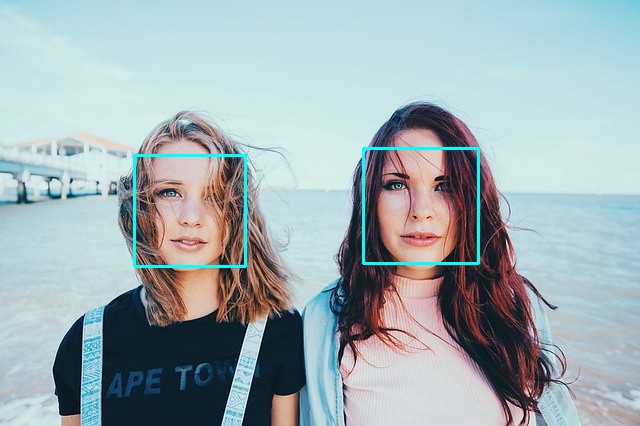
Лиц обнаружено: 2
detectMultiScale — общая функция для распознавания как лиц, так и объектов. Чтобы функция искала именно лица, мы передаём ей соответствующий каскад.
Функция detectMultiScale принимает 4 параметра:
- Обрабатываемое изображение в градации серого.
- Параметр scaleFactor . Некоторые лица могут быть больше других, поскольку находятся ближе, чем остальные. Этот параметр компенсирует перспективу.
- Алгоритм распознавания использует скользящее окно во время распознавания объектов. Параметр minNeighbors определяет количество объектов вокруг лица. То есть чем больше значение этого параметра, тем больше аналогичных объектов необходимо алгоритму, чтобы он определил текущий объект, как лицо. Слишком маленькое значение увеличит количество ложных срабатываний, а слишком большое сделает алгоритм более требовательным.
- minSize — непосредственно размер этих областей.
Contours — распознавание объектов
Распознавание объектов производится с помощью цветовой сегментации изображения. Для этого есть две функции: cv2.findContours и cv2.drawContours .
В этой статье детально описано обнаружение объектов с помощью цветовой сегментации. Всё, что вам нужно для неё, находится там.
Сохранение изображения
Заключение
OpenCV — отличная библиотека с лёгкими алгоритмами, которые могут использоваться в 3D-рендере, продвинутом редактировании изображений и видео, отслеживании и идентификации объектов и людей на видео, поиске идентичных изображений из набора и для много-много чего ещё.
Эта библиотека очень важна для тех, кто разрабатывает проекты, связанные с машинным обучением в области изображений.


