- How to Fix DCOM Error 10016 on Windows 7, 8 and 10
- Method 1: Give the Sufficient Permissions to the App Causing the Error
- Method 2: Delete Registry Keys
- How to Fix DCOM Error 1084 on Windows 10
- What causes DCOM got Error 1084?
- Solution 1: Reinstalling Graphics Driver
- Solution 2: Running SFC and DISM
- Solution 3: Running Safe Mode
- Solution 4: Restoring your System
- Solution 5: Repair your Windows
- Как исправить ошибку DistributedCOM 10016 в Windows 7, 8.1 и 10?
- Добавление полных разрешений приложению, вызывающего ошибку
- Удаление разделов реестра
How to Fix DCOM Error 10016 on Windows 7, 8 and 10
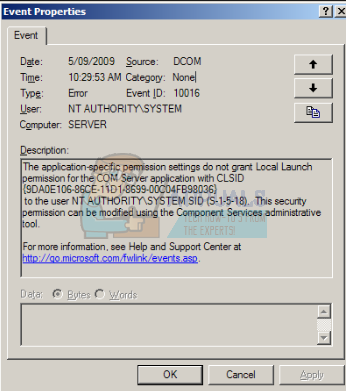
Getting a DCOM error with an Event ID 10016 means that a program tried to start the DCOM server by using the DCOM infrastructure, but the user doesn’t have the necessary permissions to do so. This is a known error that remains from older Windows editions, but it isn’t actually solved when you upgrade to a newer version of the OS and is also seen in Windows 8 and 10.
You will receive this in the form of a system error, and you will also get a message which contains a CLSID and APPID. This DCOM error may be completely harmless, but seeing it and having to deal with it all the time can be annoying.
But before moving on with the troubleshooting process, make sure your system’s power supply is up to the mark and is not faulty. If you are using any type of overclocking (CPU, GPU or RAM) then either lower it down or remove it. Also, make sure that your system’s drivers especially GPU drivers are up to date and then check if your system is clear of the error under discussion.
There is a solution that has been proven to work for a lot of users, and to do that you will need the CLSID and APPID from the error message, and you should follow the steps in the method below.
 DCOM Error 10016 on Windows
Method 1: Give the Sufficient Permissions to the App Causing the Error
The CLSID and APPID are unique to an app – and having them both can help you in identifying the app causing the issues. Even if you know which app is causing the problems, all you need to do is give it sufficient permissions so it doesn’t cause problems every time it needs them. The steps to do so are very simple.
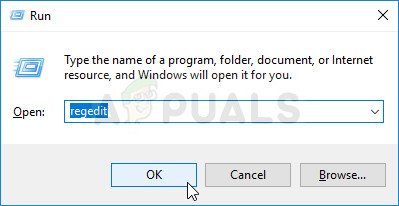
- Press simultaneously the Windows and R keys on your keyboard, and type RegEdit in the Run Press Enter or click OK to open the Registry Editor.
 Running the Registry Editor
 Open CLSID in Registry Editor
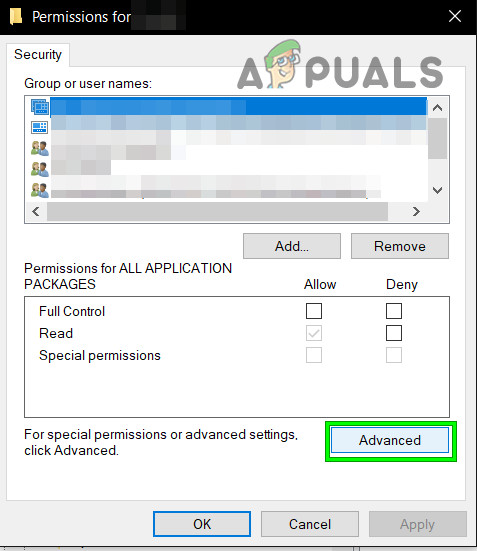 Open the Advanced Tab in Permissions
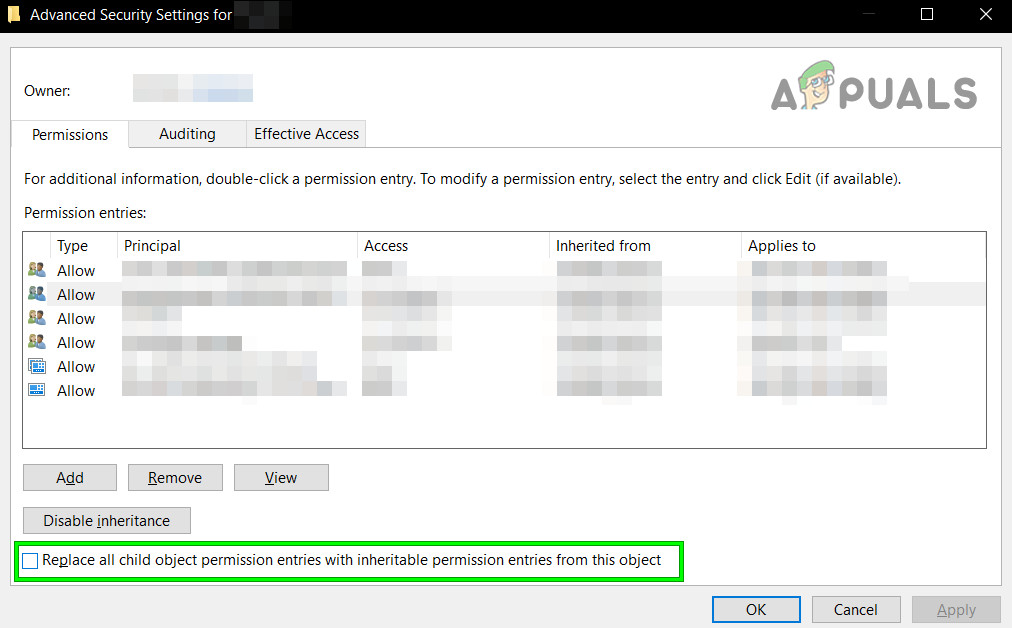 Replace All Child Object Permission Entries
Back in the main permissions window, click Add, enter Everyone and click OK. Again in the main permissions Window, select Everyone from the list of users in the top, and select Full Control from the Allow column in the bottom half. Click OK.
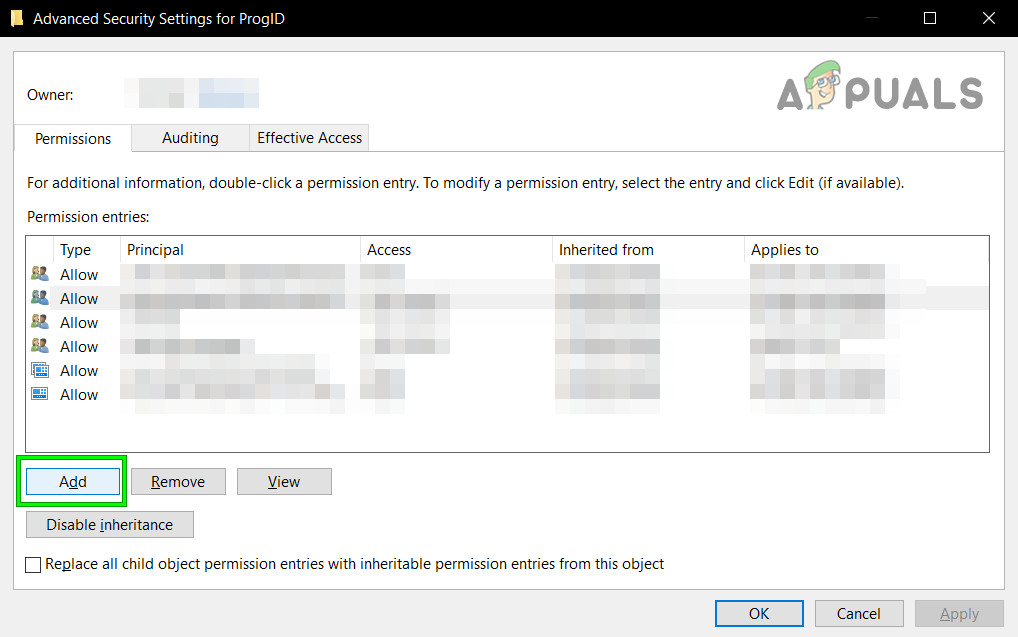 Click Add in Advanced Permissions
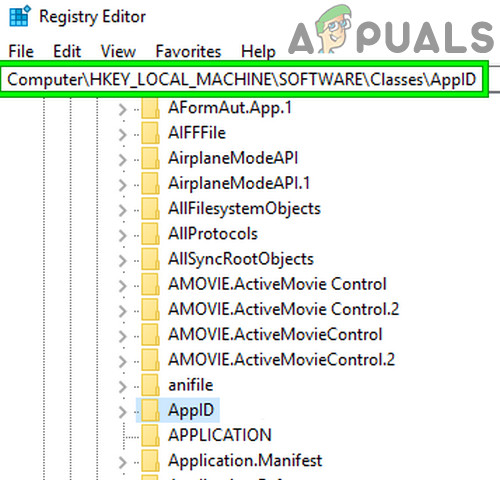 Open AppID in Registry Editor
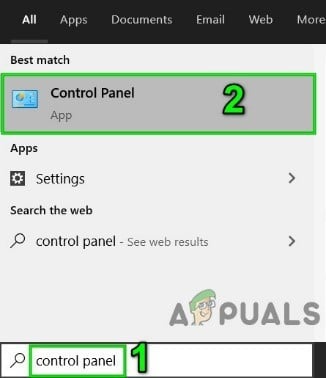 Open Control Panel
Even though this might seem like a long and exhausting way to solve the issue, it is the one that has been reported to work for a vast majority of the users having this problem. Follow it carefully step by step, and you will have the DCOM error gone in no time.
Method 2: Delete Registry Keys
Some conflicting registry keys can cause this problem as well. Registry keys are a form of instructions in binary for the system to follow. There are a few registry keys present in your registry which even though belong to Microsoft sub-category itself, are known to cause problems. Deleting these keys may solve the issue at hand.
Warning: Changing the system’s registry needs technical expertise and if done wrong, you may damage your system beyond repair, so, proceed at your own risk. Also, do not forget to create a backup of your registry if you are going to make changes in the registry.
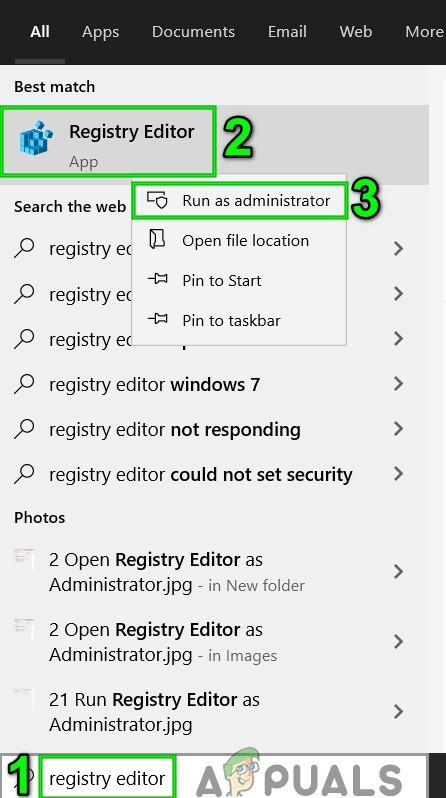
- Click on the Windows button and in the search box, type Registry Editor. Now in the results shown, right-click on the Registry Editor and click on “Run as Administrator“.
 Open Registry Editor as Administrator
 - Navigate to the following key:
- Now delete the following keys
- Save changes and restart your system.
- After deleting the above-mentioned keys from the registry, the default permissions will be written for the system. As a result, the apps that require access to the DCOM Server will have access to it.
 Open Registry Editor as Administrator
How to Fix DCOM Error 1084 on Windows 10
The ‘DCOM got Error 1084’ usually appears if you’ve recently updated your Windows which can be due to corrupt system files or registry errors. DCOM (Distributed Component Object Model) is a Microsoft component that allows COM objects to communicate with each other. The symptoms of this error include computer freezing in which case you are impelled to shut it down or restart. The freezing of circle dots while your system boots also indicate this problem. That, however, at times, can be solved by just waiting it out or with a restart.
The error can also indicate failing hard disk in which case you’ll have to verify your drives using CHKDSK. Some users have reported that they weren’t able to even boot up their Windows because of this error and the only resolution was to repair their Windows.
What causes DCOM got Error 1084?
The DCOM error is usually popped because of –
- Corrupt system files. The DCOM error usually points to corrupted OS. If you had a recent Windows update, there’s a possibility that it might’ve messed around with your files due to which the error is occurring.
Due to DCOM got Error 1084, you might face screen flickering, frequent freezes or your Windows won’t boot up. To solve these errors, follow the provided solutions:
Solution 1: Reinstalling Graphics Driver
If you are facing screen flickering, there’s a possibility it is caused by this error. If this is not the case for you, skip to the next solution. Resolving this issue is pretty straightforward. This frequently occurs due to bad graphics driver in which case you’ll have to reinstall them. To do this, follow the instructions:
- Go to Start Menu and type in ‘Device Manager’.
- Open Device Manager.
- There, locate ‘Display Adapters’ and click to expand it.
- Right click on your graphics card driver and select ‘Uninstall device’.
- Follow the prompted instructions and your driver will be uninstalled.
- Reboot your system.
After your system has loaded up again, download the latest graphics driver from your graphics card manufacturer’s website and install it. This will remove the corrupted files and your screen won’t flicker anymore.
Solution 2: Running SFC and DISM
Utilizing Windows built-in utilities is important while resolving certain issues. Like we mentioned earlier, the DCOM error indicates corrupt OS most of the time, therefore, System File Checker and Deployment Image Servicing and Management can potentially find and repair the corrupted files on your system.
Follow the SFC and DISM articles already published on our site in detail to learn how to run SFC and DISM.
Solution 3: Running Safe Mode
Sometimes, the third-party software installed on your system can be the one causing the issue. To verify this, you’ll have to start your system in Safe mode. Safe mode allows you to boot up your system with the minimal services required for boot-up so that you can investigate if a third-party software is causing the issue. To boot up your PC in Safe mode, do the following:
- Go to the Start Menu.
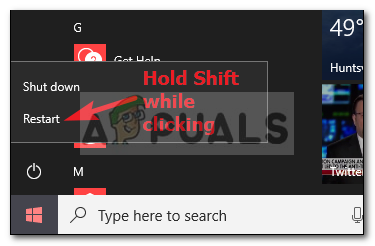
- Click on the Power button and while holding Shift, click Restart. Click Restart while holding shift
- When your system boots up you will be shown a blue screen with a list of options. Select ‘Troubleshoot’. Select Troubleshoot
- There, select ‘Advanced Options’.
- Inside Advanced options, click on ‘Startup Settings’. Click Startup Settings
- You’ll be shown a list, press F4 to boot your system in Safe Boot mode. Press F4 for Safe Mode
 Click Restart while holding shift
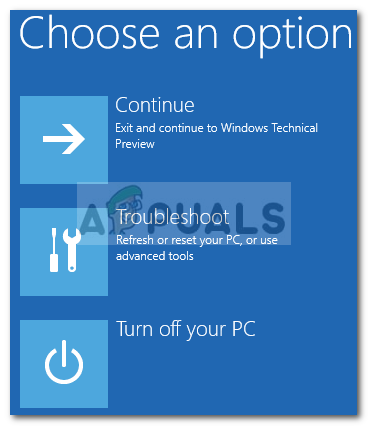 Select Troubleshoot
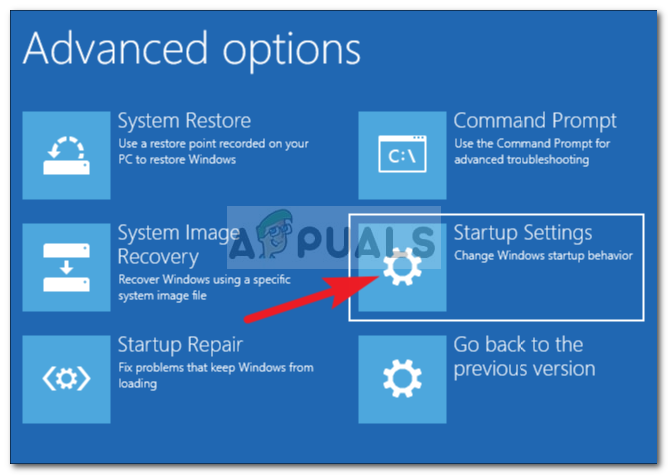 Click Startup Settings
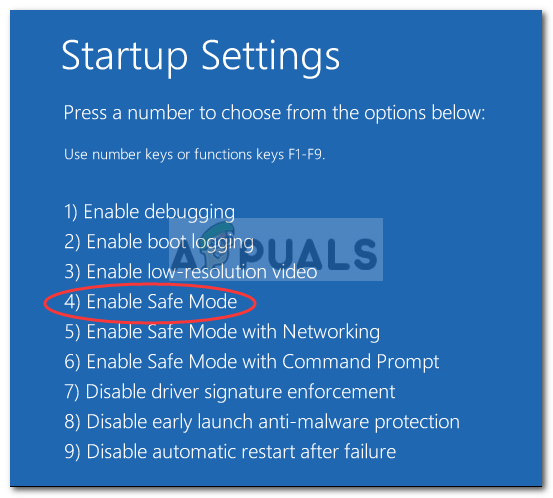 Press F4 for Safe Mode
If your system runs fine in safe boot mode, this means a third-party software is interfering with your system which causes the error, thus, you’ll have to uninstall the software that you had installed before the error popped up.
Solution 4: Restoring your System
If you failed to find the third-party software that is responsible for the error, perhaps you should try restoring your system. System Restore allows you to restore your PC to a point where certain apps weren’t installed. By doing this, you might just solve your error.
We’ve already written an article on how to restore your system to a certain point – so please refer to this article where you’ll learn how to restore your system quite thoroughly.
Solution 5: Repair your Windows
Some users have reported that when this error occurred to them and they couldn’t even boot up their windows as a result, repairing their Windows solved their problem. You can repair your Windows without having to lose your personal files. Here’s how to do it:
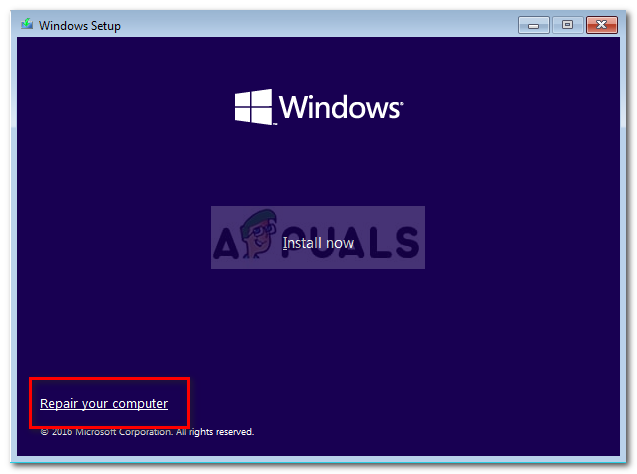
- Insert a Windows Setup DVD or bootable USB.
- When prompted ‘Install Windows’ option, select ‘Repair your computer’. Select ‘Repair my computer’
- Follow through the instructions and see if it solves your problem.
 Select ‘Repair my computer’
Как исправить ошибку DistributedCOM 10016 в Windows 7, 8.1 и 10?
Возникновение ошибки DistributedCOM с кодом события Event ID 10016 означает, что приложение пыталось запустить сервер DCOM, но в текущей учетной записи пользователя нет требуемых разрешений для этого. Ошибка известна еще с Windows 7, однако не решается при обновлении системы до Windows 8.1 и 10.
Эта системная ошибка, в сообщении которой содержаться CLSID и APPID, и в большинстве случаев совершенно безвредная, но ее постоянное присутствие может раздражать.
Но прежде чем приступить к устранению неполадок, проверьте состояние блока питания ПК. Если используется разгон процессора, видеокарты или ОЗУ, уменьшите установленные параметры или вообще отключите. Кроме того, убедитесь, что драйверы видеокарты обновлены по последней версии.
Добавление полных разрешений приложению, вызывающего ошибку
Значения CLSID и APPID уникальны для каждого приложения. С их помощью можно идентифицировать приложение, вызывающего ошибку DistributedCOM 10016.
Когда определите, какое приложение вызывает проблемы, все, что нужно сделать, это предоставить ему достаточные разрешения. Для этого выполните следующие шаги.
Откройте Редактор реестра командой regedit , запущенной из окна Win + R.
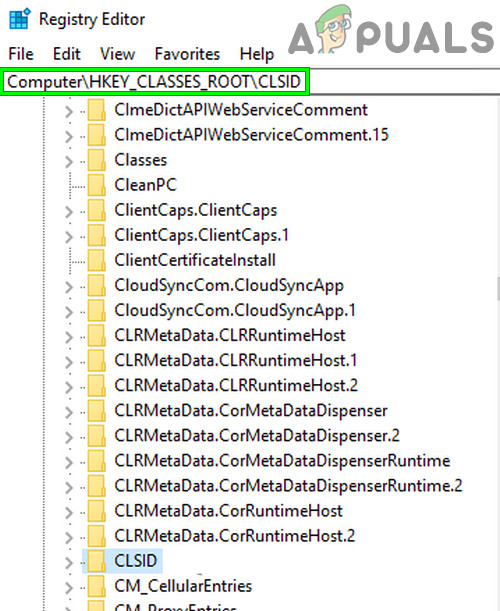
Перейдите в раздел HKEY_CLASSES_ROOT, затем в CLSID.
Найдите папку с идентификатором CLSID, который указан в сообщении об ошибке DCOM.
Теперь щелкните правой кнопкой мыши на нем и выберите «Разрешения», затем нажмите на кнопку «Дополнительно».
Перейдите на вкладку «Владелец» и измените его на группу «Администраторы». Отметьте флажком опцию «Заменить владельца подконтейнеров и объектов». Примените изменения нажатием на «ОК».
Вернувшись в окно разрешений, кликните на кнопку «Добавить». Нажмите Дополнительно – Поиск и выберите учетную запись «Все». Снова в окне разрешений выберите «Все» из списка пользователей и предоставьте ей полный доступ в столбце «Разрешить». Примените изменения на «ОК».
После этого в редакторе реестра перейдите по пути:
HKEY_LOCAL_MACHINE – Software – Classes – AppID .
Перейдите в раздел, содержащий тот же идентификатор приложения, что указан в сообщении об ошибке. Щелкните по нему правой кнопкой мыши и выберите «Разрешения», затем нажмите на «Дополнительно».
Повторите указанные шаги для предоставления приложению полного доступа.
Нужно отметить, что при просмотре папок CLSID и APPID увидите раздел с именем службы, вызывающей ошибку DCOM 10016.
Затем перейдите в Панель управления командой control из окна Win + R.
Переключитесь на крупные значки и перейдите в раздел «Администрирование».
Разверните вкладку «Службы компонентов». В центральном окне разверните вкладку «Компьютеры», затем Мой компьютер.
Теперь найдите службу, вызывающую ошибку, щелкните ее правой кнопкой мыши и выберите «Свойства». Откройте вкладку Безопасность.
Если разрешения были правильно установлены в реестре, появится возможность изменить параметры для всех трех категорий (на запуск и активацию, доступ и изменение настроек). Если какой-либо из них выделен серым цветом, повторите шаги по предоставлению полного доступа.
После выбора настроек для трех категорий, выберите «Изменить» для разрешения на запуск и активацию. Если отобразится предупреждение о том, что одна или несколько прикрепленных записей доступа имеют неправильный тип, щелкните кнопку «Удалить». Это означает, что разрешения в реестре были установлены на значение, отличное чем «По умолчанию», которое требуется для завершения исправления.
В новом окне найдите учетную запись «Система» в списке пользователей. Если она не существует, щелкните на «Добавить». Введите «Система» и кликните на «ОК».
Теперь выберите запись «Система», установите флажок в столбце разрешить рядом к локальным запуском и активацией.
Также можете увидеть локальный доступ вместо этого, поэтому просто убедитесь, что есть проверка для этого элемента в столбце разрешить. Для сохранения нажмите на «ОК».
Повторите шаги для остальных категорий – разрешения доступа и изменения настроек.
Затем повторите все шаги для других значений ClSID и AppID, перечисленный в журнале событий.
После завершения перезагрузите компьютер. Попытайтесь запустить программу, которую ранее не удавалось из-за ошибки DistributedCOM с Event ID 10016.
Удаление разделов реестра
Ошибку DCOM также может вызвать конфликт между разделами. Для ее решения попробуйте их удалить. Но перед этим сделайте резервную копию реестра.
Откройте Редактор реестра с помощью поисковой системы Winsows, предоставив ему доступ администратора.
Перейдите в раздел HKEY_LOCAL_MACHINE –SOFTWARE – Microsoft – Ole .
Теперь удалите разделы:
- DefaultAccessPermission;
- DefaultLaunchPermission;
- MachineAccessRestriction;
- MachineLaunchRestriction.
Сохраните изменения и перезагрузите систему. После перезагрузки в реестр будут записаны значения по умолчанию, что должно устранить ошибку DistributedCOM с кодом события 10016.


