- Dell EMC and Ubuntu
- In the data centre
- Dell servers provisioning with MAAS
- Deploy containers at scale with Charmed Kubernetes
- Enterprise clouds with OpenStack
- Ubuntu on Dell: What to Consider?
- Things to Consider Before Installing Ubuntu on Dell PC
- Best Dell Laptops to Install Ubuntu
- 1. Dell XPS 13
- 2. Dell Precision 5530 Mobile Workstation Laptop
- 3. Dell Inspiron 17 5000
- 4. Dell G3 17
- 5. Dell Precision 3530
- About the author
- Swapnil Tirthakar
- Ubuntu Wiki
- DellBIOS
- Checking your current BIOS version
- Upgrading the BIOS and hardware firmware for PowerEdge servers
- CentOS
- Dell OpenManage Ubuntu Repository
- Upgrading with a FreeDOS USB drive
- Using WINE to extract the BIOS image for a Dell Inspiron 1525
- Updating the BIOS by booting into firmware directly
- Obtaining and using an image from the WinPhlash utility
- Obtaining the phlash16.exe Utility
Dell EMC and Ubuntu
From desktop to the edge, from the data centre to multi-cloud environments — Dell EMC and Canonical bring you open source solutions that work out-of-the-box.

In the data centre
Dell servers provisioning with MAAS
At the heart of the data centre and a key component to building a hybrid strategy, Dell PowerEdge servers come certified with Ubuntu as the operating system. Offering the performance and versatility to get the most from your infrastructure, Dell’s flexible designs offer a range of options for price, functionality and scalability to meet your workload needs. Those servers can be provisioned with MAAS for a cloud-like experience and enhanced automation.

Deploy containers at scale with Charmed Kubernetes
You can go confidently into production as we have completed extensive validation, testing and certification to identify the best-fit Dell hardware for container-based solutions. Use Dell EMC PowerEdge servers and Ceph software-defined storage running Ubuntu Server and Canonical’s Charmed Kubernetes to help you manage the complexities of multiple containers across multiple servers. And if you prefer to focus on your business, we can set up your k8s cluster and manage Kubernetes for you, handing back control when you are ready.
Enterprise clouds with OpenStack
Over 50% of all Openstack deployments use Ubuntu and Dell is the most-used hardware for deploying Openstack. Together we have designed, built, tested and certified a private cloud offering so you can move quickly, cost-effectively and reliably from pure virtualisation solution to a production-grade cloud platform like OpenStack. Whether you are experienced and want to operate your OpenStack on your own, or need a fully managed option, you can choose the OpenStack package that best fits your needs.
Источник
Ubuntu on Dell: What to Consider?
My experience with Ubuntu on Dell has always been smooth and enjoyable with some minor glitches which are considerable when you are trying to run Ubuntu on minimum resources and alongside Windows. My search for an operating system which is lightweight, distraction-free, very easy to understand and work with once you get used to it and various easy workarounds to fix issues which is a tedious task in Windows is ended at Ubuntu.
So today, I am going to give you guys some tips to consider before installing Ubuntu on Dell machine and also we will look for 5 best Dell laptops available in market which you can configure and buy to get Ubuntu out-of-the box.
Things to Consider Before Installing Ubuntu on Dell PC
Dell is no doubt one of the most trusted and reliable computer OEM’s in the market, but just like Windows, Linux and its distros like Ubuntu have their own list of hardware requirements which machine must have to run the operating system smoothly and make available all its features for end user.
- Make sure you have minimum 4GB of RAM on-board, Ubuntu can run smoothly on lower memory but for smooth running of Ubuntu without having to compromise any of its features, I would recommend you guys to have minimum 4GB RAM.
- Ubuntu requires 25GB of hard drive space to install and run various applications, but it is good to have at least 50GB of hard drive space reserved for Ubuntu considering your future requirements.
- In case you are hard core gamer and planning to try it on Ubuntu then keep at least 75GB of memory space on hard drive for Ubuntu.
- Most important thing to consider before buying a laptop for Ubuntu is the processor and it is safe to have at least 2 GHz dual core processor and if you manage to get higher variant at decent price then it’s amazing.
- Graphics processor which I don’t think a very important thing to consider before installing Ubuntu or buying Ubuntu laptop unless you’re a hard core gamer. Most of the basic tasks and applications on Ubuntu can run smoothly with the help of on-board graphics.
- These are the basic but most important things to consider before installing Ubuntu on any system. Anything other than these can be considered for having powerful machine which is not going to make any changes in Ubuntu performance.
Best Dell Laptops to Install Ubuntu
No doubt Dell is one of the best OEM’s out there and most trusted and reliable one too. Having recognized increased demand for Linux and Ubuntu friendly systems, Dell has shifted its focus on developing machines more suitable to Linux and its distros such as Ubuntu, LinuxMint, etc. And that was really good news for me as I’m big fan of Dell machines.
1. Dell XPS 13
Carved in machined aluminum, Dell XPS 13 is slick and slim portable laptop with eye-catching design. Dell claims it to be smallest laptop in the world, it comes with 13.3” 4K Ultra HD InfinityEdge touch display. The laptop is highly customizable and you can configure it according to your requirements.
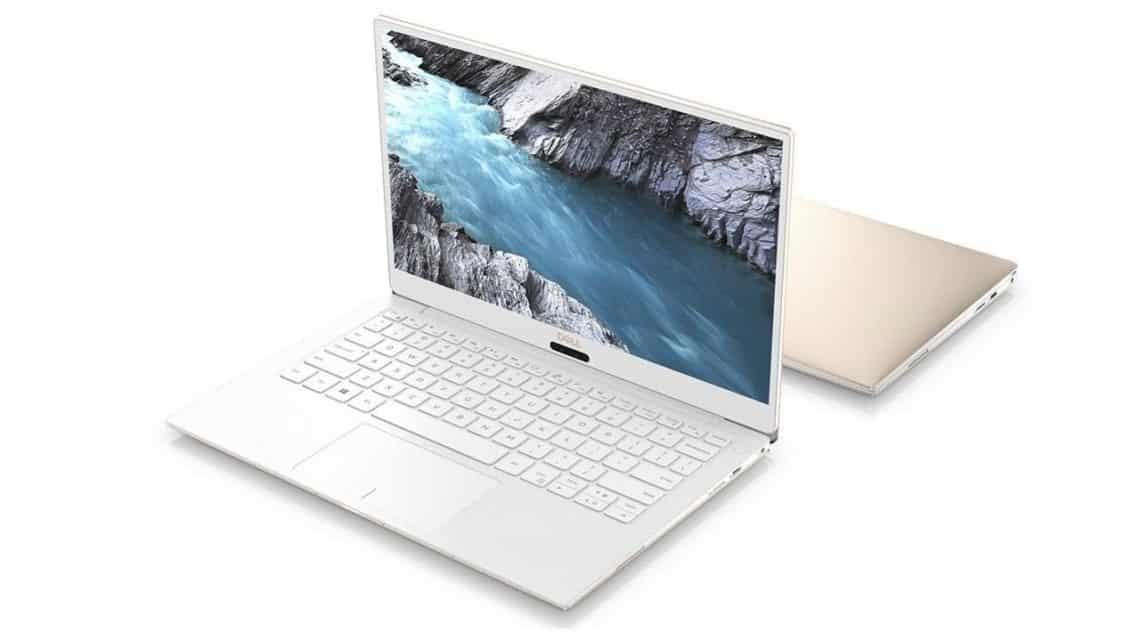
Best thing about this laptop is that it comes with full-fledge Linux support which is always the case with Dell flagship machines and a big thumbs-up to Dell for that. It also has developer edition variant which comes with Ubuntu 16.04 LTS out of the box however this normal Dell XPS 13 variant can also be customized to come with Linux out of the box.
Key Specs
- CPU : 8 th Gen Intel Core i7-8550U Processor
- RAM : 8GB/16GB DDR3 SDRAM
- Storage : 512GB PCIe Solid State Drive
- GPU : Intel UHD Graphics 620
- Ports : 3 x USB Type-C Ports
2. Dell Precision 5530 Mobile Workstation Laptop
Dell Precision 5530 is a beast of a laptop especially built for power users. Precision 5530 ships-in with Windows 10 Pro but Ubuntu can be installed on it very easily without having to perform any tweaks. It is futuristic machine especially meant for professional users and it has slim design with eye-catching look.
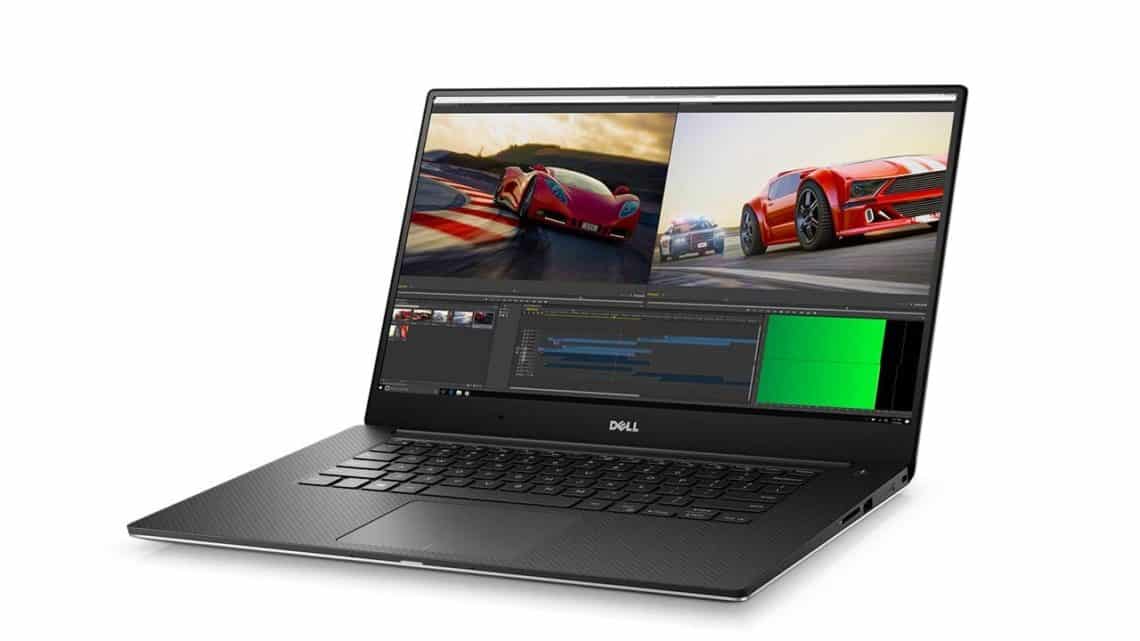
Arguably, Precision is all-rounder laptop with feature to fulfill all type of user needs such as high-end gaming, professional audio/video editing and many other power user tasks. This machine comes with 15.6” Ultra-HD InfinityEdge display, NVIDIA Quadro P2000 GPU and other high performance hardware components. It is available in quad-core Intel i5, six-core Intel i7 and first ever Intel Core i9 variant.
This machine is especially recommended for Linux power users who engage in heavy tasks such as 3D rendering, animation, CAD, system administration and lot of client/server tasks. Normal users can order lower variants for performing various day-to-day tasks on Linux Ubuntu.
Key Specs
- CPU : 8 th Gen Intel Core and Xeon 6 core processors
- RAM : 32GB DDR4 SDRAM
- Storage : 3TB PCIe Solid State Drive
- GPU : NVIDIA Quadro P2000
- Ports : 2 x USB 3.1 Gen 1 Port
3. Dell Inspiron 17 5000
Inspiron 17 5000 is a high performance laptop which is excellent for high-end gaming and tasks which require powerful hardware resources. Carved in a platinum silver chassis, Inspiron 17 comes with massive 17.3” FHD LED-Backlit display. Laptop ships-in with Windows 10 pre-installed but you can easily install Ubuntu alongside Windows or as a single operating system too.
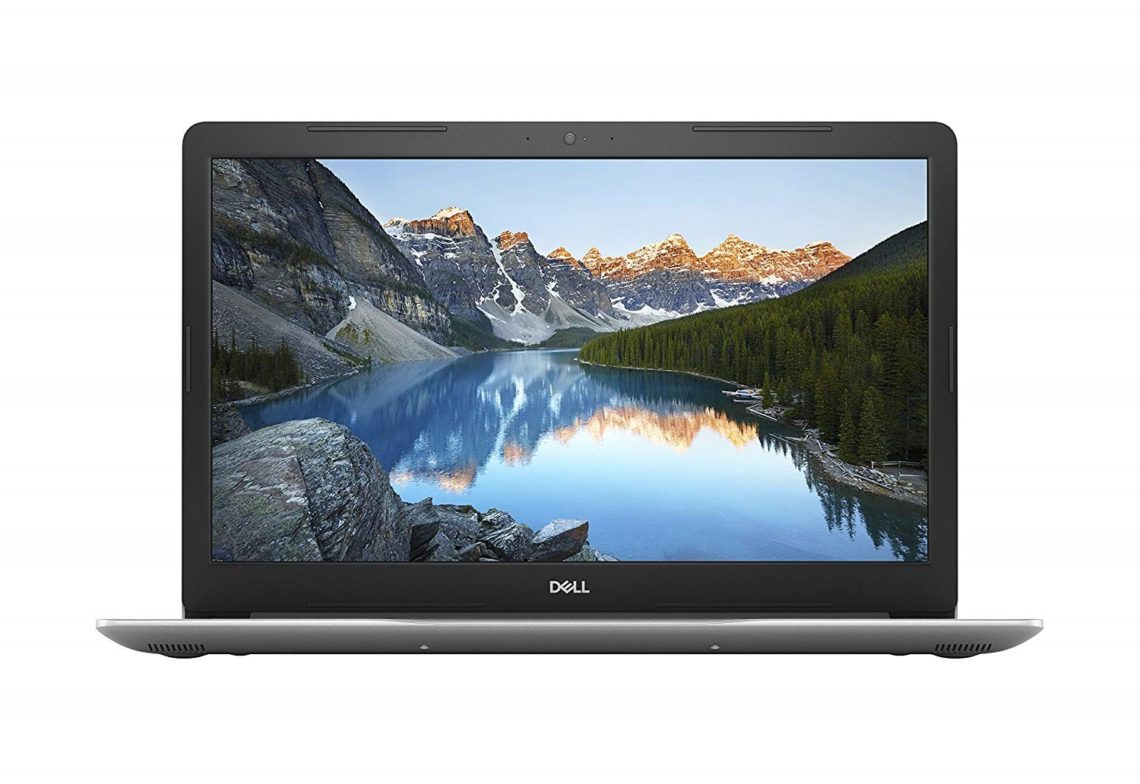
As being said it is a perfect gaming laptop thanks to on-board Direct X12 technology and seamless Xbox integration. Backed by 8GB DDR4 RAM (can be expanded up to 16GB) and Intel UHD Graphics 620, Inspiron 17 5000 series is the best Dell machine to install Ubuntu and it is available at very competitive price.
This laptop ships-in with all the hardware resources to install and run latest Ubuntu and its applications effortlessly. If you are looking for a laptop for multiple purposes and have tight budget then this one is perfect for you.
Key Specs
- CPU : 8 th Gen Intel Core i5-8250U Processor
- RAM : 8GB/16GB DDR4 SDRAM
- Storage : 1TB SATA Hard Drive
- GPU : Intel UHD Graphics 620
- Ports : 2 x USB 3.1 Type-A and 1 USB 2.0 Port
4. Dell G3 17
Dell G series laptops are popular for their gaming friendly hardware and Dell G3 17 is no exception as it is also a very powerful gaming and multi-purpose laptop. Styled in polycarbonate chassis, Dell G3 sports 17.3” Full HD IPS display and 8 th Gen Intel Core i7 processor which is clocked at 2.2 GHz.

It is a powerhouse of a laptop which can be used for any task and work. Ubuntu users working specially on 3D rendering, CAD, animations, etc. will love to work on this machine. Even though it comes with Windows 10 pre-installed, Ubuntu can be installed very easily without having to perform any tweaks.
Speakers of this laptop are backed by Waves MaxxAudio Pro which is giant in audio upscaling technology. Overall it is high performance multi-purpose laptop which can be useful for any type of user.
Key Specs
- CPU : 8 th Gen Intel Core i5-8300H Processor
- RAM : 8GB DDR4 SDRAM
- Storage : 1TB Hybrid Hard Drive
- GPU : NVIDIA GeForce GTX 1050
- Ports : 1 x USB 3.1 Gen 2 and 2 x USB 3.1 Gen 1 Type-A Port
5. Dell Precision 3530
Precision 3530 is recently launched mobile workstation from Dell. This is entry-level model which ships-in with pre-installed Ubuntu 16.04. Precision 3530 is a 15” powerful laptop specially built for high-end purpose. You can choose from various processors variants ranging from 8 th Gen Core i5/i7 to Xeon 6-core processors.
It is fully customizable laptop to match all type of user’s requirements. It also comes with high resolution screen with bigger storage options.
Key Specs
- CPU : 8 th Gen Intel Core i5-8400H Processor
- RAM : 4GB DDR4
- Storage : 256GB Solid State Drive
- GPU : Intel UHD Graphics 630/ NVIDIA Quadro P600
These are the 5 best Dell laptops available in market which you can buy to install Ubuntu. If you have any queries or suggestions then feel free to ping us at @LinuxHint and @SwapTirthakar.
About the author

Swapnil Tirthakar
A Software Engineer who loves football and passionate about traveling. I often spend my free time playing with gadgets and exploring new possibilities in tech world. I am Linux enthusiast and have about 6 years of experience in web development. I have good command on Python, Java, SQL and system security.
Источник
Ubuntu Wiki
DellBIOS
BIOS update utilities and files are often provided as .exe files. The BIOS updates work by booting the machine into DOS using a USB or floppy (FreeDOS or MS-DOS) and then running an executable to reflash the BIOS.
This guide provides information for Dell users to use such files without using Windows.
Checking your current BIOS version
The current BIOS version can be checked by this command from Ubuntu:
The current BIOS release date can be obtained by invoking:
Upgrading the BIOS and hardware firmware for PowerEdge servers
CentOS
One of the easiest methods requiring no server configuration is to upgrade PowerEdge servers via booting into a CentOS 7.0 x64 live environment (USB is faster but one may want to use CD/DVD due to a limited number of USB ports), load the firmware BIN files onto a FAT32 USB drive, execute the following in a terminal to find the path to the USB drive, and launch the .BIN extension firmware file:
This is how the files were developed assuming one is using Red Hat. As well, while one of the files tested worked by default in Ubuntu (ex. firmware update for Broadcom BCM5720 NetXtreme Gigabit Ethernet Adapter), running the .BIN file for the iDRAC firmware initially complained of missing packages (ex. rpm, stty, gzip, among others) despite gzip being confirmed installed. Installed rpm, executed the .BIN file and this caused the server to start to reboot and then hang, which after a hard shutdown, and booting into the Lifecycle Controller the firmware was not upgraded. However, the same .BIN file worked flawlessly in CentOS.
Dell OpenManage Ubuntu Repository
Upgrading with a FreeDOS USB drive
Follow the directions here to create a FreeDOS USB drive: http://chtaube.eu/computers/freedos/bootable-usb/
After you’ve done that:
1. Eject the USB drive, then re-insert it so you can see the new FreeDOS file system.
2. Copy your BIOS update file to the drive.
3. Reboot, press F12 for the one-time boot menu, and boot from the USB Storage Device.
5. Choose «4 — Load FreeDOS without drivers.»
6. Execute the BIOS update.
Using WINE to extract the BIOS image for a Dell Inspiron 1525
Check your BIOS version number:
Download the BIOS update .exe from Dell’s support site, then run:
Check it outputs a .hdr file:
Then use this file:
One should see a BIOS update screen. Please ensure you do not restart, or lose power during this process. Once it reboots automatically, one may see if it took via:
Updating the BIOS by booting into firmware directly
1. Obtain the appropriate BIOS .EXE file for your computer from http://support.dell.com (search under «drivers & downloads»). Download it to your hard drive. In this example we’ll use the filename I545-A12.EXE but it will be different for you if you have a different Dell model (or a newer BIOS revision).
2. We need to create a 2.88MB «floppy» disk image (1.44MB is too small for the uncompressed BIOS code) and mount it. Note that FreeDOS doesn’t provide an ’empty’ 2.88MB boot disk so we need to delete the «fdos» utility folder to get space. We’ll need to obtain a FreeDOS disk image and mount it:
Note that that last step is crucial to free up sufficient space on the «floppy».
3. Next we need to install dosemu (a DOS emulator) so we can extract the BIOS files from the Dell installer but with unlimited diskspace:
You should get a window pop up that looks like DOS with the C drive active. What you are actually seeing is a dosemu ‘virtual’ drive, who’s actual location on your Ubuntu system is
4. Copy the .exe file to your dosemu «C» drive:
5. Back in the dosemu window, type:
and confirm that the BIOS update’s .EXE file is there.
6. Type the name of the BIOS file (e.g. I545-A12) and hit return to start it up. You should see a ‘ Copyright (c) Foxconn LTD 2001-2007. ‘ message and importantly messages ‘ Decompress the exe file‘ and ‘ Decompress the bin file‘. Unfortunately, you’ll also notice that it ends with an error message and ‘ ALL Files removed!‘ at the bottom. So this is where you need to get quick with your fingers, because we need to get those files before they disappear!
Run the BIOS upgrade file again in the DOS box, and wait until it says ‘ Begin to check the bin file‘. Immediately press Ctrl-C on the keyboard to cancel and exit the program before it fails and erases the files we need. Make sure the files you need are there by typing:
If you don’t see files named something like AFU877.EXE (probably the same for everyone) and 8A1D1P34.BIN (probably different for everyone), you hit Ctrl-C a moment too late. Just re-run the original .EXE file and try to kill it at the right moment. The .BIN file should be around 1-2MB in size, depending on the BIOS.
7. Copy the files to your «floppy» drive image:
8. That’s it for the DOS stuff so you can close the DOS box down. Now to tidy up and prepare to run the update:
9. You now need to add the biosupdate boot image to your grub (system boot) menu. You can do this from the command line like this:
10. Press Ctrl-D to save your changes to that file.
11. Restart your computer. As soon as it starts to boot from the hard drive, hold down the Shift key to make the Grub menu appear.
12. At the Grub menu select the final entry (the one you just added; it should say «Dell BIOS Flash Updater») and press Enter.
13. FreeDOS should now start up. If you get prompts for the date and time just press Enter until you get to the A:> prompt.
14. Start the BIOS update by typing the following (substitute the name of the .EXE and .BIN files you extracted from the Dell download, as appropriate):
15. Follow the prompts, reboot, and confirm that your BIOS was updated.
Obtaining and using an image from the WinPhlash utility
Firstly, you need WINE to obtain the image from the archive:
Then extract and attempt to run the updater, which will fail, but place a file named BIOS.ROM in C:\Windows\Temp\WINPHLASH\. Now download the phlash16.exe utility, which will actually perform the flash using BIOS.ROM.
If this method doesn’t work, you may have downloaded a newer installer. You can then try:
which will extract the ROM file in the same directory:
Assuming the image from biosdisk is called bios.img, next mount the image somewhere and modify it (as root):
Now write the image to a floppy or boot it with GRUB as before, but once you get a command prompt and autoexec.bat has failed, type:
Obtaining the phlash16.exe Utility
One way of getting phlash16.exe has been described previously. The relevant directions from there are reproduced in what follows. 1747A04_DOS.exe has been successfully used before, though other archives from Dell may also work. After downloading the suitable file, use DosBox to extract it:
In the directory where you just downloaded the file:
In the DosBox window, type the name of the executable. It will give an error, but upon closing it, and inspecting your directory, you should see that the archive was extracted and phlash16.exe should now be present.
DellBIOS (последним исправлял пользователь penalvch 2015-02-04 01:52:30)
Источник


