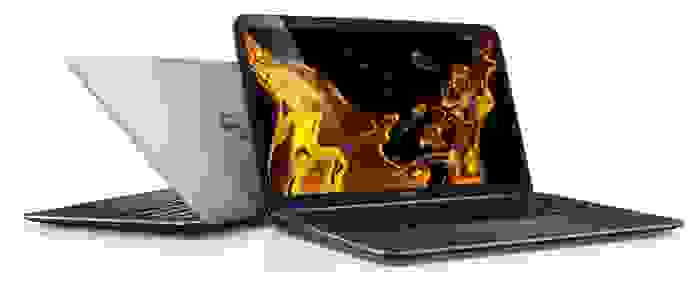
- Dell XPS 13 Developer Edition, или Ubuntu приходит на ультрабуки
- Dell XPS 15 9560
- Contents
- Power Management
- Suspend and Hibernate
- Fan and temperature monitoring and control
- Sensor kernel module and configuration
- Power Saving
- Disable discrete GPU
- bbswitch method
- acpi_call method
- Standard power saving configuration
- Disable/autosuspend of touchscreen
- Enable NVME APST
- Enable power saving features for the i915 kernel module
- Wifi and Bluetooth
- Undervolt intel CPU and GPU
- Graphics
- Intel card only
- Open source driver with PRIME render offloading
- Proprietary driver with bumblebee
- Proprietary driver with PRIME output offloading
- Touchpad
- libinput Driver Configuration
- Synaptics Driver Configuration
- Configure middle button
- Thunderbolt docks
- Dell Docks
- Firmware updates
- Tooled
- Manual
- Fingerprint reader
- Troubleshooting
- xorg freezes at startup
- Audio / headphones
- PCIe Bus Error in system logs
- lspci causes CPU lockups
- General slowness & stuttering
- During Boot time(POST), device attached to USB-C port does not working
Dell XPS 13 Developer Edition, или Ubuntu приходит на ультрабуки
Когда мне предложили познакомиться поближе с ультрабуком Dell XPS 13 Developer Edition, я, честно говоря, довольно долго сопротивлялся. Во-первых, об XPS 13 на Хабре уже написано. Сделал это лично добрых полтора года назад. Во-вторых, Developer Edition в названии означает, что работает ультрабук на Ubuntu 12.04 LTS. Linux для меня — другая планета. Летал туда несколько десятков раз, но каждый раз возвращался обратно. Причем точно не помню — то ли уходил сам с гордо поднятой головой, то ли операционная система давала мне крепкого пинка для ускорения…
В итоге знакомство все же состоялось. И внезапно обнаружилось, что XPS 13 отличается от изученного полтора года назад целиком и полностью, а сама Ubuntu стала настолько удобна для повседневной работы, что я уже несколько дней работаю только на ней, не испытывая ни малейшего дискомфорта. И этот пост тоже целиком написан в LibreOffice Writer.
Ноутбуки с предустановленным Linux встречались на прилавках и раньше. Но все они относились к так называемому бюджетному сегменту из-за простенькой начинки. Да и Linux туда ставили такой, словно производитель и не предполагал, что кто-то будет в нем всерьез работать. Помните шутку об Internet Explorer — приложении, предназначенном для однократного запуска в целях установки нормального браузера? Вот и с теми Linux-ноутбуками похожие ощущения были.
XPS 13 Developer Edition безжалостно рвет шаблон. Это не очередной бюджетник, а современный во всех отношениях ультрабук с очень серьезными характеристиками. Судите сами.
Его процессор Core i7-3537U (третье поколение Core, семейство Ivy Bridge) имеет паспортную частоту 2 ГГц, но под нагрузкой разгоняется до 3.1 ГГц.
В 13.3-дюймовом экране используется FullHD-матрица, выполненная по технологии IPS. Четкость, сочность оттенков, углы обзора — все отлично. Для пущей долговечности матрица защищена от внешних воздействий пластиной Gorilla Glass.
Объем оперативной памяти 8 Гбайт. Объем встроенного накопителя 256 Гбайт, и это, как можно догадаться по цифре, не обычный жесткий диск, а быстрый SSD.
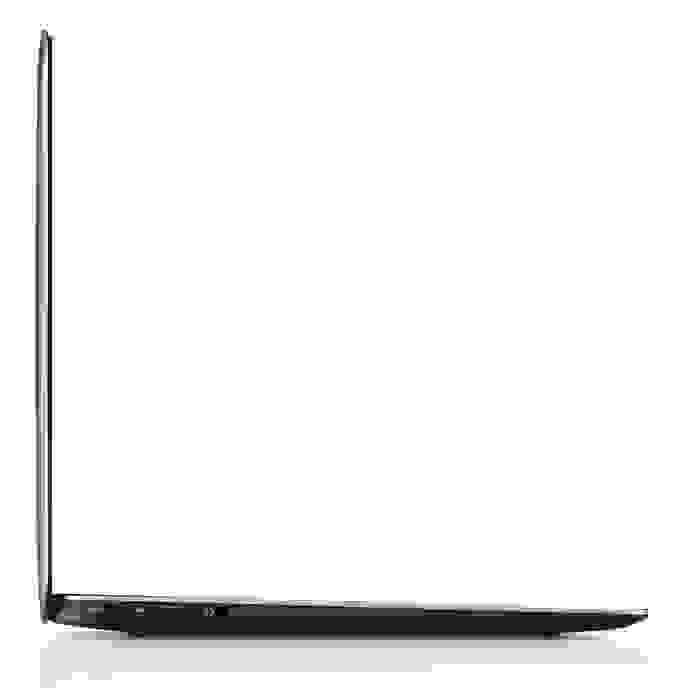
Корпус выполнен из алюминия, а основание его — из углеводородного волокна. Последнее сделано не для экономии, а во имя заботы о пользователе. По собственному опыту знаю, что ставить металлический ноутбук на голые колени не очень приятно, а ведь девушкам это приходится делать регулярно.

Тыльная часть: симпатично и практично
Для подключения периферийных устройств есть два разъема USB 3.0, причем один предназначен для подзарядки разного рода гаджетов, даже если ультрабук выключен. Емкость 6-ячеечной батареи составляет 47 Вт-ч, и ее полного заряда хватает в среднем на 5 часов работы. Если обрабатывать «тяжелые» иллюстрации и смотреть flash-ролики, отпущенное время сократится до 4 часов. Если, наоборот, задумчиво читать что-то с экрана, приглушив яркость экрана и отключив подсветку клавиатуры — хватит на 6.5 часов. Но в среднем получается именно 5.
Присутствует поддержка двухдиапазонного WiFi со скоростью соединения до 300 Мбит/с. В адаптер (Intel Centrino Advanced-N 6230) встроен и Bluetooth 3.0, так что можно подключать беспроводные гарнитуры, динамики, мышки и что душе угодно.
В общем, никаких упрощений. Действительно современный и мощный ультрабук. И вот на эту красоту поставили Ubuntu…
Как уже писал выше, я ставил Linux на свои компьютеры не раз и не два. Всегда это были ноутбуки — от первых нетбуков до дескноутов с большой диагональю экрана. С самим процессом установки обычно проблем не было, но в абсолютном большинстве случаев начинались какие-то нестыковки с драйверами. Неработающий WiFi, нестандартное разрешение экрана, отсутствие звука в динамиках — всего и не упомнишь. Среди моих знакомых есть несколько матерых линуксоидов, и они всегда пытались помочь. «Все же очень просто», — говорили эти добрые люди, — «Надо просто набрать несколько команд в терминале, и все заработает!». Я набирал эти команды (обычно они занимали по половине экрана), и кое-что действительно начинало функционировать. Но потом прилетало какое-то обновление системы, и WiFi отваливался напрочь. И старые заклинания в терминале уже не помогали.
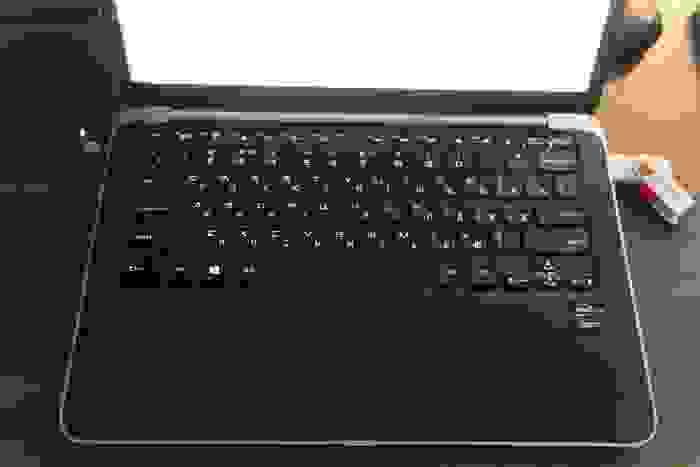
На клавиатуре без труда обнаруживается клавиша «Пуск». Это единственное, что напоминает о Windows
За этой милой возней с настройкой железа до радостей Linux дело как-то не доходило. Любопытство-любопытством, а работать без WiFi или с мутным изображением на экране как-то некомфортно. И в результате я всегда возвращался обратно на Windows.
На XPS 13 Developer Edition никаких проблем с совместимостью нет. Вообще. Никаких.
WiFi работает в обоих диапазонах. Картинка на экране в FullHD. Со звуком все хорошо. USB 3.0 работает на полной скорости. Тачпад поддерживает жесты, вроде пролистывания экрана двумя пальцами. При этом проприетарные драйверы в системе не используются — все правильные, родные.
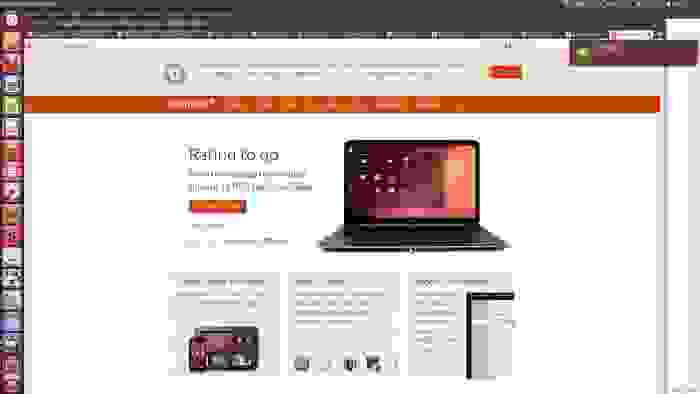
Возможно, многие уже видели XPS 13 Developer Edition на главной странице Ubuntu.com
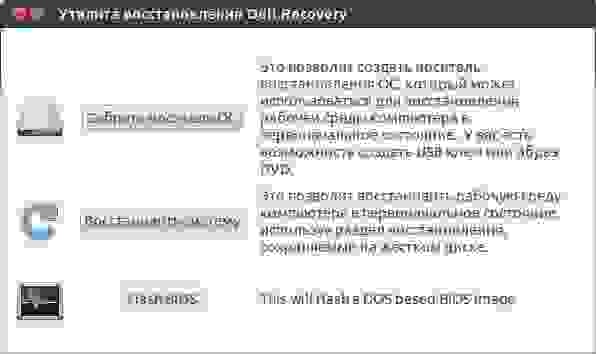
Неплохо и то, что в Dell не ограничились заливкой стандартного дистрибутива. В перечне приложений присутствует два фирменных приложения — одно отвечает за установку и обновление драйверов, а другое — за создание загрузочного диска, восстановление системы и прошивку BIOS. Последнее частично дублирует функциональность самой ОС, но забота лишней не бывает.
Что касается самой Ubuntu 12.04 LTS, то я заранее прошу прощения у более опытных читателей за акценты на банальностях и упущение важных моментов. Система для меня, по большому счету, новая, и отделить зерна от плевел получается не всегда.
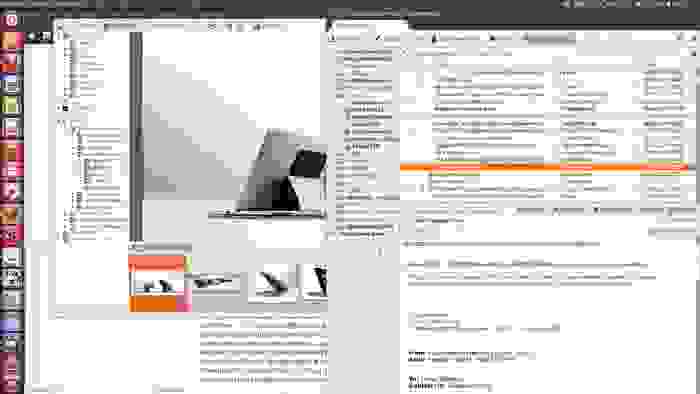
Так вот простите за крамольную мысль, но, похоже, парни из Canonical очень пристально смотрят на OS X и кое-какие идеи оттуда берут. Например, файловый менеджер Ubuntu просто до боли похож на Finder. Только, как мне кажется, работает получше. Меню параметров системы тоже заставляет вспомнить о лаконичном дизайне Apple… Не знаю, кто там кем вдохновлялся, но в результате пользоваться Ubuntu очень удобно. Не возникает проблем — куда нажимать, что открывать? Все понятно интуитивно даже такому неопытному в Linux человеку, как я.
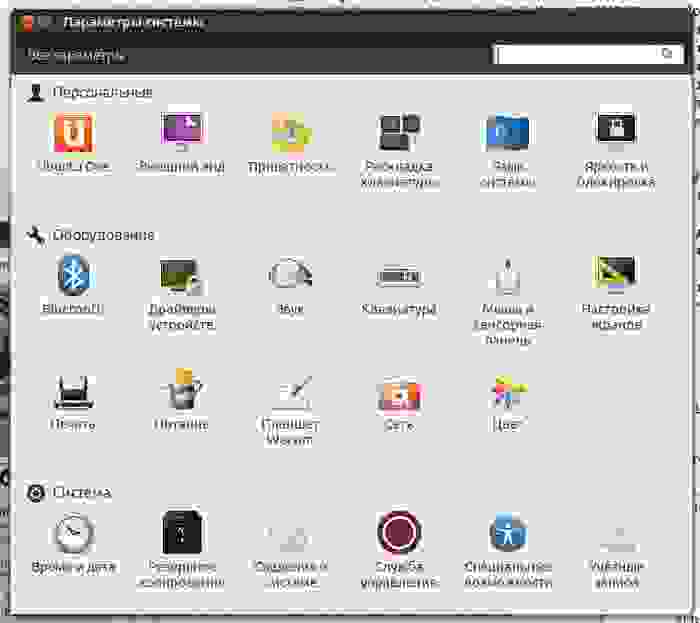
Что-то до боли знакомое.
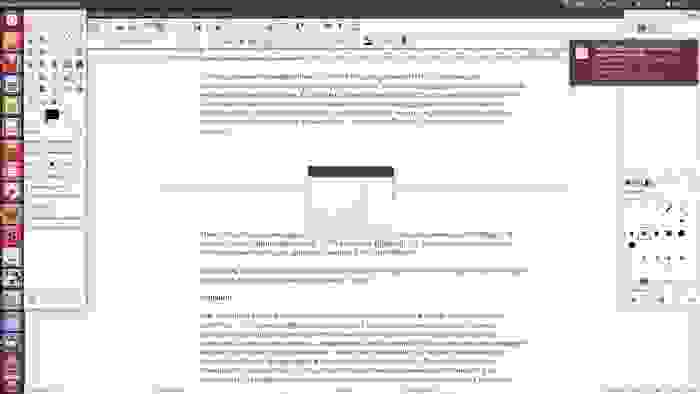
Как положено, на ультрабуке был изначально установлен LibreOffice. Наверное, как и все бесплатные офисные пакеты, он дает слабину при работе со сложными презентациями, но в моих статьях обычно не бывает какого-то изысканного форматирования, поэтому придраться ни к чему не могу.
Почтовым клиентом Thunderbird (тоже предустановленным) я долго пользовался на Windows, но несколько версий подряд слишком яростно жрали ресурсы системы, и в итоге пришлось сбежать на Outlook. Там и прижился. На Ubuntu Thunderbird ведет себя прилично, легко подцепил ящик из Gmail и пока желания сбежать не вызывает. Ну а если вдруг обнаружится, что аппетиты выросли, всегда можно перейти на веб-интерфейс, благо они сейчас вполне приличны практически у всех бесплатных почтовых сервисов.
IM-клиент Pidgin я поставил сам, хотя, наверное, можно было обойтись и предустановленным Empathy. Но уж больно хорош встроенный магазин приложений. Раньше там было как-то… небогато, а теперь мгновенно подобрал смотрелку для фотографий (Gwenview), фоторедактор (Gimp) и программу для конвертации RAW, производимых моей камерой Sony (digiKam). На этом мои потребности пока ограничились, но софта в магазине действительно много, причем как традиционно бесплатного, так и за деньги. Удобная система рейтингов в сочетании с Google позволяют быстро подобрать нужный вариант.
Пожалуй, единственное, чего мне не удалось сделать — настроить печать. У меня довольно свежая модель МФУ Epson L210, и в базе драйверов она не значится. С учетом богатства этой базы, почти уверен, что со временем драйвер появится, но это интересует меня, скорее, для порядка. Дело в том, что ни с одного своего мобильного ноутбука я за последние года три не распечатал ни единой страницы. Потребности нет. А раз так — стоит ли предъявлять какие-то претензии к Ubuntu?
День сменяет день, а желание снести Ubuntu все не возникает. Все нормально работает. Железо обслуживается корректно — вот даже экран загорается и гаснет плавно, а не рывком (это мелочь, говорящая о многом). Весь софт есть. Так чего желать еще? Если завтра понадобится лететь в командировку, могу взять этот XPS 13, и он точно справится со всеми рабочими задачами. И я его не расшибу об стол в припадке несовпадения характеров.
Но тут мы подходим к одному важному вопросу…
На сайте Dell написано следующее:
«Ноутбук Dell XPS 13 Developer Edition работает под управлением Ubuntu 12.04LTS — удобной для разработчиков облачных систем операционной системы в версии с долгосрочной поддержкой.
Помимо ОС Ubuntu 12.04LTS, ноутбук XPS 13 Developer Edition оснащается следующими компонентами:
• Базовый набор инструментов и служебных программ для разработчиков.
• Средство запуска облачной системы (бета-проект): позволяет создавать «микрооблака» на ноутбуке, имитируя среду в соответствующем масштабе, а затем легко развертывать эту среду в облаке.
• Инструмент профилей (бета-проект): предоставляет доступ к библиотеке профилей, таких как Ruby и Android, для быстрой настройки сред разработки и цепей инструментов».
Времена, когда я мог назвать себя разработчиком, минули лет десять назад. И потому мне трудновато представить — насколько все это полезно людям, работающим в сфере ПО и сервисов. Верить же на слово и пытаться ввести в заблуждения читателя не очень хочется.
В связи с этим вопросы:
1) Какие преимущества для людей, активно использующих Linux, имеет ультрабук с предустановленной и настроенной Ubuntu по сравнению с аналогами на платформе Microsoft?
2) Как легкий и мощный ноутбук с Ubuntu может улучшить и расширить ваши рабочие возможности и пользовательский опыт?
Ответы на них, скорее всего, потребуют определенных затрат времени. Понимая это, я договорился с Dell, что автор комментария, набравшего больше всего плюсов, получит побывавший у меня экземпляр XPS 13 Developer Edition на длительный тест. Ну если, конечно, это не будет зубодробительная шутка о красных глазах — тогда придется передать ультрабук занявшему второе место.
А пока победитель еще не определился, я продолжу пользоваться этой интересной машинкой с дружелюбной и внятной операционной системой.
Еще неделю назад даже представить не мог, что когда-нибудь скажу такое про Ubuntu…
Источник
Dell XPS 15 9560

| Device/Functionality | Status |
|---|---|
| Suspend | Buggy |
| Hibernate | Working |
| Integrated Graphics | Working |
| Discrete Nvidia Graphics | Modify |
| Wifi | Working |
| Bluetooth | Working |
| rfkill | Working |
| Audio | Working |
| Touchpad | Working |
| Webcam | Working |
| Card Reader | Working |
| Function/Multimedia Keys | Working |
| Power Management | Modify |
| EFI firmware updates | Working |
| Fingerprint reader | Not working |
This page contains recommendations for running Arch Linux on the Dell XPS 15 9560 (late 2016). With some configuration almost all the hardware is well supported. Exceptions are the fingerprint reader, occasional locks on resuming from suspend experienced by some users, and the lack of support for PRIME render offload to the discrete GPU in the Nvidia proprietary driver.
Contents
Before installing it is necessary to modify some UEFI Settings. They can be accessed by pressing the F2 key repeatedly when booting.
- Change the SATA Mode from the default «RAID» to «AHCI». This will allow Linux to detect the NVME SSD. If dual booting with an existing Windows installation, Windows will not boot after the change but this can be fixed without a reinstallation.
- Change Fastboot to «Thorough» in «POST Behaviour». This prevents intermittent boot failures.
- Disable secure boot to allow Linux to boot.
Installation of Arch Linux can proceed normally. Refer to the Installation guide for more information.
Power Management
Suspend and Hibernate
Suspend and Hibernate work out of the box, although some users have reported occasional system hangs on resuming from suspend, more commonly on kernels since 4.10.
The suspend function key is not printed on the keyboard, but it’s actually mapped to Fn + Insert .
Fan and temperature monitoring and control
Many of the thermometers can be read with lm_sensors.
Fan speeds can be monitored with i8kctl from i8kutils-git AUR . This laptop is not in the supported list so it is necessary to load the i8k kernel module with the force=1 module option. See Kernel modules#Setting module options. It is also possible to manually control fan speeds (at your own risk) however with manual control only a subset of the possible speeds are available (0rpm, 2500rpm, 4800rpm) instead of (0rpm, 2500rpm, 3200rpm, 3700rpm, 4800rpm, and 5100rpm) in the firmware’s automatic control. See Fan speed control#Dell laptops.
The built in fan modes can also be controlled directly by editing the setting in the bios. The libsmbios package provides many tools for reading and modifying certain settings on the computer. The smbios-thermal-ctl command can be used with the —set-thermal-mode flag to change the fan between modes performance, cool-bottom, quiet and balanced. For example:
this changes the fan mode to quiet, which makes the fan curve less aggressive.
The thermometer on the discrete Nvidia GPU can be monitored with the nvidia-smi utility, which is part of nvidia-utils .
Sensor kernel module and configuration
One avenue worth investigating is the use of the native kernel module dell-smm-hwmon:
If the module will not load, try the passing the option ignore_dmi=1 when running modprobe:
Upon successfully loading it you should see the following in your kernel logs and/or dmesg:
Now the sensors command should be able to display some useful data:
You can make these settings permanent by adding the following to /etc/modprobe.d/dell.conf :
And also by making the the HWMON_MODULES variable appears like so in /etc/conf.d/lm_sensors :
Power Saving
Disable discrete GPU
bbswitch method
The discrete Nvidia GTX 1050 GPU is on by default and cannot be disabled in the UEFI settings. Even when idle, it uses a significant amount of power (about 7W). To disable it when not in use it is necessary to install bbswitch and bumblebee , add acpi_rev_override=1 to the Kernel parameters, enable bumblebeed.service , and reboot (you may need to reboot twice for the firmware to notice acpi_rev_override ).
should now print
should print something like
acpi_call method
An alternative set of steps, not requiring bbswitch or bumblebee is as follows:
- Install the Intel video driver using the xf86-video-intel package.
- Blacklist the nvidia & nouveau modules Kernel modules#Blacklisting
- Power down the GPU with an ACPI command
Standard power saving configuration
It is a good idea to install a tool to tune common settings to save power. See Power management#Userspace tools.
Disable/autosuspend of touchscreen
Disabling the touchscreen can be done in the UEFI settings and results in significant power savings. If touchscreen is required it can be placed into autosuspend by TLP by adding 04f3:24a1 to USB_WHITELIST in tlp config file. The USB_AUTOSUSPEND must be set to 1 for this to have an effect. This will leave touchscreen enabled for usage and will consume much less battery.
Enable NVME APST
Starting from linux 4.11, NVME APST is supported and enabled by default, allowing NVME SSDs to be switched to lower power states when idle, achieving significant power savings. See Solid State Drives/NVMe#Power Saving (APST). Depending on the specific SSD, it may also be necessary to adjust the default_ps_max_latency_us parameter to the nvme_core module in order to make ASPT work. This is necessary with the Toshiba THNSN5512GPUK for example.
Enable power saving features for the i915 kernel module
Passing the following options to the i915 kernel module results in significant power savings: enable_fbc=1 enable_psr=1 disable_power_well=0 . Some users with the HD matte screen have reported that these parameters cause screen flickering. Frame buffer compression ( enable_fbc=1 ) is enabled by default starting from kernel 4.11.
Wifi and Bluetooth
For the Precision 5520 which has an Intel 8265 wifi card, the power_save option for the iwlwifi kernel module can be set from 1 to 5 with potential power savings. See Kernel modules#Setting module options. Bluetooth and Wifi can seperately be disabled with rfkill. See Wireless network configuration#Rfkill caveat.
Undervolt intel CPU and GPU
It is possible to reduce the voltage supplied to the CPU and integrated intel GPU in order to reduce their power consumption. Usually some reduction is possible without any instability, depending on the specific system. Often the first signs of instability come during suspend, resume, and transitions between load and idle, not necessarily during extended periods of high load. See intel-undervolt and linux-intel-undervolt-tool AUR which can automate the process of undervolting on each boot/resume.
Graphics
The integrated Intel HD 630 GPU works well out of the box. Optionally you may install xf86-video-intel but this is no longer recommended, since the built in kernel modesetting driver is more reliable. If you do not want to use the discrete Nvidia GPU, no extra setup is necessary. Otherwise there are a few options. All of the display outputs are connected to the integrated GPU so there is no need to set up output from the discrete GPU. It may be necessary to compile a custom kernel as described in #Power Saving.
Intel card only
Open source driver with PRIME render offloading
With this setup it is possible to use the integrated GPU by default and to offload GPU intensive applications to the discrete GPU by the use of the DRI_PRIME environment variable. See PRIME for details. Note that the open source Nvidia driver Nouveau currently does not support power management on Pascal GPUs such as the GTX 1050, so performance is very poor with this driver. See Nouveau#Power management.
Proprietary driver with bumblebee
With this setup the integrated GPU is used by default but some applications can be rendered on the discrete GPU with the optirun or primusrun launchers. See Bumblebee for detailed instructions. The lack of proper v-sync support means that with this method applications rendered on the discrete GPU exhibit tearing. There is also some overhead introduced as a result of moving data inefficiently between the discrete and integrated GPUs, but the Nvidia GPU performs much better than it does with Nouveau.
Proprietary driver with PRIME output offloading
With this setup the discrete GPU is used for all rendering and the integrated GPU is used only to display the rendered output. Power consumption is much higher during light usage because the discrete GPU cannot be disabled. Performance for graphics intensive applications is significantly better than with Bumblebee, and v-sync works due to PRIME Synchronization so tearing is eliminated. Remove bumblebee and follow the instructions in NVIDIA Optimus, Nvidia README, or PRIME Synchronization thread using PCI:1:0:0 as the BusID. Add the modeset=1 parameter to the nvidia_drm kernel module (on boot, not with modprobe) to enable PRIME synchronization and remove tearing (see Kernel modules#Setting module options).
Touchpad
The Synaptics Touchpad’s basic functionality works out of the box. Some desktop environments ship with libinput and others with the xf86-input-synaptics driver. You can see which package is installed by running:
Depending on which package handles your touchpad input, the methods to extend the functionality varies.
libinput Driver Configuration
The full documentation for libinput seemed to work quite well for this touchpad. While the driver already contains logic to process advanced multi-touch events like swipe and pinch gestures, the desktop environment or window manager might not have implemented actions for all of them yet.
To get some three and four-touch gestures to work you may need to use the documentation at libinput-gestures and install the libinput-gestures AUR package.
Synaptics Driver Configuration
You can use synclient to list the touchpad’s capabilities and change them for the session.
Configure middle button
The touchpad has a big click zone in the bottom that can be disabled or configured for 1, 2 or 3 buttons. For example, to have most of the touchpad seen as «button 1» but the middle lower zone (middle button) and the right lower zone (right button), create /etc/X11/xorg.conf.d/50-synaptics.conf with content:
With the recent deprecation of synaptics, it is possible to use existing GUI (for instance, GNOME Tweak Tool) to change the behavior. Using gnome-tweaks, under Keyboard & Mouse section, Mouse Click Emulation is set by default to «Fingers». Changing it to the «Area» option, which uses the bottom right of the touchpad for a right click, fixes the problem.
Thunderbolt docks
TB16 works fine if either Thunderbolt security is disabled in the BIOS or using bolt to temporarily authorize or permanently enroll Thunderbolt devices with Thunderbolt security activated. Various quirks are detailed on the Dell TB16 page.
Dell Docks
Some Dell docks (tested with the D6000) experience behavior whereby the displays periodically disconnect. Unplugging and plugging the dock back in again causes the displays to come back to life, but the displays will disconnect again. The more permanent fix for this is to edit the /etc/pulse/default.pa file, and comment out the following line:
A discussion around this issue can be found here, including the discussion around fixes.
Firmware updates
Tooled
Firmware updates are provided by Dell and can be installed with fwupd .
Manual
Alternatively, firmware images can be found at Dell support page as XPS_15_9560_X.Y.Z.exe files. In order to install:
- Download the desired firmware from section «Dell XPS 15 9560 System BIOS»
- Save it in /boot/EFI/Dell/Bios/ (this path may vary, depending on your installation) or to a FAT32-formatted USB key
- Reboot the system, and enter the boot menu by pressing repeatedly F12 on Dell logo
- Choose «Bios Flash Update»
- Select the file previously saved, and start the process
The process will take about five minutes, during which the system will have some reboots and push fans at maximum speed. Finally the system will reboot normally.
Fingerprint reader
The fingerprint reader is a Validity/Synaptics model with USB id 138a:0091 . There is currently a working prototype of a driver capable of capturing prints, however direct integration with libfprint is unlikely due to the manner in which the matching algorithm is implemented. [1].
There is also some people working on drivers for various other related readers. According to them it should be fairly easy to implement a driver for this model as none of the traffic to or from the device appears to be encrypted. Nevertheless, 138a:0091 is out of the scope of the project. [2]
Troubleshooting
xorg freezes at startup
If Xorg freezes as soon as it starts, even before printing any logs, and you are trying to use the Intel card with the nvidia one disabled, you need to add kernel parameter acpi_rev_override=1 as explained in #Disable discrete GPU above.
Audio / headphones
If audio output through the headphone jack suddenly stops working and restarting the computer does not help, try suspending/resuming it. It may be necessary to unplug headphones before suspending and then plug them in after the computer fully wakes up (based off of this AskUbuntu answer and my experience on Arch). If headphone audio seems permanently missing even after suspend/resume tricks and plugging/unplugging the cable, $ alsactl restore can bring it back. The last suggested thing to try is booting to Windows and muting/unmuting audio with headphones connected.
If audio volume is low through the speakers/headphones, you may need to reboot into Windows and increase the volume in Windows. Then reboot into Linux and your speakers/headphones should be louder.
PCIe Bus Error in system logs
If you have an NVMe disk and depending of your BIOS version (but even with 1.5.0 from october 2017), you may have a lot of system error logs like:
This can be corrected with the kernel boot option pcie_aspm=off which appears to have minimal to no affect on power consumption. If that does not work, try pci=nommconf (see here for explanation).
lspci causes CPU lockups
The NVidia/nouveau driver may cause any runs of lspci , starting an X server, or otherwise poking the graphics card to cause at least one CPU core to lock up, as well as seeming to completely lock up PCIe access, for instance to the NVMe SSD. The kernel parameter nouveau.modeset=0 may fix this. This is also related to the X freezes on startup (some machines may require lspci/startx to be run twice so they freeze after nouveau is taken care of); the solution in that case is to also set acpi_rev_override=1 . [3]
General slowness & stuttering
If you experience a large degradation of general performance and responsiveness it may be due to the CPU getting stuck at 800mhz. To check run watch -n1 ‘lscpu | grep MHz’ and perform some tasks. If the CPU MHz is stuck at 800 the whole time then you have the problem.
To fix there are two options:
- Disconnect the battery then hold the power button for 5-30 seconds
- Drain the battery then hold the power button for 5-30 seconds
After restarting run the same command again and the CPU MHz should be back to normal. [4]
During Boot time(POST), device attached to USB-C port does not working
It can be a problem in some cases when device attached to USB-C port.
- Cannot enter BIOS boot menu or BIOS setup with external keyboard.
- Cannot deal with boot loader menu.
- Cannot boot from external USB storage.
It caused by Dell system does not init USB-C port during POST by default. But it can be turned on in BIOS setup.
- System Configureation
- Thunderbolt Adapter Configuration
- Enable Thunderbolt Adapter Boot Support
- Thunderbolt Adapter Configuration
Источник


