- Как открыть устройства и принтеры в Windows 10
- Инструкция по открытию системного окна «Устройства и принтеры» в Windows 10
- Видеоинструкция
- Установка принтера в Windows 10
- Требуется дополнительная помощь?
- Windows 10 networked printers not showing in Devices and Printers
- Windows 10 Devices and Printers
- Replies (7)
- Create Devices and Printers Shortcut in Windows 10
- About Sergey Tkachenko
- 6 thoughts on “ Create Devices and Printers Shortcut in Windows 10 ”
Как открыть устройства и принтеры в Windows 10
Приветствую!
Если в предыдущих версиях Windows добраться до системного окна «Устройства и принтеры» можно было интуитивно быстро, благо его пункт находился в меню Пуск, то в Windows 10 разработчики усложнили данную процедуру. Складывается впечатление, что разработчики поступательно усложняют доступ к некогда привычным системным элементам, в угоду их урезанным собратьям, в которых представлены далеко не все возможности, что можно посмотреть, настроить или использовать в операционной системе Windows.
Но мы оставим это на совести текущего руководства в Microsoft, что курирует разработку Windows 10. В нашу же задачу входит информирование о том, как всё-таки открыть весьма актуальное для многих пользователей окно «Устройства и принтеры», в котором не только представлены подключенные к компьютеру устройства, но и имеется возможность настройки и управления некоторыми из них.
Инструкция по открытию системного окна «Устройства и принтеры» в Windows 10
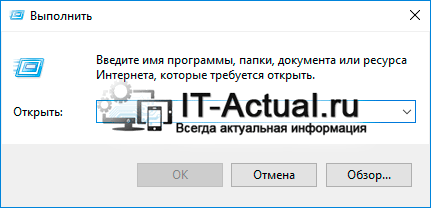
- Мы рассмотрим открытие необходимого нам окна через системную команду. Сама команда вводится в специальное окно «Выполнить», которое можно вызвать через соответствующий пункт в общем списке приложений, в папке Служебные – Windows, или же просто нажав на клавиатуре комбинацию клавиш Win + R (как её нажать).
Далее следует в окне, которое было вызвано на предыдущем шаге, вписать короткую команду:
И нажать по клавише OK (или Enter на клавиатуре).
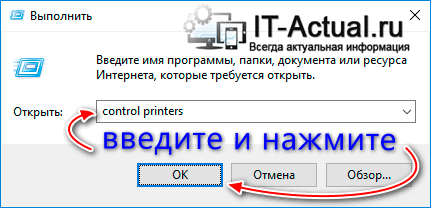
Команда будет тут же отработана, и вы увидите желанное окно «Устройства и принтеры» в Виндовс 10, в котором вы уже непосредственно сможете просмотреть подключенные к вашему компьютеру устройства и при желании произвести необходимые дополнительные манипуляции.
Видеоинструкция
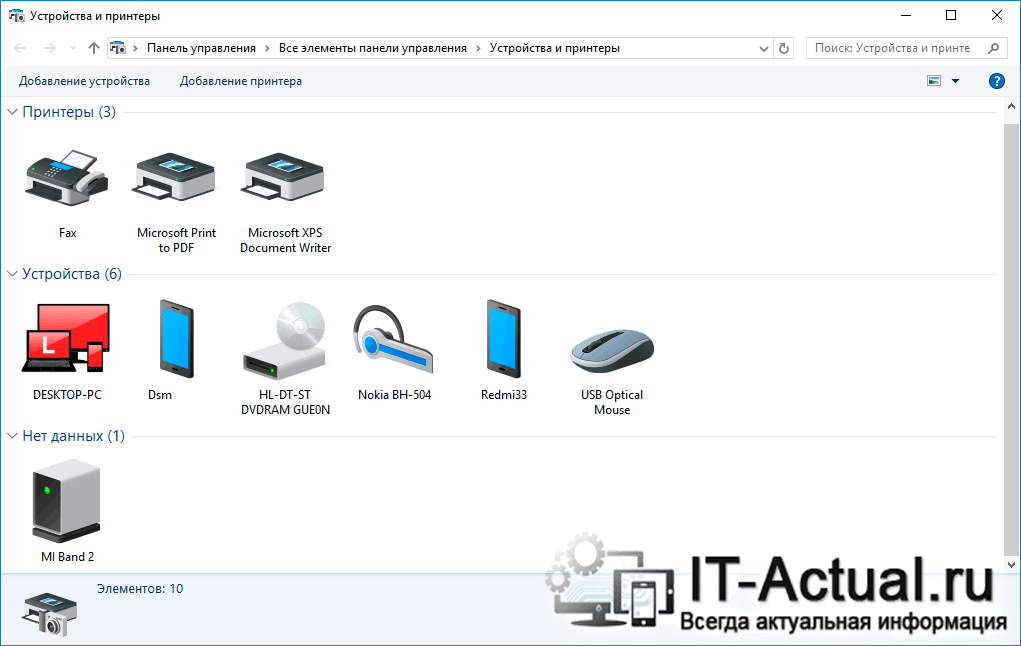
Всего пару описанных шагов достаточно для того, чтобы открыть важный системный элемент, в котором отображаются как подключенные принтеры, так и любые другие устройства: телефоны, смартфоны, клавиатуры, мышки, приводы, гарнитуры и так далее.
Если же вам достаточно часто необходимо обращаться к данному окну, то имеет смысл создать на рабочем столе соответствующий ярлык, дабы максимально оперативно осуществлять его открытие. Более подробно о данной возможности вы сможете узнать из материала «Как создать ярлык с нужной командой в Windows».
В свою очередь, Вы тоже можете нам очень помочь.
Просто поделитесь статьей в социальных сетях и мессенджерах с друзьями.
Поделившись результатами труда автора, вы окажете неоценимую помощь как ему самому, так и сайту в целом. Спасибо!
Установка принтера в Windows 10
Как правило, подключив принтер к компьютеру или добавив его в домашнюю сеть, вы можете сразу начать печать. Windows 10 поддерживает большинство принтеров, поэтому вам вряд ли придется тратить время на установку специального программного обеспечения. Дополнительная поддержка и драйверы для принтеров могут быть доступны при обновлении Windows 10.
Примечание: Если ваш компьютер работает под управлением Windows 10 S, некоторые принтеры могут не работать с ним или могут иметь ограниченную функциональность. Дополнительные сведения см. в статье Поддержка устройств в Windows 10 S.
Если принтер включен и подключен к сети, Windows легко найдет его. Список доступных принтеров может включать все принтеры в сети, например беспроводные и Bluetooth-принтеры или принтеры, подключенные к другим компьютерам и доступные в сети. Для установки некоторых принтеров вам может потребоваться разрешение.
Нажмите кнопку Пуск , а затем выберите Параметры > Устройства > Принтеры и сканеры.
Открытие принтеров & параметров сканеров
Выберите Добавить принтер или сканер. Подождите, пока компьютер найдет находящиеся рядом принтеры. Затем выберите нужный принтер и нажмите кнопку Добавить устройство.
Если принтера нет в списке, выберите Необходимый принтер отсутствует в списке, а затем следуйте инструкциям, чтобы добавить его вручную, используя один из вариантов.
При использовании беспроводных точек доступа, расширителей или нескольких беспроводных маршрутизаторов с отдельными SSID необходимо убедиться, что вы подключены к той же сети, что и принтер, чтобы компьютер нашел и установил его.
Если у вас есть новый беспроводной принтер, который еще не был добавлен в домашнюю сеть, ознакомьтесь с инструкциями по принтеру и посетите веб-сайт изготовителя принтера, чтобы узнать больше и получить актуальное программное обеспечение для принтера.
В большинстве случаев для установки принтера достаточно подключить его к компьютеру. Для этого просто вставьте USB-кабель принтера в USB-порт компьютера и включите принтер.
Нажмите кнопку «Пуск», а затем выберите Параметры > устройства> принтеры & сканеры.
Открытие принтеров & параметров сканеров
Выберите Добавить принтер или сканер. Подождите, пока компьютер найдет находящиеся рядом принтеры. Затем выберите нужный принтер и нажмите кнопку Добавить устройство.
Если принтера нет в списке, выберите Необходимый принтер отсутствует в списке, а затем следуйте инструкциям, чтобы добавить его вручную, используя один из вариантов.
Требуется дополнительная помощь?
Если вам нужна помощь по сканеру, ознакомьтесь со справкой Установка и использование сканера в Windows 10.
Если состояние вашего принтера отображается как «не в сети», вот как можно изменить состояние на «в сети».
Если возникают проблемы с принтером после обновления до последней версии Windows 10, см. раздел Устранение проблем с принтерами после обновления Windows 10. Для устранения проблем с драйвером ознакомьтесь с разделом «шаг 3: Обновление драйверов» на этой странице.
Windows 10 networked printers not showing in Devices and Printers
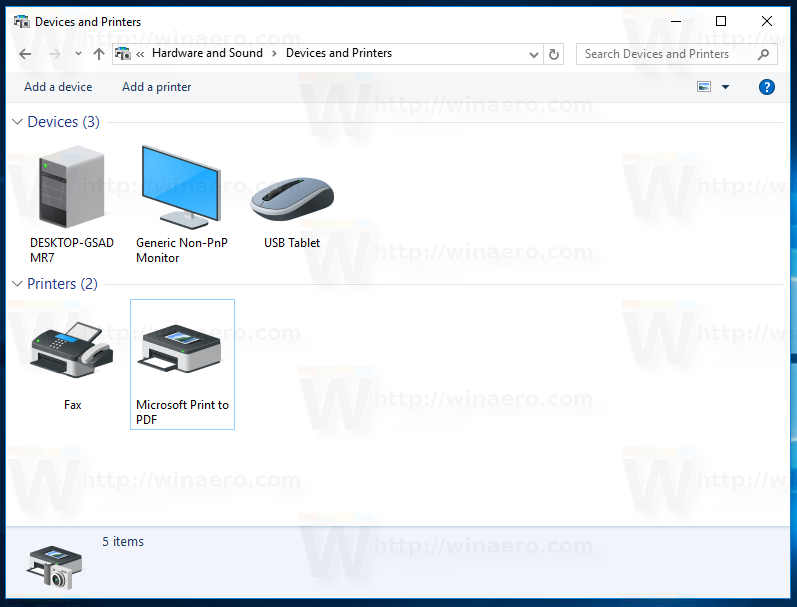
New Windows 10 — not an upgrade. I have installed 3 networked printers. If I go to Devices and Printers, they are not listed. Some local printers are listed: Fax, Microsoft Print to PDF, Send to OneNote 2016.
However, if I open Wordpad and select print, I can choose the network printers and I’m able to print to the printer. If I look under Print Queues in Device Manager, the local printers are listed.
![]()
Please let us know, How do you have the printer connected to your computer? It is plugged into USB, on the network, or some other way?
Usually all available printers will be shown directly under Device and Printers. Moreover it also show the status of the printer. Not sure how this is happening. Suggest you to check this issue by removing and re-installing the printer.
You may try the following methods and check if it helps.
Normally this will happen if the Print Spooler service is not running but then your local machine would display with a red indicator in Print Management.
Method 1 :
Please try steps below check if it helps.
- Press Windows + R, type services.mscand press Enter.
- Find Print Spooler service and double-click.
- Make sure Print Spooler’s Startuptype set to Automatic.
- The Service status of the Print Spooler should be Running.
- If not, can you «Start» the Print Spooler service.
If the issues still persist, refer to the below methods.
Method 2: I would suggest you to uninstall and reinstall the printer driver.
1. Press Windows Key + R Key.
2.Then type “devmgmt.msc” without the quotes and hit on Enter Key.
3. Expand Printe Queues.
4. Right click on the driver and click on Uninstall.
5. Restart your Computer.
If the issue still persist, then I suggest you to download and install the latest printer driver from the manufacture website.
Let us know the status of the issue in regards with printers display in Devices and Printers.
Windows 10 Devices and Printers
Replies (7)
![]()
For us to further isolate the issue, please clarify the following:
- What’s the make and model of your computer and printer?
- Did you receive any error messages?
- Are you able to use the printer with a different device?
Meanwhile, you may try running the printer troubleshooter and let us know how it goes.
18 people found this reply helpful
Was this reply helpful?
Sorry this didn’t help.
Great! Thanks for your feedback.
How satisfied are you with this reply?
Thanks for your feedback, it helps us improve the site.
How satisfied are you with this reply?
Thanks for your feedback.
For us to further isolate the issue, please clarify the following:
- What’s the make and model of your computer and printer?
- Did you receive any error messages?
- Are you able to use the printer with a different device?
Meanwhile, you may try running the printer troubleshooter and let us know how it goes.
My computer was built by me several years ago with Windows 7 Professional originally installed. My printer is an HP Deskjet D1600. Both worked fine until the latest batch of updates. They are part of a home network that include a Windows 8.1 laptop and three computers with Ubuntu 16.04 installed.
The error message I received after I tried installing the printer after the updates indicated that the printer properties needed to be changed.. Although the printer still did not appear in Devices and Printers, it did show as a selection when I tried to print a document. I could not change the printer properties because the printer was not showing in Devices and Printers. When I tried to print something now, I get an error message that no pages were selected to print, which is false.
I am able to use the printer with all other devices in the network.
9 people found this reply helpful
Was this reply helpful?
Sorry this didn’t help.
Great! Thanks for your feedback.
How satisfied are you with this reply?
Thanks for your feedback, it helps us improve the site.
How satisfied are you with this reply?
Thanks for your feedback.
Hi SCTanner to work around this issue
- Open Services Console (Go to Run Win + R and type SERVICES.MSC)
- You should have to find five Services 1. «Device Association Service» 2. «Device Install Service» 3. «Device Management Enrollment Service» 4. «Device Setup Manager» and «DevQuery Background Discovery Broker». The first, third, fourth and fifth properties startup type should have to be «Automatic (Trigger Start)». «Device Management Enrollment Service» is just «Manual».
- Make sure that these services are running if it isn’t the go to their properties and start it.
- After checking reboot the machine.
Now check the Devices and Printers folder: all the missing printer icons should appear.
Then every printer ports should be manually configured. i.e. in Control Panel > Device and Printer, right click on the printer => Printer properties. Choose port and either add a new port or configure one of the old ones. In this case you shall know the exact IP for the printer (if it’s a network printer). If it’s a local printer then choose the correct port (local, or COM or USB). Plz.. let me know the result.
Deepak K Prajapati
Thank you for reaching out on Microsoft Community.
Create Devices and Printers Shortcut in Windows 10
Devices and Printers is a special system folder which shows the important devices connected to your computer with fancy icons. This folder was first introduced in Windows 7. Windows 10 comes with this folder in the classic Control Panel. You can create a special shortcut to access this feature faster.
The Devices and Printers folder provides a useful user interface to access and manage your peripheral devices. It shows advanced properties of devices and is able to download realistic looking images for printers, cameras, mice and keyboards. It also contains a number of quick actions in the context menu of a device. It also replaces the classic Printer folder.
For fast access to this useful folder in Windows 10, you might want to create the Devices and Printers shortcut on the Desktop.
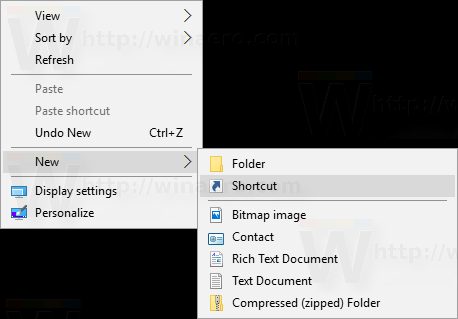
To create Devices and Printers shortcut in Windows 10, do the following.
- Right-click the empty space on your Desktop. Select New — Shortcut in the context menu (see the screenshot).

- In the shortcut target box, type or copy-paste the following:
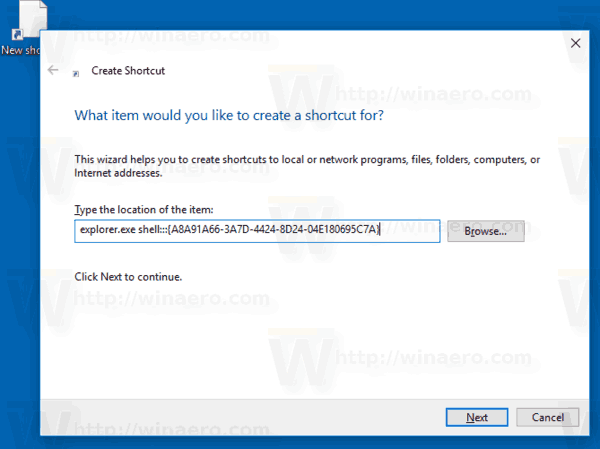
The command we used is special Active X (CLSID) command. Refer to the full list of these commands available in Windows 10: CLSID (GUID) shell location list in Windows 10
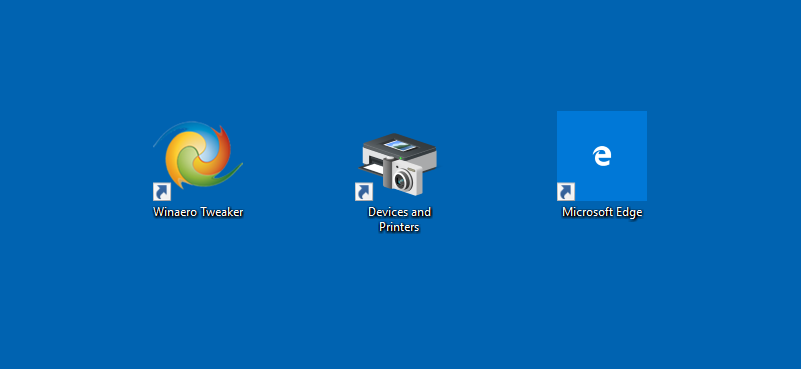
Now, you can move this shortcut to any convenient location, pin it to taskbar or to Start, add to All apps or add to Quick Launch (see how to enable Quick Launch). You can also assign a global hotkey to your shortcut.
Winaero greatly relies on your support. You can help the site keep bringing you interesting and useful content and software by using these options:
Share this post
About Sergey Tkachenko
Sergey Tkachenko is a software developer from Russia who started Winaero back in 2011. On this blog, Sergey is writing about everything connected to Microsoft, Windows and popular software. Follow him on Telegram, Twitter, and YouTube.
6 thoughts on “ Create Devices and Printers Shortcut in Windows 10 ”
Printer error not resolved – job status needs to be cleared
Thank you for the guidance..
Heh, don’t mention it. Thanks for your printer service!
You guys really help me out . I really need this information.
OMG…I was so cynical that this wouldn’t work! It was easy…simple to follow….Genius


