- Узнаем серийный номер ноутбука
- Определение серийного номера ноутбука
- Способ 1: Просмотр надписи на наклейке
- Способ 2: Поиск информации в BIOS
- Способ 3: Использование фирменных программ
- Способ 4: Использование консольных команд Windows
- How to find your PC’s model number on Windows 10
- How to check PC model with System Information
- How to check PC model with PowerShell
- How to check PC model with Command Prompt
- More Windows 10 resources
- The Dell XPS 15 is our choice for best 15-inch laptop
- Halo: MCC’s live service elements make it better, not worse
- Microsoft’s Surface Duo is not ‘failing up’
- These are the best PC sticks when you’re on the move
- Get USB Drive Serial Number on Windows in C++
Узнаем серийный номер ноутбука

Серийный номер ноутбука иногда требуется для получения поддержки со стороны производителя или определения его технических характеристик. Каждое устройство имеет уникальный номер, состоящий из разного количества символов, что определяет производитель. Такой код указывает принадлежность ноутбука к определенной серии устройств с похожими характеристиками.
Определение серийного номера ноутбука
Обычно в комплекте с каждым ноутбуком идет инструкция к нему, где и указан серийный номер. Кроме этого он написан и на упаковке. Однако такие вещи быстро теряются или выбрасываются пользователями, поэтому далее мы рассмотрим несколько других простых способов определения уникального кода устройства.
Способ 1: Просмотр надписи на наклейке
На каждом ноутбуке сзади или под батареей находится наклейка, где указана основная информация о производителе, модели, а также там находится и серийный номер. Вам достаточно только перевернуть устройство, чтобы задняя крыша оказалась вверху, и найти там соответствующую наклейку.
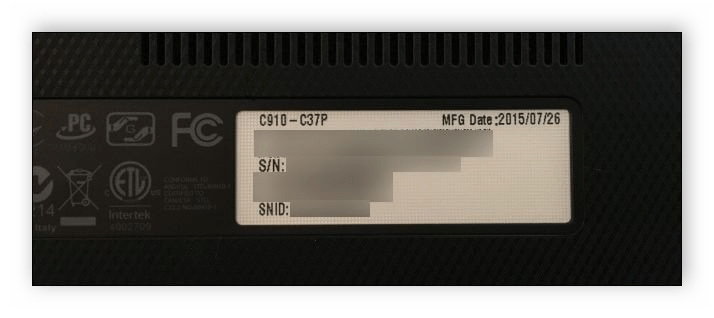
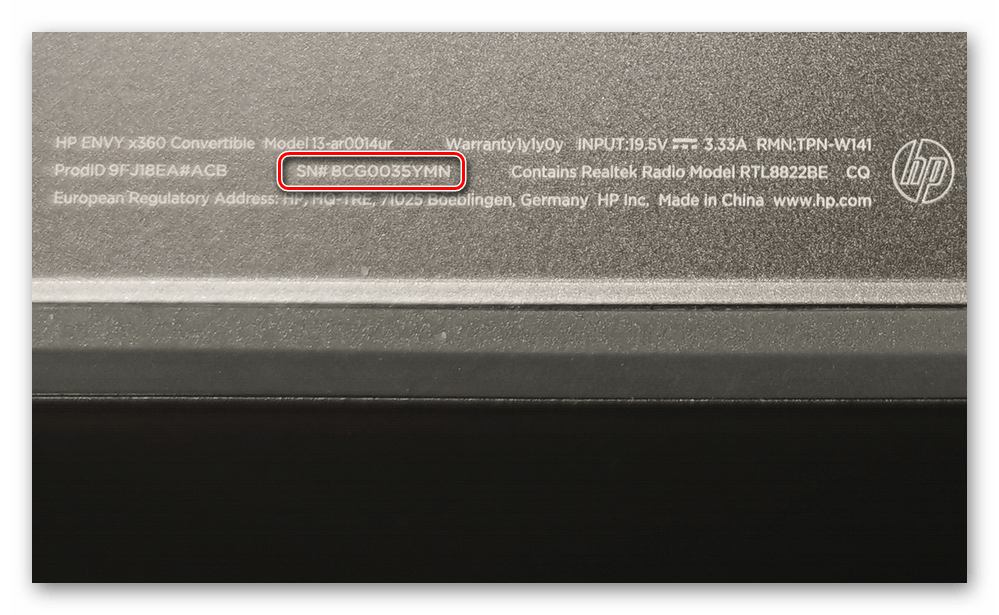
Когда наклейка нет, поищите нанесенную на корпус надпись. Например, на фото ниже вся необходимая информация находится в нижней части корпуса.
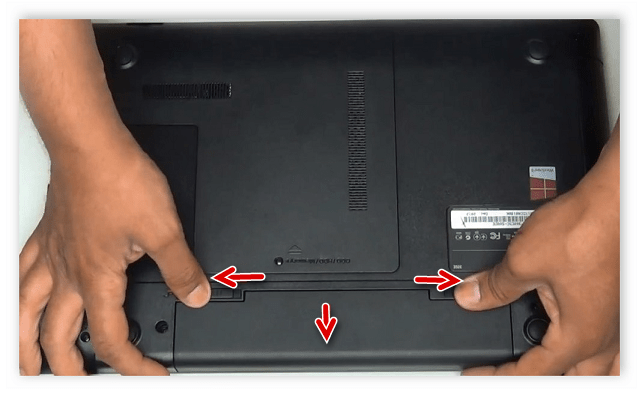
Если ноутбук старый, вместо такой надписи и наклейки искомые данные находятся под батареей. Вам потребуется выполнить следующие действия:
- Полностью выключите устройство и отсоедините его от сети.
- Переверните его задней крышкой вверх, разведите защелки и вытащите батарею.
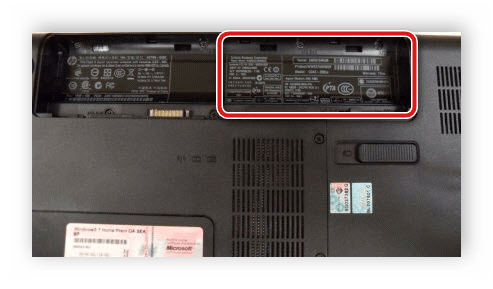
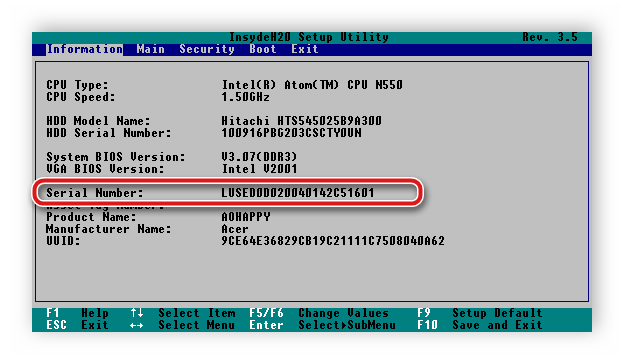
Теперь обратите внимание — на корпусе находятся различные надписи. Найдите там строку «Serial Number» или «Серийный номер». Те цифры, что идут после данной надписи, и есть уникальный код ноутбука.
Запомните его или запишите где-то, чтобы каждый раз не снимать батарею, а далее останется только собрать устройство. Конечно, такой способ определения серийного номера самый простой, однако со временем наклейки стираются и некоторые цифры или вовсе все надписи не видно. Если такое произошло, то следует использовать другой метод.
Способ 2: Поиск информации в BIOS
Как известно, в BIOS находится основная информация о компьютере, а запустить его можно даже без установленной операционной системы. Метод определения уникального кода ноутбука через BIOS будет полезен тем пользователям, у которых возникли определенные неполадки, не позволяющие полностью запустить ОС. Давайте подробнее рассмотрим его:
- Включите устройство и перейдите в БИОС нажатием на соответствующую клавишу на клавиатуре.
Вам не понадобится даже переключаться по вкладкам, обычно серийный номер указан в разделе «Main» или «Information».
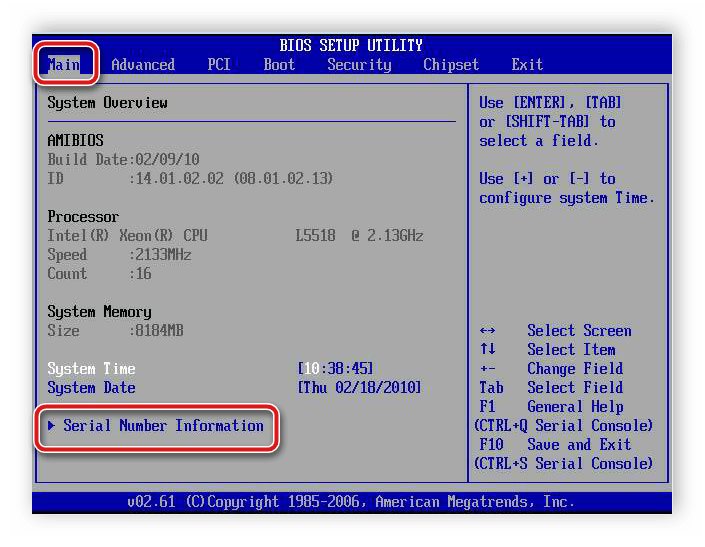
Существует несколько версий BIOS от разных производителей, все они имеют одинаковое предназначение, однако их интерфейсы отличаются. Поэтому в некоторых версиях БИОСа вам потребуется перейти во вкладку «Main» и выбрать строку «Serial Number Information».
Способ 3: Использование фирменных программ
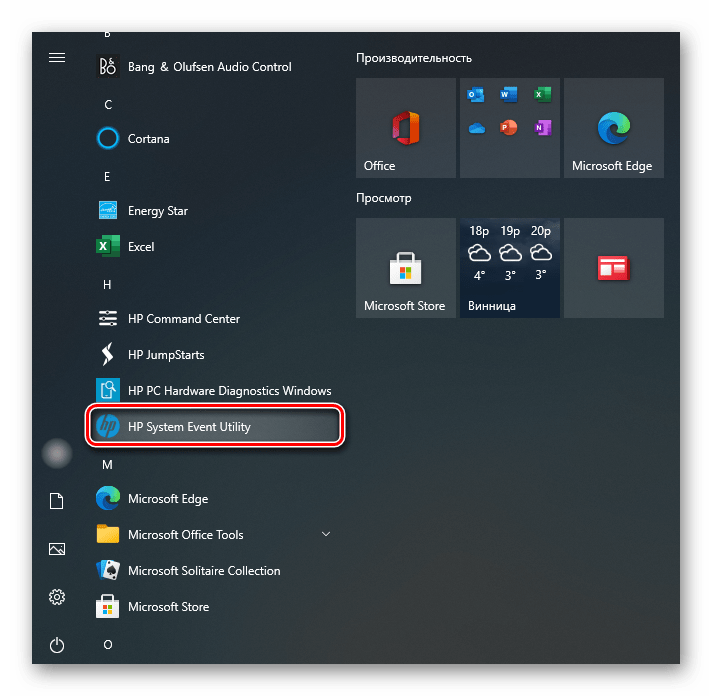
Практически у всех ноутбуков есть фирменное программное обеспечение, чаще всего предустановленное. Таких программ, как правило, несколько, и все они отвечают за выполнение разных действий. Вам понадобится найти то приложение, которое отображает именно информацию о ноутбуке. Например, у лэптопов HP эта программа называется HP System Event Utility (та же информация доступна и через HP Support Assistant), у других брендов название должно быть примерно похожим. Найти ее можно через «Пуск» — весь предустановленный софт всегда отображается там, если вы его, конечно, не удаляли. В такой ситуации проще всего воспользоваться любым другим способом нашей статьи.
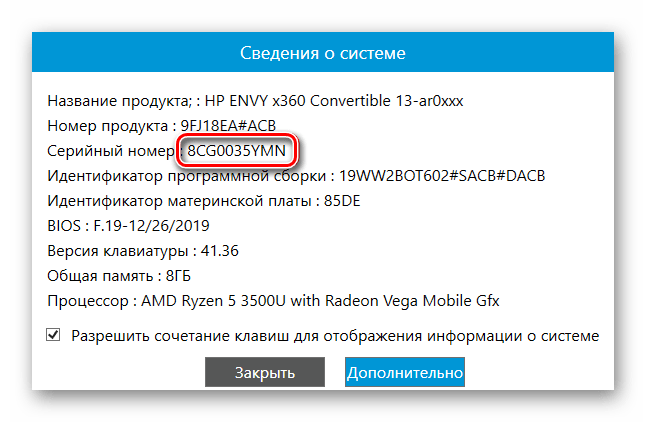
Как видно на скриншоте ниже, одна из строк демонстрирует серийный номер устройства.
Способ 4: Использование консольных команд Windows
Во всех версиях операционной системы Windows старше 7 присутствует встроенная WMIC-утилита, позволяющая быстро определить серийный номер устройства через командную строку. Данный способ очень прост, а пользователю необходимо будет выполнить всего два действия:
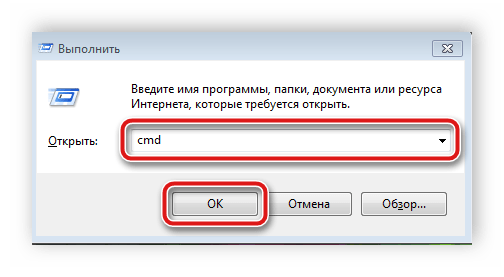
- Зажмите сочетание клавиш Win + R, чтобы запустить «Выполнить». В строку введите cmd и нажмите «ОК».
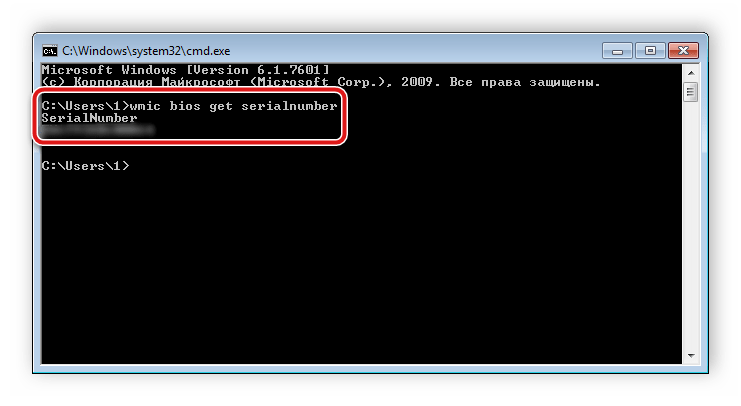
Откроется командная строка, куда потребуется вписать следующее:
wmic bios get serialnumber
Для выполнения команды нажмите Enter, и через несколько секунд в окне отобразится уникальный номер вашего устройства. Прямо отсюда его можно скопировать в буфер обмена.
Если же вам более удобно пользоваться утилитой PowerShell, откройте ее, а затем введите одну из представленных далее команд.
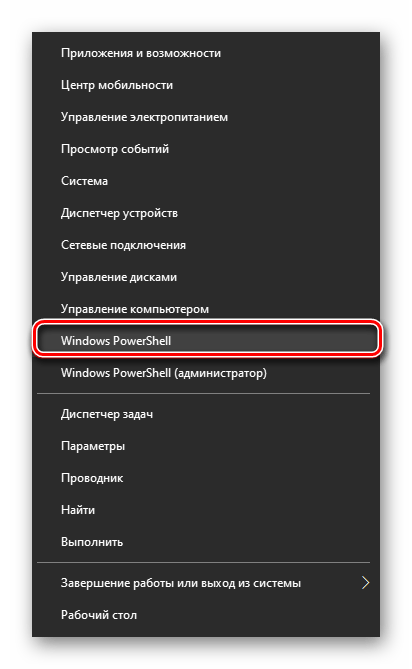
Поскольку PowerShell по умолчанию встроена в альтернативный «Пуск», открывающийся кликом правой кнопкой мыши, у всех последних версий Windows 10 (в старых сборках используется «Командная строка»), некоторым юзерам удобнее запускать именно эту оболочку консоли.
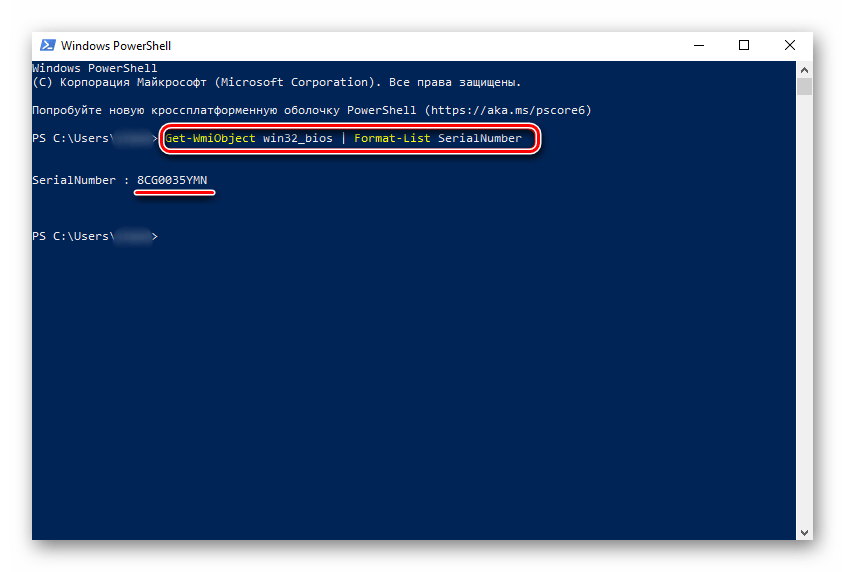
Она поддерживает две команды, которые выводят серийный номер ноутбука. Первая — Get-WmiObject win32_bios | Format-List SerialNumber . Скопируйте и вставьте ее, а затем нажмите Enter.
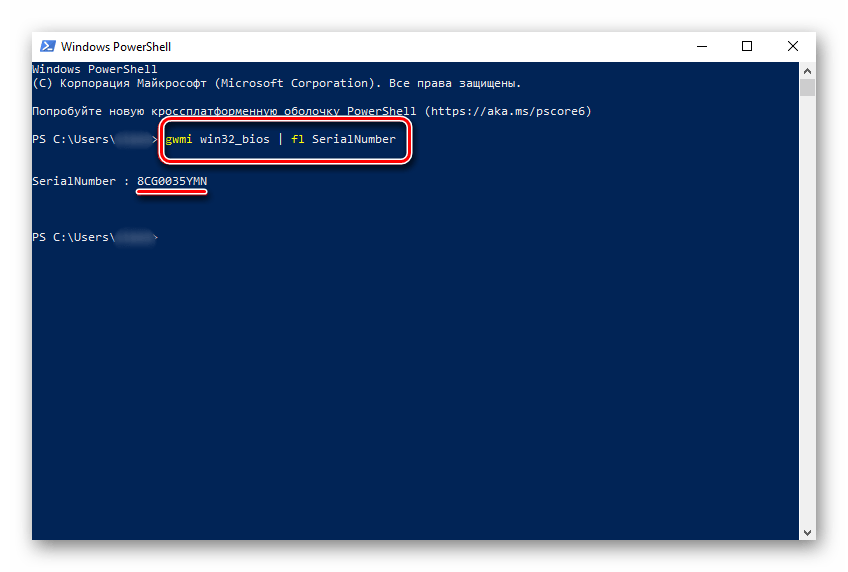
Если у вас по каким-то причинам предыдущая команда не работает, можете воспользоваться ее аналогом — gwmi win32_bios | fl SerialNumber . Результат, как видите, тот же.
Как видите, серийный номер ноутбука определяется всего в несколько действий простыми способами и не требует от пользователя дополнительных знаний или навыков. Все, что от вас нужно, – выбрать подходящий метод и следовать инструкции.
How to find your PC’s model number on Windows 10
 Source: Windows Central
On Windows 10, knowing the model number of your computer can be useful in many scenarios. For instance, when you have to upgrade a component (such as memory, hard drive, display, and power supply), the model number can simplify the search to obtain a compatible replacement. If you have to troubleshoot a problem, and you need to contact technical support. Or it can also come in handy to properly inventory the device.
Although a lot of manufactures usually affix a sticker and provide tools to find this information on your laptop or desktop, Windows 10 includes at least three ways to find the model number as well as serial number (also known as «service tag») of your computer using System Information, PowerShell, and Command Prompt.
In this Windows 10 guide, we will walk you through the steps to find out the model number of your device, whether it’s from Dell, HP, Acer, Lenovo, or from another brand.
How to check PC model with System Information
To find the computer model number with System Information, use these steps:
- Open Start.
- Search for System Information and click the top result to open the app.
- Click on System Summary.
Confirm the model number of your device under the «System Model» field.
 Source: Windows Central
Once you complete the steps, you will have a clear understanding of the device model you use.
How to check PC model with PowerShell
To determine your laptop or desktop model number with PowerShell, use these steps:
- Open Start.
- Search for PowerShell and click the top result to open the console.
Type the following command to check the device model and the serial number and press Enter:
Get-CimInstance -ClassName Win32_ComputerSystem
 Source: Windows Central
(Optional) Type the following command to check the model and serial number and press Enter:
Get-CimInstance -ClassName Win32_bios
Source: Windows Central
After you complete the steps, the PowerShell commands will reveal the model number and the device’s serial number.
How to check PC model with Command Prompt
To figure out your computer model number with Command Prompt, use these steps:
- Open Start.
- Search for Command Prompt and click the top result to open the console.
Type the following command to get the desktop or laptop model and press Enter:
wmic csproduct get name
 Source: Windows Central
(Optional) Type the following command to view the model and serial number and press Enter:
wmic csproduct get name, identifyingnumber
Source: Windows Central
Once you complete the steps, the commands will display the model number and the serial number of your desktop, laptop, or tablet running Windows 10.
We are focusing these instructions on Windows 10, but you can also use these steps on Windows 8.1. On Windows 7, only the System Information and Command Prompts steps will work.
More Windows 10 resources
For more helpful articles, coverage, and answers to common questions about Windows 10, visit the following resources:
![]()
The Dell XPS 15 is our choice for best 15-inch laptop
For a lot of people, a 15-inch laptop is a perfect size that offers enough screen for multitasking, and in a lot of cases, some extra performance from powerful hardware. We’ve rounded up the best of the best at this size.
![]()
Halo: MCC’s live service elements make it better, not worse
Halo: The Master Chief Collection is more popular than ever, but some fans don’t agree with the live service approach 343 Industries has taken with it. Here’s why those elements are, at the end of the day, great for the game and for Halo overall.
![]()
Microsoft’s Surface Duo is not ‘failing up’
Microsoft announced this week that it was expanding Surface Duo availability to nine new commercial markets. While Surface Duo is undoubtedly a work in progress, this is not a sign of a disaster. It’s also doesn’t mean that Surface Duo is selling a ton either. Instead, the reason for the expansion is a lot more straightforward.
![]()
These are the best PC sticks when you’re on the move
Instant computer — just add a screen. That’s the general idea behind the ultra-portable PC, but it can be hard to know which one you want. Relax, we have you covered!
Get USB Drive Serial Number on Windows in C++
Getting the serial number of a USB device in Windows is a lot harder than it should be. ( But it’s a lot easier than getting the USB serial number on Os X!)
It is relatively simple to get USB information if you have the device handle of the USB device itself. And you can get information about a mounted volume pretty easily. But to match up a mounted volume with a USB device is tricky and annoying.
There are many code examples on the net about how to do it in C#, visual basic, and similar broken garbage languages. If you are forced to program in C# or visual basic – get help. There are alternatives to suicide. There are some example of how to do it through WMI, which is a Windows operating system service – which is slow, buggy and unreliable. If you have to do it in WMI, you are beyond help.
First here is the code:
You pass in the volume number. This is just the drive letter, represented as an integer. Drive “A:” is zero. So the first thing we do is create a drive path. For example, if the mounted volume you want to get a serial number for is “F:”, you’d pass in “5”, and construct a device path \\.\F: .
Next you get a device handle for that volume using CreateFile() . Originally this function was meant to create regular file system files. But today it can be used to open handles to devices of all kinds. Each device type is represented by different device paths.
Next, you get the device number. When a volume is mounted, it will be associated with a device, and this function returns its number. Why the OS doesn’t just give you a device path here is ridiculous. The device numbers will be low. Typically a number under 10. Don’t be surprised. I was.
You get the device number by calling DeviceIOControl() with the handle to your device:
There is an old windows API, in setupaip.h that was designed to help write installers. It has now been obsoleted by newer installation APIs, but you can still use it to enumerate devices. Basically you pass in the GUID of the type of device interface you want. In this case we just want to enumerate USB flash disks. That guid is defined at the top of the file.
You setup for enumeration with SetupDiGetClassDevs() , and iterate over the devices with SetupDiEnumDeviceInterfaceDetail() . When you are done you close the iterator with SetupDiDestroyDeviceInfoList() .
Then for each device you get the device name and number using SetupDiGetDeviceInterfaceDetail , and match up the device number of each device with the one you got for the volume. When you find a match then you have the device path for your actual USB flash drive. At that point you could start querying the device itself using functions like DeviceIoControl() , but in this case the information we want is coded right into the device path
Here is a typical device path for a USB flash disk:
The device path for a flash disk must start with “usbstor”. This first part of the path is name of the driver, which on windows is called “usbstor”. The vendor id, product id, product revision and serial number are highlighted in red.
The following regular expressions will extract this information from the device path:


