- How to Disable the Get Windows 10 Update GWX App Completely
- Banish the Get Windows 10 Notification for Good
- Disable Get even more out of Windows message with these 2 steps
- How can I disable the Get even more out of Windows message on Windows 10?
- Method 1 – Disable the prompt through the Settings app
- Method 2 – Disable the prompt through the Registry Editor
- Как запретить обновление до Windows 10 — GWX Control Panel
- GWX Control Panel — установка, настройка, использование для запрета обновления Windows 10
- Послесловие
- how to permanently disable windows 10 automatic updates,
- Replies (12)
How to Disable the Get Windows 10 Update GWX App Completely

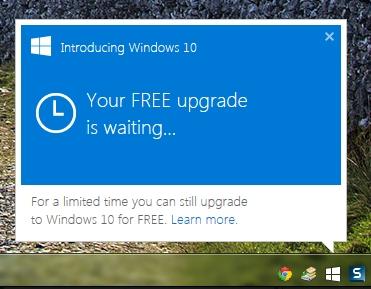
Since May 2015, Microsoft has been pushing out the Get Windows 10 app or what is known as the GWX app. If you want to upgrade, it’s a useful tool in determining if your PC can run Windows 10 and prepare it for the upgrade. But if you’re not upgrading, you probably don’t like seeing the Get Windows 10 notification all day.
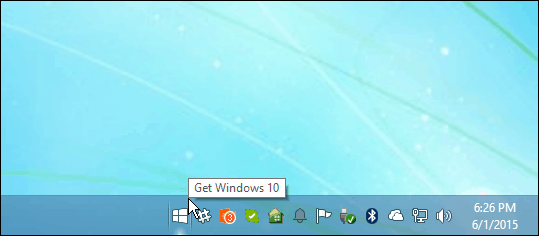
Get Windows 10 app (GWX) in Windows 7 Notification Area
We previously showed you how to get rid of the annoying Windows 10 upgrade notification. However, Microsoft has been getting more aggressive in pushing the new version of Windows and at times upgrading PCs without permission. In a perfect world, Microsoft would have every computer running Windows 10, but the reality is, that isn’t going to happen. Windows 7 and Windows 8.1 with Update 1 are still supported, and many users are comfortable with their current version.
Banish the Get Windows 10 Notification for Good
Removing the GWX has turned out be quite the whack the mole experience for many. Microsoft is using its Windows Update service to deliver the GWX app over and over. Even when you think you have removed the appropriate KB Updates, it still keeps coming back. Thankfully, someone has taken it upon themselves to stop GWX once and for all. Microsoft is expected to start delivering Windows 10 as a recommended update in 2016, until then, here is how you can put a stop to it.
The GWX Control Panel is a free third-party utility developed to stop Microsoft’s Get Windows 10 app for you. In addition to disabling GWX, the following functions are included:
- Remove the “Get Windows 10” icon that appears in your notification area.
- Prevent your Windows Update control panel from upgrading your computer to Windows 10.
- Prevent your computer from secretly downloading Windows 10 installation files.
- Detect and remove the hidden Windows 10 installation files if they’re already on your PC.
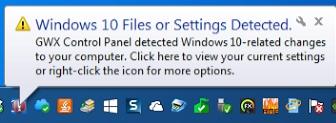
- Optionally monitor your computer for unwanted Windows 10-related settings and files. (New in version 1.6.)
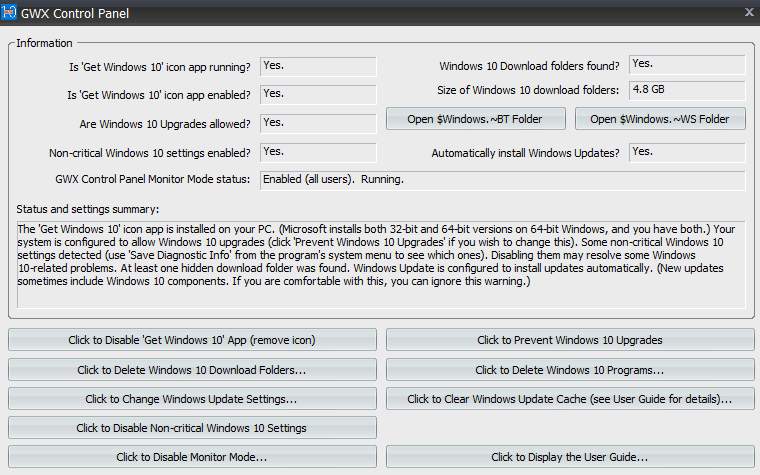
The GWX Control Panel interface is packed with information and settings. The app detects if the Get Windows 10 app is enabled. It also checks if GWX files have been downloaded or if your settings are configured to install the Windows 10 Upgrade.
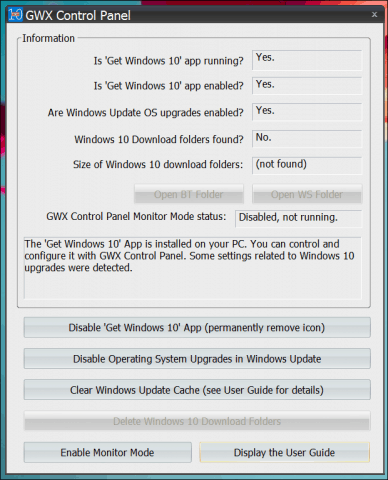
If you don’t want the Get Windows 10 app make any changes to your system, click Disable ‘Get Windows 10’ App (permanently remove icon) and Disable Operating System Upgrades in Windows Update. That’s it! You no longer have to worry about upgrading to the latest version of Windows.
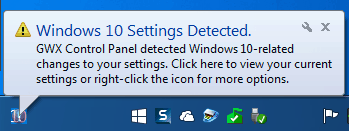
To further reassure you, the latest version of GWX Control Panel includes a monitor mode you can use to check for new KB updates or system related changes that might be associated with the Get Windows 10 app. You can quickly access it from the Notification Area.
So what if you eventually decide to upgrade to Windows 10, especially before the July 2016 deadline? The Media Creation Tool can be used to initiate the upgrade; we have detailed how you can use it to perform an upgrade from previous versions of Windows.
Disable Get even more out of Windows message with these 2 steps

Windows 10 has a lot of features and sometimes they require multiple steps to set up.
If you don’t fully set up your PC after a clean install of Windows 10, a feature update, or even after a restart or log in, you can be prompted with the Get even more out of Windows message.
This message helps you launch services linked to your Microsoft account like:
- Set up Windows Hello
- Do more across devices
- Get Office 365 ready
- Protect your files with OneDrive
- Link your phone and PC
Starting with Windows 10 build 18945, the message states Suggest ways I can finish setting up my device to get the most out of Windows and can be turned ON or OFF in Settings, under Notifications & actions.
The Get even more out of Windows message can be useful for users who want to set up the above-mentioned services, but for those who don’t, it is really annoying.
Today, we’ll take a look at how you can get rid of this prompt in Windows 10.
How can I disable the Get even more out of Windows message on Windows 10?
There are 2 methods to get rid of the Get even more out of Windows message in Windows 10.
Method 1 – Disable the prompt through the Settings app
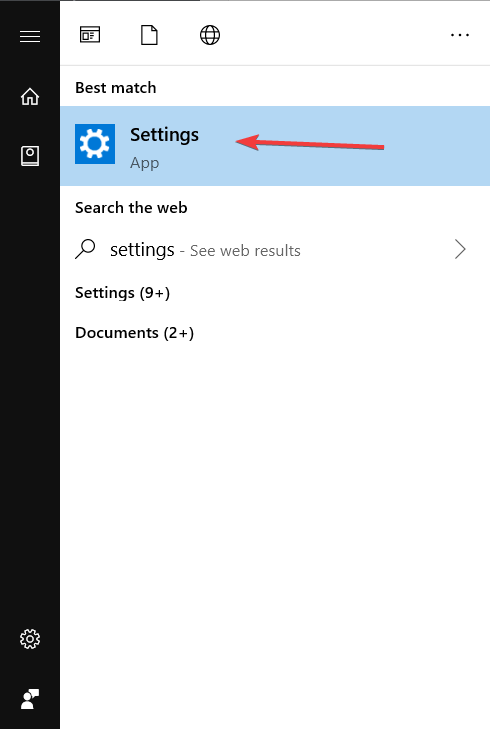
- In your Windows search box type settings and click on the first result. You can achieve the same result by pressing the Windows key + I.

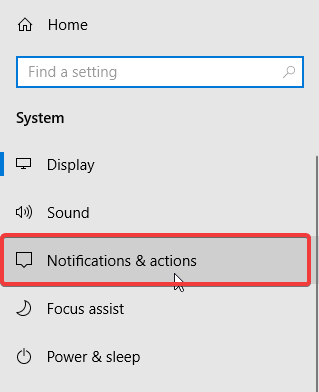
- Once in Settings, navigate to System > Notifications & actions.
- In the right section, under Notifications, find Suggest ways I can finish setting up my device to get the most out of Windows.
- Click on it to remove the checkmark and disable the option.
- Close Settings app.
Now, the prompt should be disabled and you won’t see the Get even more out of Windows message anymore.
Method 2 – Disable the prompt through the Registry Editor
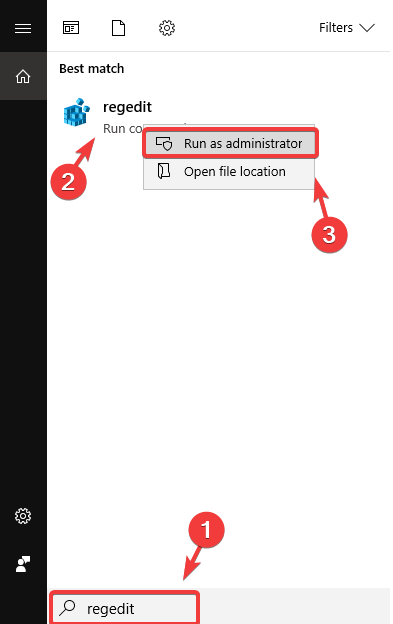
- In your Windows search box type regedit and right-click on the first result. Then select Run as administrator.
- Once in the Registry Editor, navigate to Computer\HKEY_CURRENT_USER.
- From there go to Software\Microsoft\Windows\CurrentVersion\UserProfileEngagement
- If you can’t find the UserProfileEngagement, you’ll have to create it by right-clicking CurrentVersion and then select New > Key > name it UserProfileEngagement.
- In the right section, double-click on ScoobeSystemSettingEnabled. If you can’t find the Dword ScoobeSystemSettingEnabled, you’ll have to create it by right-clicking UserProfileEngagement and then select New > Dword (32-bit) value > name it ScoobeSystemSettingEnabled.
- After double-clicking it, you can disable it by entering the 0 value or enable it by entering the 1 value.
- Now close the Registry Editor and restart your PC.
If you can’t edit your Windows 10’s registry, read this handy guide and find the quickest solutions to the issue.
The second option is a bit more complicated, but you can use it if the first method doesn’t work.
After carefully following these steps, you should no longer get the Get even more out of Windows message on your Windows 10 PC.
If you have any other questions or suggestions, don’t hesitate to leave them in the comments section below and we’ll be sure to check them out.
Как запретить обновление до Windows 10 — GWX Control Panel
Всем доброго времени суток и проческих радостей, дорогие друзья, знакомые, читатели, почитатели и прочие личности.
Думаю, что многие знают, сталкивались или, как минимум читали где-нибудь о том, что Microsoft все сильнее и навязчивее пропихивает свою Windows 10 , которая в свою очередь таки следит за пользователями (кто бы что не говорил).

Последние её попытки уже обвинили (да и они таковыми вообщем-то и были) в том, что реализация проталкивания обновления на 10 -тку выглядит не иначе как поведение вируса, что не сильно-то далеко от истины (учитывая, что не смотря на отказ, таки обновление все равно производилось).
По этому поводу интернет кишит уже тоннами решений в попытке остановить насильное обновление. Об одном из таковых мы и поговорим сегодня.
GWX Control Panel — установка, настройка, использование для запрета обновления Windows 10
Для начала необходимо скачать дистрибутив с программой, описанной в заголовке и подзаголовке, т.е GWX Control Panel .
Утилита полностью бесплатна и сделана специально для того, чтобы защитить Вас от насильственных попыток обновится на 10 -тку, при этом не избавляя Вас от других критических обновлений для Вашей системы ( Win 7/8 ) и не меняя её (системы) принципы работы в корне.
Конечно, никто не может однозначно гарантировать, что сие чудо программисткой мысли будет работать всегда, но пока это одно из наиболее разумных и рабочих решений (еще и обновляющихся).
Установка предельно проста и на ней я останавливаться не буду (просто распакуйте архив и запустите установочный файл). Что именно будем «лечить», думаю, всем прекрасно уже известно и понятно.
Поэтому давайте сразу разберемся как с этим взлетать. После установки программы (если Вы не снимали последнюю галочку), либо при непосредственном её запуске, Вы увидите окно приблизительно следующего содержания:
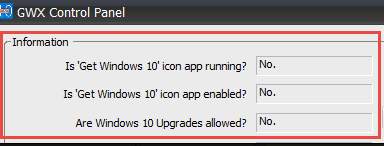
В левой верхней части программы Вы сможете увидеть список, который может содержать значения » Yes «, » No » или » App not found «. Как пример, вот вариант с положением » No «, когда система защищена от многострадальных навязчивых попыток обновить Вас до Windows 10 :
Собственно, давайте кратенько разберемся с тем, что означает каждая из строк, чтобы у Вас было понимание того, что именно мы наблюдаем и с чем будем работать:
- » Is ‘Get Windows 10’ icon app running? «, — уже есть и запущено приложение, которое вопит о необходимости обновления до Windows 10 (например, синенькое как на скриншоте выше по тексту);
- » Is ‘Get Windows 10’ icon app allow? «, — разрешен ли запуск вышеупомянутого приложения в принципе (и, по идее, его загрузка);
- » Are Windows 10 Upgrades allowed? «, — разрешено ли обновление до Windows 10 в общем и целом;
- » Non-critical Windows 10 settings enabled? » — не критические настройки Windows 10 включены? (видимо имеется ввиду какие-то настройки, которые могут косвенно привести к попыткам обновиться до 10 -тки);
- » GWX Control Panel Monitor Mode status «, — статус работы монитора GWX Control Panel , т.е программы, которую мы только что установили.
Скорее всего, раз уж Вы читаете эту статью, то имеете проблему с насильной попыткой обновить Вас до 10 -тки, поэтому какие-то из значений (особенно второе и третье) находятся в положении » Yes «.
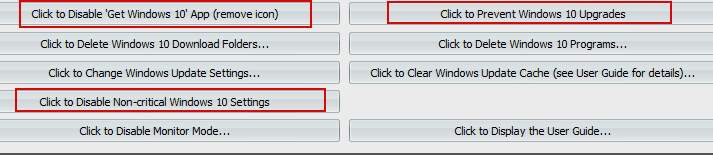
Чтобы всё это дело вылечить нам, собственно, как минимум, необходимо нажать в кнопки:
- «Click to Disable ‘Get Windows 10’ App«;
- «Click to Prevent Windows 10 Upgrades«;
- И, собственно, неплохо бы тыкнуть в кнопку «»Click to Disable Non-critical Windows 10 Settings«.
В результате мы должны будем вылечить саму суть проблемы, если уже с ней столкнулись и не сталкиваться в будущем. BSOD его знает конечно, что там еще Microsoft придумает, но, как минимум, на какое-то длительное количество времени этого должно хватить.
Так или иначе, скорее всего у Вас уже успело нагрузится файлов обновления, которые занимают место на диске, да и мало ли что еще содержат.
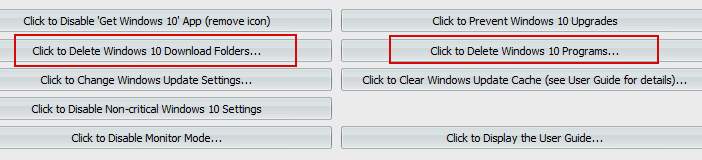
Поэтому хорошо бы (опционально и строго по желанию!) надавить в кнопки:
- » Click to Delete Windows 10 Download Folders «;
- » Click to Delete Windows 10 Programs «;
- И, с некоторой осторожностью, в » Click to Clear Windows Update Cache (see User Guide for details.. «.
Последнее с осторожностью, т.к оно полностью очистит любой кеш (не только связанный с обновлением до Windows 10 ) системы обновления, поэтому, возможно, кого-то это может несколько раздражать (например тем, что уже загруженные и подготовленные обновления для текущей системы, придется загружать еще раз).
Если Вы всё еще переживаете, что злобная 10 -тка вернется по Вашу душу, то можно включить режим мониторинга, используя кнопку » Click to Enable Monitor Mode.. «. Это добавит иконку монитора в трей (где часы), которая, если что, уведомит о том, что загрузились какие-либо файлы и может быть предпринята повторная попытка обновления.
Кстати, напоследок, полезно было бы перезагрузиться.
Ну, а у нас, на сим, пожалуй, всё.
Пора переходить к послесловию.
Послесловие
Вот такой вот инструмент придумали народные умельцы. Здесь хорошо бы еще написать пару ласковых про Microsoft , но, думаю, что в Вашей голове их хватает и без нас (раз уж Вы читаете эту статью и решаете подобную проблему).
Как и всегда, если есть какие-то мысли, дополнения, вопросы, благодарности и всё такое прочее, то добро пожаловать в комментарии к этой записи.
how to permanently disable windows 10 automatic updates,
Replies (12)
* Please try a lower page number.
* Please enter only numbers.
* Please try a lower page number.
* Please enter only numbers.
Hi Ezequíaz, complete the 3 steps below to permanently stop Windows 10 Automatic Updates:
1.
Open the Settings App
Go to Accounts — Sign-in Options
Choose to sign in with a Local Account rather than a Microsoft Account.
2.
In the Settings App
Go to Network and Internet
Set your WiFi connection as Metered
3.
Click your Start Button, type services and hit ENTER
Scroll down the list of services to find Windows Update
Double click the service
If it has started, click ‘Stop’
Then you must set its startup type to ‘Disabled’ — ‘Manual’ will not do!
Restart your PC
Power to the Developer!
MSI GV72 — 17.3″, i7-8750H (Hex Core), 32GB DDR4, 4GB GeForce GTX 1050 Ti, 256GB NVMe M2, 2TB HDD
3 people found this reply helpful
Was this reply helpful?
Sorry this didn’t help.
Great! Thanks for your feedback.
How satisfied are you with this reply?
Thanks for your feedback, it helps us improve the site.
How satisfied are you with this reply?
Thanks for your feedback.
Thanks a lot, can you please tell where to find the Settings App, (this windows10 is in spanish) .
Was this reply helpful?
Sorry this didn’t help.
Great! Thanks for your feedback.
How satisfied are you with this reply?
Thanks for your feedback, it helps us improve the site.
How satisfied are you with this reply?
Thanks for your feedback.
Power to the Developer!
MSI GV72 — 17.3″, i7-8750H (Hex Core), 32GB DDR4, 4GB GeForce GTX 1050 Ti, 256GB NVMe M2, 2TB HDD
Was this reply helpful?
Sorry this didn’t help.
Great! Thanks for your feedback.
How satisfied are you with this reply?
Thanks for your feedback, it helps us improve the site.
How satisfied are you with this reply?
Thanks for your feedback.
ok step one was already set.
step two i cant find the option
In the Settings App
Go to Network and Internet
Set your WiFi connection as Metered
Was this reply helpful?
Sorry this didn’t help.
Great! Thanks for your feedback.
How satisfied are you with this reply?
Thanks for your feedback, it helps us improve the site.
How satisfied are you with this reply?
Thanks for your feedback.
Hi Ezequíaz, are you using a WiFi connection?
If so, on the WiFi page is there no option to set your connection as metered?
Power to the Developer!
MSI GV72 — 17.3″, i7-8750H (Hex Core), 32GB DDR4, 4GB GeForce GTX 1050 Ti, 256GB NVMe M2, 2TB HDD
Was this reply helpful?
Sorry this didn’t help.
Great! Thanks for your feedback.
How satisfied are you with this reply?
Thanks for your feedback, it helps us improve the site.
How satisfied are you with this reply?
Thanks for your feedback.
Was this reply helpful?
Sorry this didn’t help.
Great! Thanks for your feedback.
How satisfied are you with this reply?
Thanks for your feedback, it helps us improve the site.
How satisfied are you with this reply?
Thanks for your feedback.
ok i found it clicking on the specific name of the wifi signal and set all the nets as measured also disable at services.
lets hope it works
keep you posted
Was this reply helpful?
Sorry this didn’t help.
Great! Thanks for your feedback.
How satisfied are you with this reply?
Thanks for your feedback, it helps us improve the site.
How satisfied are you with this reply?
Thanks for your feedback.
Click the network icon in your Taskbar Notification area
Click the Wifi connection you are currently connected to
Click Properties
Scroll down then toggle on Wi-Fi
See options for managing how and when Windows Updates are installed.
Use Show/Hide Updates tool to block the update:
Is there an option or work around to block updates or hardware drivers that might cause problems?
Yes, Microsoft has released a KB update (KB3073930) that will let users block or hide Windows or driver updates.
Press Windows key + R
Type: services.msc
Hit Enter
Scroll down to Windows Update
Select it then right click it
Click Properties
Under the General tab, choose Startup type to DIsabled
Click Stop
Click Apply then OK
Upgrade to Windows 10 Pro which can pause updates for up to 35 days or block them for a year.
Open Start > Settings > Update & security > Activation
Click the link ‘Go to the store to upgrade or enter a product key’
Click the $99 button to make your purchase (the price might vary by region or depending on the edition you are upgrading from or upgrading to).
Follow the on screen instructions to make your purchase.
Within 5 to 10 minutes, your system will be upgraded to Windows 10 Pro, your personal files, apps and settings preserved.
You won’t get a product key, you get a digital license, which is attached to your Microsoft Account used to make the purchase.


