- DisplayLink and Windows 10
- What has changed in the Windows 10 DisplayLink driver?
- Windows 10 Anniversary Update changes
- Device Manager
- DisplayLink System Tray Icon
- First Connect Behaviour
- Full Fix: DisplayLink driver not working on Windows 10
- How can I fix common DisplayLink Windows 10 problems?
- 1. Update your DisplayLink drivers
- DriverFix
- 2. Remove the DisplayLink driver and reconnect the docking station
- 3. Reinstall DisplayLink drivers
- 4. Check Extend these displays option
- 5. Use USB 2.0 cable or USB 2.0 port
- 6. Use Display Settings to change the resolution
- 7. Mirror the primary display
- 8. Run the troubleshooter
- 9. Disable Nvidia Share feature
- 10. Update Universal Serial Bus drivers
- Windows 10 DisplayLink Drivers
- About DispayLink
- How to Scan for missing Windows 10 Drivers
- How to scan for missing DisplayLink Windows 10 Drivers and optimize your system performance!
- Other options for installing Windows 10 DisplayLink drivers
- Third Party Driver Software
- Why use Driver Reviver?
DisplayLink and Windows 10
DisplayLink technology is fully supported on all current versions of Windows 10 (Intel and AMD CPUs). In the summer of 2016, the DisplayLink architecture on Windows 10 was improved. This changes the behaviour and installation methods. The details of this are covered below:
Windows 10 Anniversary Update requires our driver v8.0 or above. The latest driver can be downloaded from our website.
What has changed in the Windows 10 DisplayLink driver?
DisplayLink has been working with Microsoft on extending the Windows graphics architecture to support USB graphics on Windows. A new interface has been designed between Microsoft and DisplayLink for USB displays. This is available in Windows 10 Anniversary Update 2016 (Redstone) from August 2016. The DisplayLink software uses the new native DisplayLink USB graphics support on Windows 10 Anniversary Update 2016 onwards to provide a forward compatibility with Windows. There is no change to Windows 10 Threshold and earlier OS versions. The table summarises the DisplayLink driver compatibility:
| Windows 10 Threshold 1 Windows 10 Threshold 2 | Windows 10 Anniversary Update (Redstone 1) Windows 10 Creators Update (Redstone 2) | |
|---|---|---|
| Windows OS Build version How to find the Windows build number | 10.0.14393 | |
| Windows 10 «version» | v1507 and v1511 | v1607 and newer |
| DisplayLink driver minimum version to use | 7.9 | 8.0 |
V8.0 or later will be installed by Windows Update on Windows 10 Anniversary Update. Running the DisplayLink installer, from the DisplayLink website will also automatically install the appropriate driver for the Windows 10 version you are running.
You MUST NOT try to install DisplayLink driver 7.9 on Windows 10 Anniversary Update and newer. Similarly you MUST NOT deploy DisplayLink_Win7-10TH2.msi when you are using a Redstone build. Changes in the Windows driver model can then prevent your computer from booting!
Windows 10 Anniversary Update changes
Device Manager
DisplayLink displays appear under «Display Adapters» in Device manager, rather than under «USB Display Adapters»:

DisplayLink System Tray Icon
First Connect Behaviour
On Windows 10 Anniversary Update 2016, on first connect, DisplayLink displays are configured by the Windows OS. The Windows OS behaviour is to:
- Desktop PCs: Set the display to extend
- Laptops and Tablets: Set the display to clone
This behaviour is no longer overridden by the DisplayLink driver.
Новые и зарегистрированные пользователи могут войти
Full Fix: DisplayLink driver not working on Windows 10

- DisplayLink is a great technology that allows you to connect two or more displays to your computer using a USB.
- Some users report that their DisplayLink driver is not working on Windows 10 and we will explore in this article ways to help you fix this.
- Don’t forget to bookmark our Fix section where you can find more related guides and articles.
- Make sure to check out our Windows 10 Hub for more interesting news and updates.
DisplayLink is a technology designed to connect two or more displays to your computer using a USB, but users are reporting some issues with DisplayLink and Windows 10, so let’s try to fix these issues.
Although this technology has its advantages, it is far from perfect, and from time to time issues can occur and cause you some inconvenience, but don’t worry, we have a few solutions that might help you.
Here are some of the common problems that users reported:
- DisplayLink won’t work – Try reinstalling your DisplayLink drivers.
- DisplayLink only shows one monitor – Select Extend option from the display settings.
- DisplayLink HDMI not working – Update all your drivers and check if that solves the problem.
- DisplayLink video not working – Switch to the USB 3.0 port and check if the problem is still there.
- DisplayLink black screen – Disable the Nvidia Share feature.
How can I fix common DisplayLink Windows 10 problems?
1. Update your DisplayLink drivers

In some cases, in order to fix this problem, you just have to update your DisplayLink drivers. To do that, just download the latest driver from DisplayLink’s website and install it. Once your drivers are up to date, the issue should be permanently resolved.
Downloading drivers manually can be a bit tedious task, but you can easily update all your drivers automatically by using DriverFix. Simply run this tool and let it download and update all your drivers for you.

DriverFix is portable and very easy to use. The interface is intuitive and all you need to do is launch it and allow it to scan your PC.
After the system scan is finished, DriverFix will compare all the drivers with its built-in database and will make sure to fix the ones that are broken or corrupted.
Once your drivers are up to date, the issue should be completely resolved. In addition to the DisplayLink drivers, some users are also recommending to update your chipset drivers, so be sure to do that as well.
DriverFix
2. Remove the DisplayLink driver and reconnect the docking station

In some cases, you might be able to fix the problem simply by uninstalling the DisplayLink driver. To do that, simply go to the Apps section in the Settings app and remove the DisplayLink driver.
After doing that, you need to disconnect your docking station, power it off, wait for a few minutes, and connect it again.
Once your docking station is connected, the required driver will be installed automatically and the issue should be resolved.
3. Reinstall DisplayLink drivers

Users have reported Blue Screen of Death errors while using two or more monitors on their PCs, and in this case, the cause of the problem is usually the DisplayLink driver, so let’s try to reinstall it:
- Download DisplayLink Installation Cleaner.
- Download the latest DisplayLink drivers.
- Run DisplayLink Installation Cleaner software.
- After the uninstall process is finished restart your computer.
- When your computer restarts install the downloaded DisplayLink drivers.
- After you have installed the drivers your computer will restart again.
- When Windows 10 boots again go to Settings and select System.
- Next, choose Displayand configure your monitors.
4. Check Extend these displays option

Users have reported that their display isn’t shown in Display Settings after they disabled it. This is normal behavior when you choose Show only on 1, or any other monitor in Display Settings.
This option is used when you want to work only on your larger display, but you won’t be able to see additional monitors in Display Settings.
To fix this issue you just need to check the Extend these displays option in Display Settings and click Apply to save changes.
5. Use USB 2.0 cable or USB 2.0 port
Users report some issues with DL-3xxx and DL-5xxx USB docking stations, as well. According to them, if you use a USB 3.0 cable you might experience some sound problems.
We have to mention that this issue only affects playback devices, such as headphones, speakers, and monitors, that are attached to your docking station.
On the other hand, several users had issues with DisplayLink while using a USB 2.0 connection. After connecting their monitor to a USB 3.0 port, the problem was completely resolved and everything started working again.
6. Use Display Settings to change the resolution

In some cases, users cannot change the display mode or resolution of their external monitor using the DisplayLink icon menu.
This isn’t such a big problem, but in Windows 10 in order to change the display resolution of the external monitor, you have to use Display Settings from Windows 10.
7. Mirror the primary display
Users are also complaining that they are unable to enter Tablet Mode while the external monitors are connected, and this is a normal behavior while external monitors are extending the main display.
In order to enter Tablet Mode, your external monitors need to mirror the primary display.
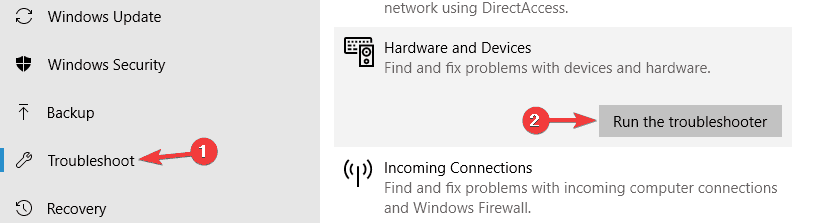
8. Run the troubleshooter
- Open the Settings app. You can do that by using Windows Key + I shortcut.
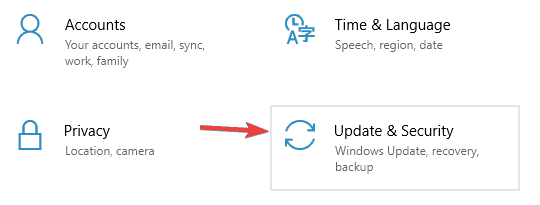
- Now go to the Update & Security section.

- Select Troubleshoot from the left pane.
- Now select Hardware and Devices from the list and click the Run the troubleshooter button.
- Follow the instructions on the screen to complete the troubleshooter.
After the troubleshooter is finished, check if the problem with DisplayLink monitor is still there. Keep in mind that this isn’t the most effective solution, but few users reported that it worked for them, so be sure to try it out.
9. Disable Nvidia Share feature
According to users, issues with DisplayLink can occur due to the Nvidia Share feature. In case you’re not familiar, this is Nvidia’s overlay that allows you to create video recordings and screenshots during gameplay sessions.
Although this feature is useful, it can sometimes cause issues with DisplayLink, and the only way to fix the problem is to disable Nvidia Share completely. To do that, follow these steps:
- Start the GeForce Experience app.
- Click the Settings icon in the top right corner.
- Go to the General tab and disable the Share feature.
After doing that, the problem should be completely resolved. Keep in mind that you need to keep this feature disabled at all times if you want to avoid any future issues with DisplayLink.
10. Update Universal Serial Bus drivers
- Press Windows Key + X to open Win + X menu.
- When the menu opens, choose Device Manager from the list.
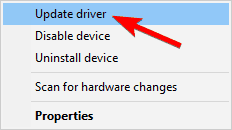
- Expand the Universal Serial Bus controllers section, right-click Universal Serial Bus controllers and choose Update driver for the menu.
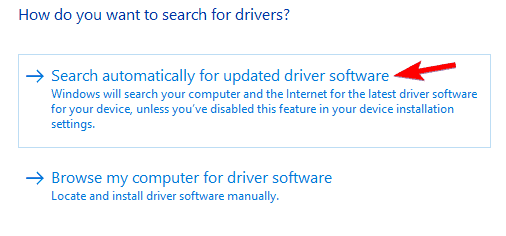
- Now select Search automatically for updated driver software.
- After the process is finished, your driver will be updated.
- Repeat the previous steps for all Universal Serial Bus devices on your PC.

Once all Universal Serial Bus drivers are updated, the problem should be completely resolved.
If the issue with DisplayLink is still there, you might be able to fix the problem simply by reinstalling the Universal Serial Bus controller drivers. To do that, follow these steps:
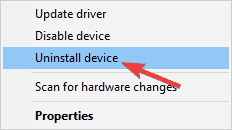
- Locate Universal Serial Bus controller driver, right-click it, and choose Uninstall device from the menu.
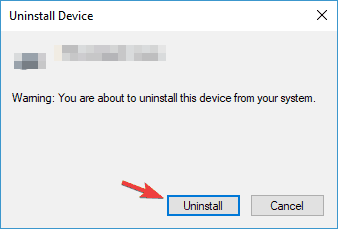
- When the confirmation dialog appears, click Uninstall.
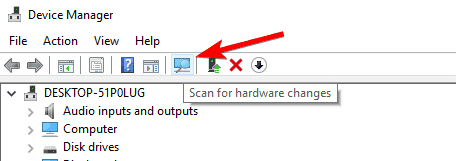
- After removing all drivers, click Scan for hardware changes icon.
- The missing drivers will now be installed.
This is a simple solution, but it might work for some users, so be sure to try it out.
That would be all, I hope this article helped you to solve the problem with your DisplayLink connector in Windows 10. If you have any comments or questions, just write them down, below.
Windows 10 DisplayLink Drivers
On this page, we will share the information we have on the latest DispayLink Drivers for Windows 10.
The link given below points to the official driver repository where you have to select your device and download the drivers.
However, manufacturers tend to modify products such as these so the stock driver might not work for you.
In that case, go to your manufacturer’s website and download the drivers from there. (ex. Dell).
[thrive_link color=’blue’ link=’http://www.displaylink.com/downloads/windows’ target=’_blank’ size=’small’ align=’aligncenter’]Download Display Link Drivers[/thrive_link]
About DispayLink
DisplayLink is a privately held company with offices in the USA, Asia and Europe.
Their technology turns any monitor into a USB device making it really easy to plug into any computer that supports USB (which means any computer).
They call this Plug and Display.
It also means that any computer can drive more than one monitor – up to six in fact.
DisplayLink is supported by the major PC computer and accessories companies and is designed into docking stations, graphics adapters, and monitors.
They have offices in California, The UK, Poland, Japan and Taiwan.
[thrive_text_block color=»note» headline=»Keep Drivers Up to Date always»] Driver download from this page will be one time installation.
What if there is an update tomorrow?
Learn how to scan and automatically find the best suitable driver for computer hardware. Using a simple application, it is possible to keep constant check for new updates so that you get optimal experience every time!
[thrive_2step ][thrive_link color=’light’ size=’small’ align=’aligncenter’]Get Access Now (It’s Free)[/thrive_link] [/thrive_2step] [/thrive_text_block]
How to Scan for missing Windows 10 Drivers
[thrive_text_block color=»note» headline=»Keep Drivers Up to Date always»] Driver download from this page will be one time installation.
What if there is an update tomorrow?
Learn how to scan and automatically find the best suitable driver for computer hardware. Using a simple application, it is possible to keep constant check for new updates so that you get optimal experience every time!
[thrive_2step ][thrive_link color=’light’ size=’small’ align=’aligncenter’]Get Access Now (It’s Free)[/thrive_link] [/thrive_2step] [/thrive_text_block]
How to scan for missing DisplayLink Windows 10 Drivers and optimize your system performance!
So usually the best way to handle hardware issues and install DisplayLink drivers is through the Device Manager.
Let’s walk through the steps.
- Open the Control Panel in Windows 10 by pressing the Winkey + X at the same time. Winkey is the Windows key on your keyboard. The Power User Menu will pop up.
- Select the Control Panel option from here.
- If you can’t see all the different options in the panel, then change the view to Small icons, and all options will be displayed.
- Go to Device Manager.
- Expand the categories in the Device Manager and locate the device you want to update the driver for.
- A windows will pop-up with two choices. Select Browse my computer for driver software.
- Click on Browse and then select the location of the downloaded driver file. You can also copy and paste the location of the downloaded driver files into the location address bar.
- Hit Next and Windows 10 will try and automatically find the associate driver and install it.
Now a computer restart is usually not needed, but if it is necessary, do a reboot and your drive will be installed, and the hardware ready to use.
Other options for installing Windows 10 DisplayLink drivers
If that doesn’t work, it’s time to look for other solutions online.
You can ask at our Windows 10 Questions page. We have hundreds of Windows 10 users who look at the questions every day. The same is true for our Windows 10 Forums .
Look through the forums, questions and Google and see if you can find a solution.
Third Party Driver Software
If all of the above doesn’t work for you, you should use a third party software solution.

Why use Driver Reviver?
Considering all of the individual components on your PC, not to mention external devices such as printers, scanners, web cams, Hard Drives and more, keeping abreast of all the latest Drivers can not only be a time consuming and tedious task, but also one that can be terribly confusing.
Driver Reviver solves this problem by allowing you to scan all of your hardware to identify the current Driver that is installed on your system, and determines if it is the most up-to-date version.
Once the required updates are identified, Driver Reviver then allows you to quickly and easily download and install all these updates from one central location.
Driver Reviver ensures you are getting the maximum performance from your PC, its components and its software.


