Installing Debian on the D-Link DNS-323 and Conceptronic CH3SNAS
Overview
In a nutshell, the installation of Debian on your D-Link DNS-323 or Conceptronic CH3SNAS device works like this: you use the original firmware of your device to install a «firmware upgrade» which in reality contains the Debian installer. When you restart your device, Debian installer starts and allows you to login via SSH to perform the installation. Debian will be installed to disk and a Debian kernel will be put in flash that will start Debian from disk.
If you follow this procedure, Debian will be installed to your SATA disk and the original firmware in flash will be replaced with Debian and your disk will be erased. Since Debian is installed on disk, your machine will not boot without the disk. Debian does not install a web interface to configure your machine, although it’s possible to install such software. Furthermore, the D-Link DNS-323 and Conceptronic CH3SNAS devices don’t have a recovery mechanism that would allow you to load a firmware image via the network. If something goes wrong, you’ll have to connect a serial console to access the recovery mechanism. Please proceed only if you want to replace your firmware with Debian and if you can make a serial console for your device in case there are problems. If you don’t want to replace the original firmware in flash or retain the capability of booting without a disk, you can install a Debian chroot instead.
Status
Please note that the D-Link DNS-323 is no longer supported as of Debian 9 (stretch). You can still install Debian 8 (jessie) for some time after the release of Debian 9 but at some point in the future installer support will go away.
Requirements and Preparation
In order to install Debian, you need the following:
- A D-Link DNS-323 (revision A1 or B1; C1 is not supported!) or a Conceptronic Grab’n’GO CH3SNAS.
- An internal SATA disk in the device.
- A network connection.
- Another machine on which you have an SSH client. SSH is included in every Linux distribution as OpenSSH and there is PuTTY for Windows.
- While a serial console is not required for the installation, you have to be able to make one in case something goes wrong during the installation or later during the operation of Debian.
Making a Backup
You have to make a backup of all the data stored on your D-Link or Conceptronic device before starting with the installation of Debian since Debian will format the whole disk during the installation.
Starting the Installer
First of all, check in the original firmware that your network settings are correct. The Debian installer will use the same settings as your original firmware, so please choose either DHCP or configure a valid IP address, gateway and DNS.
Now you can go ahead and download the installer image to your PC. Please download the right image for your device:
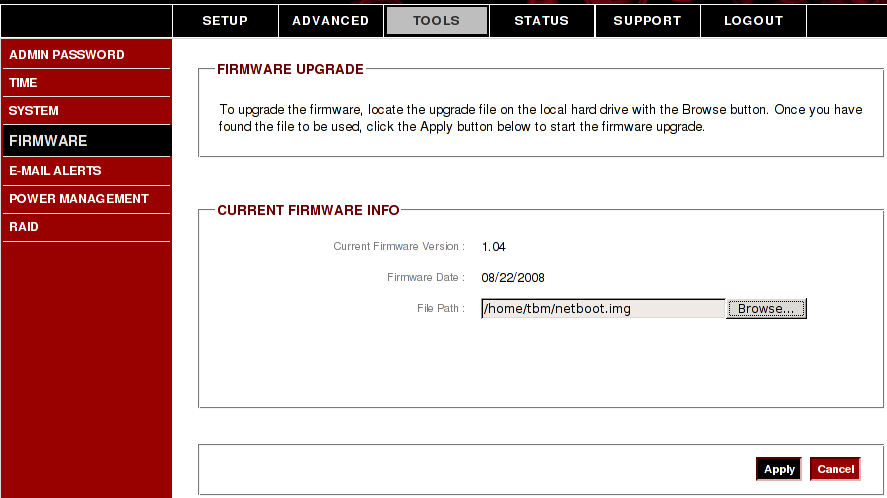
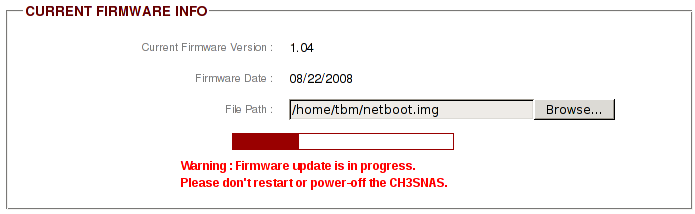
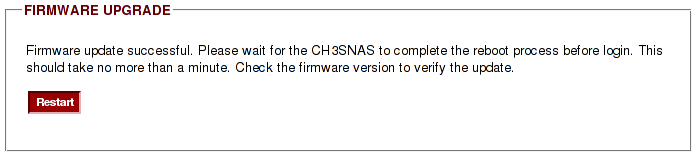
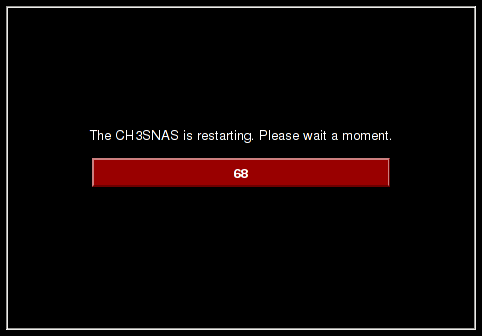
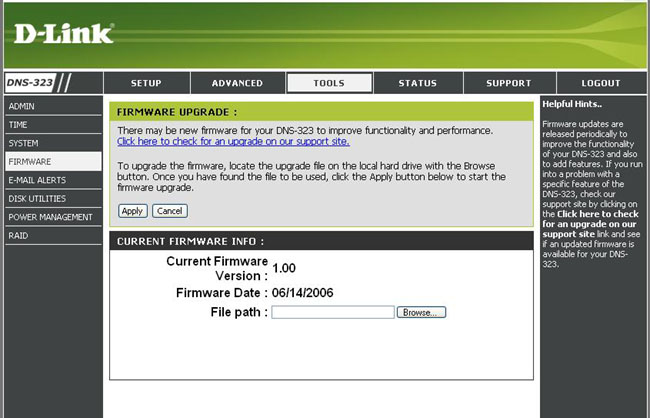
Now you can access the admin interface of your device with your web browser in order to install the firmware image containing the Debian installer. Log in as user admin (the default password is empty), go to Tools and choose Firmware . Hit the Browse button and select the installer image you downloaded before (look for netboot.img ). Press Apply and the Debian installer will be written to flash. When the firmware update has completed, restart your device. After a few minutes, you will be able to connect to the Debian installer.
Here’s what the firmware upgrade process looks like on the Conceptronic CH3SNAS:
The firmware upgrade page on the D-Link DNS-323 looks very similar:
The Installation
After you have flashed the Debian installer image and restarted your device, the Debian installer will start. Since the DNS-323 and CH3SNAS do not have any IO device, SSH will be used for the installation. The installer will bring up the network, start the OpenSSH server and you can then connect to the device using SSH. You have to wait a few minutes after starting the system before you can connect. Unfortunately, the installer currently doesn’t use the LED to signal when it’s ready, so you just have to wait a few minutes.
Since the DNS-323 and CH3SNAS do not have an LCD, the installer cannot tell you which IP address to connect to or which password to use. With regards to the IP address, the following strategy is used:
- If your original firmware is configured to use DHCP (the default configuration from D-Link and Conceptronic), Debian installer will try to acquire an IP address with DHCP. You can use the MAC address listed at the bottom of your device to tell your DHCP server to give out a specific IP address to your machine.
- If you configured a static address in your original firmware, this configuration will be used. However, if your network configuration was incomplete (e.g. IP address or DNS were missing), the installer will use DHCP instead.
- If DHCP is used but your DHCP server does not respond, the installer will use the fallback address `192.168.0.32`. This is the default IP address used by the D-Link firmware, but please note that it is different to the default IP address from the Conceptronic firmware. If you are unsure what the address of your device is, unplug the Ethernet cable, start the machine again, wait until Debian installer is ready for SSH and then plug the cable back in and connect to this fallback address.
Please make sure that your device is on a local network to which only you have access since the installer uses a very generic password, namely install . The user is installer . Connect to the installer (again, replace the address in the example with the actual IP address of your device):
Important note: When you connect to the installer, one of the first screens will allow you to select additional installer modules. Make sure to select the ext3 module. If you don’t select the ext3 module, the installer will not work correctly due to a bug.
The installation itself should be pretty standard and you can follow the installation guide. The installer knows about the DNS-323 and CH3SNAS and at the end of the installation it will flash a kernel and ramdisk that will automatically boot into Debian.
Since your device boots from flash you don’t have many limitations as to how you partition your hard drive. You can use LVM and RAID and a number of filesystems.
At the end of the installation, the installer will write the new kernel to flash. Afterwards you will get a confirmation that the installation is complete. Confirm, wait for the installer to finish and once your SSH session terminates, wait a few minutes before you can connect to your newly installed system via SSH. You will be able to log in as root or your newly created user.
Success
You should now have a complete Debian system running on your DNS-323 or CH3SNAS. You can use apt and other tools to install additional software. The D-Link DNS-323 and Conceptronic CH3SNAS are ARM based devices and the armel architecture is fully supported by Debian.
Finally, make sure to read the tips and tricks about running Debian on the D-Link DNS-323 and Conceptronic CH3SNAS. In case you run into any bugs or problems, you may want to check the list of known issues and bugs.
Источник
Dns 323 установка linux
WARNING: This procedure is horrible. For a “real” native Debian installation, take a look at http://www.cyrius.com/debian/orion/d-link/dns-323/install.html .
This page described how to get Debian natively running on your DNS-323 .
NOTE2: You can brick your unit if you are not careful, and maybe even if you are careful. As long as you don’t overwrite the mtdblock4 device, you *should* be able to recover your system, but this procedure has not been well tested. MAKE SURE to save off your old MTD devices someplace safe so you can restore them if necessary.
You need a minimal debian image installed on a machine that can act as an NFS server. You can get http://dev.skcserver.de/dns323/etch.tar, I think, but I have not tried it. This is a full minimal image, but I’m going to document using cdebootstrap, though, since the above link may go away and this is more general. You need an existing debian system to do this, and you need root access and need to be logged in as root.
The ”–foreign” option tell cdebootstrap to only perform unpacking action of the needed packages. All the operations that need to be executed on the destination machine will be executed after the first booting by executing the “fake” init.
Now create the rtc and ttyS0 devices as to prevent some errors
You can add other stuff later, but that will be enough to get you going. We will uncomment these once we get them on the disk.
And prepare the nfs export
Add the following to /etc/exports:
Now let other mount it through NFS:
Now you will be able to mount the root filesystem. The default kernel on the dns-323 is able to mount an NFS filesystem. Now let’s hook to the serial port. Mine is on /dev/ttyS0, but it depends on where you have it plugged in.
Note: Before to connect correctly to the nas, i need to execute on the kermit command line these two command, “set flow xon/xoff” and “set stop-bits 1”. Personally i prefer minicom as you don’t need kermit if you dont’have to upload a binary file, and minicom give me less difficulties than kermit.
Now power the system on, and quickly type the space then “1” keys. This will fall into uboot. Then we will boot on the NFS partition we just created and exported. Substitute your IP address with the one I use.
Boot the thing using NFS.
If the device is new and you never have set the clock, you will probably have some little problem due to a wrong clock setting. If not, just don’t execute the related command.
Now check frequently in “dns/etch/etc” if the file inittab as been extracted, and as soon as you find it edit the file as follow
Find the line that says:
and turn it into:
Wait until cdebootstrap have terminated it’s work. This will take some times.
If you modify “inittab” too late you will not find the login prompt, and you’ll have to repeat the boot process. Only the boot process using the same method as before, getting the u-boot prompt and setting the bootargs variable.
When you get the login prompt login as “root”, and first of all set the clock to an acceptable date.
Create the remaining needed devices
These following for the flash driver. You really do not want to overwrite mtdblock4, since that is uboot, so we make it read-only. As long as you have a serial port and uboot, you can recover the device.
Now we need to save off the old MTD files, in case we need to restore them later.
The most interesting ones are mtd2 (kernel) and mtd3 (filesystem) Now save off the old filesystem. You will need some files from it later. It’s in a uboot image, so we have to play around a little to extract it.
First get the mac_read command so we can properly set our MAC address:
Now set up networking:
The exact format of the interfaces file depends on your configuration. Let’s use:
We’ll replace the first line with the commented out line later, so it won’t mess you up if you reboot. We won’t start it up yet, we’ll wait, as it will mess up our NFS mount. If you do an ifconfig, you’ll notice that the mac address is 00:00:00:00:00:00. This will be fixed by mac_read sometime later.
Now we’ll set up fan control.
Add the following before the “exit 0” in rc.local:
Now lets create some things on the disk. I’ll demo creating a / filesystem of 5gb on a RAID 1 volume, and an LVM you can create whatever you want to with.
For some odd reason D-Link didn’t compile the scsi disk driver into the kernel. No matter, easy enough to handle:
If you have two disks, do the same (starting with the fdisk command) for sdb
Now we need some debian packages to install. First, many routers will not route 00:00:00:00:00:00 MAC addresses, so do:
Edit /etc/resolv.conf and point it to your DNS server. Look on your running system to see what it should be.
Edit /etc/hostname and put your machine’s name in it.
Edit /etc/hosts and add your host, like (replacing the names with your name, but leave localhost alone):
This may take some time and generates some output. It may generate an error on a couple of gets, this is probably not a big deal.
Let’s set up the initrd now:
Put the following in bin/init:
And make it executable:
You will need to install mkimage from mkimage.gz into /usr/local/bin after un-gzipping it. Make sure to chmod +x’ ‘the file, too, so it will be executable. The sources are available as part of the uboot code from D-Link, but I’ve pared it down in mkimage.tgz. You should also install freeramdisk from freeramdisk.gz into /usr/local/sbin» after un-gzipping it. chmod this one, too. The source is in freeramdisk.c.gz.
Now create the tools to build the init ramdisk:
And make it executable
Now get the mdadm package:
If it asks you for arrays needed for the root filesystem, you can say “None”, and not to start MD arrays automatically.
Now put mdadm onto the initrd:
If you have one disk:
It may ask you questions, just tell it “yes”. Now create the filesystem on /dev/md0.
We will make md1 into an LVM later. Now copy everything into the new filesystem:
Now let’s edit the fstab on the disk:
Remove the comments from the /dev/sda1 and /dev/md0 lines. If you have a second disk, you can remove the comment form /dev/sdb1. We can also edit the network config:
Delete the line that says “auto lo” and uncomment the next “auto” line.
Now we are ready to boot set up to boot from disk. Create the initrd:
Now write the initrd into the flash and reboot:
You should boot from disk now. Do not do the “space” “1” thing, you want to boot using the initrd you just put onto the disk.
Log in as root, set the root password, and you are in a fully functional debian system. Not much will be installed, that will depend on your needs. 64MB is plenty of room to run a server, though you may run into problems if you run programs that use X.
A few other things you might want to do:
Provide access to the temperature sensor:
I’m not sure what all the sensor values mean here.
Источник


