- SOLVED: Windows 10 Won’t Install or Download Updates
- Repair Corrupt System Files
- Solution 1: Run the Windows Update Troubleshooter
- Solution 2: Ensure that all services related to Windows Update are running
- Solution 3: Using a Registry Tweak to reset Windows Update
- Solution 4: Fix the issue via an elevated Command Prompt
- Solution 5: Turn OFF Metered Connection
- Update to Windows 8.1 from Windows 8
- Before you begin
- Prepare your PC
- Get the free update
- Restart
- Choose your settings
- Sign in
- If you have a Microsoft account
- If you have a local account
- OneDrive cloud storage
- Final updates
- Reinstall your apps
SOLVED: Windows 10 Won’t Install or Download Updates
While Windows 10 is the latest and greatest iteration of the Windows Operating System in existence, it is far from perfect. That being the case, Microsoft periodically rolls out tons of updates for both Windows 10 and the programs and applications that it contains. Unlike with older versions of Windows, however, all updates rolled out to Windows 10 computers via Windows Update are mandatory and are automatically downloaded and installed at one time or another. Regardless of the important status of an update and regardless of whether or not you want to install it, it will eventually be downloaded and installed, although you do have the power to delay the occurrence slightly.
Some Windows 10 users, unfortunately, have been and continue to be affected by an issue where their computers accumulate tons of pending updates, some of which are marked as waiting to be downloaded, some marked as waiting to be installed, but none actually being downloaded or installed no matter how many times affected users try to download and install them. When users affected by this issue go into Windows Update, they see a list of all of the updates available for their computer but are unable to download and/or install any of them even though some are marked as waiting to be downloaded and some waiting to be installed.
Thankfully, though, this problem is not a dead-end problem and can be fixed by pretty simple means. The following are the three most effective solutions that you can use to try and fix this problem:
Repair Corrupt System Files
Download and run Restoro to scan for corrupt files from here, if files are found to be corrupt and missing repair them and then check if it fixes the issue, if not then proceed with Solutions listed below.
Before you Proceed: Make sure to leave the process for at least an hour or two to make sure that Windows isn’t just initializing updates.
Solution 1: Run the Windows Update Troubleshooter
If a Windows 10 component is not working or behaving the way it is supposed to, what you need to do is simply run Windows 10’s built-in Troubleshooting utility, but run it specifically for the component that is malfunctioning. The same applies to Windows Update – since Windows Update is behaving strangely, the first solution you should try out is running the Windows Update Troubleshooter. To do so, you need to:
- Open the Control Panel.
- Switch to Icons
- Click on Troubleshooting.
- Click on View all in the left pane.
- Click on Windows Update.
- Click on Next, and then proceed with the troubleshooter all the way through to the end, following the on-screen instructions along the way.

The Troubleshooter will try to identify any and all problems with Windows Update and fix any problems that it finds. Once you have successfully run the Troubleshooter, you should restart your computer and try downloading and installing Windows Updates once it boots up to see whether or not the issue still persists.
Solution 2: Ensure that all services related to Windows Update are running
You may be facing this Windows Update issue if one or more of the services pertaining to Windows Update is either not enabled or are not running on your computer. If that is the case, this issue can be easily remedied by making sure that all Windows Update-related services are enabled and running.
- Hold down the Windows Logo key, and while doing so, press R to open a Run
- Type services.msc into the Run dialog and press Enter.
- Locate and right-click on the Windows Update service, and click on Properties.
- Set the service’s Startup type to Automatic, if the service is stopped, click on Start to start it, click on Apply and then click on OK.
- Locate and right-click on the Background Intelligent Transfer Service (BITS), and click on Properties.
- Repeat step 4.
- Locate and right-click on the Cryptographic Service, and click on Properties.
- Repeat step 4.
Close the utility, restart your computer and check to see whether or not the problem has been fixed once it boots up.
Solution 3: Using a Registry Tweak to reset Windows Update
If the solutions provided above doesn’t fix your problem there is a possibility that registry keys are corrupted or modified there is a Registry Tweak that you can try, basically it will reset the Windows Update‘s registry keys and set them to default which can potentially fix the issue you are having.
- Click hereto download the Registry Tweak.
- Wait for the Registry Tweak to be downloaded.
- Navigate to where the Tweak was downloaded to and double-click on it to run it.
- There will be a pop-up asking “Are you sure you want to continue?” Press “Yes”
- Now press ok.
- Restart your Computer then check to see if the issue still persists.
Solution 4: Fix the issue via an elevated Command Prompt
If none of the solutions listed and described above have worked for you, you may just be able to fix this issue through an elevated Command Prompt. In order to do so, you need to:
- Right-click on the Start Menu button to open the WinX Menu.
- Click on Command Prompt (Admin).
- One by one, type the following commands into the elevated Command Prompt, pressing Enter after typing in each one and waiting for one command to be executed fully before typing in the next:
Once all of the commands listed above have been fully executed, close the Command Prompt and restart your computer.
Check whether or not you are now able to download and install updates via Windows Update once your computer boots up.
Solution 5: Turn OFF Metered Connection
In some cases, the internet connection that you are using might be set up as a metered connection due to which the download restriction might be implemented on it. Therefore, in this step, we will be turning this metered connection OFF and then check to see if the issue still persists. For that:
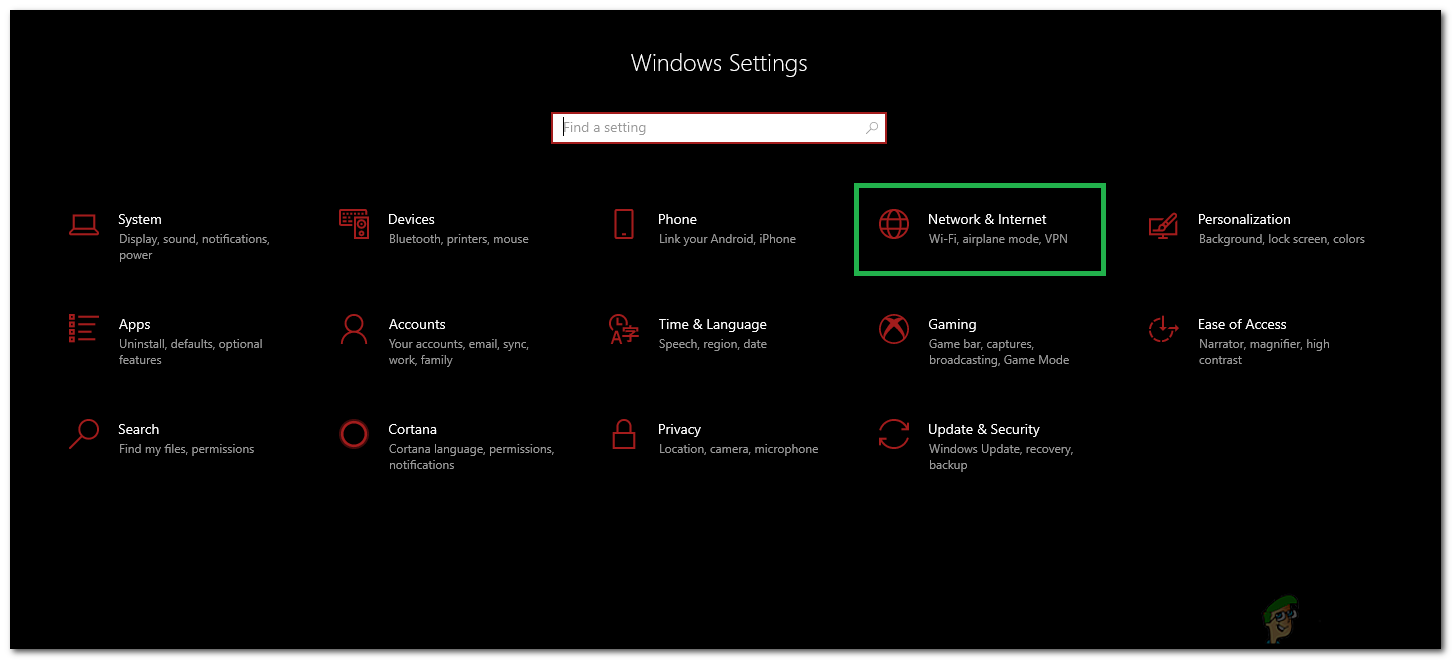
- Press “Windows” + “I” to open settings.
- Click on the “Networkand Internet” option.
 Selecting “Network and Internet” Options
 - Click on the “Wifi” option on the left pane and select “Manage known Networks” in the next window. Accessing the Manage known networks menu
- Click on the Wifi name in the next window and select “Properties”.
- Click on the “Toggle” for “Set as Metered Connection” to turn it off.
- Check to see if the issue persists.
 Selecting “Network and Internet” Options
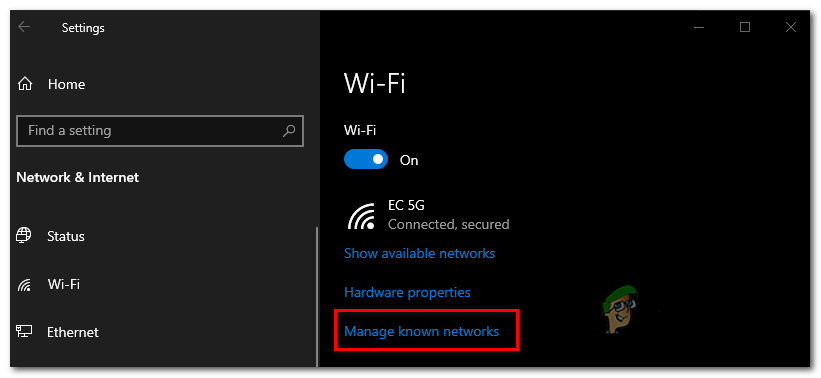 Accessing the Manage known networks menu
Update to Windows 8.1 from Windows 8
Windows 8 has reach end of support, which means Windows 8 devices no longer receive important security updates. We recommend making the free upgrade to Windows 8.1 to continue receiving security updates and support.
Upgrading your Windows 8 or Windows RT PC to Windows 8.1 or Windows RT 8.1 will also bring you enhancements in personalization, search, apps, the Windows Store, and cloud connectivity, all with the security and reliability features you expect from Windows.
Beginning in July 2019, the Windows 8 Store is officially closed. While you can no longer install or update applications from the Windows 8 Store, you can continue using those already installed. However, since Windows 8 has been out of support since January 2016, we encourage you to update to Windows 8.1 for free.
Before you begin
The system requirements for Windows 8.1 and Windows RT 8.1 are nearly the same as the requirements for Windows 8—if your PC is already running Windows 8 (or Windows RT), in most cases, you can get the free update to Windows 8.1 (or Windows RT 8.1).
Before you begin, here are some things to keep in mind.
Your files, desktop apps, user accounts, and settings come with you. Windows 8.1 and Windows RT 8.1 come with some new built-in apps and will update or replace some of your existing built-in apps. Your existing Windows Store apps don’t come with you, but once the update is complete, you can reinstall all of these apps at once—or just the ones you want.
We’ll check your desktop apps and devices for you. As part of the update, we check your current desktop apps and connected devices. We’ll let you know what you’ll need to do to get them ready for the update or to get them working again after the update. In most cases, you won’t need to do anything—most desktop apps, devices (like printers), and network connections will work normally after the update.
Consider using a Microsoft account to sign in to your PC. If you already use a Microsoft account to sign in to Windows 8 or Windows RT, you’ll use that same account to sign in to Windows 8.1 or Windows RT 8.1. If you don’t, we recommend that you start using a Microsoft account in Windows 8.1 or Windows RT 8.1. If you already have an account you use with Outlook.com, Xbox LIVE, Windows Phone, or Skype, then you already have a Microsoft account.
You can keep working while the update is installing. Download and installation times vary from about 30 minutes to several hours, depending on your internet connection speed and the speed and configuration of your PC, but you can still use your PC while the update is installing in the background. During this time, make sure to save your work and close any apps you have open before leaving your PC unattended in case your PC needs to restart automatically while you’re away. After it restarts, you won’t be able to use your PC for a little while (from about 20 minutes to an hour) while the updates are being applied. After that phase is complete, we’ll walk you through choosing a few basic settings and then Windows will finish applying any final updates that are needed.
Prepare your PC
There are a few things you should do before you start installing:
Back up your files. Although your files and apps come with you when you update to Windows 8.1 or Windows RT 8.1, it’s a good idea to back up your important files to an external drive or the cloud.
Make sure you have enough free disk space. If you’re currently running Windows 8, you need 3,000 MB of available space to install the 32-bit version of Windows 8.1 and 3,850 MB of available space to install the 64-bit version of Windows 8.1. On a Windows RT device, you need 2,250 MB of available disk space to install Windows RT 8.1.
Plug in your laptop or tablet. It’s important to keep your PC plugged in throughout the update process, because if you lose power before it’s done, the update might not install properly.
Connect to the internet. It’s best to stay connected until the update is done. If you don’t, you’ll need to connect again to finish setting up later and setup will take longer.
Get the latest critical and important updates. There are some updates you might need before you can install Windows 8.1. In most cases, the latest updates will be installed automatically using Windows Update. But if you don’t have automatic updates turned on and you need to check for updates manually, or if you’d like to check to see when the latest updates were installed, you can do this from Windows Update.
Temporarily turn off your antivirus program. Some antivirus software might interfere with the installation. After you install Windows 8.1 or Windows RT 8.1, remember to turn your antivirus program back on.
Get the free update
The Store is no longer open for Windows 8, so you’ll need to download Windows 8.1 as a free update.
Go to the Windows 8.1 download page and select your Windows edition.
Select Confirm and follow the remaining prompts to begin the download.
The update will download and install in the background while you use your PC to do other things. The installer will check to make sure you have enough disk space, that your apps and devices will work with Windows 8.1 or Windows RT 8.1, and that you have all the required updates.
In some cases, the installer might find something you need to take care of before you can continue installing the update. If so, you’ll see a message telling you what you need to do.
Restart
After the update is downloaded and the first phase of the installation is complete (which could take between 15 minutes and a few hours, depending on your system and your connection speed), you’ll see a message telling you that your PC needs to restart. It will give you 15 minutes to finish what you’re working on, save your work, and close your apps, and then it will restart your PC for you. Or you can restart it yourself.
Important: If you leave your PC before it’s ready to restart, be sure to save your work and close any desktop apps you’re using to make sure you don’t lose anything when it restarts automatically. Your PC might need to restart more than once, depending on how it’s set up and whether additional updates are needed.
Restarting will take longer than usual—from 20 minutes to about an hour—while the update is applied. During this time, you won’t be able to use your PC.
Choose your settings
You’ll see a list of recommended settings called Express settings. To accept these settings and continue, select Use express settings. You can change any of these settings later, after you finish setting up. If you’d like to change some of these settings now, select Customize.
For more info, select Learn more about express settings. To learn about how these settings affect your privacy, select Privacy statement.
Sign in
Next, you’ll be asked to sign in. If you already use a Microsoft account to sign in to Windows 8 or Windows RT, your account name will be filled in for you. If you previously used a local account, you can still use it to sign in
If you have a Microsoft account
Enter your Microsoft account email address, if needed, and your password.
We’ll send a security code to the alternate email address or phone number you’ve set up for this account, and you’ll need to enter that code to verify that you’re the owner of the account. This helps us protect your account and devices when you access sensitive info. If you don’t have alternate contact info set up for the account yet, you’ll be asked to provide it now.
Note: If you signed in to your PC using a Microsoft account before you installed Windows 8.1 or Windows RT 8.1, then you might not need to enter a security code.
If you have a local account
To sign in with your local account, enter your password. You can always connect to a Microsoft account later, and we recommend giving it a try. Simply put, your Microsoft account is the glue that holds together so many useful features of the new Windows. With an account, you’ll be able to get apps from the Windows Store, automatically sync your settings and documents between PCs, back up your photos to the cloud so you can get to them from anywhere, and see all your contacts from multiple email and social networking accounts together in the People and Mail apps.
OneDrive cloud storage
If this is your first time setting up a PC with Windows 8.1 or Windows RT 8.1, you’ll see the new OneDrive options.
If you already have another PC running Windows 8.1 or Windows RT 8.1 and you chose to sync settings on that PC, then your OneDrive settings will also sync from your existing PC to this one and you might not see this screen.
If you select Next on this screen, your PC will use these default OneDrive settings:
Photos you take with this PC are saved to your camera roll folder on this PC, and a smaller copy of each photo is automatically backed up to your OneDrive.
When you create a new document, the default save location is OneDrive. But you can always choose to save individual documents locally or on another drive.
Windows will save a backup copy of your PC settings to OneDrive. If something ever happens to your PC and you need to replace it, your settings are saved in the cloud and you can transfer them to a new PC instantly.
You can change any of these settings later in PC settings. If you’d prefer to turn off all of these settings now, select Turn off these OneDrive settings (not recommended).
Final updates
Because Windows is always being updated, it’s possible that critical updates have become available since Windows 8.1 and Windows RT 8.1 were finalized. Windows checks for these critical updates when you finish setting up Windows 8.1 or Windows RT 8.1 for the first time, and if it finds any, it will download them automatically. Downloading and installing these updates might take a few minutes, depending on the updates you need. Your PC might also need to restart one or more times to complete the updates.
Reinstall your apps
Your desktop apps come with you when you update to Windows 8.1 or Windows RT 8.1, but you’ll need to reinstall your Windows Store apps. You can see all of the Windows Store apps you own in the Your apps section of the Store. From here, you can choose the ones you want to install on your updated PC and install them all at once.
On the Start screen, select the Store tile to open the Windows Store.
Select Account, and then select My apps.
Select all the apps you want to install, and then select Install.
Note: You don’t need to wait for the apps to finish installing. They’ll keep installing in the background while you do other things.


