- How to auto Shut down Windows 10 after some time
- Using Windows Command:
- Create Scheduled auto shutdown Daily, weekly or Monthly
- How to schedule Automatic Shutdown in Windows 10 [EASY GUIDE]
- How to schedule shutdown in Windows 10?
- 1. Use Run dialog, Command Prompt or PowerShell
- 2. Use Task Scheduler
- 3. Use a dedicated software to help with shutdown
- PcWinTech.com™
- Simple Shutdown Timer
- How to Shut Down Windows 10 with the Shutdown Timer
- 3 Ways to shut down Windows 10 using the Shutdown Timer
- Method # 1: Using Run prompt to shutdown Windows 10
- Method # 2: Using the command prompt to shutdown Windows 10
- Method # 3: Use PowerShell to shutdown Windows 10
- Conclusion
How to auto Shut down Windows 10 after some time
There are times in which we wish to have our PC shut down automatically after sometime. May be if there is a chance that you may fall asleep watching a movie online or if you want to go for some other work and need a download to be completed. In all these cases it will be a great help if the PC shut down automatically according to the timer set by us.
There are many ways to do this. Let’s explore some of these methods.
Using Windows Command:
1.Open the Run window by pressing Windows+R . In the run command box type the command ” shutdown -s -t 3600 /f ” . Now click OK.
Note that if its not working you can also use shutdown /s /t 3600 . 3600 in seconds means it will shut down itself after 3600 seconds. You can put your desired time in seconds to shutdown your windows 10 PC automatically after some time.
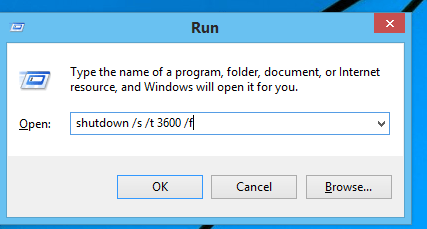
Note: – In windows 8 and later versions ” shutdown /s /t 3600 /f ” can also be used. Both commands are equivalent.
Here the meaning of different arguments used in the command are:
/t – time in seconds. Here 3600 seconds is the time given. So the system will shut down after 3600 seconds that is 1 hour.
/f- ‘force shutdown’ option is enabled.
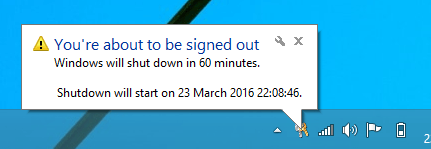
Now your automatic shutdown is scheduled. This will be shown as a notification in the task bar.
2. But what if your plans have changed and you need to abort the shut down process scheduled. Don’t worry you can do it easily. Just open the Run window by pressing Windows+ R. Type the command ” shutdown -a ” and click OK. Here the argument -a stands for abort.
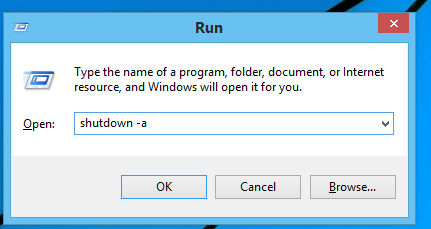
Now you can see the notification about cancelling the shut down.

Thus the scheduled shut down is cancelled.
Create Scheduled auto shutdown Daily, weekly or Monthly
Using the task scheduler in our windows we can set options to automatically shut down our system. This have many options. We can schedule the task of shut down for any intervals like daily or once and set a time at which the task will be done.For this follow these steps.
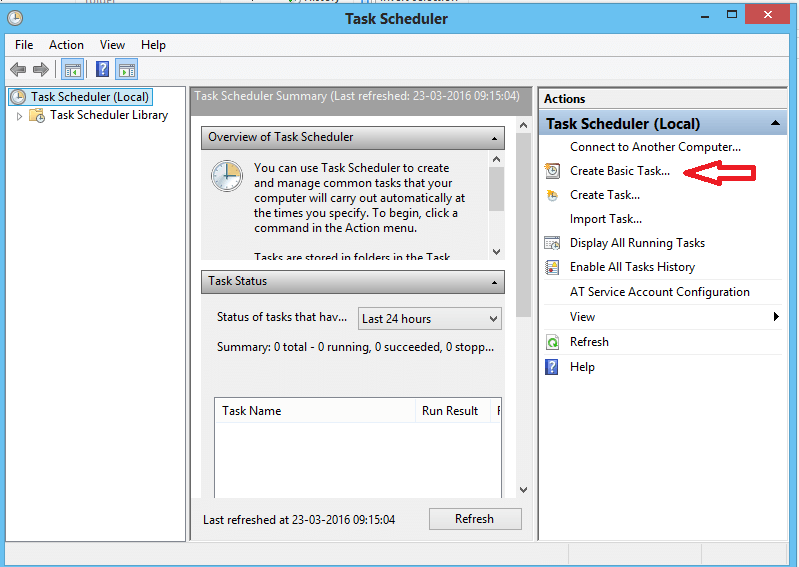
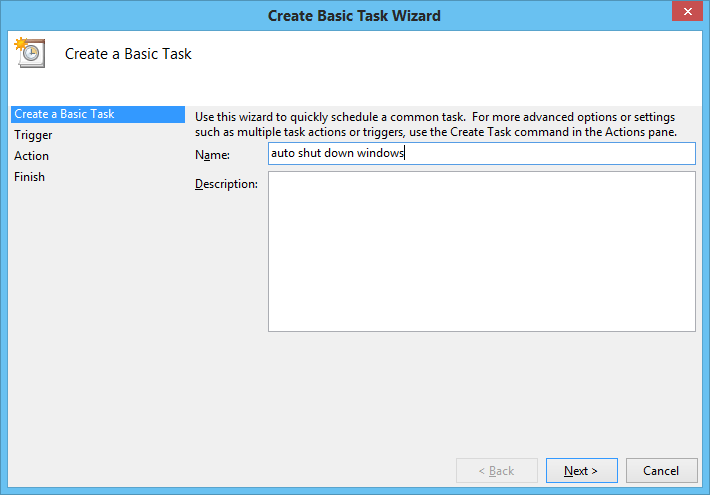
- Open the task scheduler from the search panel or navigate to Control panel->System and security-> Administrative Tools -> Task Scheduler.Select the Create Basic Task option under the Actions tab.
2.Give a name to the task like Automatic shutdown or auto shut down windows as you wish. Then click next.
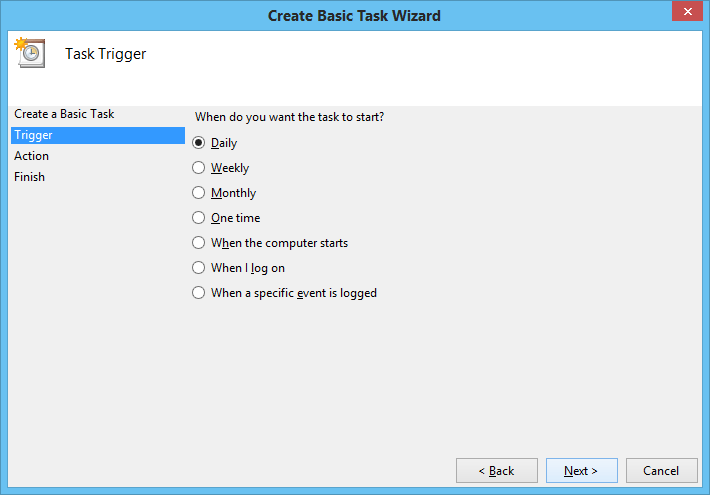
2.Now choose the frequency of the task. If you want to schedule the shut down at a particular time everyday or just one day select the option according to your convenience. Then click next.
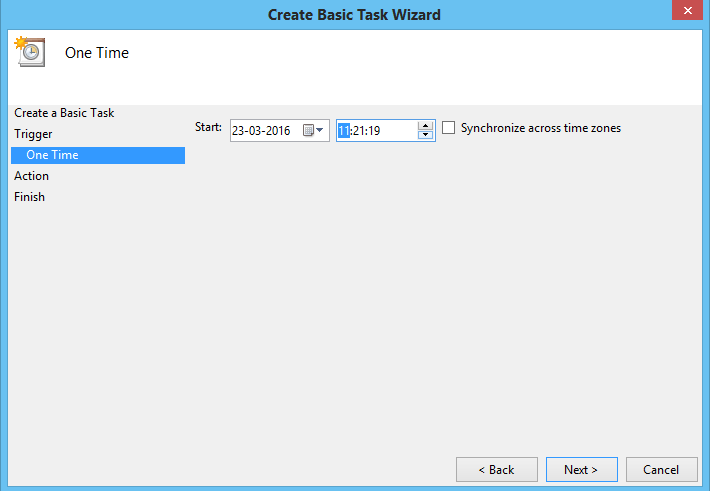
3.Now set the time when the event will start. If it is set as one- time event then at the scheduled time system will shut down that day. If any other period is set then after every interval the task of shut down will be done. After setting the start time click next.
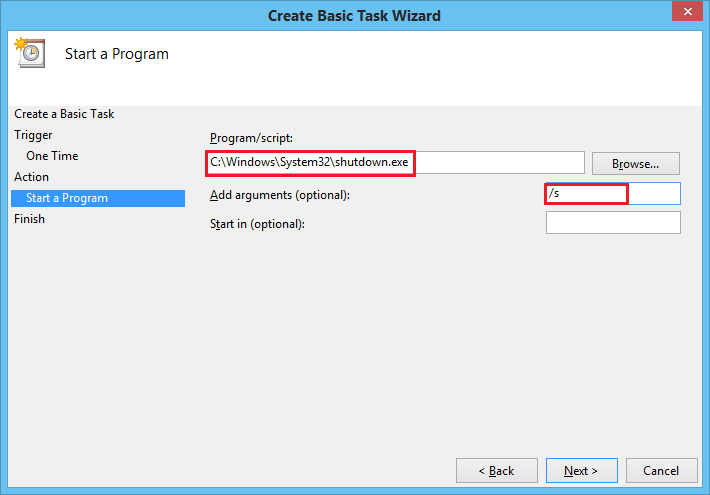
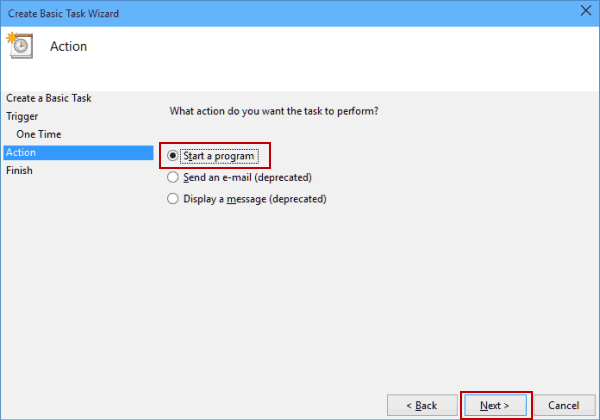
4.Now in Action tab select ‘Start a program’ and click next.

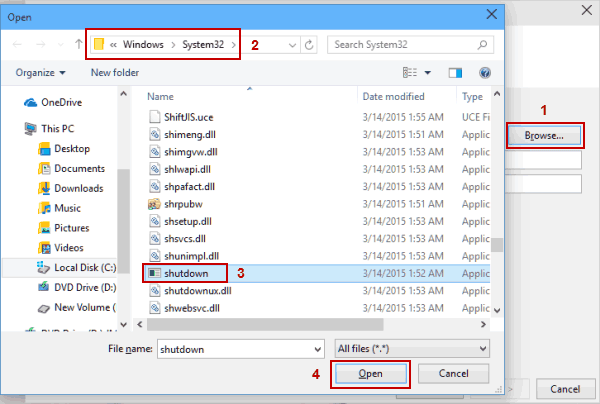
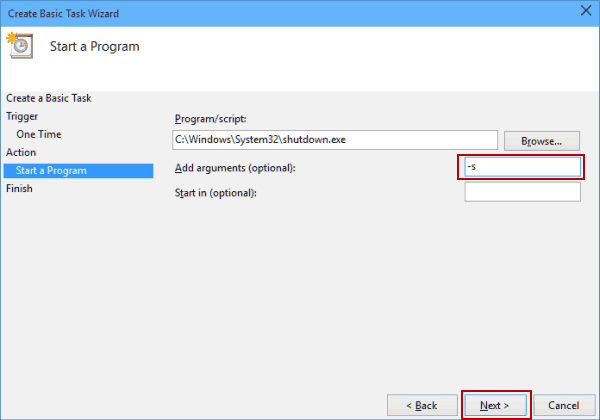
5.In the Program/script bar type the path ‘ C:\Windows\System32\shutdown.exe ‘ . Give ‘ /s ‘ as the argument. Click next.
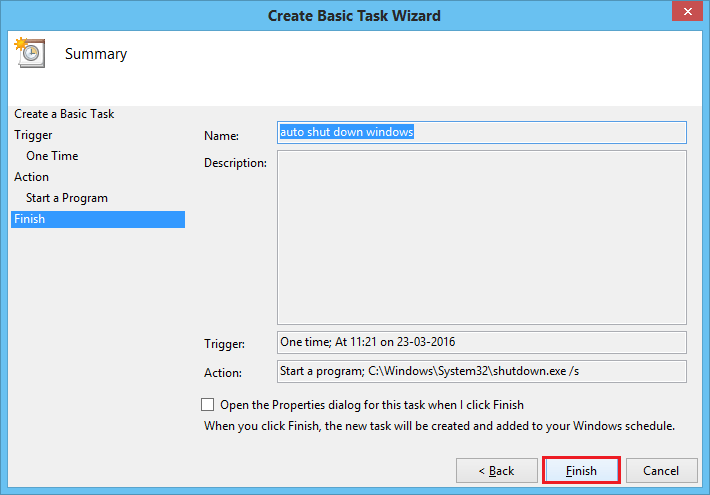
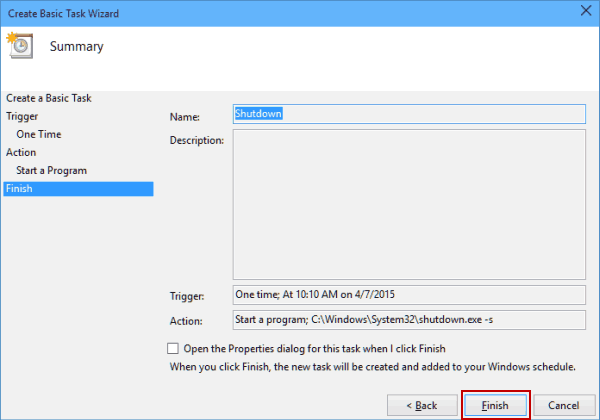
6.Now complete the scheduled task by clicking Finish.
Now shutdown is scheduled for the given time. If you want to cancel or remove the task just go to task scheduler and right-click on the task we created for automatic shutdown and select disable. To remove the task permanently select delete.
These methods can be used to automatically shut down your system. So now no worries about forgetting to shut down the system. Just schedule it using any of the above methods and it is done.
How to schedule Automatic Shutdown in Windows 10 [EASY GUIDE]

- Programming your device to shut down automatically can be done in a couple of steps.
- In this article, we’re showing you how to do this, using certain commands or apps.
- Curious to learn more tips&tricks about Windows 10? Go to our Windows 10 Guides Hub for some interesting articles.
- Don’t leave without checking out the How-To area, for useful tutorials about everything concerning your electronic devices.

- Download Restoro PC Repair Tool that comes with Patented Technologies (patent available here).
- Click Start Scan to find Windows issues that could be causing PC problems.
- Click Repair All to fix issues affecting your computer’s security and performance
- Restoro has been downloaded by 0 readers this month.
Sometimes you might want to schedule certain tasks, especially if you don’t have enough time to do them manually.
If you want to learn more about scheduling on Windows 10, today we’re going to show you how to schedule shutdown on Windows 10.
If you can’t shut down your computer manually for some reason, you might want to schedule a shutdown. This is extremely useful if you leave your computer to do something during the night, or if you have to leave your computer for a few hours while you do some errands.
So, let’s see how to schedule a shutdown in Windows 10.
How to schedule shutdown in Windows 10?
1. Use Run dialog, Command Prompt or PowerShell
To start the Run dialog just press Windows key + R. If you want to run Command Prompt or PowerShell you can search it in the search bar.
Now, all that you have to do is type the following command into Run dialog, Command Prompt or PowerShell and press Enter:
shutdown –s –t 600 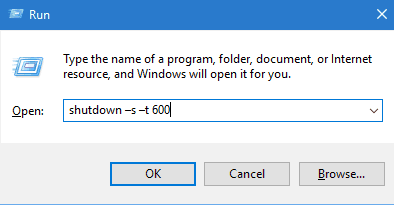
We have to mention that 600 represents the number of seconds, so in this example, your computer will turn off automatically after 10 minutes. You can experiment with different values and set the one you want.
If you’re having trouble accessing Command Prompt as an admin, then you better take a closer look at this guide. There’s a similar article about Powershell problems and how to fix them.
2. Use Task Scheduler
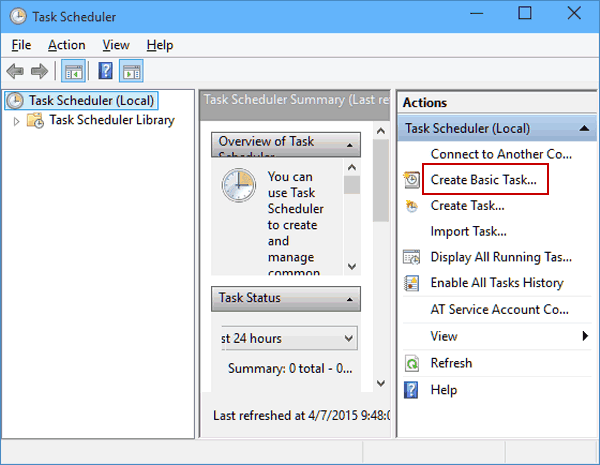
- Start Task Scheduler by going to the Start Menu, typing schedule in the Search bar, and choosing Schedule tasks.
- When Task Scheduler opens, click the Create Basic Task.

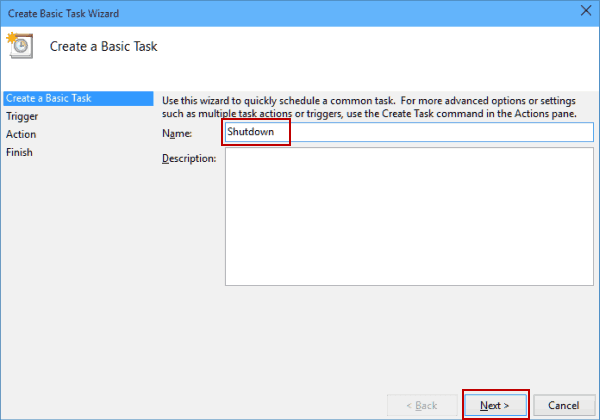
- Enter the name for your task, for example, Shutdown.
- Now choose When do you want the task to start. In our case, we’ll choose One time.
- Now enter the time and date when the task will be executed.
- Next, choose Start a program.
- Click the Browse button and go to C:WindowsSystem32 and select a file called shutdown. Then click Open.
- Now just in the Add arguments field add -s, and then click Next.
- Now you should see the task information. You can check it one last time, and if you’re pleased with your settings click Finish to schedule a shutdown.

3. Use a dedicated software to help with shutdown
Windows Shutdown Assistant is a software that allows you to shut down your PC at the set time automatically. You can also set it to shut down in other situations such as system idle, excessive CPU usage, or low battery.
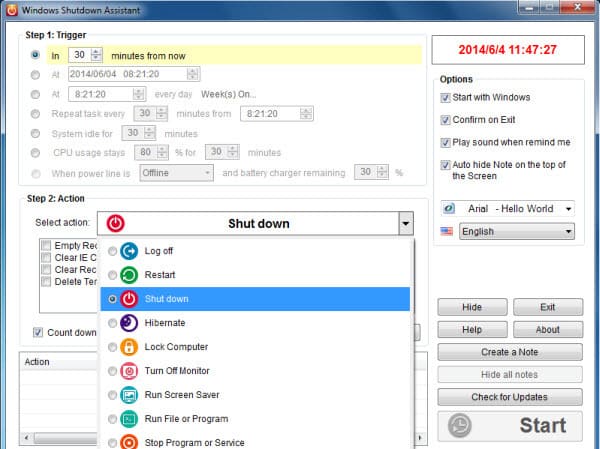
It can also support computer log off, restart, and lock up, all automatically. Thus, we recommend you download the free version of the program before deciding whether it’s worth your money or not.
That’s it, you now know how to schedule a shutdown in Windows 10. If you have any questions, just reach for the comments below.
PcWinTech.com™
«Knowledge should be shared not hidden.»
Site Last Updated: Nov 15, 2019
Simple Shutdown Timer
v1.1.2
Windows 2000, XP, 2003, Vista, 2008, 7, 8
(Direct Download)
(Portable Version (Zip, No Setup))
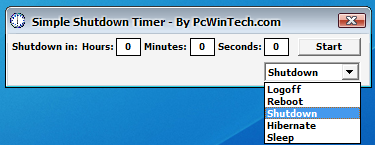
Program is pretty self explanatory. Put in the time and click start. When the time reaches 0 the computer will shut down and power off (if able to power off).
The program supports 2 command lines
Example 1:
SimpleShutdownTimer.exe /sleepnow
This will put the system into standby mode, no count down, no icons.
Example 2:
SimpleShutdownTimer.exe 02:30:00
This tells the program to set the time for 2 hours and 30 mins. and 0 sec. and to start the countdown.
This option allows you to run the program from a script without user input.
Who would need this program?
Well I made this program for myself and have used it for the last couple of years.
Basically when I am waiting for my computer to finish something up but I don’t want to wait,
I need to head to bed or work or whatever then I want my system to shut down when it is done.
I don’t need my power bill going up when I’m not even using my system.
So I set the timer for how ever long I think my system needs to finish what it is doing.
If I need to come back or I don’t want it to shutdown I can stop the timer, this is why I don’t simply
use the built in windows shutdown.exe, yes I can start a countdown but I can’t stop it!
So I made this and now I’m sharing it. It’s very simple and sometimes simple is better.
Need anything? Have questions?
Drop me a line in the forums.
How to Shut Down Windows 10 with the Shutdown Timer
While working in Windows 10, there are times when you do not want to shut down your computer system manually. You might want your Windows 10 to shut down automatically after a certain period. The reason for this is that you might get busy with something important and do not find time to properly shut down your computer system. In such a situation, Windows 10 provides you with the utility of the shutdown timer. In this article, we will explain to you the methods through which you can shut down Windows 10 with the shutdown timer.
3 Ways to shut down Windows 10 using the Shutdown Timer
In order to shut down Windows 10 with the shutdown timer, you can follow any of the three methods listed below:
Method # 1: Using Run prompt to shutdown Windows 10
In this method, we will tell you how you can shut down Windows 10 with the shutdown timer using the Run Prompt. For doing this, you need to perform the following steps:
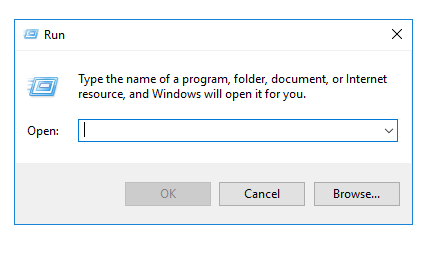
Type run in the search section of your taskbar and click on the search result to launch the run prompt. The newly opened Run Prompt is shown in the following image:
Type the command:
in the text box corresponding to the Open field. Here, TimeInSeconds represents the time in seconds after which you want your computer system to shut down automatically. This command is shown in the following image:
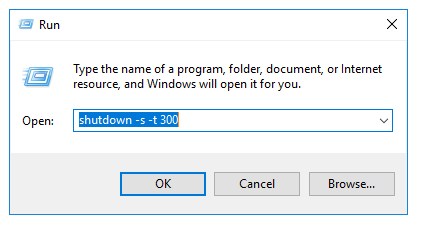
In this example, I want my computer system to shut down after 5 minutes. There are 60 seconds in a minute so there will be 5 * 60 = 300 seconds in 5 minutes.
After typing the command, click on the OK button.
As soon as you will click on it, Windows 10 will prompt you with the following message “You are about to be signed out” and when the timer expires, Windows 10 will automatically shut down.
Method # 2: Using the command prompt to shutdown Windows 10
In this method, we will tell you how you can shut down Windows 10 with the shutdown timer using the Command Prompt. In order to do this, you need to proceed as follows:
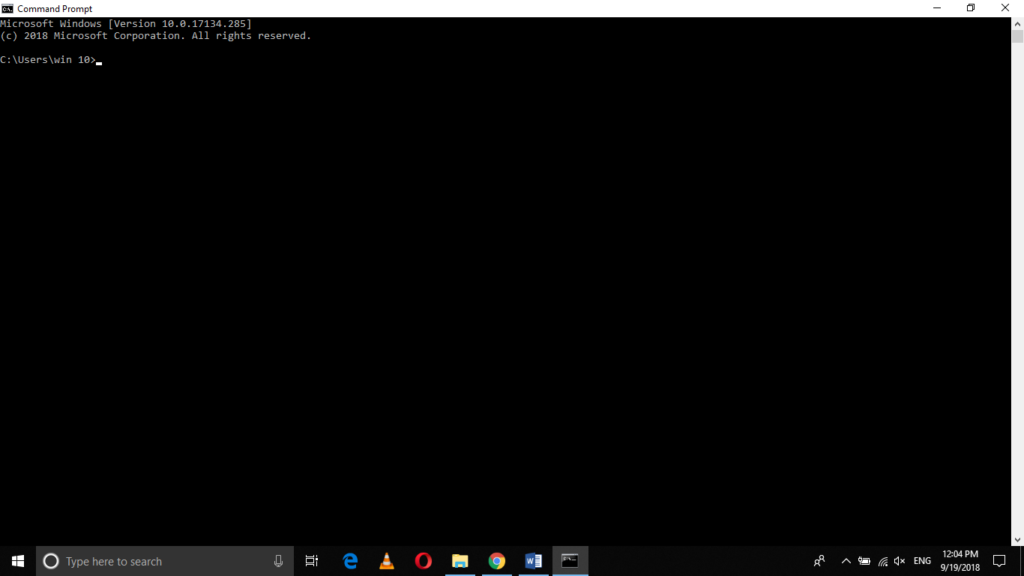
Type cmd in the search section of your taskbar and click on the search result to launch a new command prompt window. The newly opened Command Prompt window is shown in the following image:
Type the command
in your command prompt window and then press the Enter key. Here, TimeInSeconds represents the time in seconds after which you want your computer system to shut down automatically. This command is shown in the following image:
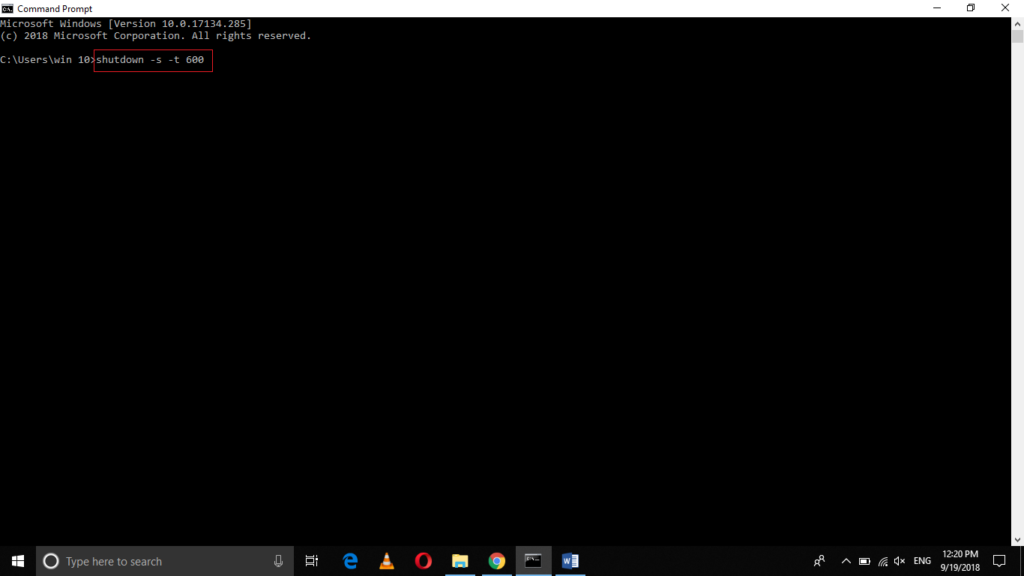
In this example, I want my computer system to shut down automatically after 10 minutes. Since there are 60 seconds in a minute, so there will be 10 * 60 = 600 seconds in 10 minutes.
As soon as the set timer expires, Windows 10 will automatically shut down.
Method # 3: Use PowerShell to shutdown Windows 10
In this method, we will tell you how you can shut down Windows 10 with the shutdown timer using the Power Shell. For doing this, you need to perform the following steps:
Press Win+ X to launch the Power User menu. The Power User menu is shown in the following image:
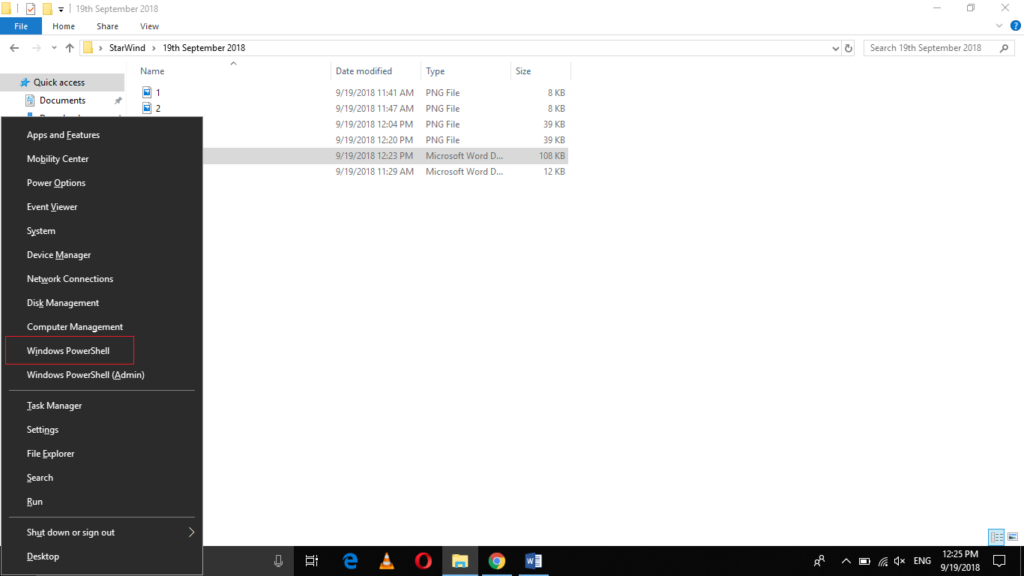
Now click on the Windows PowerShell as highlighted in the image shown above.
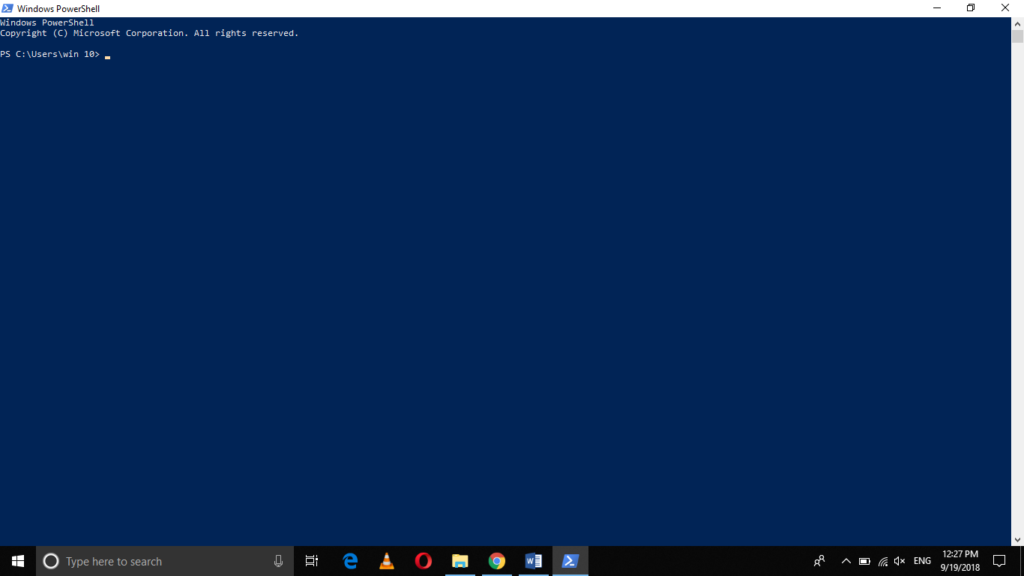
As soon as you will click on it, the PowerShell window will appear which is shown in the image below:
Type the command
in your PowerShell window and then press the Enter key. Here, TimeInSeconds represents the time in seconds after which you want your computer system to shut down automatically. This command is highlighted in the following image:
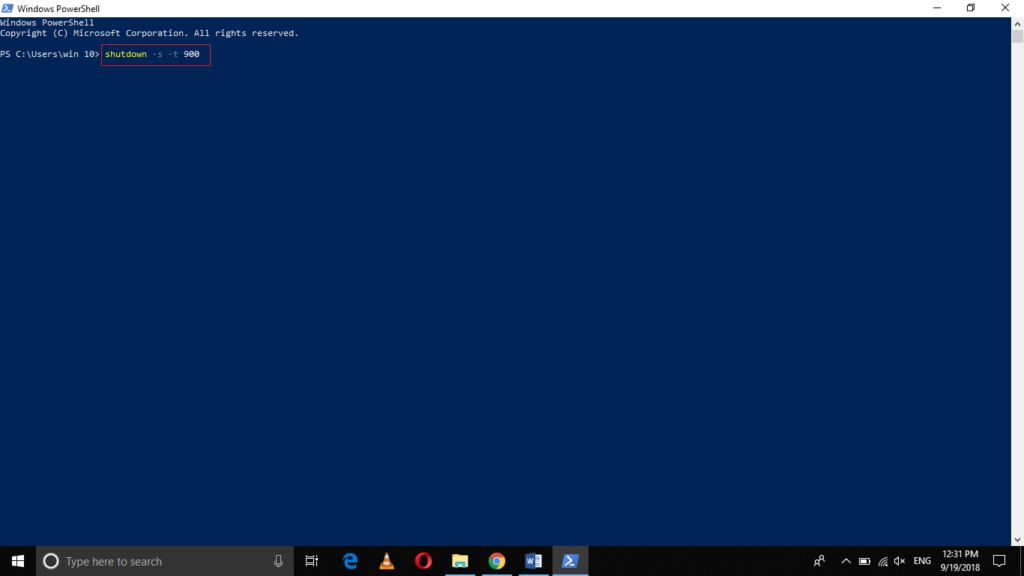
In this example, I want my computer system to shut down automatically after 15 minutes. Since there are 60 seconds in a minute, hence there will be 15 * 60 = 900 seconds in 15 minutes.
As soon as the set timer will expire, Windows 10 will shut down automatically.
Conclusion
In this article, we studied three different methods through which we can shut down Windows 10 with the shutdown timer. All the three methods listed above are simple and easy to use and work perfectly fine in every situation. It is up to your own choice which method you like to use for automatically shutting down your computer system. You just need to follow a simple set of steps in all the three cases and you can get your work done very easily.


