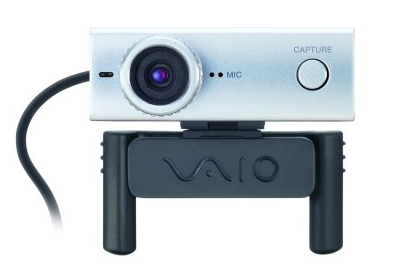
- SONY Motion EYE Camera Driver Download
- Supported Models
- Manufacturers
- Supported Operating Systems
- File Name
- Find Related Drivers
- Uploader Notes
- Uploaded By
- Most Helpful Reviews
- Recent Help Articles
- More Popular Downloads
- Related Driver Updates
- How to Update SONY Motion EYE Camera Device Drivers Quickly & Easily
- Step 1 — Download Your Driver
- Step 2 — Install Your Driver
- How to Open Device Manager
- How to Install a driver from Device Manager
- Sony Camera Drivers Download
- Popular Utilities
- Driver Updates for Popular Sony Camera Models
- Featured Sony Camera Downloads
- How to Update Device Drivers
- Option 1: Update drivers automatically
- Option 2: Update drivers manually
- How to Install Drivers
- Драйвера для камеры sony eye для windows
- Sony Visual Communication Camera Driver v.1.32.500.0 Windows XP / Vista / 7 32-64 bits
- Подробнее о пакете драйверов:
- Sony Visual Communication Camera Driver. Характеристики драйвера
- Скачать драйвер для Sony MOTION EYE Video Capture Device
- Sony MOTION EYE Video Capture Device
- Как установить драйвер?
SONY Motion EYE Camera Driver Download

Supported Models
SONY Motion EYE Camera Driver
Manufacturers
Supported Operating Systems
File Name
Find Related Drivers
Uploader Notes
Uploaded By
WOOK (DG Member) on 4-Dec-2003
Most Helpful Reviews
- Updates PC Drivers Automatically
- Identifies & Fixes Unknown Devices
- Supports Windows 10, 8, 7, Vista, XP
Recent Help Articles
More Popular Downloads
Related Driver Updates
How to Update SONY Motion EYE Camera Device Drivers Quickly & Easily
Step 1 — Download Your Driver
To get the SONY Motion EYE Camera driver, click the green download button above. After you complete your download, move on to Step 2.
If the driver listed is not the right version or operating system, search our driver archive for the correct version. Enter SONY Motion EYE Camera into the search box above and then submit. In the results, choose the best match for your PC and operating system.
Tech Tip: If you are having trouble deciding which is the right driver, try the Driver Update Utility for SONY Motion EYE Camera. It is a software utility which automatically finds and downloads the right driver.
To find the newest driver, you may need to visit the Sony website. Most major device manufacturers update their drivers regularly.
Step 2 — Install Your Driver
Once you have downloaded your new driver, you’ll need to install it. In Windows, use a built-in utility called Device Manager, which allows you to see all of the devices recognized by your system, and the drivers associated with them.
How to Open Device Manager
In Windows 10 & Windows 8.1, right-click the Start menu and select Device Manager
In Windows 8, swipe up from the bottom, or right-click anywhere on the desktop and choose «All Apps» -> swipe or scroll right and choose «Control Panel» (under Windows System section) -> Hardware and Sound -> Device Manager
In Windows 7, click Start -> Control Panel -> Hardware and Sound -> Device Manager
In Windows Vista, click Start -> Control Panel -> System and Maintenance -> Device Manager
In Windows XP, click Start -> Control Panel -> Performance and Maintenance -> System -> Hardware tab -> Device Manager button
How to Install a driver from Device Manager
Locate the device and model that is having the issue and double-click on it to open the Properties dialog box.
Select the Driver tab.
Click the Update Driver button and follow the instructions.
In most cases, you will need to reboot your computer in order for the driver update to take effect.
Tech Tip: Driver downloads and updates come in a variety of file formats with different file extensions. For example, you may have downloaded an EXE, INF, ZIP, or SYS file. Each file type has a slighty different installation procedure to follow.
For more help, visit our Driver Support Page for step-by-step videos on how to install drivers for every file type.
Sony Camera Drivers Download
After you upgrade your computer to Windows 10, if your Sony Camera Drivers are not working, you can fix the problem by updating the drivers. It is possible that your Camera driver is not compatible with the newer version of Windows.
- Updates PC Drivers Automatically
- Identifies & Fixes Unknown Devices
- Supports Windows 10, 8, 7, Vista, XP
Popular Utilities
Driver Updates for Popular Sony Camera Models
Featured Sony Camera Downloads
How to Update Device Drivers
There are two ways to update drivers.
Option 1 (Recommended): Update drivers automatically — Novice computer users can update drivers using trusted software in just a few mouse clicks. Automatic driver updates are fast, efficient and elimate all the guesswork. Your old drivers can even be backed up and restored in case any problems occur.
Option 2: Update drivers manually — Find the correct driver for your Camera and operating system, then install it by following the step by step instructions below. You’ll need some computer skills to use this method.
Option 1: Update drivers automatically
The Driver Update Utility for Sony devices is intelligent software which automatically recognizes your computer’s operating system and Camera model and finds the most up-to-date drivers for it. There is no risk of installing the wrong driver. The Driver Update Utility downloads and installs your drivers quickly and easily.
You can scan for driver updates automatically and install them manually with the free version of the Driver Update Utility for Sony, or complete all necessary driver updates automatically using the premium version.
Tech Tip: The Driver Update Utility for Sony will back up your current drivers for you. If you encounter any problems while updating your drivers, you can use this feature to restore your previous drivers and configuration settings.
Double-click on the program to run it. It will then scan your computer and identify any problem drivers. You will see a results page similar to the one below:
Click the Update button next to your driver. The correct version will be downloaded and installed automatically. Or, you can click the Update All button at the bottom to automatically download and install the correct version of all the drivers that are missing or out-of-date on your system.
Before updating, use the built-in driver backup feature to save your current drivers to a specified folder. Use this backup folder to safely restore drivers if necessary:
Option 2: Update drivers manually
To find the latest driver, including Windows 10 drivers, choose from our list of most popular Sony Camera downloads or search our driver archive for the driver that fits your specific Camera model and your PC’s operating system.
Tech Tip: If you are having trouble finding the right driver update, use the Sony Camera Driver Update Utility. It is software which finds, downloads and istalls the correct driver for you — automatically.
After downloading your driver update, you will need to install it. Driver updates come in a variety of file formats with different file extensions. For example, you may have downloaded an EXE, INF, ZIP, or SYS file. Each file type has a slighty different installation procedure to follow. Visit our Driver Support Page to watch helpful step-by-step videos on how to install drivers based on their file extension.
How to Install Drivers
After you have found the right driver, follow these simple instructions to install it.
- Power off your device.
- Disconnect the device from your computer.
- Reconnect the device and power it on.
- Double click the driver download to extract it.
- If a language option is given, select your language.
- Follow the directions on the installation program screen.
- Reboot your computer.
Драйвера для камеры sony eye для windows
 zotov17, javaga, не хреновые, а скоростные. за качество нужно жертвовать чем то.
зы: 240 кадров в секунду в год выпуска камеры — мало кто мог похвататься таким.
ну вот и я столкнулся с этой напастью. разобрался, но решения не нашел.
драйвера х32
в приложениях х32 работает
в приложениях х64 не работает
в общем правильно сказал:
там и картинка лучше.
для привлечения внимания: javaga, GHJIF123678,
Здравствуйте всем! cooler.nvkz, Так а что это все таки дохлый номер использовать ps3 eye в скайпе?
У меня собственно в скайпе в место изображения — черный экран. В Вайбере и тестовой програмке все отлично. Микрофон в скайпе работает. В настройках она определена, но вместо картинки — тьма. Решения проблемы так и нету?
PS. Windows 7, 64 bit.
Сообщение отредактировал bonus2004 — 28.11.18, 12:42
Sony Visual Communication Camera Driver v.1.32.500.0 Windows XP / Vista / 7 32-64 bits
Подробнее о пакете драйверов:
Sony Visual Communication Camera Driver. Характеристики драйвера
Драйвер веб камеры для Sony Visual Communication Camera с чипсетом от компании Ricoh. Предназначен для ручной установки на Windows XP, Windows Vista, Windows 7.
Внимание! Драйвер на веб камеру — неподписанный. На 32-разрядных (x86) ОС при установке будет выдано предупреждение об этом, и если выбрать «Всё равно установить», то драйвер установится и будет работать. На 64-разрядных ОС для установки драйвер потребуется подписать с помощью Driver Signature Enforcement Overrider 1.3b (файл dseo13b.exe). Если мы просто (как на х86) попытаемся установить имеющийся драйвер, то ничего не выйдет, потому, что Windows 7 64-bit (или Vista 64-bit) не предупреждая нас, просто не запустит неподписанный драйвер. Вот такая особенность имеется у 64-разрядных систем. Можно штатно отключить эту проверку, но к сожалению только на один сеанс (до перезагрузки компьютера). Для этого нужно до загрузки Windows нажать клавишу F8 и выбрать соответствующий пункт меню.
Driver Signature Enforcement Overrider 1.3b позволяет подписать драйвер и включить тестовый режим, который не будет слетать при перезагрузке компьютера.
Как подписать драйвер:
- Отключаем UAC (Контроль Учётных Записей): щёлкните на кнопке Пуск и затем откройте окно Панель управления. В поле поиска, расположенном в верхнем правом углу окна, введите UAC. Теперь щёлкните на ссылке Изменение параметров контроля учётных записей. Откроется окно, в котором ползунок передвигаем в самый низ. Ок – перезагружаемся.
- Отключаем запрет на установку неподписанных драйверов и подписываем тестовой подписью:
a.) Запускаем dseo13b.exe давим Next, Yes (соглашаемся с тем, что никто, ни за что не несёт ответственности, хотя программа использует штатный режим операционной системы и не может навредить сама по себе). b.) Включаем тестовый режим, установив переключатель в положение «Enable Test Mode», давим Next. Должно появиться окно с предупреждением, что включен тестовый режим. «Test Мode has been ENABLED. » давим ОК. Предусмотрено и обратное действие «Disable Test Mode», отключающее тестовый режим.
c.) Теперь нужно добавить подписи для непроверенных системных файлов. Для этого выберите «Sign a System File» и введите имя файла, включая полный путь. Например, если файл драйвера RCUVCMNPx64.sys (после установки драйвера) расположен в каталоге «C:\Windows\SysWOW64\drivers», то вам необходимо указать «C:\Windows\SysWOW64\drivers\RCUVCMNPx64.sys». Ввели путь к файлу драйвера, давим ОК. Делаем то же самое для файлов RCUVCMNPx64.dll и 5U875x64.ax, они находятся в папке «C:\Windows\SysWOW64», соответственно указываем «C:\Windows\SysWOW64\RCUVCMNPx64.dll» и «C:\Windows\SysWOW64\5U875x64.ax». - Теперь, если мы перезагрузимся, то на Рабочем столе появится надпись Test Мode и т. п., надпись маленькая, жить особо не мешает, но если раздражает, то запускаем RemoveWatermarkX64.exe давим Y, и ждём, пока в окошке не появится «Press Enter to exit», после этого давим Enter и перезагружаемся. Всё, мы сделали своё дело, драйвер будет принят за своего, и мы можем пользоваться веб камерой.
Внимание! Перед установкой драйвера Sony Visual Communication Camera Driver рекомендутся удалить её старую версию. Удаление драйвера особенно необходимо — при замене оборудования или перед установкой новых версий драйверов для видеокарт. Узнать об этом подробнее можно в разделе FAQ.
Скачать драйвер для Sony MOTION EYE Video Capture Device
Sony MOTION EYE Video Capture Device
Драйвер это по своей сути связующее звено между операционной системой, то есть программным обеспечением и железом, то есть физическими устройствами, таким как видеокарты, принтеры, процессоры и т.д. В операционной системе могут быть заложены базовые драйвера для самых необходимых устройств — мышка, клавиатура, но для всего остального потребуются свежие драйвера.
Как установить драйвер?
a) Для начала надо на рабочем столе выбрать значок (Мой компьютер) и нажать по нему правой кнопкой мыши, в выпадающем меню выбрать (Свойства).
b) Теперь переходим на вкладку (Оборудование) и нажимает на кнопку (Диспетчер устройств).
c) Теперь необходимо выбрать устройство для которого будет устанавливаться/обновляться драйвер. На строке с устройством надо нажать правой кнопкой мыши и в выпадающем меню выбрать (Свойства), либо можно просто дважды по нему щелкнуть, чтобы перейти в нужные настройки.
d) Переходим на вкладку (Драйвер), выбираем кнопку (Обновить).
e) В появившемся диалоговом окне выбираем пункт (Нет, не в этот раз) и переходим (Далее).
f) На этом этапе есть два вариант. Можно попытаться установить драйвера в автоматическому режиме, тогда ОС сама попытается найти подходящие устройству драйвера и установить их, для этого выбираем (Автоматическая установка (рекомендуется)) , если попытка завершится неудачно, то надо переходить ко второму пункту (Установка из указанного места) и выбираем (Далее).
g) Этот пункт меню подразумевает выбор между поиском драйвера на сменных носителях и вариантом указать папку с драйвером самостоятельно. Поэтому если в наличии есть диск с драйверами, то надо вставьте диск в CD-rom и выбрать вариант (Поиск на сменных носителях (дискетах, компакт-дисках..)) и перейти (Далее).
Если драйвер найден и скачен в интернете самостоятельно, то надо указать в ручную путь к папке в которой находятся установочный данные для драйвера следующим образом. Выбираем пункт (Включить следующее место поиска:) и переходим в (Обзор), теперь из списка выбираем папку с драйвером и кликаем на кнопку (ОК). Теперь смело переходим (Далее), если все сделано правильно, то начнется установка необходимого драйвера.


