- Устранение проблем с сенсорной панелью в Windows 10
- Is your Lenovo touch screen not working? Try this
- What can I do if my Lenovo touch screen monitor isn’t working?
- 1. Disable and re-enable HID-compliant touch screen
- 2. Disconnect peripherals
- 3. Repair your Registry
- Run a System Scan to discover potential errors
- 4. Install the latest Windows updates
- 5. Rollback drivers
- 6. Run the built-in Windows troubleshooter
- 7. Hold the power button for 1 minute
- HID-совместимый драйвер сенсорного экрана отсутствует и больше не доступен в диспетчере устройств
- Отсутствует HID-совместимый драйвер сенсорного экрана
- Запустите средство устранения неполадок оборудования
- Как переустановить HID-совместимый драйвер сенсорного экрана
- Удалить ненужные драйверы из Windows 10
Устранение проблем с сенсорной панелью в Windows 10
Если ваша сенсорная панель не работает, причиной этому может быть отсутствующий или устаревший драйвер.
В меню «Пуск» выполните поиск по запросу «Диспетчер устройств», а затем выберите его в списке результатов. В разделе «Мышь и другие указывающие устройства» выберите необходимую сенсорную панель, откройте ее, перейдите на вкладку «Драйвер» и нажмите «Обновить драйвер». Если Windows не находит новый драйвер, найдите его на веб-сайте изготовителя устройства и выполните сопутствующие указания.
Если эти действия не помогут устранить проблему, попробуйте удалить драйвер сенсорной панели. Для этого откройте диспетчер устройств, щелкните драйвер сенсорной панели правой кнопкой мыши (или нажмите и удерживайте) и выберите пункт «Удалить». Перезапустите устройство, и Windows попробует снова установить драйвер.
Если это не поможет устранить проблему, попробуйте воспользоваться универсальным драйвером, который поставляется вместе c Windows. Вот как это можно сделать. В диспетчере устройств щелкните правой кнопкой мыши (или нажмите и удерживайте) драйвер сенсорной панели и выберите «Обновить ПО драйвера. « > «Выполнить поиск драйверов на этом компьютере» > «Выбрать драйвер из списка уже установленных драйверов», выберите элемент «HID-совместимая мышь», нажмите кнопку «Далее», а затем следуйте указаниям по установке.
Если изменение драйвера не поможет, возможно, проблема связана с самой сенсорной панелью. Обратитесь за помощью к изготовителю компьютера.
Is your Lenovo touch screen not working? Try this

- The Lenovo touch screen not working problem is not very common and the solutions are pretty simple.
- The first solution is to disable and re-enable HID-compliant touch screen.
- Other important steps are to disconnect all peripherals and repair the registry.
- Installing the latest Windows updates and running the built-in troubleshooter are also recommended.
- Download Restoro PC Repair Tool that comes with Patented Technologies (patent available here).
- Click Start Scan to find Windows issues that could be causing PC problems.
- Click Repair All to fix issues affecting your computer’s security and performance
- Restoro has been downloaded by 0 readers this month.
Windows 10 is optimized to work with touchscreen devices but it seems that few users have problems with Lenovo touchscreen monitors. If the Lenovo touchscreen is not working, you might want to check few of these solutions.
If you own a touchscreen monitor then it’s probably a lot simpler and faster to sometimes use its touchscreen than to use keyboard and mouse.
The Lenovo ThinkPad touch screen not working problems can occur and sometimes touchscreen monitor just won’t work for some reason. If that’s the case for you, then you might want to try the following solution.
What can I do if my Lenovo touch screen monitor isn’t working?
- Disable and re-enable HID-compliant touch screen
- Disconnect peripherals
- Repair your Registry
- Install the latest Windows updates
- Rollback drivers
- Run the built-in Windows Troubleshooter
- Hold the Power button for 1 minute
1. Disable and re-enable HID-compliant touch screen
- Open Start and search for Device Manager. From the list of results click Device Manager to open it.
- Go to the Human Interface Devices section and expand it.
- Find HID-compliant touch screen.
- Right-click it and choose Disable. You might get asked if you’re sure that you wish to disable it, so click Yes.
- Right click the HID-compliant touch screen again and choose Enable.
- Your touchscreen device should start working.
As you can see, this is a simple solution for the Lenovo Thinkpad touch screen not working and users report that it has managed to fix touchscreen issues with other brands of touchscreen devices, but there’s no reason why not to try it with your Lenovo touchscreen monitor.
If you’re looking for more solutions for Lenovo’s touchscreen devices, we have recently covered how to fix touchscreen display on Lenovo Edge 15, so you might want to check that as well.
If you’re curious about how you can disable your touchscreen in Windows 10, check out this article to learn what you need to do.
2. Disconnect peripherals
If the solution listed above didn’t help, continue the troubleshooting process with step number 2. Some users reported that disconnecting all peripherals and restarting the computer helped them fix the problem.
I think I’ve found the problem. When I boot the laptop without an external display or USB, touch screen works fine. The problem only comes in when I connect USB devices.
Keep in mind that you should wait until your machine has completely booted up to plug your peripherals back in.
3. Repair your Registry
3.1 Use CCleaner
If certain Registry keys got corrupted, you may experience various technical issues, including touchscreen problems.
The simplest way to repair your registry is to use a dedicated tool, such as CCleaner. Windows 10 users can also use Microsoft’s System File Checker to check for system file corruption, but CCleaner is the real help in this situation.
Plus, you can download it for free, and optimize your system resources with it.
Note: Don’t forget to backup your Registry before tweaking it. In case anything goes wrong, you’ll be able to restore a working version of the OS.
3.2 Run a SFC scan
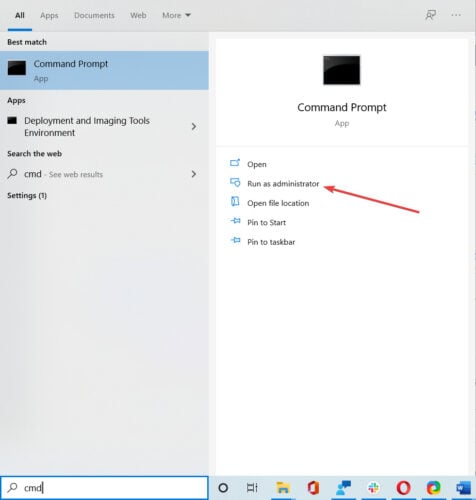
1. Go to Start, type cmd, and click on Run as administrator to start Command Prompt.
2. Type the sfc /scannow command.
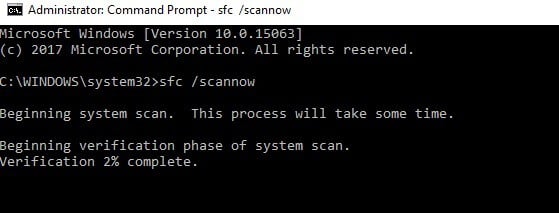
3. Wait for the scanning process to complete and then restart your computer. All corrupted files will be replaced on reboot.
Run a System Scan to discover potential errors


Looking for the best registry cleaners for Windows 10? Take a look at this list and choose the one that suits you best.
4. Install the latest Windows updates
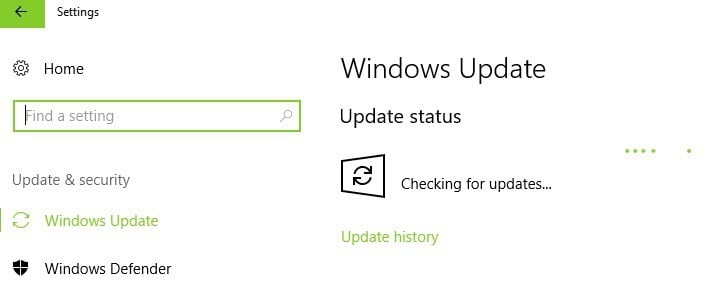
Make sure that you’re running the latest Windows OS updates on your computer. Microsoft constantly rolls out updates in order to improve the system’s stability and fix various issues.
If the touchscreen issue is actually a general Windows 10 bug, chances are that Microsoft already pushed a hotfix for it.
To access the Windows Update section, you can simply type “update” in the search box. Then go to Windows Update, check for updates and install the available updates.
If you have trouble updating your Windows 10, check out this guide that will help you solve them in no time.
5. Rollback drivers
When you install the latest OS updates using Windows Update, the system also installs the latest drivers. However, sometimes the newest drivers aren’t fully compatible with your system configuration which could trigger various problems.
In this case, rolling back to default drivers may fix the problem.
Launch Device Manager, right click on the HID-compliant touch screen and go to Properties. Navigate to the Driver tab and click on ‘Roll Back Driver’.
If you want to avoid similar issues in the future, you can block Windows 10 from auto updating certain drivers. To find out more about this, check out our step-by-step guide that will help you do just that.
6. Run the built-in Windows troubleshooter
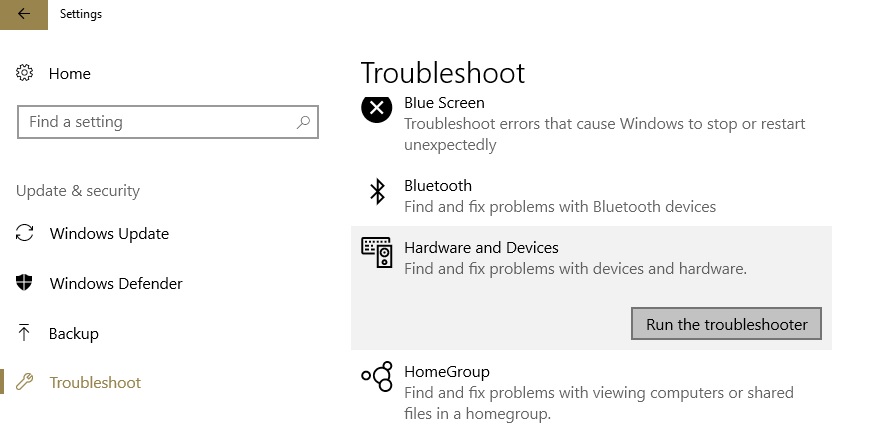
Windows 10 also features a built-in troubleshooter that you can use to fix general technical issues. For touchscreen issues, the best solution is to run the Hardware and Devices Troubleshooter.
Go to Settings, click on Update & Security, select Troubleshoot, and launch the Hardware and Devices troubleshooter.
Once the troubleshooter completed the scan process, restart your computer and check if the issue persists.
7. Hold the power button for 1 minute

As strange as this solution may appear, many Lenovo users confirmed it worked. Moreover, Lenovo marked it as a solution on its support forums, so it’s worth giving it a try.
All you need to do is shut down your computer completely. Wait for a few seconds and then unplug the power cord. Now, hold the power button for 1 minute. Plug your computer back in and the touchscreen should work now.
We hope that our solutions were helpful to you and that you’ve managed to resolve any touchscreen issues that you had with your Lenovo touchscreen monitor.
If you have any more questions, don’t hesitate to leave them in the comments section below.
HID-совместимый драйвер сенсорного экрана отсутствует и больше не доступен в диспетчере устройств
Если по какой-то причине вы отключили сенсорный экран Windows PC, потому что он не работает с установленной версией Windows 10, и позже вы обнаружите, что он не может быть включен, это будет разочаровывать. Windows 8.1 на самом деле не так хороша, как Windows 10, когда дело касалось сенсорного управления. Windows 10 имеет прочную интеграцию для сенсорных и таких аксессуаров, как цифровая ручка. В то время как обычный способ отключения и включения – через Human Interface Device или HID в Диспетчере устройств, если HID-совместимый сенсорный экран больше не доступен в Диспетчере устройств, вот исправление.
Если вы посмотрите на скриншот ниже, вы увидите тонны HID листинга. То, что выглядит как несколько устройств, является копиями оригинальных устройств и называется Ghost Devices. Это ранее установленные устройства, которые больше не включены, но драйверы все еще присутствуют в компьютере.

Отсутствует HID-совместимый драйвер сенсорного экрана
Выполните следующие действия, чтобы включить сенсорный экран, и переустановите драйвер сенсорного экрана, если он перестал работать.
Запустите средство устранения неполадок оборудования
Windows 10 поставляется с выделенным разделом устранения неполадок, который может решить большинство распространенных проблем. Когда вы запускаете средство устранения неполадок оборудования, оно проверяет фактически подключенное оборудование и удаляет остальные из них. Непосредственно перед тем, как начать, если это внешнее сенсорное устройство, обязательно подключите его.
- Перейдите в Настройки> Обновление и безопасность> Устранение неполадок.
- Нажмите «Оборудование и устройства» и запустите средство устранения неполадок.
- Это откроет новое окно, и просто следуйте инструкциям впредь.
- Это удалит все устройства Ghost.
- Теперь щелкните правой кнопкой мыши на списке устройств HID слева и включите его.
Как переустановить HID-совместимый драйвер сенсорного экрана
Возможно, что драйверы никогда не были установлены для устройства, потому что оно было отключено, и теперь его нельзя включить, если вы не установите правильные драйверы.
Лучше всего обновлять драйверы через Центр обновления Windows . Большинство OEM-производителей теперь поставляют обновление через канал доставки Windows Update, и они проверены на совместимость. Итак, зайдите в Настройки> Обновление и безопасность и запустите программу обновления, чтобы увидеть, есть ли обновление. Возможно, что Windows предложит это как дополнительное обновление, но установите его, особенно если это для вашего HID.
Если драйвер недоступен, вы всегда можете загрузить его с сайта OEM . Как только он у вас будет, вы сможете запустить его напрямую, чтобы снова установить на свое устройство.
Удалить ненужные драйверы из Windows 10
Последний совет – удалить ненужные драйверы, которые были пропущены средством устранения неполадок оборудования или они просто продолжают появляться. Это будет немного подробно, поэтому будьте осторожны. И да, вам нужны права администратора для всего этого.
- Откройте командную строку с правами администратора.
- Введите set devmgr_show_nonpresent_devices = 1 и нажмите Enter. Для этого не будет выходных данных, поскольку вы просто включаете настройку, чтобы скрытые устройства отображались в диспетчере устройств.
- Затем введите devmgmt.msc и нажмите Enter, чтобы запустить консоль диспетчера устройств Windows.
- В консоли диспетчера устройств в меню Вид выберите Показать скрытые устройства .
Это покажет вам список устройств, драйверов и служб, которые не были установлены или удалены должным образом. Вы можете найти устройство-нарушитель, щелкнуть правой кнопкой мыши и выбрать удалить , чтобы полностью удалить его из системы. Обратите внимание, что если устройства серого цвета, не удаляйте их. Удалите только те, которые, по вашему мнению, вызывают проблемы. Кроме того, обязательно удалите один и проверьте, а затем вернитесь, если он не работает.
Дайте нам знать, помогло ли это вам.


