- Установка Кали Линукс вместе с Windows 10
- Установка Kali Linux
- Подготовка
- Установка на нераспределенное место
- How to Dual Boot Kali Linux with Windows 10
- What is Kali Linux
- How to Dual Boot Kali Linux with Windows 10
- Download Kali Linux ISO
- Create a Bootable USB
- Free up Space For Installing Kali Linux
- Dual Boot Kali Linux with Windows PC
Установка Кали Линукс вместе с Windows 10

Хакерский Kali Linux удобно использовать в качестве дополнительной системы, оставив на ПК и привычную Windows10. Для этого нужно установить дистрибутив Kali вместе с Windows. Давайте разберемся, как производится установка Linux в режиме Dual Boot – то есть когда можно загрузиться в любую систему по вкусу.
Установка Kali Linux
Линукс и Windows10 не могут использовать один и тот же раздел. Поэтому для совместной установки потребуется выделить свободное место для Kali Linux. Сделать это можно прямо из установленной Windows10.
Подготовка
Сначала нужно открыть инструмент для управления Windows10 – например, через правый клик по иконке компьютера на рабочем столе.

Потребуется перейти в раздел «Управление дисками».

Видно, что все место на диске выделено под раздел с Windows10.
Теперь нужно выбрать «Сжать том» для диска С: (на нем стоит Windows10) из контекстного меню…

Или через меню «Действие».

Откроется окно, в котором необходимо указать размер сжимаемого пространства.

Для установки полной версии Kali рекомендуется высвободить как минимум 20 гигабайт, с Light версией Kali Linux можно попробовать установить и на меньшее пространство.
После сжатия должна появиться область, на которой написано «Не распределена». Именно в нее и будет производиться установка Kali Linux.

Теперь можно перезагружаться и запускать инсталлятор Kali с флешки или с DVD.
Установка на нераспределенное место
Большая часть шагов в точности совпадает с действиями при обычной установке.
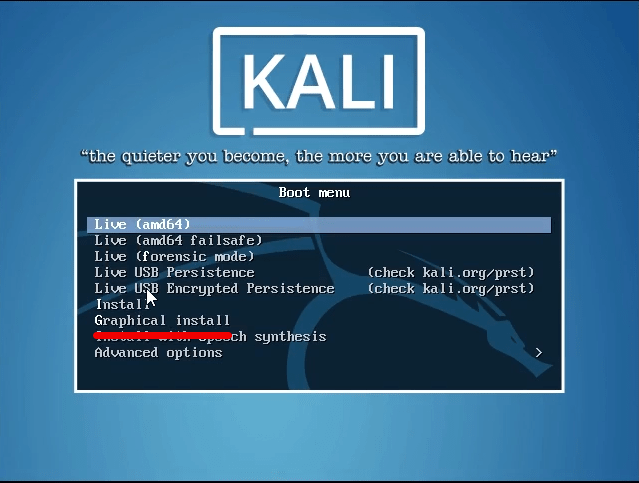
Необходимо загрузиться с носителя Kali Linux и выбрать пункт Graphical Install.

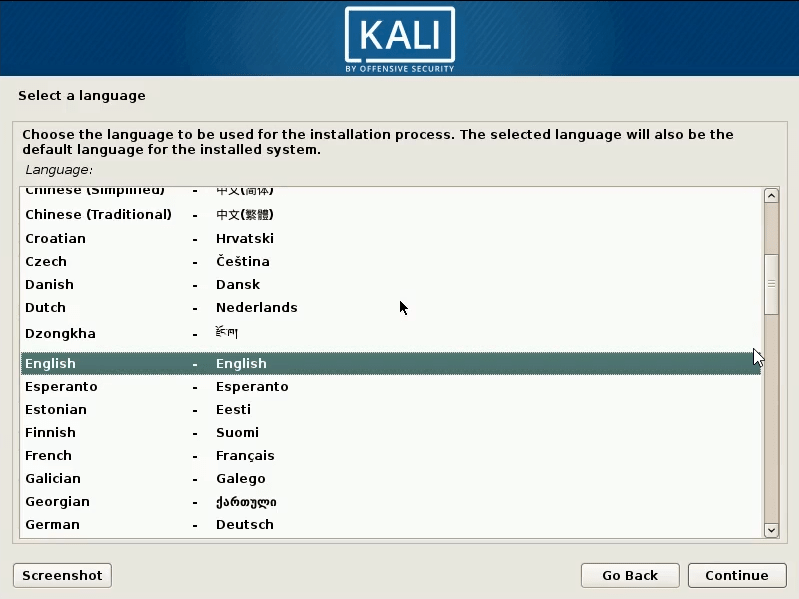
Затем выбрать язык. Он будет использоваться во время установки и для работы в Kali Linux. При желании его можно будет поменять в настройках.

Система предупредит, что перевод может быть неполным. Бояться этого не стоит, на русском вся необходимая информация корректно показывается. А вот с менее распространенными языками может и не повезти.

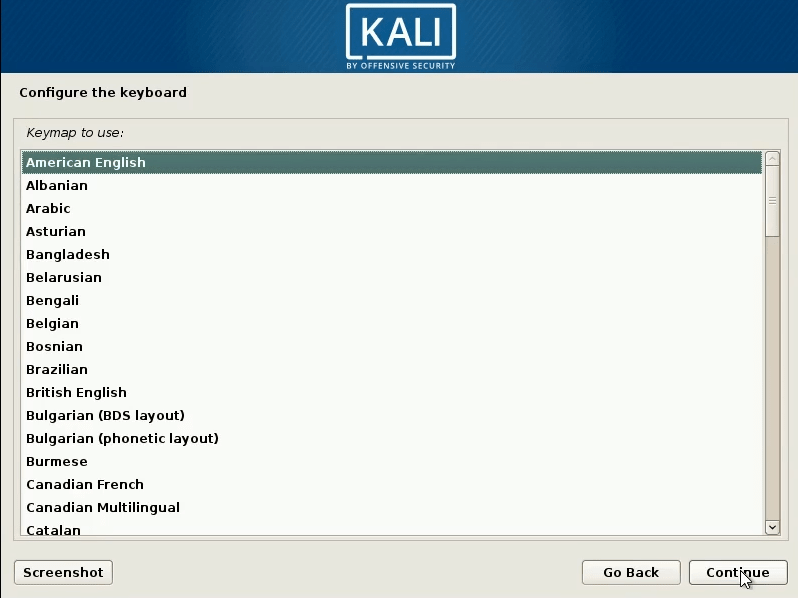
Затем нужно указать раскладку клавиатуры.

И выбрать способ смены раскладки.

После этого установщик Linux попробует настроить сеть в автоматическом режиме.

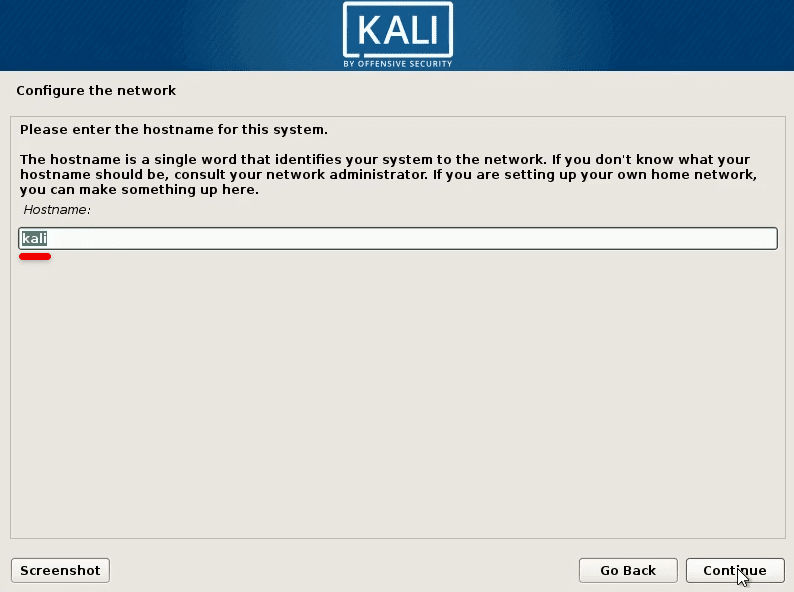
Если у него это получится, будет предложено ввести имя компьютера (для работы из-под Kali Linux).

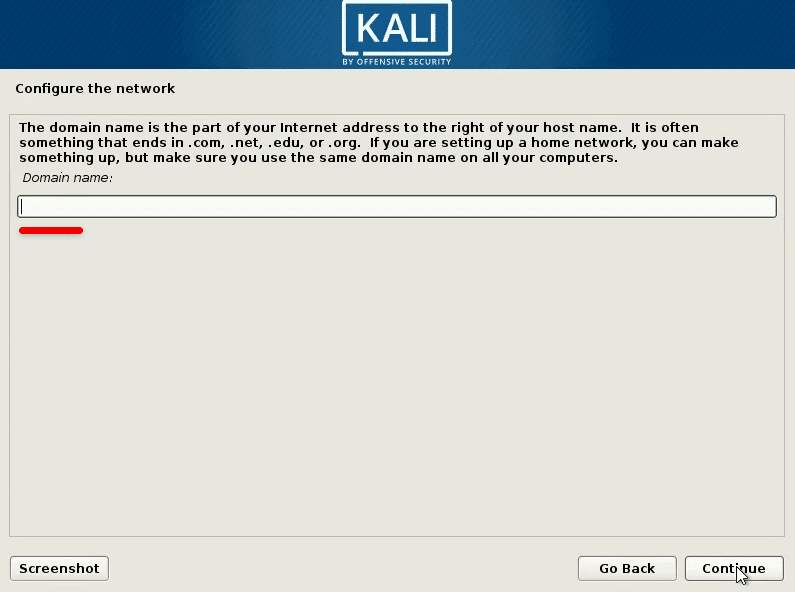
При необходимости можно указать домен. Если непонятно, что это такое – не нужно вводить ничего.

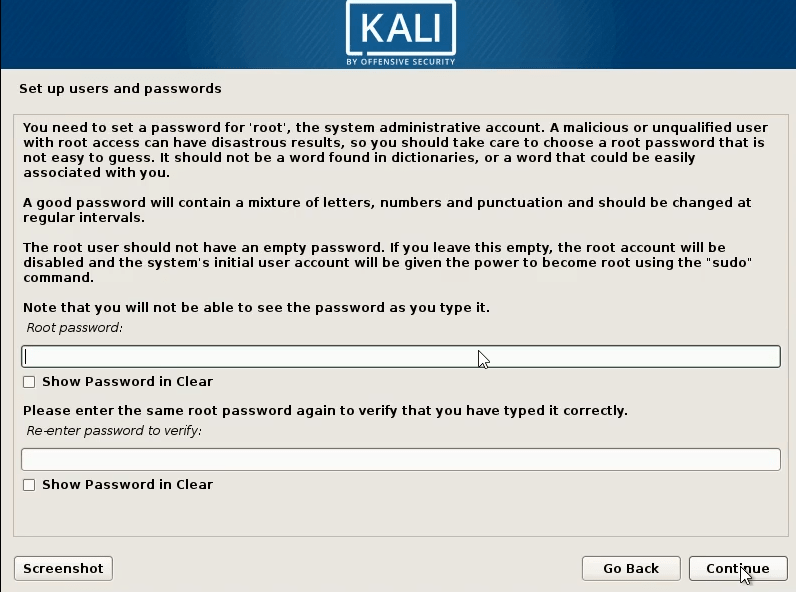
После этого потребуется ввести пароль для супер пользователя Kali.

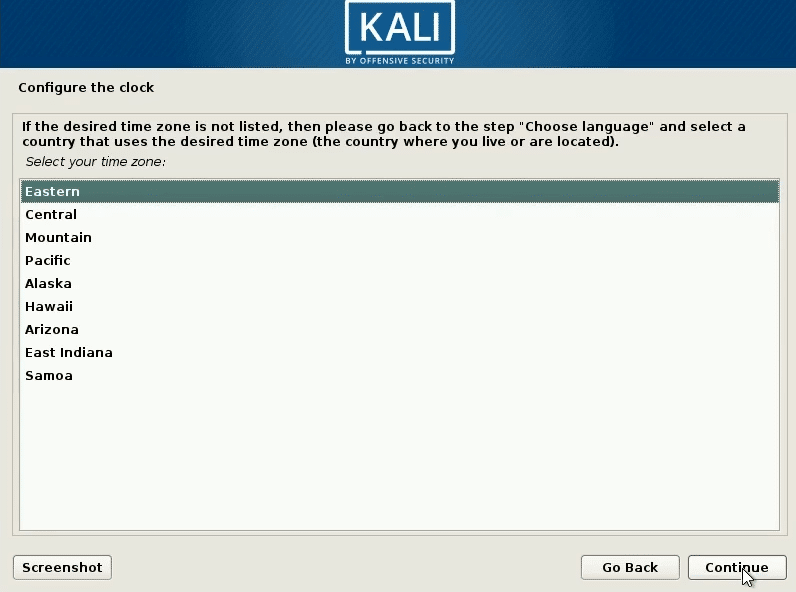
Также потребуется указать часовой пояс.

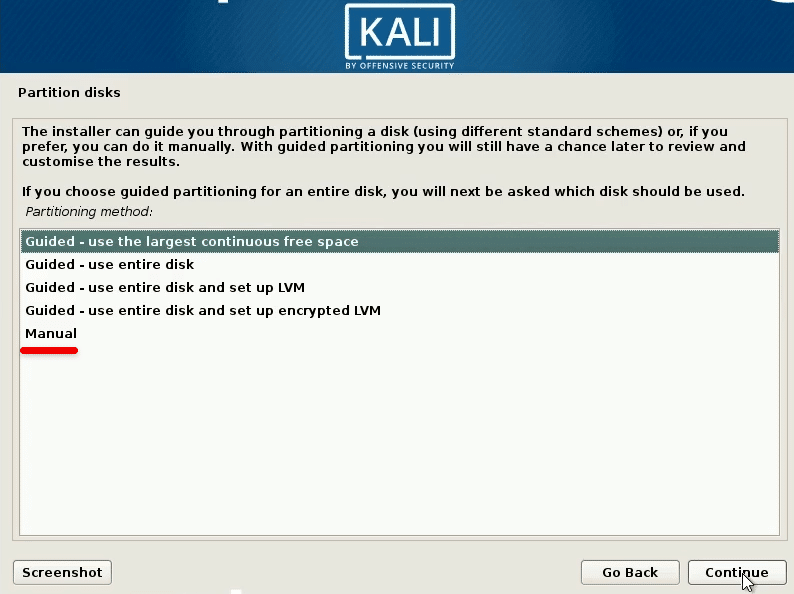
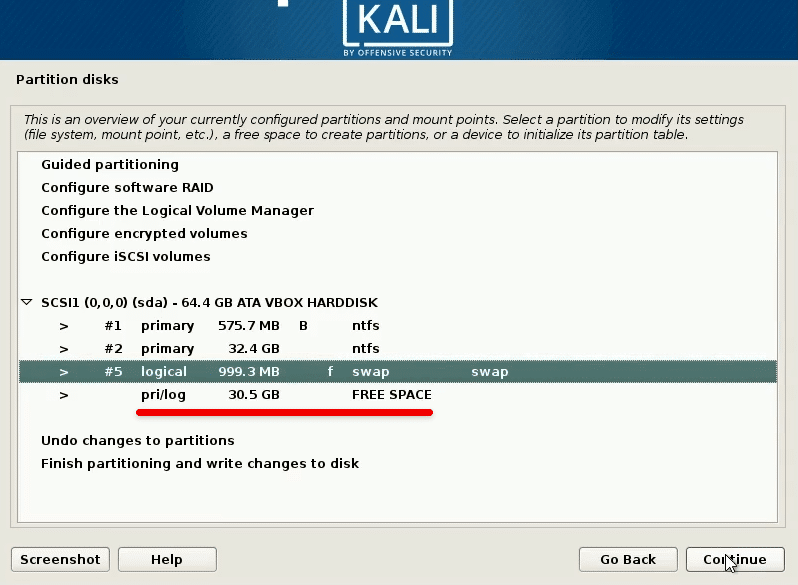
Следующий шаг установки Kali c Windows10 самый важный: на этапе разметки дисков нужно указать инсталлятору, как установить Linux. Поскольку ранее было подготовлено неиспользуемое пространство, необходимо выбрать пункт «Авто – использовать наибольшее свободное место».

Важно! Если на этом шаге ошибиться и указать любой из вариантов с использованием всего диска, Windows10 будет стерта. Kali Linux удалит разделы, переформатирует их и запишет свои данные. Восстановить что-либо после этого достаточно проблематично.
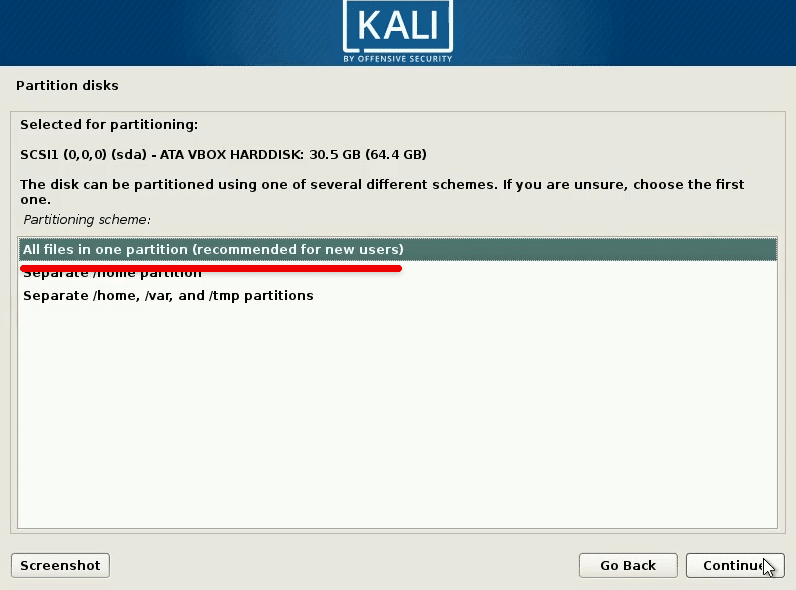
По умолчанию предлагается все данные Linux поместить в единственном новом разделе. Можно согласиться или вынести часть системы на отдельные разделы.

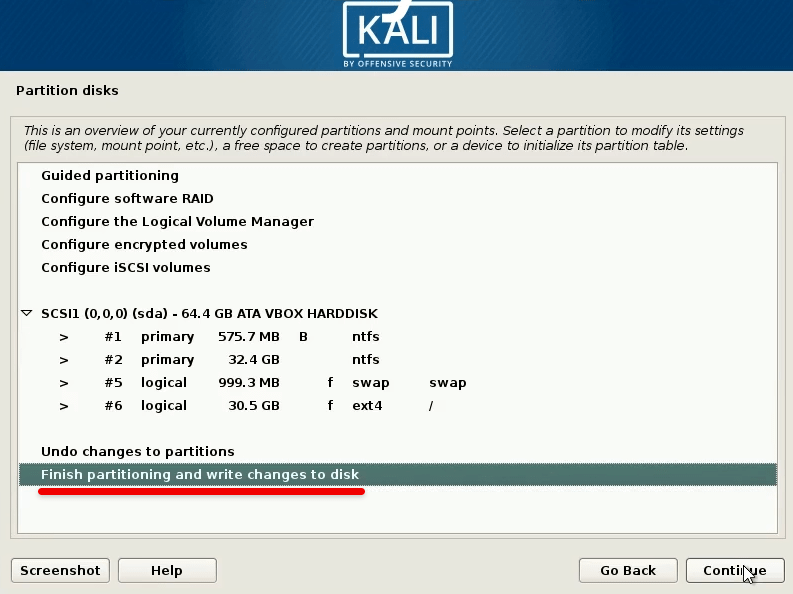
Установщик покажет будущую структуру (разделы Windows10 отображаются с типом ntfs).

Необходимо подтвердить внесение изменений.

Начнется установка Kali Linux.

Под конец Kali Linux спросит, использовать ли зеркало архива. Если образ скачивался давно, могли появиться обновления для программ и стоит подключить репозиторий Linux.

Если используется прокси – нужно ввести его параметры.

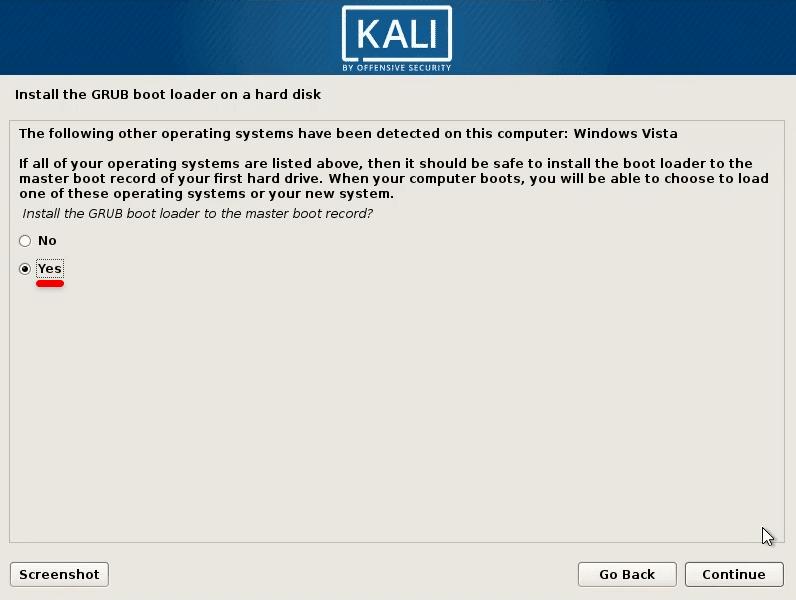
Наконец, необходимо установить на диск загрузчик GRUB – именно он позволяет корректно поставить Linux рядом с Windows10 и выбирать, какую ОС запустить.
Инсталлятор Kali должен сам обнаружить установленную Windows10 (может отображаться как Vista).

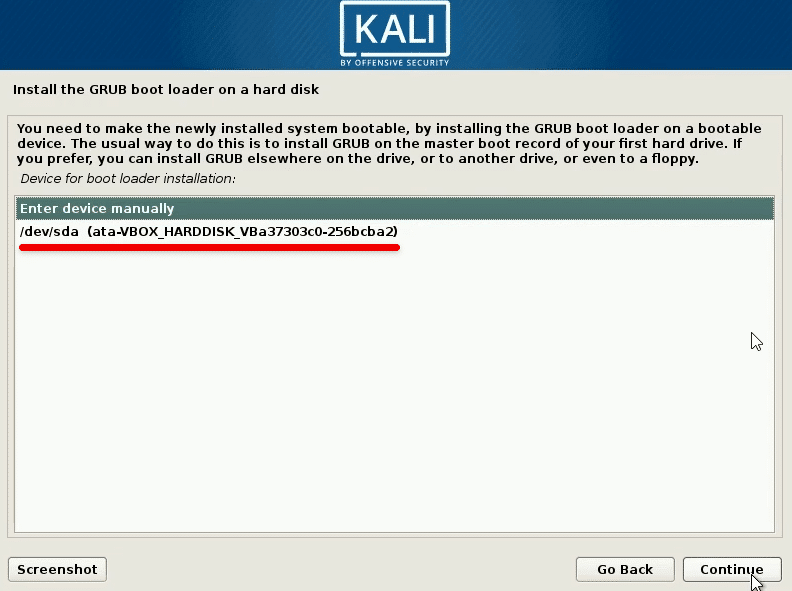
Дальше нужно указать место записи GRUB. Типичный вариант установки – в главный раздел диска. Для единственного накопителя это будет /dev/sda.

Установщик самостоятельно пропишет загрузчик Kali.

После этого появится сообщение о завершении установки Linux. Нужно убрать носитель, с которого выполнялась установка Kali.

Напоследок инсталлятор Kali приберет за собой, чтобы в системе не оставалось ничего лишнего.

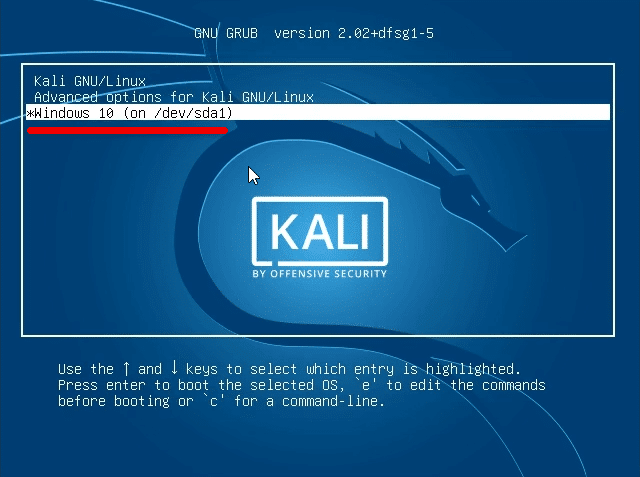
После перезагрузки отобразится меню GRUB. Kali Linux прописывает себя в качестве варианта по умолчанию. На выбор Windows10 дается несколько секунд.

Если выбрать Кали Линукс, то вскоре отобразится форма входа. Логин по умолчанию root, пароль – тот, который был указан во время установки.

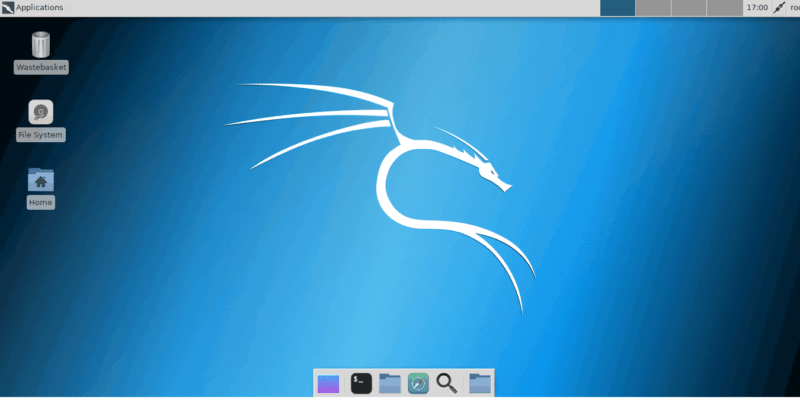
Откроется рабочий стол Kali Linux. Ниже показано, как он выглядит для версии Light.

Обратите внимание, что файловая система доступна в полном объеме, включая созданные в Windows10 разделы.
Если же в меню GRUB выбрать Windows10, то начнется загрузка ОС от Microsoft.

А вот Windows10 не может полноценно работать с линуксовыми разделами. При этом в диспетчере дисков они отображаются.
How to Dual Boot Kali Linux with Windows 10

In the previous post, we installed Kali Linux on VMware and VirtualBox and also we reset forgotten Kali Linux password. The installation is easy and quick on a virtual machine and in some cases, it’s also easy to install on PC. Now Kali Linux installed on virtual machine is fine but it won’t work as nice as actually installed on PC. Including that, there are a bunch of features which either don’t work or don’t work well as it should. With those things lacking, it’s probably not the perfect idea to use Kali Linux on VMware or VirtualBox. Here’s how to dual boot Kali Linux with Windows 10.
The next option which most thinks about is installing Kali Linux on PC. Suppose we install Kali Linux on PC but what happens when we are in need of Windows. The solid solution for this is probably dual boot which lets us work with Kali Linux and Windows that will let them perform perfectly at a time. In this post, I’ll show how to dual Boot Kali Linux with Windows 10.
Table of Contents
What is Kali Linux
Kali Linux is Debian-based Linux distribution at advanced Penetration Testing and Security Auditing. Kali Linux is one of the stablest platforms for testing and penetration testing. For those who see Kali Linux as illegal, I’d say that if you use it for the purpose of hacking, so it will be illegal. Otherwise, it is not made for illegal purposes instead it is used only for installing for teaching, learning and studying. Else, it is not created for hacking or penetrating into someone else Wi-fi, online accounts or other. For how to dual Boot Kali Linux with Windows 10., follow the steps below carefully.
Before going any step forward, backup your files and document beforehand. The risk of losing your files is pretty high so it’s better to take the backup of your files so if something bad happens also you don’t regret it. Don’t worry, it isn’t really risky or complicated as we’ll cover from A to Z with shots.
How to Dual Boot Kali Linux with Windows 10
While Windows 10 is probably pretty useful and is also Kali Linux. Whether you’re a developer, a student or any other computer guy who would like to test, penetrate and learn, you’d certainly need to access Kali Linux, but also Windows 10 since you’re a beginner or would like t access for some other reasons. In this case, dual boot is the best option. Let’s head to how to dual Boot Kali Linux with Windows 10.
Download Kali Linux ISO
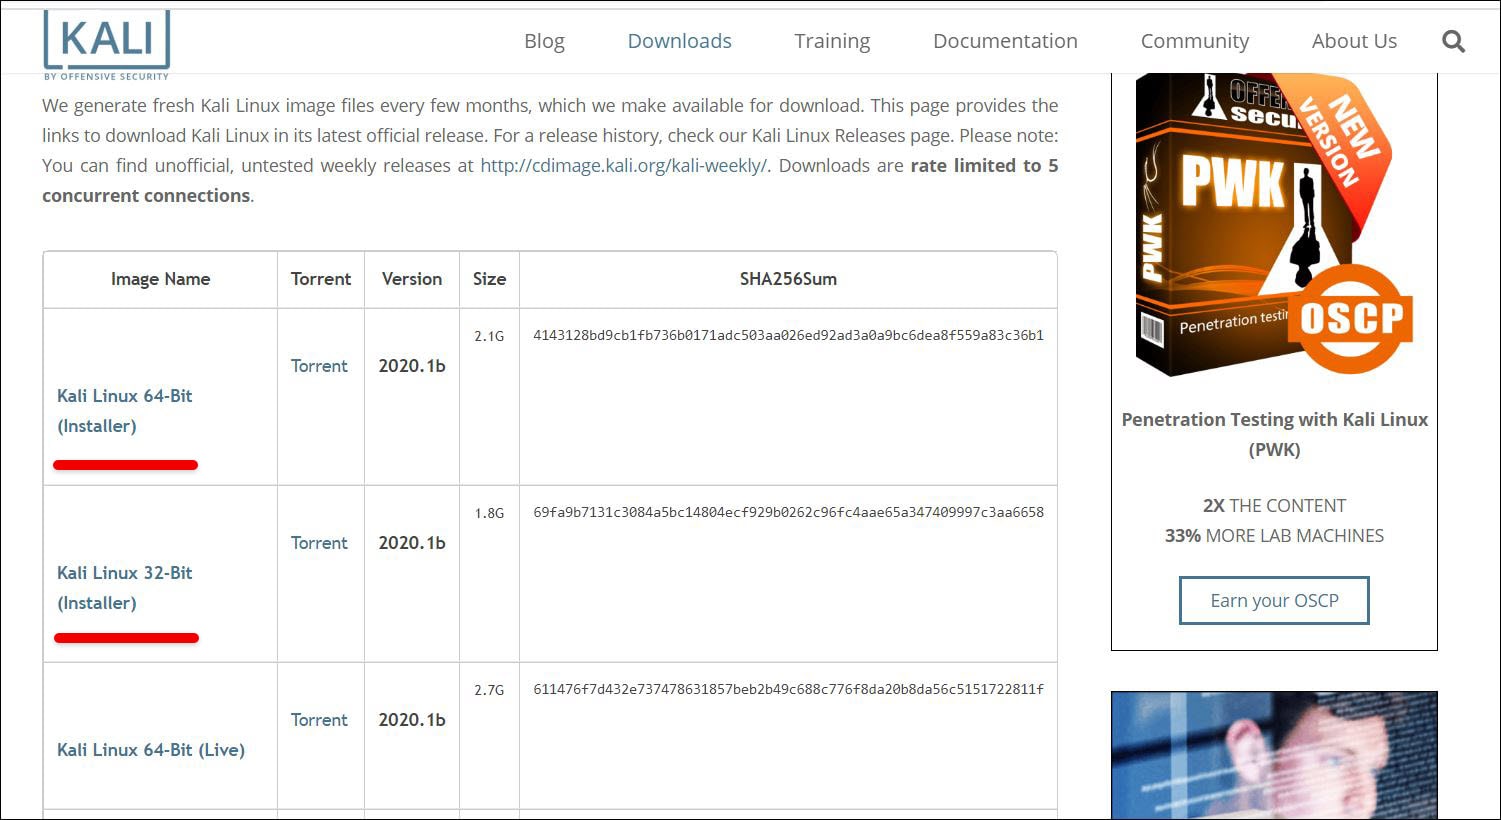
The first thing you have to do is to Download Kali Linux ISO. Doesn’t matter whether you choose x32-bit or x64-bit.
In this page, you will see all the Kali Linux Versions so you can choose any of them. If you have an updated operating system so the old versions will not work in your PC. You can choose it according to your computer processor. If your computer is 64 bit so download 64 bit ISO of Kali Linux. If you have a Mac so I recommend you download the Kali Linux 64 bit Mate because it works quite easy with this. There is the Kali Linux Torrent and ISO so click on the ISO file then save it. So here’s how to dual Boot Kali Linux with Windows 10.
Create a Bootable USB
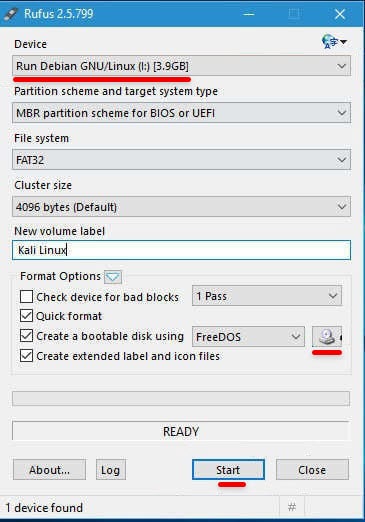
The next thing you’d need to do is to create a bootable USB. To create a Bootable USB installer for Kali Linux, install Rufus first. This is used to create a new bootable USB.
When the option comes to your screen ” Do you want to allow this app to make changes to your device?” Click Yes. Now choose your device, partition and other settings like the shot and click on Start. When it’s done, your bootable USB is done you have created that now you can close that.
Dual boot Kali Linux with Windows
Free up Space For Installing Kali Linux
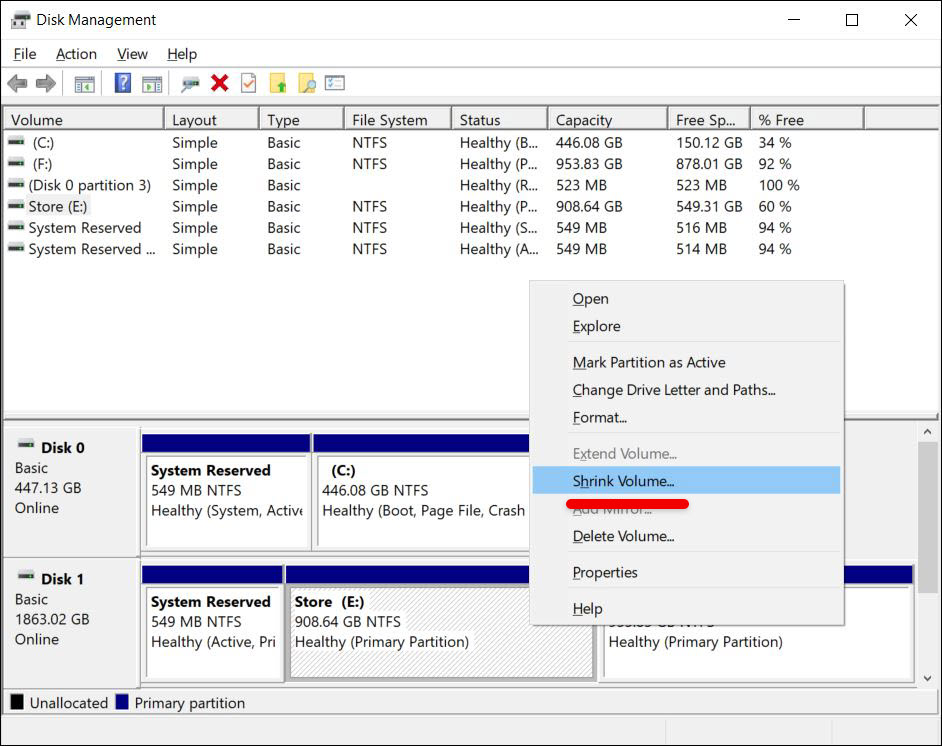
Now open up Start Menu and type in there “diskmgmt.msc” then enter.

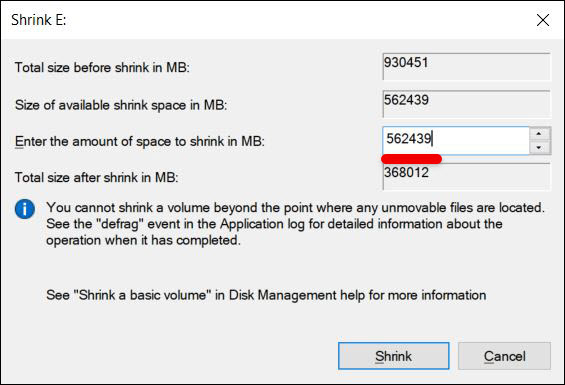
When the Disk Management opened, find an empty, unused or a drive which has some free space drive. Right-click on the drive and from the options, click “Shrink volume”. You’ll be promoted how much our new partition will have disk space. In the field enter the amount of space in MB to shrink.
Once you’ve shrinked, the specific amount will now be shrinked and will be available to create a new drive. Right-click on the drive and select Simple Volume. Proceed with the wizard and the drive will be live. The partition is now created for Kali Linux and it’s ready for installation.
Note: Make sure the Secure Boot and Fast Boot options are disabled.
Dual Boot Kali Linux with Windows PC
After it’s done, reboot your computer. When reboot, select the USB Drive for boot and it will show up the installation screen.
In the Boot Menu move down to “Graphical Install” and hit Enter. Now comes to how to dual Boot Kali Linux with Windows 10..
Install Kali Linux
Once the Graphical Install loaded, select your language then click Continue.
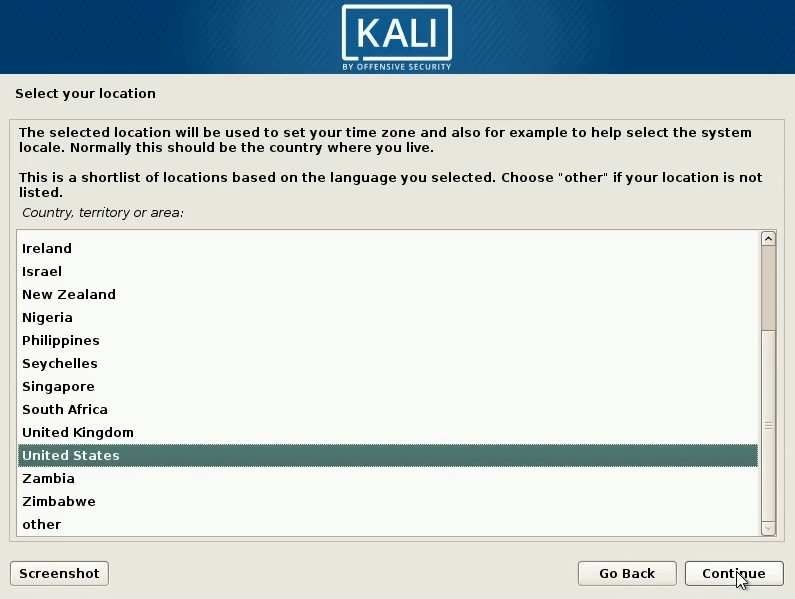
On the next window, choose your country then click Continue.
Now choose your keyboard layout then click Continue.
Configure The Keyboard
Now the load installer component from CD which will take some time to load. Configure the network option by entering a hostname for the system. Then click Continue.
Now enter a domain name for the network then Continue.
On the setup users and password, type in a password then re-enter your password for verifying then click Continue.
Create An Account
For the accurate time zone, select the appropriate one and click Continue.
Configure The Clock
For this part, they will ask for the partition method so choose Manual and click Continue.
Click on Free Space option then click Continue.
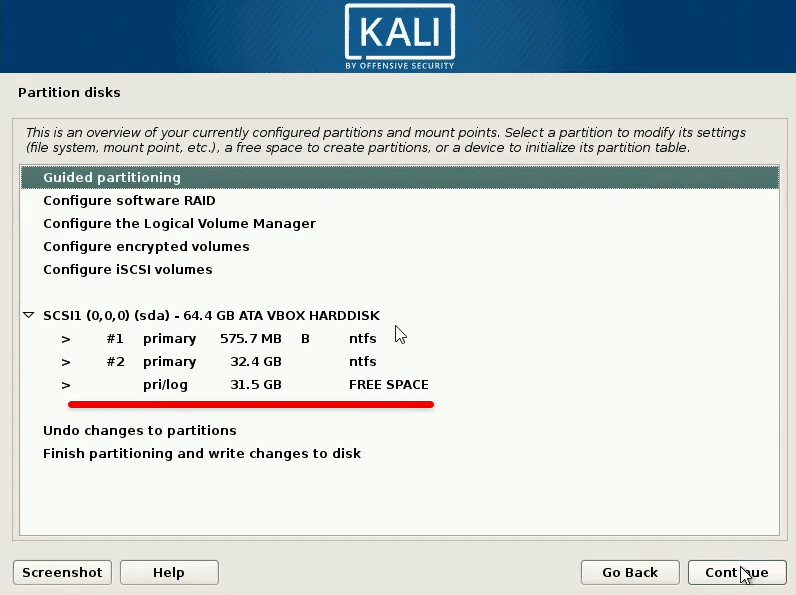
Select Free Partition
Create a new partition then click Continue.
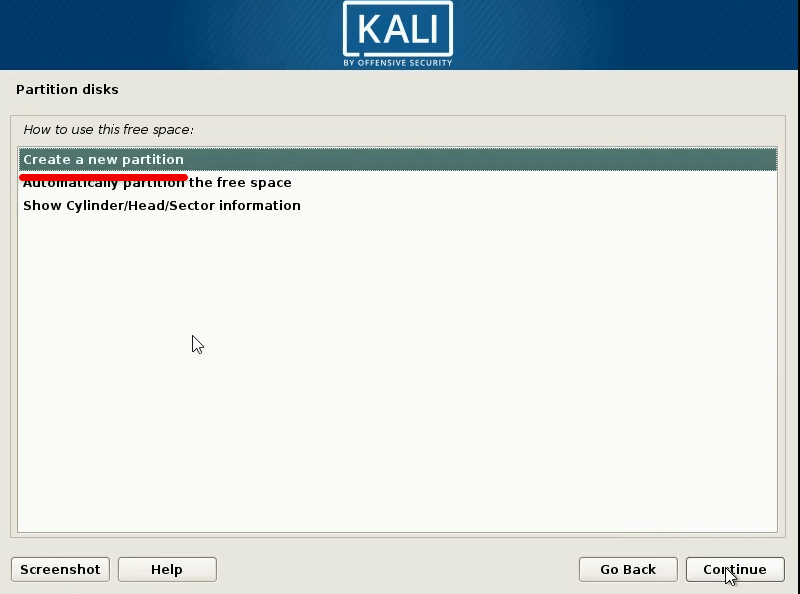
Create a New Partition
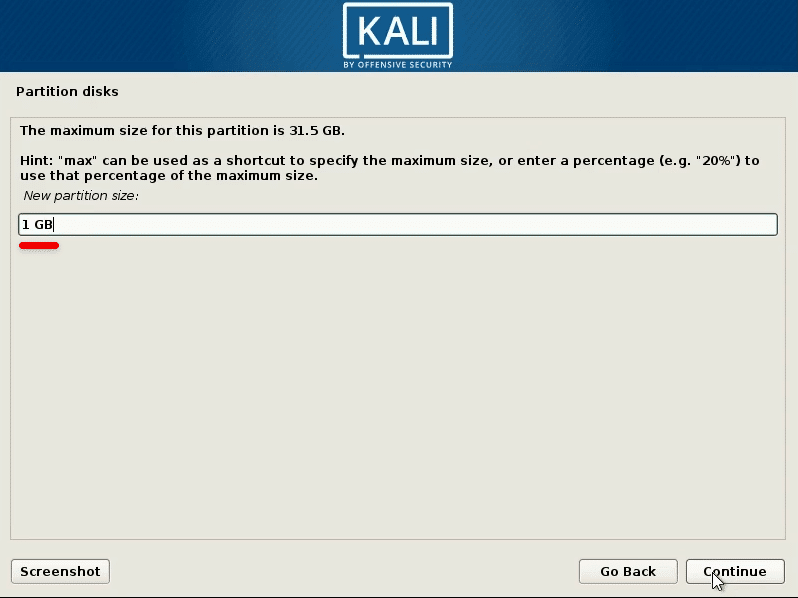
Put a new partition size. If you have more space, increase the disk size to more than 21.5 but if you don’t, let it the same as 21.5 then click Continue.
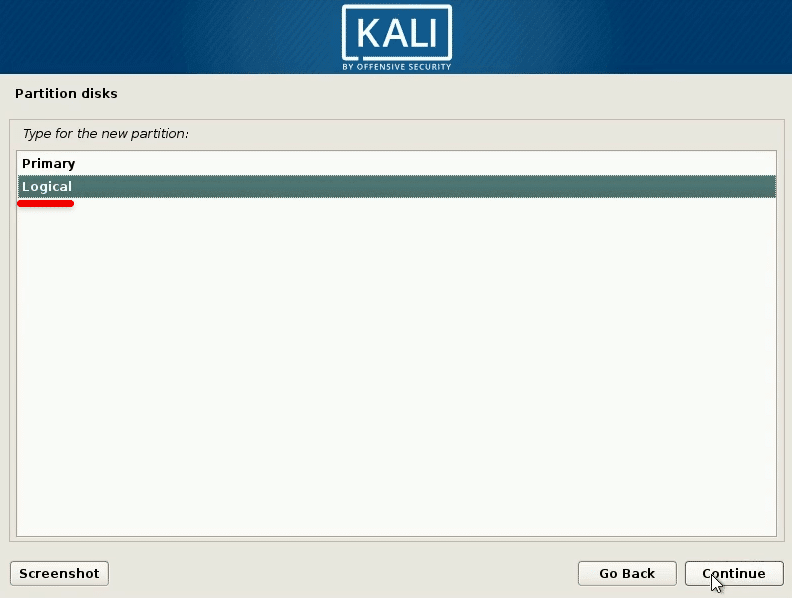
Now choose Logical as it’s easy and simple than Continue this.
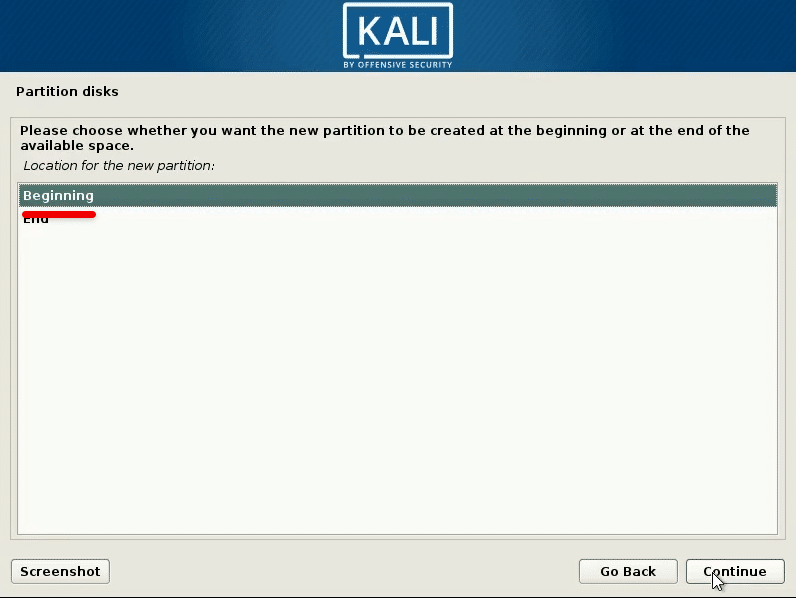
You will be asked about the created partition to whether space it at the beginning or at the end of the available space. I recommend you choose beginning then Continue.
Opt in “Use as Ext4 journaling file system ” then click Continue.
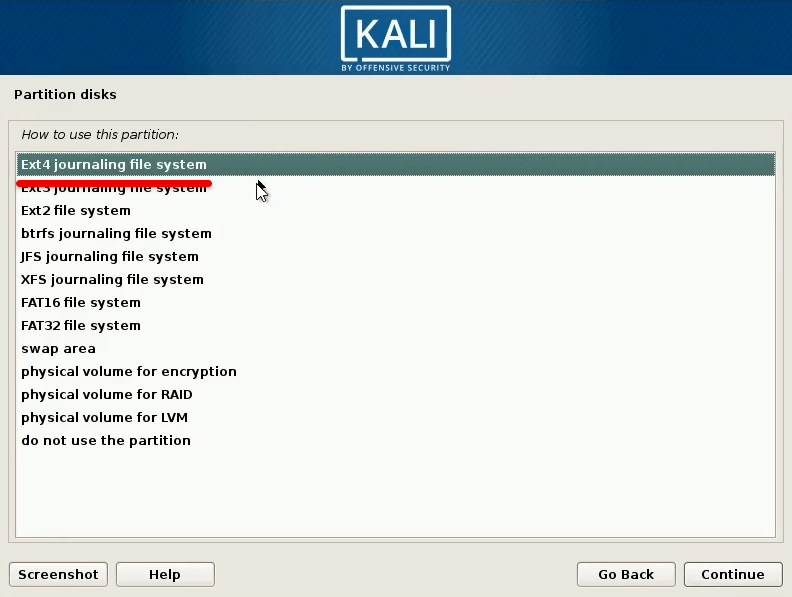
Select File System
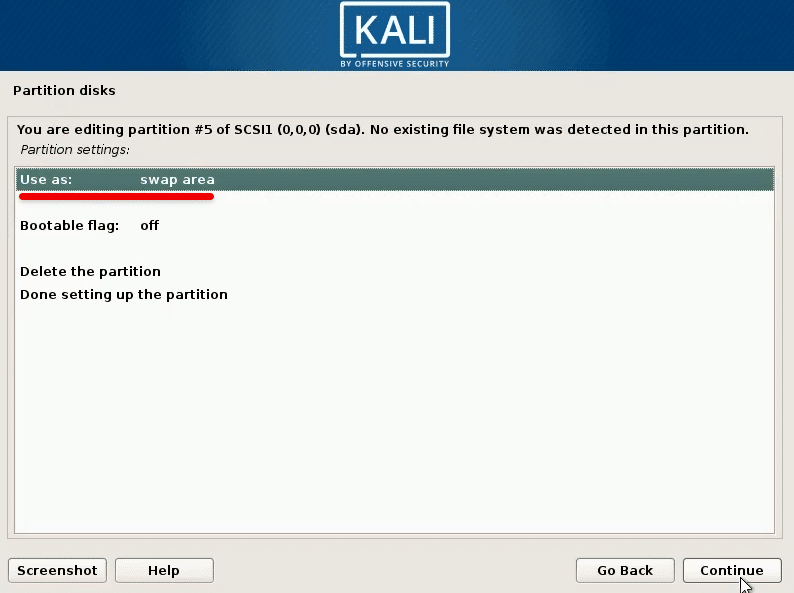
Select the “Use as: swap area” then click Continue.
Click again the Free Space option then Continue.
Select The Created Partition
Select Automatically partition the free space then click Continue.
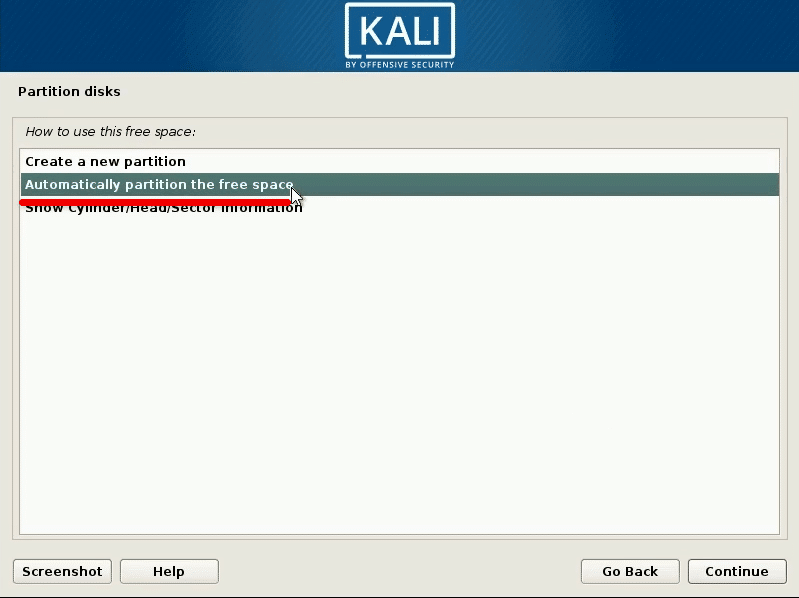
Next let the setting by default then click Continue.
Now select Finish Partitioning and write changes to disk then click Continue.
Accept the changes to the disk by selecting the disk then click Continue.
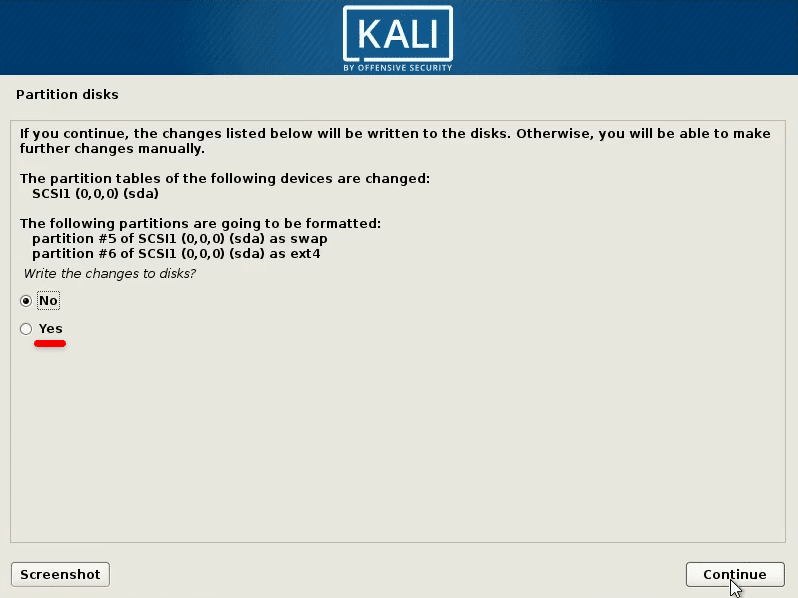
Write The Changes
The GRUP boot loader can be installed. I’ll choose Yes.
Now installing GRUB boot loader will be finished so it will take up some time.
Then choose the second one which is Hard Disk then click Continue.
Now the installation will be finished. The Kali Linux is now installed completely. When rebooting, remove the USB installer and restart the PC. After restarting, you’ll see the window where you can choose Windows 10 or Kali Linux. Choose the first option Kali Linux.
Select Kali Linux or Windows
What comes up next is the login screen, type root in the username and also password blank and Continue.
The Kali Linux should now have been successfully installed and eventually you should be in.
How to Dual Boot Kali Linux with Windows 10
The Kali Linux is a perfect penetrating and testing tool for a professional and a beginner. In terms of security, Kali Linux is the fantastic point to learn about which has the required useful tools integrated in it. What’s prohibited is, when you’ve enough knowledge and enough information and trick to penetrate or hack into, you shouldn’t. That’s where you’ll enter into the black area.
With this step, you’ve no more steps left. That was how to Dual Boot Kali Linux Windows 10. I have tried to provide every single steps and I hope it’s complete. If you’ve some questions, suggestions or ideas for improvement, we’re happy to hear.


