- Eclipse all in one linux
- Eclipse IDE for Linux Developers
- Package Description
- This package includes:
- Download Links
- Bugzilla
- How to Install Eclipse IDE on Ubuntu 20.04
- Install Eclipse by installer package [Method 1]
- Eclipse installation by snap [ Method 2]
- Create launcher icon
- Conclusion
- More Articles You May Like
- 6 Comments. add one
- 5 Steps to Install Eclipse
- 1. Download the Eclipse Installer
- 2. Start the Eclipse Installer executable
- 3. Select the package to install
- 4. Select your installation folder
- 5. Launch Eclipse
- Установка Eclipse в Ubuntu
- Установка Eclipse на Ubuntu
- 1. Установка из официального сайта
- 2. Установка Eclipse с помощью snap
- Выводы
Eclipse all in one linux
Community
Participate
Eclipse IDE
- Home
- Downloads
- Packages
- Release
- Eclipse IDE Helios
- M7
- Eclipse IDE for Linux Developers

Eclipse IDE for Linux Developers
Package Description
An IDE for Linux developers with Mylyn integration.
This package includes:
- org.eclipse.cdt,7.0.0
- org.eclipse.cdt.debug.ui.memory,
- org.eclipse.cdt.mylyn,
- org.eclipse.cdt.p2,
- org.eclipse.cdt.platform,7.0.0
- org.eclipse.cvs,1.1.0
- org.eclipse.epp.usagedata.feature,
- org.eclipse.equinox.p2.user.ui,1.1.0
- org.eclipse.help,1.1.0
- org.eclipse.linuxtools.callgraph,
- org.eclipse.linuxtools.cdt.autotools,
- org.eclipse.linuxtools.cdt.libhover,
- org.eclipse.linuxtools.changelog,
- org.eclipse.linuxtools.gcov,
- org.eclipse.linuxtools.gprof,
- org.eclipse.linuxtools.lttng,
- org.eclipse.linuxtools.man,
- org.eclipse.linuxtools.oprofile,
- org.eclipse.linuxtools.rpm,
- org.eclipse.linuxtools.rpm.ui.editor,
- org.eclipse.linuxtools.systemtap,
- org.eclipse.linuxtools.valgrind,
- org.eclipse.mylyn.bugzilla_feature,
- org.eclipse.mylyn.context_feature,
- org.eclipse.mylyn.ide_feature,
- org.eclipse.mylyn.team_feature,
- org.eclipse.mylyn.wikitext_feature,
- org.eclipse.mylyn_feature,
- org.eclipse.platform,3.6.0
- org.eclipse.rcp,3.6.0
Maintained by: Eclipse Packaging Project
Download Links
Bugzilla
| Bug ID | Title | Status |
| 342350 | Incorrect dependencies in epp.packages.linuxtools | NEW |
| 350153 | Linux C/C++ developer package shows CDT 7, not 8 | ASSIGNED |
Bugs listed in italics indicate the bug has been moved to another project.
| Bug ID | Title | Status |
| 316617 | Small correction to Linux developer details | RESOLVED |
| 316629 | Re-name Linux Tools EPP feature | RESOLVED |
| 316630 | osgi.requiredJavaVersion should be Java 1.6 | RESOLVED |
| 373587 | Remove separate Juno EPP product for Linux Tools and instead ship along with C/C++ EPP for supported Linux platforms | RESOLVED |
| 303198 | Create a «C/C++ Linux Developer» package | RESOLVED |
| 315798 | Include Linux Tools N&N link | RESOLVED |
| 315797 | Re-name to «Eclipse IDE for C/C++ Linux Developers»? | RESOLVED |
| 314345 | The package logo should be improved | RESOLVED |
| 315794 | The size of the package appears as 0 MB | RESOLVED |
| 314179 | linux tools package feature needs «linux filter»? | CLOSED |
| 344042 | Update to CDT 8.0 N&N for Indigo | CLOSED |
| 344043 | Add new CDT features and EGit to Linux Tools package | CLOSED |
Bugs listed in italics indicate the bug has been moved to another project.
Источник
How to Install Eclipse IDE on Ubuntu 20.04

Eclipse is one of the most popular open-source IDE (Integrated Development Environment) for software developers. It is popular for Java-based applications, also used for C/C++, PHP, and Perl and other web projects.
Eclipse is a really powerful IDE that supports many programming languages. It provides numerous plugins and extensions for enhancing the functionality of your Eclipse such as source code version control (git, svn), class diagram generator, GUI builder.
This tutorial will show you 2 methods to install Eclipse on Ubuntu 20.04 LTS machine.
Prerequisites
In order to install Eclipse IDE, you have to install JRE (Java Runtime Environment) on your Ubuntu machine:
To verify that Java was successfully installed, let’s run:
Install Eclipse by installer package [Method 1]
At the time of this writing, the latest version of Eclipse is: Eclipse IDE 2020-06. Eclipse can be downloaded via the browser on its official website https://www.eclipse.org/downloads/
By default, the installer package is downloaded into the directory ‘
/Downloads’ with name: ‘eclipse-inst-linux64.tar.gz’.
Or by using the wget command as:
Let’s extract the downloaded tarball file to the directory ‘/opt’ by running the following command:

In order to install Eclipse, launch the installer file ‘eclipse-inst’ by running the following command:
Eclipse packages window appears, let’s choose your favorite package IDE.

For example, select the Eclipse IDE for C/C++ Developers then click INSTALL

Next, you have to accept the Eclipse Foundation Software User Agreement.

Now, your Eclipse IDE will be installing.

After the installation has completed, Eclipse is ready to be launched.
Eclipse installation by snap [ Method 2]
Installing Eclipse by snap package manager is the handiest installation method to bring the Eclipse integrated development environment to your Ubuntu machine.
In order to install an old version of Eclipse, you can use the apt package manager:
Another simple way to install Eclipse IDE is using Ubuntu Software Center. Let’s open the software center and search for Eclipse then click the Install button.
Create launcher icon
Once the Eclipse is downloaded and installed successfully, you may need to create a shortcut to launch your IDE. Using your favorite editor to create a file named ‘eclipse.desktop’ and enter the following lines to it:
Please note that the paths in lines ‘Exec=’ and ‘Icon=’ are depended on your system. You can find the path in Exec line by running command:
Now, let’s enable the launcher icon:
That’s all. From now on, you can search for eclipse and launch it in the Applications center on your Ubuntu machine.
Conclusion
In this tutorial, we learned how to install the Eclipse IDE on Ubuntu 20.04. You can now begin to write your own codes to create many awesome applications with Eclipse.
Thanks for reading and please leave your suggestion in the below comment section.
More Articles You May Like
6 Comments. add one
Installed in /root/eclipse/parallel-2020-06/eclipse/eclipse
eclipse.desktop installed in /usr/share/applications/eclipse.desktop
But Eclipse is not found by the system (Ubuntu 20.04).
Great very clear instructions. I must be close.
Thanks for any help
Carl
Thanks for your good words.
Hello, some suggestions.
* You can also add locale to comment field, which is more useful then the name.
* From the installation directory, run ./eclipse -initialize to make it start faster.
* Check the desktop file with `desktop-file-verify eclipse.desktop’ before installation. It is easy to be some errors if not.
* One could also install with `desktop-file-install eclipse.desktop’ if one doesn’t want to look up where they should be stored.
* I usually add a short script in /usr/local/bin that launches the right version from /opt/Eclipse/eclipse-*/eclipse. So I rename the /opt/Eclipse/eclipse to the version number so I do remember which I have installed. I usually also make a symbolic link `ln -s eclipse eclipse-2020-12′ so I also reach it as the current one. Then it is easy to have old and new installed at the same time.
The script in /usr/local/bin/eclipse-base looks like this.
#!/bin/sh
#
# Make a link to this script, and it will try
# to start an eclipse in the same directory
#
# If it doesn’t exists, it just will fail.
exec /opt/Eclipse/`basename $0`/eclipse $*
Then I only make a soft or hard link from the version number to this base, like this:
$ ls -l eclipse*
lrwxrwxrwx 1 root root 12 sep 23 13:39 eclipse -> eclipse-base
lrwxrwxrwx 1 root root 12 sep 23 12:43 eclipse-2019-09 -> eclipse-base
lrwxrwxrwx 1 root root 12 sep 23 12:42 eclipse-2019-12 -> eclipse-base
lrwxrwxrwx 1 root root 12 sep 23 12:44 eclipse-2020-09 -> eclipse-base
-rwxrwxr-x 1 root root 191 sep 23 12:41 eclipse-base
$
Now I can easily start eclipse from command line, and based on the name, it choose right binary in /opt/Eclipes/*/eclipse to run.
Источник
5 Steps to Install Eclipse
We’ve recently introduced the Eclipse Installer, a new and more efficient way to install Eclipse. It is a proper installer (no zip files), with a self-extracting download that leads you through the installation process. For those who prefer not to use the Installer, the packages and zip files are still available on our package download page.
1. Download the Eclipse Installer
Eclipse is hosted on many mirrors around the world. Please select the one closest to you and start to download the Installer
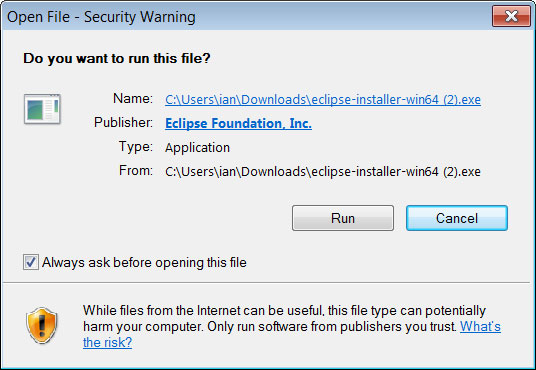
2. Start the Eclipse Installer executable
For Windows users, after the Eclipse Installer executable has finished downloading it should be available in your download directory. Start the Eclipse Installer executable. You may get a security warning to run this file. If the Eclipse Foundation is the Publisher, you are good to select Run.
For Mac and Linux users, you will still need to unzip the download to create the Installer. Start the Installer once it is available.
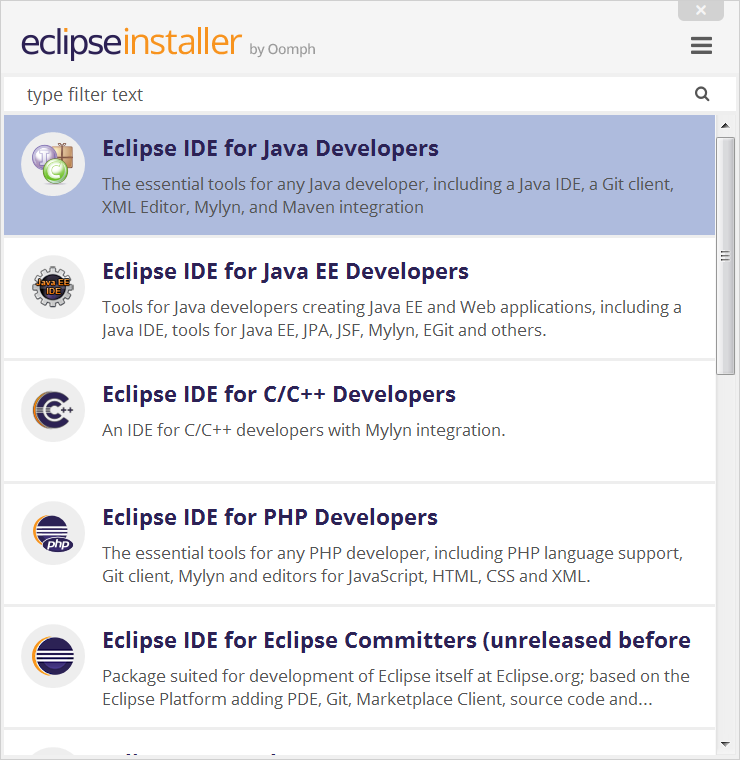
3. Select the package to install
The new Eclipse Installer shows the packages available to Eclipse users. You can search for the package you want to install or scroll through the list.
Select and click on the package you want to install.
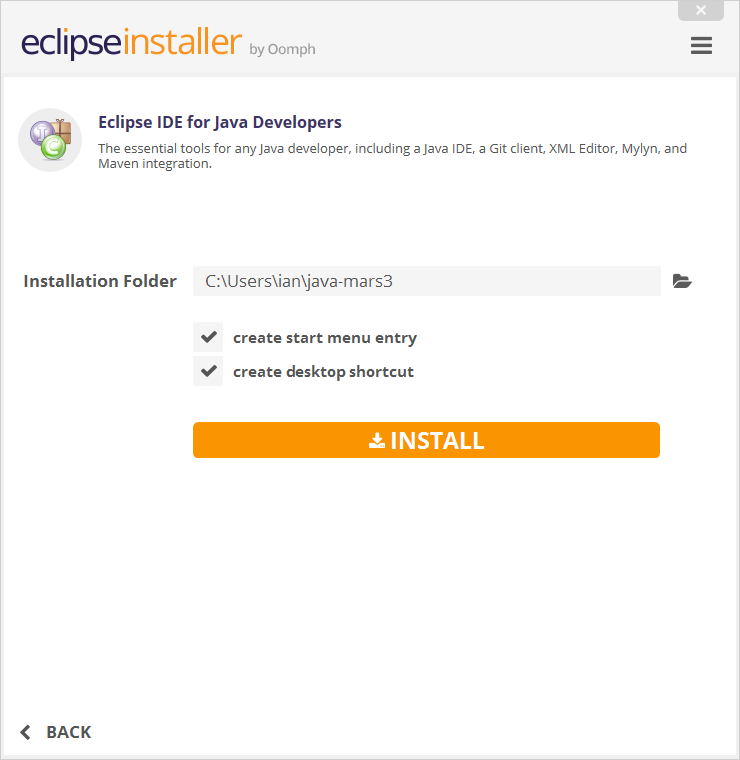
4. Select your installation folder
Specify the folder where you want Eclipse to be installed. The default folder will be in your User directory.
Select the ‘Install’ button to begin the installation.
5. Launch Eclipse
Once the installation is complete you can now launch Eclipse. The Eclipse Installer has done it’s work. Happy coding.
Источник
Установка Eclipse в Ubuntu
Eclipse — это очень популярная среда разработки с открытым исходным кодом, которая поддерживает огромное количество разных языков программирования. Первая версия среды вышла в 2004 году и изначально она поддерживала только Java. На данный момент же поддерживаются такие языки, как C++, Ada, PHP, Cobol, Fortran, X10, JavaScript, Perl, Python, Ruby и многие другие.
Среда разработки Eclipse может использоваться как в Linux так и в Windows. Не так давно состоялся релиз новой версии среды — Eclipse. В этой статье мы рассмотрим как выполняется установка Eclipse Ubuntu 20.04, и нас будет интересовать именно последняя версия.
Установка Eclipse на Ubuntu
Для работы Eclipse в вашей системе должна быть установлена Java машина. Вы можете ее установить с помощью такой команды:
sudo apt install default-jre

1. Установка из официального сайта
Чтобы получить последнюю версию Eclipse вам необходимо скачать установщик программы из официального сайта.

Тут вы можете загрузить не только сам установщик, но и пакеты для поддержки разных языков программирования. Для загрузки установщика нажмите несколько раз кнопку Download. После того, как установщик будет загружен, перейдите в папку с файлом и распакуйте его, например, для 64 битной версии команда будет выглядеть вот так:
tar xf eclipse-inst-linux64.tar.gz
Перейдите в папку установщика:
Запустите установщик без прав суперпользователя. Первым делом его надо обновить до самой последней версии:

Обратите внимание на кнопку бутерброда в верхнем правом углу и на желтый треугольник на ней. Это значит, что для программы доступно обновление. Для того чтобы установить обновление кликните по этой кнопке, а затем по кнопке Update:

Дождитесь завершения обновления и закройте установщик:

Дальше установка. Вы можете устанавливать ее с правами суперпользователя куда-нибудь в корневой каталог или без них, в домашнюю папку. Если хотите установить среду в домашнюю папку выполните:
Затем выберите версию IDE для вашего языка:
И выберите путь в вашей домашней папке для установки:

Также можно использовать sudo, тогда программа будет установлена в папку /opt:
Во время установки надо будет несколько раз принять лицензионное соглашение. После завершения установки вы можете запустить программу:

Главное окно программы выглядит вот так:

2. Установка Eclipse с помощью snap
Если вам не нужна версия из официального сайта, то вы можете установить Eclipse в Ubuntu 20.04 с помощью snap пакета. Это намного проще чем в предыдущем варианте. Достаточно выполнить:
sudo snap install —classic eclipse
Пакетный менеджер загрузит около 300 мегабайт данных и дальше вы сможете использовать Eclipse ничего не настраивая. Для удаления Eclipse, установленной таким образом надо выполнить:
sudo snap remove eclipse
Выводы
Вот и все, теперь вы знаете как установить Eclipse Ubuntu 20.04. Если у вас остались вопросы, спрашивайте в комментариях!
Источник


