- Где в windows 10 расположен браузер microsoft edge
- Как сделать чтобы в windows 10 браузер microsoft edge находился на рабочем столе
- Add image for secondary Microsoft Edge tiles
- Export Start layout and assets
- Configure policy settings
- Using MDM
- Using a provisioning package
- Prepare the Start layout and Edge assets XML files
- Create a provisioning package that contains a customized Start layout
- Как переустановить браузер EDGE в Windows 10
- Как переустановить Microsoft Edge
Где в windows 10 расположен браузер microsoft edge
Браузер edge в виндовс 10 не находится в обычном месте – в папке «Program Files». Его спрятали от глаз подальше.
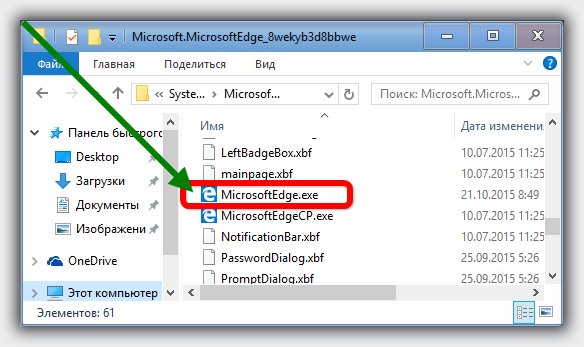
Данные браузера microsoft edge находятся в папке «Microsoft.MicrosoftEdge_8wekyb3d8bbwe», которая расположена по маршруту ниже.
Сам браузер расположен немного в другом месте:
В целом это почти никого не интересует. Владельцев ноутбуков или компьютеров больше беспокоит где находится ярлык запускающий браузер microsoft edge на windows 10.
Тут некоторых может ждать сюрприз – в отдельных windows 10 такого веб обозревателя может вообще не оказаться, точнее не в некоторых, а в Technical Preview – в полностью экипированных есть у всех.
По сути он должен находится на панели задач, но если его там нет, то можно легко поместить его туда самостоятельно.
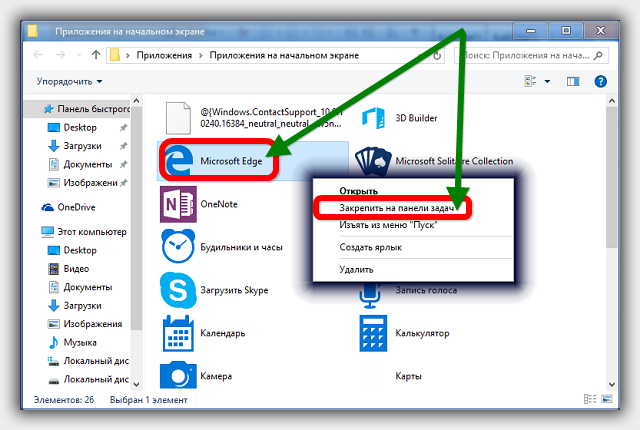
Для этого запустите команду выполнить и впишите строку, которая ниже (и нажать ентер):
Вам откроется окно, в котором кликните по edge, ПКМ и нажмите на строку «закрепить на панели задач».
Как сделать чтобы в windows 10 браузер microsoft edge находился на рабочем столе
Чтобы он находился на рабочем столе нажмите кнопку пуск, щелкните по строке «все приложения» и найдите там браузер edge.
После этого выполните одну несложную процедуру. Нажмите на него ПКМ и не отпуская переместите курсор на рабочий стол.
Браузер edge переместится вместе с курсором и будет там находится постоянно. Теперь запускать его будет вам быстро, просто, удобно.
Похожих манипуляций есть много, но описанной выше вполне достаточно, а кто хочет большего, пишем в коментах. Успехов.
Add image for secondary Microsoft Edge tiles
Applies to
- WindowsВ 10
- Windows 10 Mobile
App tiles are the Start screen tiles that represent and launch an app. A tile that allows a user to go to a specific location in an app is a secondary tile. Some examples of secondary tiles include:
- Weather updates for a specific city in a weather app
- A summary of upcoming events in a calendar app
- Status and updates from an important contact in a social app
- A website in Microsoft Edge
In a Start layout for Windows 10, version 1703, you can include secondary tiles for Microsoft Edge that display a custom image, rather than a tile with the standard Microsoft Edge logo.
Suppose that the Start layout that you export had two secondary tiles, such as in the following image:
In prior versions of Windows 10, when you applied the Start layout to a device, the tiles would display as shown in the following image:
In Windows 10, version 1703, by using the PowerShell cmdlet export-StartLayoutEdgeAssets and the policy setting ImportEdgeAssets , the tiles will now display the same as they did on the device from which you exported the Start layout.
Example of secondary tiles in XML generated by Export-StartLayout
Export Start layout and assets
Follow the instructions in Customize and export Start layout to customize the Start screen on your test computer.
Open Windows PowerShell as an administrator and enter the following command:
In the previous command, -path is a required parameter that specifies the path and file name for the export file. You can specify a local path or a UNC path (for example, \\FileServer01\StartLayouts\StartLayoutMarketing.xml).
Use a file name of your choice—for example, StartLayoutMarketing.xml. Include the .xml file name extension. The Export-StartLayout cmdlet does not append the file name extension, and the policy settings require the extension.
If you’d like to change the image for a secondary tile to your own custom image, open the layout.xml file, and look for the images that the tile references.
- For example, your layout.xml contains Square150x150LogoUri=»ms-appdata:///local/PinnedTiles/21581260870/hires.png» Wide310x150LogoUri=»ms-appx:///»
- Open C:\Users\ \AppData\Local\Packages\Microsoft.MicrosoftEdge_8wekyb3d8bbwe\LocalState\PinnedTiles\21581260870\ and replace those images with your customized images.
In Windows PowerShell, enter the following command:
Configure policy settings
You can apply the customized Start layout with images for secondary tiles by using mobile device management or a provisioning package. However, because you are including the images for secondary tiles, you must configure an additional setting to import the Edge assets.
Using MDM
In Microsoft Intune, you create a device restrictions policy to apply to device group. For other MDM solutions, you may need to use an OMA-URI setting for Start layout, based on the Policy configuration service provider (CSP). The OMA-URI setting is ./User/Vendor/MSFT/Policy/Config/Start/StartLayout .
- In the Microsoft Azure portal, search for Intune or go to More services >Intune.
- Select Device configuration.
- Select Profiles.
- Select Create profile.
- Enter a friendly name for the profile.
- Select Windows 10 and later for the platform.
- Select Device restrictions for the profile type.
- Select Start.
- In Start menu layout, browse to and select your Start layout XML file.
- In Pin websites to tiles in Start menu, browse to and select your assets XML file.
- Select OK twice, and then select Create.
- Assign the profile to a group.
The device restrictions in Microsoft Intune include other Start settings that you can also configure in your profile.
Using a provisioning package
Prepare the Start layout and Edge assets XML files
The export-StartLayout and export-StartLayoutEdgeAssets cmdlets produce XML files. Because Windows Configuration Designer produces a customizations.xml file that contains the configuration settings, adding the Start layout and Edge assets sections to the customizations.xml file directly would result in an XML file embedded in an XML file. Before you add the Start layout and Edge assets sections to the customizations.xml file, you must replace the markup characters in your layout.xml with escape characters.
Copy the contents of layout.xml into an online tool that escapes characters.
Copy the contents of assets.xml into an online tool that escapes characters.
During the procedure to create a provisioning package, you will copy the text with the escape characters and paste it in the customizations.xml file for your project.
Create a provisioning package that contains a customized Start layout
Use the Windows Configuration Designer tool to create a provisioning package. Learn how to install Windows Configuration Designer.
When you build a provisioning package, you may include sensitive information in the project files and in the provisioning package (.ppkg) file. Although you have the option to encrypt the .ppkg file, project files are not encrypted. You should store the project files in a secure location and delete the project files when they are no longer needed.
Open Windows Configuration Designer (by default, %systemdrive%\Program Files (x86)\Windows Kits\10\Assessment and Deployment Kit\Imaging and Configuration Designer\x86\ICD.exe).
Choose Advanced provisioning.
Name your project, and click Next.
Choose All Windows desktop editions and click Next.
On New project, click Finish. The workspace for your package opens.
Expand Runtime settings > Policies > Start, and click StartLayout.
If Start is not listed, check the type of settings you selected in step 4. You must create the project using settings for All Windows desktop editions.
Enter layout.xml. This value creates a placeholder in the customizations.xml file that you will replace with the contents of the layout.xml file in a later step.
In the Available customizations pane, select ImportEdgeAssets.
Enter assets.xml. This value creates a placeholder in the customizations.xml file that you will replace with the contents of the assets.xml file in a later step.
Save your project and close Windows Configuration Designer.
In File Explorer, open the project’s directory. (The default location is C:\Users\user name\Documents\Windows Imaging and Configuration Designer (WICD)\project name)
Open the customizations.xml file in a text editor. The section will look like this:

Replace layout.xml with the text from the layout.xml file, with markup characters replaced with escape characters.
Replace assets.xml with the text from the assets.xml file, with markup characters replaced with escape characters.
Save and close the customizations.xml file.
Open Windows Configuration Designer and open your project.
On the File menu, select Save.
On the Export menu, select Provisioning package.
Change Owner to IT Admin, which will set the precedence of this provisioning package higher than provisioning packages applied to this device from other sources, and then select Next.
Optional. In the Provisioning package security window, you can choose to encrypt the package and enable package signing.
Enable package encryption — If you select this option, an auto-generated password will be shown on the screen.
Enable package signing — If you select this option, you must select a valid certificate to use for signing the package. You can specify the certificate by clicking Select. and choosing the certificate you want to use to sign the package.
Click Next to specify the output location where you want the provisioning package to go when it’s built. By default, Windows Imaging and Configuration Designer (ICD) uses the project folder as the output location.
Optionally, you can click Browse to change the default output location.
Click Next.
Click Build to start building the package. The provisioning package doesn’t take long to build. The project information is displayed in the build page and the progress bar indicates the build status.
If you need to cancel the build, click Cancel. This cancels the current build process, closes the wizard, and takes you back to the Customizations Page.
If your build fails, an error message will show up that includes a link to the project folder. You can scan the logs to determine what caused the error. Once you fix the issue, try building the package again.
If your build is successful, the name of the provisioning package, output directory, and project directory will be shown.
- If you choose, you can build the provisioning package again and pick a different path for the output package. To do this, click Back to change the output package name and path, and then click Next to start another build.
- If you are done, click Finish to close the wizard and go back to the Customizations Page.
Copy the provisioning package to the target device.
Double-click the ppkg file and allow it to install.
Как переустановить браузер EDGE в Windows 10
Microsoft EDGE — это новый встроенный браузер по умолчанию в Windows 10. И так, как он новый, в нем присутствуют со временем ошибки и разные баги, он не такой стабильный по сравнению с браузером Chrome, но хорошо защищенный. Браузер Microsoft edge новая фишка microsoft, которая заменила Internet Explorer и выживает его потиху. В отличие от Chrome в браузере EDGE нет сброса настроек по умолчанию и мы разберем, как переустановить браузер edge в widows 10.
Важно: Речь идет о старом Edge, который был в Windows 10 до версии 2004.
Как переустановить Microsoft Edge
1 Способ. В обновлении Fall Creators Update, появился способ легко сбросить приложение браузер Edge по умолчанию.

- Справа выделите «Приложения и возможности«.
- Найдите слева в поле браузер Microsoft Edge и нажмите «Дополнительные настройки«.
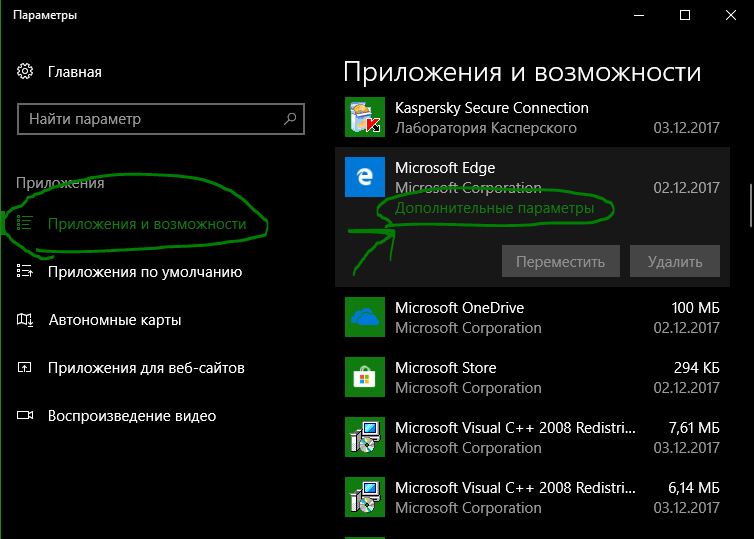
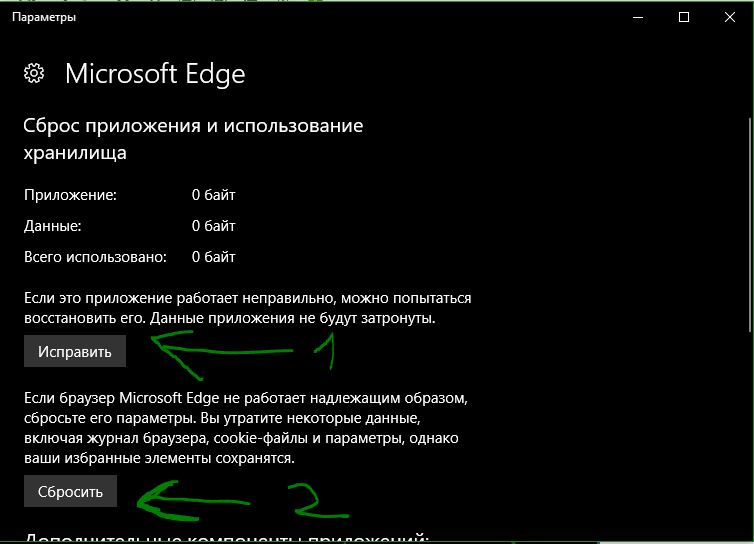
- В этом окне вы увидите две кнопки «Исправить» и «Сбросить» Microsoft Edge.
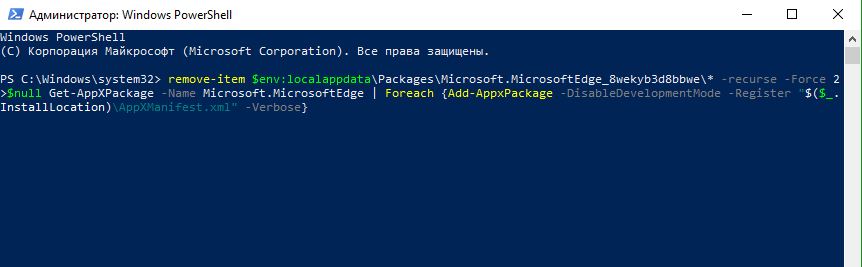
2 Способ. Вам нужно загрузиться в безопасном режиме, запустить PowerShell с правами администратора и ввести код, который автоматически переустановит браузер Microsoft Edge. После загрузки в безопасном режиме, нажмите «пуск» и напишите в поиске powershell, далее нажмите на нем правой кнопкой мыши и запуск от имени админа, после чего введите команду ниже.
remove-item $env:localappdata\Packages\Microsoft.MicrosoftEdge_8wekyb3d8bbwe\* -recurse -Force 2>$null Get-AppXPackage -Name Microsoft.MicrosoftEdge | Foreach
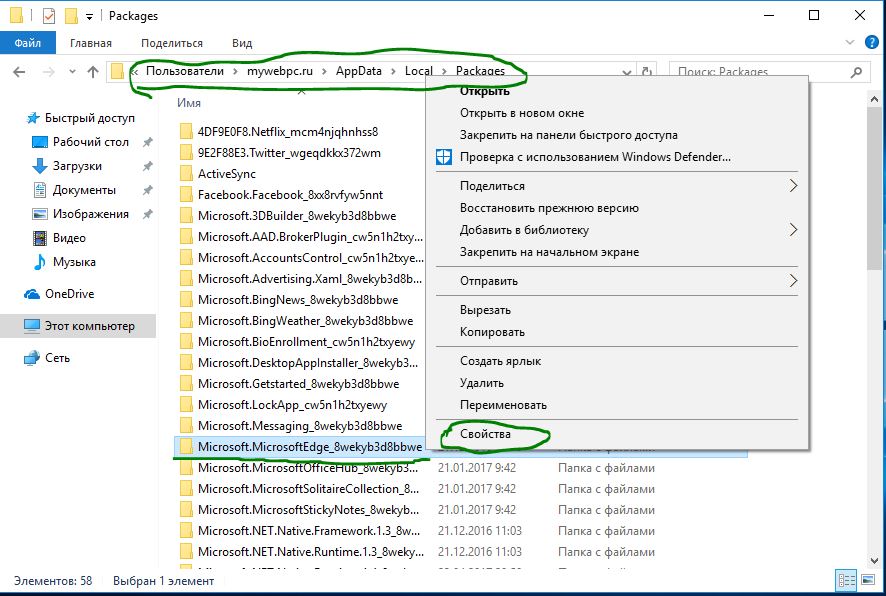
3 Способ. Этот способ аналогичен выше, только вручную, так как выше способ не всегда может сработать. Способ который поможет нам сбросить браузер edge по умолчанию с помощью удаление пакета и обратной его установки через PowerShell. Для начало вам нужно будет загрузиться в безопасном режиме . Включите скрытые папки в windows и перейдите по пути, можете скопировать путь и вставить его к себе в проводник, заменив mywebpc.ru на свое имя.
- C:\Users\mywebpc.ru\AppData\Local\Packages
Найдите пакет папку с именем Microsoft.MicrosoftEdge_8wekyb3d8bbwe, щелкните правой кнопкой мыши на этом пакете и выберите свойства.
Во вкладке общие, снимите галочку «Только для чтения» и нажмите применить.
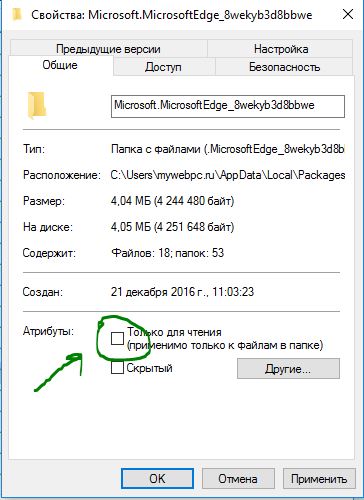
Теперь удалите папку Microsoft.MicrosoftEdge_8wekyb3d8bbwe и загрузите систему в нормальном режиме. (Выйдите из безопасного режима).
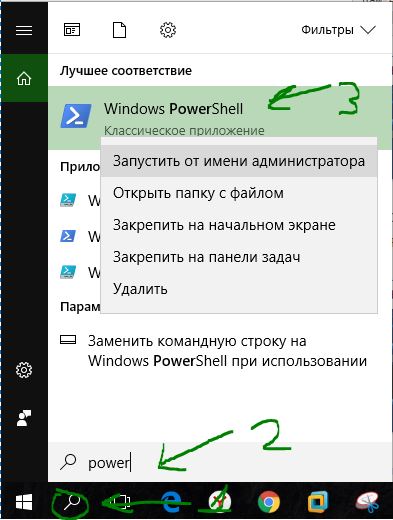
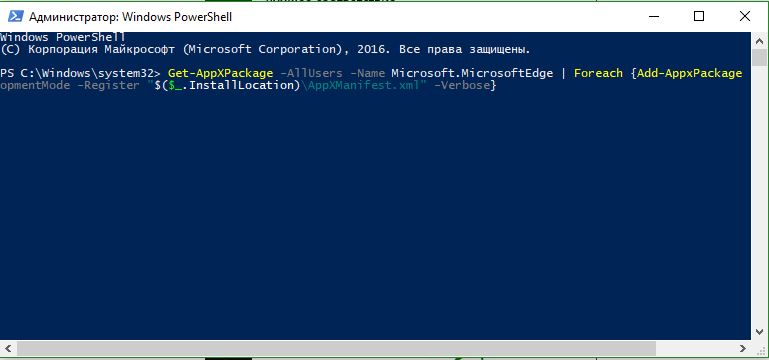
Запустите PowerShell с правами администратора. Нажмите «Поиск», введите powershell, выберите в результатах Windows PowerShell, нажмите на нем правую кнопку мыши и выберите с выпадающего меню Запустить от имени администратора.
В программе вставьте код:
Get-AppXPackage -AllUsers -Name Microsoft.MicrosoftEdge | Foreach
Вот мы переустановили браузер Microsoft EDGE в windows 10, после чего он должен работать как новый. Не забудьте перезагрузить компьютер.


