- Fix: Right Click Not Working on Windows 10
- 1. Turn off the Tablet Mode
- Method 1: Turn off Tablet Mode in Action Center
- Method 2: Turn off Tablet mode Through Settings
- Method 3: Use System Registry Editor to Turn Off Tablet Mode (Advanced Users Only)
- 2. Use Shell Extension Manager Application for Windows
- 3. Executing DISM Commands
- 4. Run the SFC Scan
- 5. Remove Registry Items
- 6: Uninstall/Disable Conflicting Applications
- 7: Update Drivers
- How to customize right click on Windows 10
- Editing right click menu on Windows 10
- 1. Use the Registry Editor
- 2. Use a context menu editor
Fix: Right Click Not Working on Windows 10
In Windows 10, you may encounter an issue whereby the right click does not work (or rather, the context menu doesn’t appear). In some cases right-clicking on the mouse works erratically; sometimes responding and others just remain still.
 Mouse
Mouse
However, if you take a look at the WinX folder all the shortcuts in there will work seamlessly when directly clicked. You can even see the event viewer.
But before moving on with the solutions, make sure the mouse is properly working, to do so, plug the mouse into another system (laptop/ desktop) and check if the right-click is working. For a wireless mouse, replace its batteries and then try the undermentioned solutions. Moreover, disable any network drives/cards during the troubleshooting process. It will be a good idea to unplug all the USB devices except the Mouse. Make sure there is no disk in the CD/DVD ROM. To be sure if the problem is hardware or software related, boot the system in Safe Mode and check if right-click is working. If you are using the PC in a corporate environment, then check with your IT administrator if any group policy is restricting the right-click.
Repair Corrupt System Files
Download and run Restoro to scan and restore corrupt and missing files from here, once done proceed with the solutions below. It is important to ensure that all system files are intact and not corrupt before proceeding with the solutions below.
1. Turn off the Tablet Mode
The failure of the right-click function can be directly attributed to TABLET mode being activated on your computer. You cannot do most of the right-click operations while in this mode. There are many ways to turn off the tablet mode on your Windows 10 PC.
Method 1: Turn off Tablet Mode in Action Center
- For this option, press the combination keys WINDOWS + A, or click on the system icon for Action Center which is usually located in the taskbar notification zone.
- Navigate to the bottom of the Action Center and then click or tap on Tablet Mode. It is a two – way toggle between ON and OFF, so do it according to your preference. Once done, test to see if the right-click now works.
 Turn Off Tablet Mode in Action Center
Method 2: Turn off Tablet mode Through Settings
- Go to Settings and click on System.
- On the left-hand side, you will see the line Tablet Mode. Click on it.
- Now on the right side identify the phrase “Make Windows more touch-friendly when using your device as a tablet”. Turn it off.
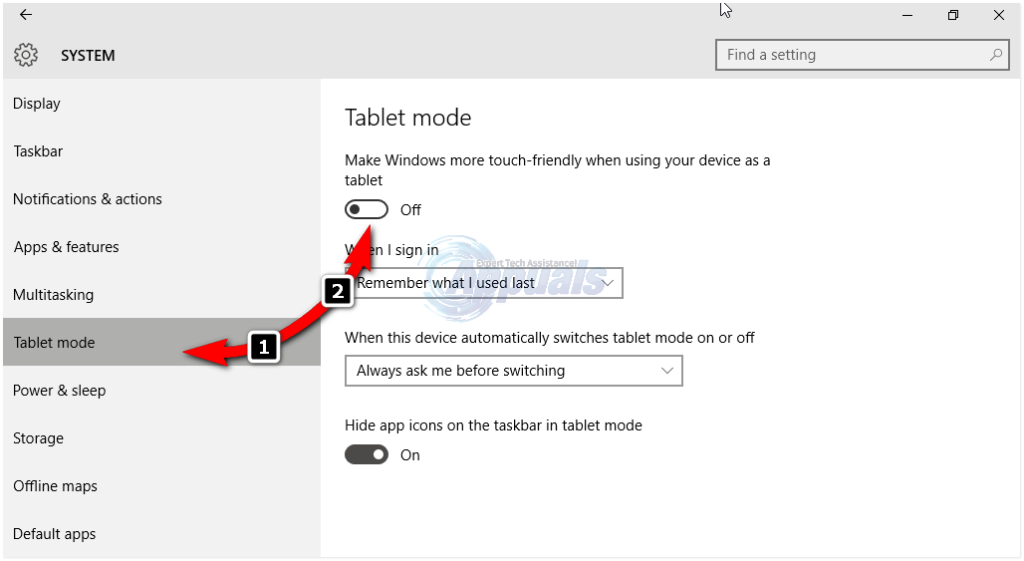 Turn Off Tablet Mode in Settings
In case you need to enable Tablet mode, just do the same thing as above but this time turn the button ON.
Take note of the options just under this instruction; they may come in handy for future interactions. There are options for the mode that initiates immediately after you sign in. You can let the system automatically switch to tablet mode on signing in, go to the desktop, or just use the last signing in mode. There are also some more options for how the system notifies you when tablet mode is on automatic mode.
Method 3: Use System Registry Editor to Turn Off Tablet Mode (Advanced Users Only)
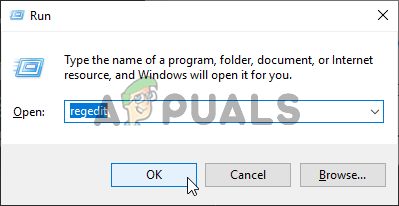
- Go to “Run”. In Run, key in the word Regedit.exe or just Regedit. The registry editor appears.
 Opening the Registry Editor
 - Navigate to the path
- When you click on the folder ImmersiveShell, on the right-hand side locate the DWORD/entry TabletMode. To turn off tablet mode, change its value to 0.
 Opening the Registry Editor
2. Use Shell Extension Manager Application for Windows
The right-click problem is sometimes also caused by third party extensions on context menus. There is a utility that can help you get rid of these extensions effectively without much struggle.
- DownloadShell Extension Manager.
- After completion of the download, launch the application using your keyboard (Shift+F10) and then select “run as administrator”. No installation is required here.
- On the menu that appears select Options. Click Filter by Extension Type and then opt for Context Menu.
- A list will be shown. Take note of the items having a pink background. They are the entries installed by 3 rd party software.
- Press and hold the CTRL key and then click on all the entries having a pink background. On the left corner, click the red button to disable them all.
- Again under Options, Restart Explorer.
- Right-click on your desktop now and see if the problem has been resolved. If so, start enabling the 3 rd party extensions one by one.
- If once again the right click problem occurs, it is most certainly the last 3 rd party extension you enabled. Disable it, or just completely uninstall its parent software or program if necessary.
3. Executing DISM Commands
The Disk health may be damaged due to which the right-click is not working on the computer. Therefore, in this step, we will be checking and repairing the Disk Health. For that:
- Press “Windows” + “R” keys simultaneously and type in cmd. Type “cmd” into the Run dialog
- Press the “Shift” + “Ctrl” + “enter” keys simultaneously to open an elevated command prompt.
- Type in the following commands one by one and press “enter” after each
- After the process finishes, check to see if the issue persists.
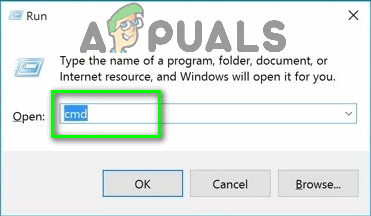 Type “cmd” into the Run dialog
4. Run the SFC Scan
It is possible that a certain driver or “.dll” file is missing or has been corrupted. Therefore, in this step, we will be initiating an SFC scan to check and repair this issue. For that:
- Press “Windows” + “R” keys simultaneously and type in cmd. Type “cmd” into the Run dialog
- Press the “Shift” + “Ctrl” + “enter” keys simultaneously to open an elevated command prompt.
- Type in the following command and press “Enter” to execute it Running SFC scan
- Wait while the system is being scanned and check to see if the issue persists after the scan is completed.
 Running SFC scan
5. Remove Registry Items
Sometimes, the error is fixed simply by deleting certain registry entries. If the registry configurations have been corrupted or are wrongly configured they can prevent certain elements of the operating system from functioning correctly. To fix that:
- Press “Windows” + “R” to open the run prompt. Opening Run Prompt
- Type in “Regedit” and press “Enter”.Running the Registry Editor
- Navigate to the following path Navigate to the indicated path
- Delete all the Folders in EXCEPT the following
- Right-click on any folder except for the ones indicated above and select “Delete” from the list to remove them. Delete Entries like these
 Opening Run Prompt
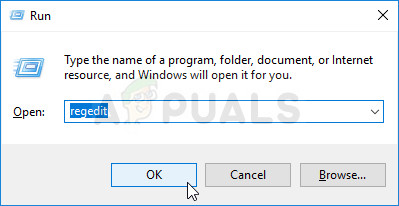 Running the Registry Editor
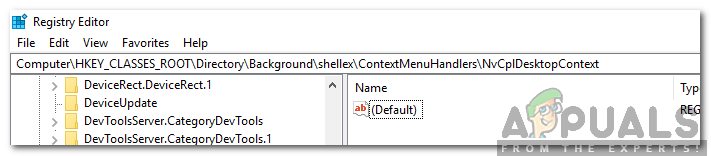 Navigate to the indicated path
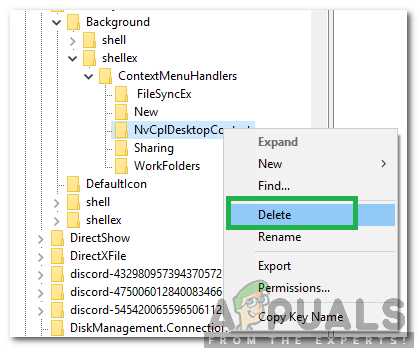 Delete Entries like these
WARNING: During the above steps, you may lose your desktop after disabling stuff and you will be left with nothing to work on for the rest of the processes. If this occurs, just press Ctrl-Alt-Del. In the task manager, select the file tab, run a new task and then key in explorer.exe. Your desktop will come up immediately.
6: Uninstall/Disable Conflicting Applications
There are known applications that cause the mouse error under discussion. These third-party applications usually take control of your HID and then sometimes, they go in an error state which causes the loss of functionality. In that case, uninstalling/disabling these applications may solve the problem. Following is a list of such applications:
- HP Display Control (PdiShellExt.dll )
- Symantec System Recovery
- 7zip
- WinZip
If you have installed any of these applications then either disable them or uninstall/reinstall them. This list might not be complete so keep a lookout for these type of applications. You can also consider starting your computer in safe mode to diagnose the problem.
7: Update Drivers
Drivers are the main components connecting your system hardware and operating system. If any of the drivers are corrupted or outdated, then updating to the latest version may solve the problem. Drivers get corrupt usually because of a bad Windows update and get outdated if they are not updated alongside a Windows update.
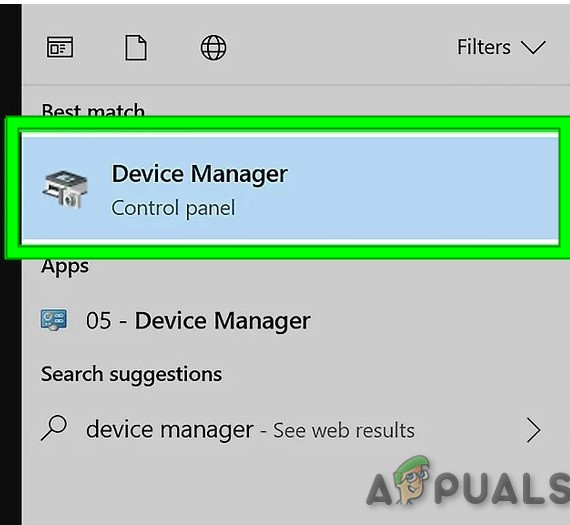
- Press Windows key and type Device Manager. Then in the results, click on Device Manager. Device Manager in Windows Search Box
- Now in the device Manager, expand your Display Adapters and right-click your Graphics Driver and then click on Update Driver. Update Graphics Driver
- Then select “Search Automatically For Updated Driver Software” Searching automatically for newer driver software
- You can also use your graphics card manufacturer website to update the driver. This is a known issue for Laptops with Dual GPU and Optimus technology. If you are using such a laptop, then download the official Intel driver to fix the issue.
- Also, Nvidia applications and drivers are known to create this issue. Uninstall all Nvidia applications/drivers and use Microsoft’s driver for your Graphics card to check if the problem is solved.
- Repeat the same process to update the driver of your mouse located under Mice and Other Pointing Devices.
- A good idea would be to update Windows, so that, all drivers are updated.
 Device Manager in Windows Search Box
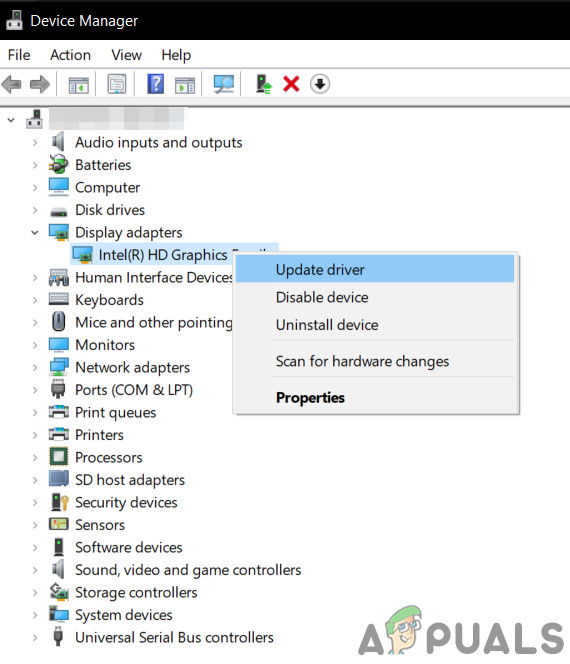 Update Graphics Driver
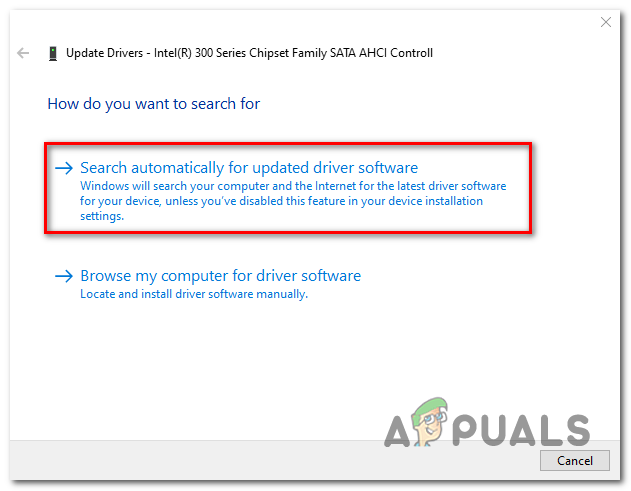 Searching automatically for newer driver software
If nothing has helped you so far, then either perform a system restore or reset Windows. But before doing any, make sure the mouse is not faulty.
How to customize right click on Windows 10

Customizing the right click menu window for Windows 10, 8 is probably one of the best features Microsoft has offered, in my opinion. There are a lot of options there like “Copy” and “Paste” a folder or file of your liking or just “Rename” a folder with a name of you’re choosing. These are just a few menu items that you can choose that makes the job a lot easier if you have them around. 
The menu that appears when you right click on a folder or an open space on the desktop of the Windows 10, 8 PC can be modified to fit your every day need or you can just take out of there the Windows 10, 8 features that you probably won’t use in your everyday activity. The tutorial below will show you exactly how to customize your right click Windows 10, 8 menu window just by doing a few easy steps I have posted below.
Editing right click menu on Windows 10
1. Use the Registry Editor
- Go with the mouse over to the left side of the screen.
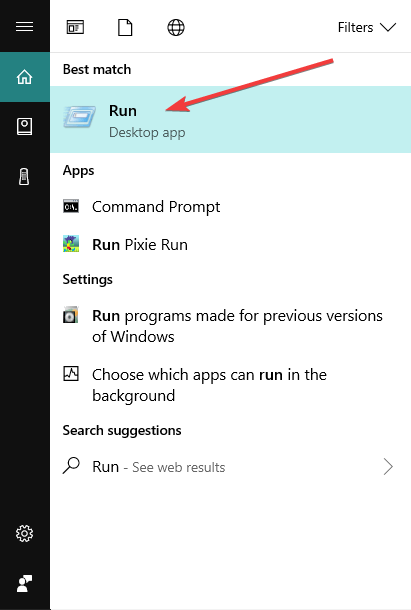
- Click (left click) in the search box in the upper left of your screen.
- Type in the search box “Run” or an easier way to do this is by pressing the buttons “Windows key” and the “R” key on the keyboard(Windows key + R).
- Click (left click) on the “Run” icon that appears in the upper left of your screen.
- Now you should have the “Run” window in front of you.
- Type in the box on the right from “Open:” the command “REGEDIT” exactly the way I have written it in quotes.
- Click (left click) on the “OK” button situated in the lower side of the “Run” window.
- Now you should have in front of you a “Registry Editor” window.
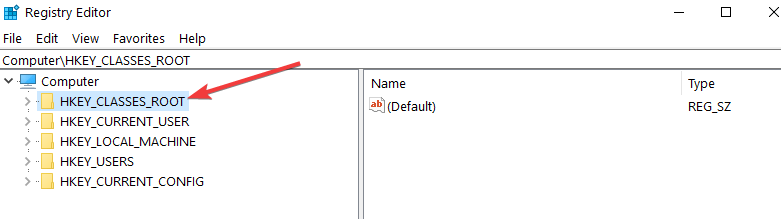
- Click (left click) on “Computer” icon you have on the upper left side of the “Registry Editor” window.
- In the list that you opened you should have there “HKEY_CLASSES_ROOT”, double click (left click) on it.
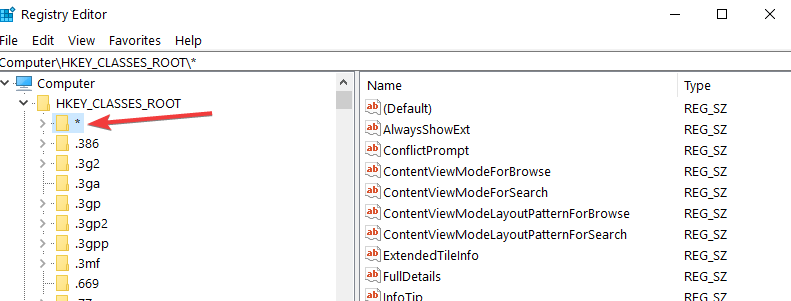
- In the “HKEY_CLASSES_ROOT” folder you should have there a folder that is named with “*”,double click (left click) on it.
- In the “*” folder you should have there a folder that is named with “Shellex”, double click (left click) on it.
- In the “Shellex” folder you should have there a folder that is named with “ContextMenuHandlears”, double click (left click) on it.
- Right click on the folder “ContextMenuHandlears”.
- In the menu that shows hover the mouse cursor over “New”
- Another menu should open up, click (left click) on “Key“ in the “New” menu you opened.
- Now you only need to enter your item name that you want to appear in the right click menu.Example “Copy to”
- If you want to remove an item from the list , click (left click) on the item and press “Delete”
- Click (left click) on the item you created and on the right side of the “Registry Editor” window you should have “Default”.
- Click (right click) on “Default”
- Click (left click) on “Modify” in the menu you opened.
- An “Edit String” window should of opened up.
- Under the “Value data” in the white box write for example the code “
” , this code is specific for the “Copy to” item on your right click menu. - Click (left click) on “OK” in the lower side of the “Edit String” window.
- Go on the Desktop and right click a folder or file and you should have there the item “Copy to”.
- RELATED: Fix: Windows 10 right-click not working
2. Use a context menu editor
If you don’t feel comfortable using the Registry Editor, you can also use a menu editor. These tools feature a user-friendly interface that’s very intuitive to use, thus making your task of personalizing right-click menu much easier.
One of the best right-click menu editors for Windows 10, 8.1 is Easy Context Menu. This software allows you to add a variety of commands and tweaks to the right-click context menus when you select My Computer, your computer’s Drives, and many other Windows components. Using this tool is as simple as a walk in the park: check the box next to the items you wish to add and that’s it.
There you have it, in a few easy steps posted above, you can now customize your right click menu on Windows 10, 8. If you have other suggestions regarding this article and you want to share them with us , feel free to post them in the comments below.
RELATED STORIES TO CHECK OUT:


