Fix: Channel Surround Sound Not Working in Windows 10
Windows 10 upgrade from prior versions of Windows is free and many users have opted to upgrade, whenever you upgrade there are likely to be conflicts and compatibility issues most commonly with the drivers you previously had that were designed and developed for your previous operating system.
Windows 10 does support most of your previously installed applications and drivers but you may need to upgrade them. The Channel surround sound not working in Windows 10 is one of such issues faced by users who upgraded to Windows 10. Users are getting basic sound from front speakers; however, they are not getting any sound from rear speakers.
Usually, the issue is prevalent in systems having Realtek’s 5.1 sound card. Because the Realtek’s 5.1 sound card is working properly in Windows 7 and 8.x, users are looking towards Microsoft for the solution to this issue. Microsoft support personnel announced that they are working on the issue. However, Microsoft has still not provided a fix.
Update: After more than two years, the surround sound is still partially broken in Windows 10. Even if fixes were implemented on builds 10586.1 and build 10586.3, the issue still partially remains. Right now, the issue only affects surround sound encoded in real-time like games or DTS Live. Pre-recorded surround tracks like the ones found on DVDs and Blu Rays are now working fine under Windows 10. With the new sound technologies like Dolby Atmos and Sonic, Microsoft is unlikely to ever release an official patch for the 5.1 surround issue for Windows 10. Microsoft is once again using planned obsolescence to force consumers into migrating to Sonic and Atmos.
While we wait eagerly for Microsoft to release an official fix for this issue, let’s go over some solutions that have enabled users to fix their channel surround problems on Windows 10. Please follow each method in order until you find a fix that works for you.
Method 1: Enabling Speaker Fill
One solution that seems particularly effective for users struggling with the 5.1 channels issue is to enable enhancements and Speaker Fill. While this will allow you to use all your speakers when running Windows 10, the overall sound quality will be lowered. Instead of getting the full audio spectrum possible through all the channels, the rear speakers will use virtualization to provide a surround-like effect. Here’s what you need to do to enable speaker fill:
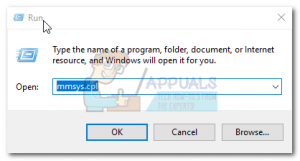
- Press Windows key + R and type “mmsys.cpl”. Hit Enter to open the Sound dialog box.

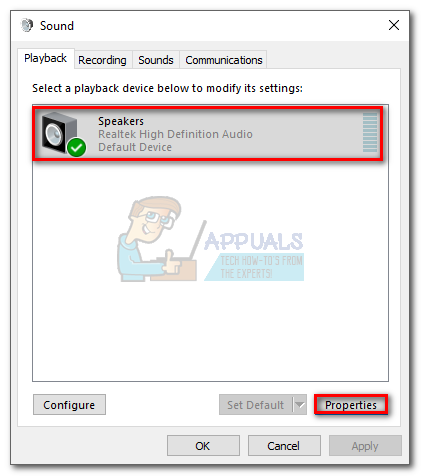
- Go to the Playback tab, select your 5.1 surround speakers and click on Properties.
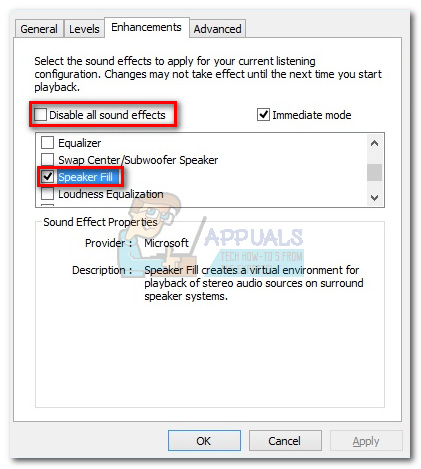
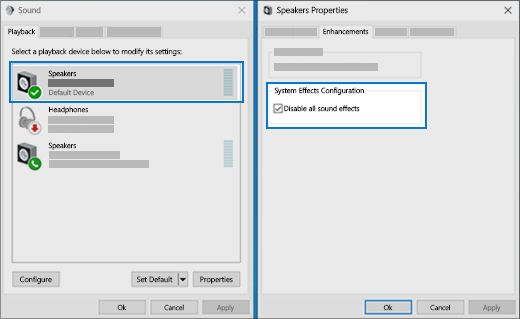
- In Speaker Properties, go to the Enhancement tab and uncheck the box next to Disable all sound effects. Then, Scroll down to the menu below and check the box next to Speaker Fill. Hit Apply to save your configuration.
- Reboot your device and see whether you can hear sound from your rear speakers. If you have the same issue, move over to the next method.
Method 2: Changing the Audio Format to 24/96
This following method is particularly effective if your audio is outputted through S/PDIF. Some users have successfully enabled the 5.1 surround sound after changing the audio format to 24 bit, 96000 Hz. This also proved to be effective with users who had trouble enabling Dolby Direct Live. Follow the steps down below o change the audio format to 24/96:
- Press Windows key + R and type “mmsys.cpl”. Hit Enter to open the Sound dialog box.
- Go to the Playback tab, select your 5.1 surround speakers and click on Properties.
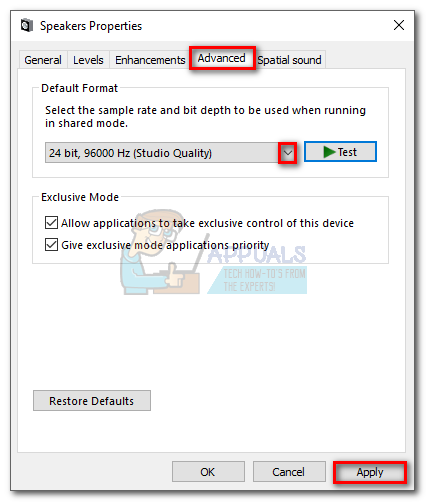
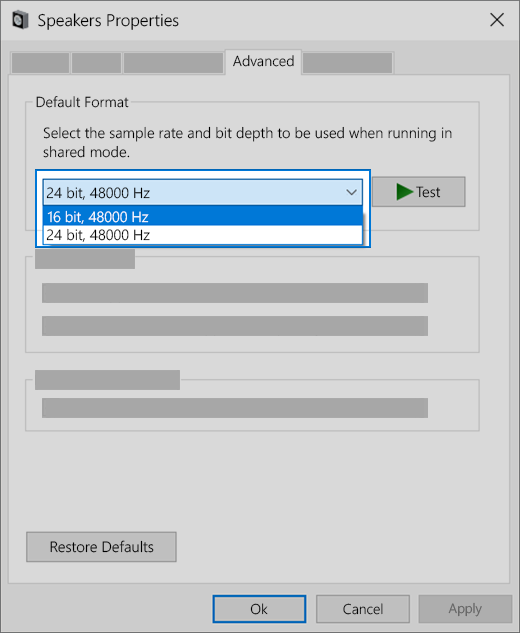
- Next, go to the Advanced tab and use the drop-down menu below Default Format to change the audio format to 24 bit, 96000 Hz (Studio Quality). Hit Apply to save your modifications.
- Reboot your system and see whether 5.1 channel surround is now working. If nothing changed for the better, move to the next method.
Method 3: Uninstalling Windows Audio Driver
Some users have remedied this issue by uninstalling the sound driver from Device Manager. This will force Windows to reinstall the driver and often time it will automatically install a newer version. Here’s what you need to do:
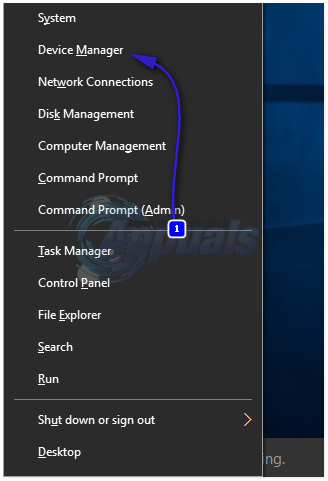
- Hold the Windows Key and Press X and choose Device Manager.
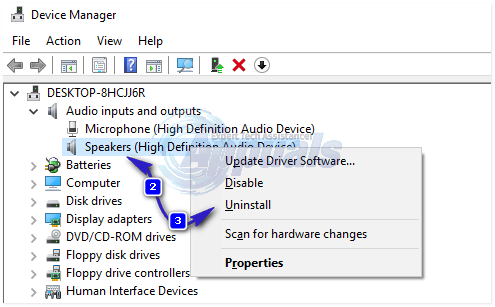
- Double-click Audio inputs and outputs to show the sub-items. Right-click on the installed devices one by one, and click Uninstall. Click OK in the Confirm Device Uninstall dialog.
- After uninstalling the old device drivers, click on Scan for hardware changes from the Action tab.

Windows 10 will try to automatically install the drivers for your audio devices at the next reboot. If prompted, click Search automatically for updated driver software, and let Windows 10 install the drivers. In most cases, you will be able to get your 5.1 surround sound back after you reinstall the audio drives.
Note: If Windows doesn’t automatically download and install the audio driver, you’ll need to go to your onboard sound card manufacturer website and manually download the driver (for Realtek onboard, download the High Definition Audio Driver from here). After that, check your audio and see if the 5.1 surround sound is working.
If your still not getting signal to the rear speakers, you have little else to do but to buy a speaker with the newest technology (powered by Atmos or Sonic) or buy a dedicated 5.1 sound card that is known to function properly under Windows 10 (there aren’t many). A more desperate solution would be to revert back to Windows 8.1 or Windows 7, to when 5.1 surround channels where fully supported.
Fix sound problems in Windows 10
If you’re having audio problems, the following suggestions might help. The tips are listed in order, so start with the first one, see if that helps, and then continue to the next one if it doesn’t.
If multiple audio output devices are available, check that you have the appropriate one selected. Here’s how:
Select the Speakers icon on the taskbar.
Next, select the arrow to open a list of audio devices connected to your computer.
Check that your audio is playing to the audio device you prefer, such as a speaker or headphones.
If this doesn’t help, continue to the next tip.
The audio troubleshooter might be able to fix audio problems automatically.
To run the troubleshooter
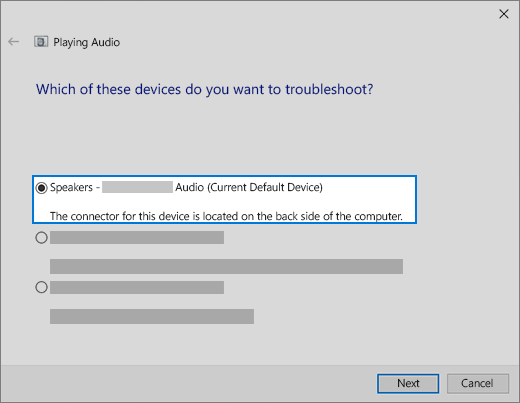
In the search box on the taskbar, type audio troubleshooter, select Fix and find problems with playing sound from the results, then select Next.
Select the device you want to troubleshoot and then continue through the troubleshooter.
You can also launch the troubleshooter from audio Settings. Select Start > Settings > System > Sound > Troubleshoot.
If running the troubleshooter doesn’t help, continue to the next tip.
To check for updates
Select Start > Settings > Update & Security > Windows Update > Check for updates.
Do one of the following:
If the status says «You’re up to date, go to the next tip.
If the status says «Updates are available,» select Install now.
Select the updates you want to install, then select Install.
Restart your PC and see if your sound is working properly.
If that didn’t solve your problem, continue to the next tip.
Try these steps
Check your speaker and headphone connections for loose cords or cables. Make sure all cords and cables are plugged in.
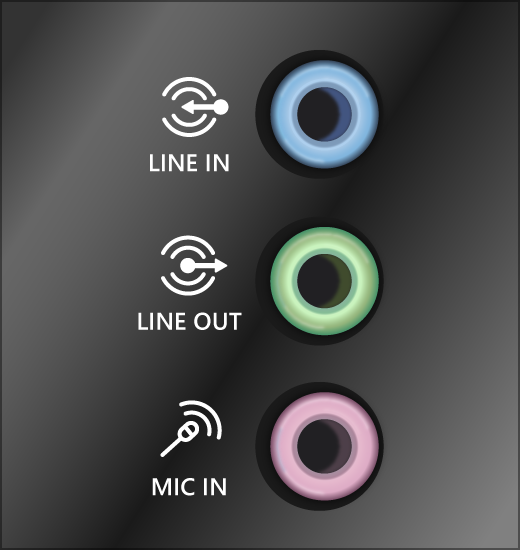
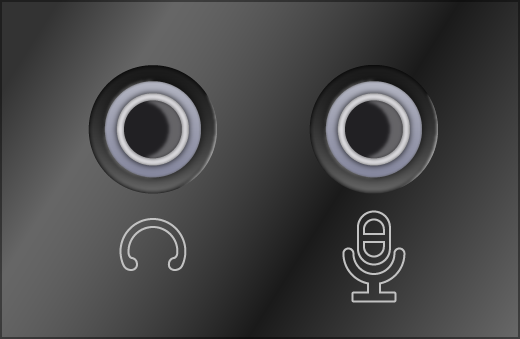
If you have multiple 5mm jacks to plug into, especially on a surround sound system, make sure all cords and cables are plugged into the correct jack.
If it’s not clear which jack goes with which cord, consult your hardware manufacturer, or try the most obvious outputs one at a time and see if they work.
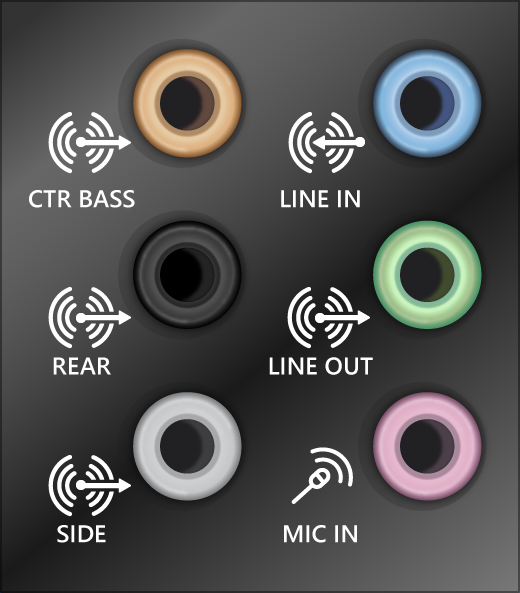
Note: Some systems use a green jack for output and pink for mic input and others will be labeled «headphone» or «microphone.»
Make sure the power is turned on and check the volume level.
Make sure the mute setting is not turned on, and try turning up all the volume controls.
Remember some speakers and apps have their own volume controls. Be sure to check them all.
Try connecting your speaker and headphones to a different USB port.
It’s possible that your speakers won’t work when your headphones are plugged in. Unplug your headphones and see if that helps.
If your cables and volume are OK, see the next sections for additional troubleshooting.
Check to make sure your audio devices aren’t muted and haven’t been disabled.
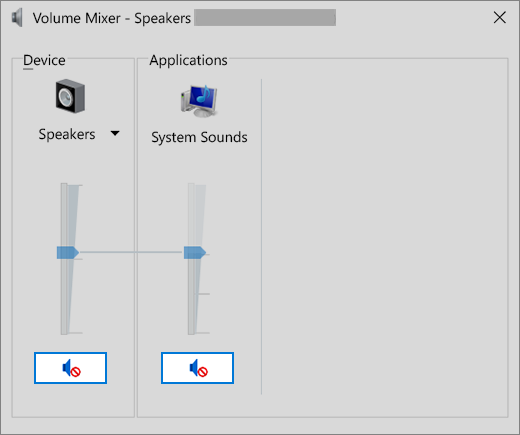
Right-click the Speakers icon on the taskbar, and then select Open Volume mixer.
You’ll see a set of volume controls for your devices. Make sure none of them are muted. If any of them are muted, you’ll see a red circle with a line through it next to the volume control. In that case, select the volume control to unmute.
Check your device properties to make sure that your devices have not been disabled by mistake. Select Start > Settings > System > Sound .
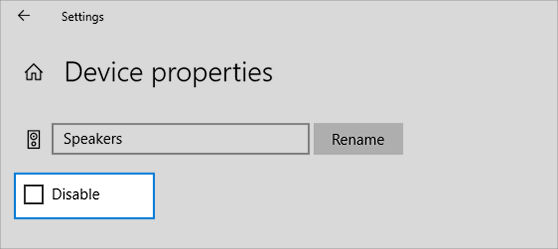
Select your audio device, and then select Device properties. Be sure to select Device properties for both the output and input devices.
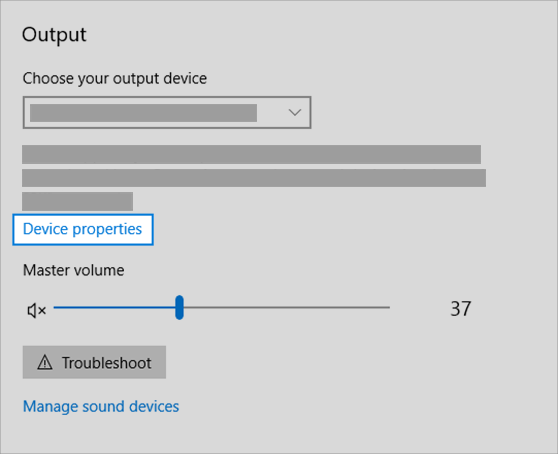
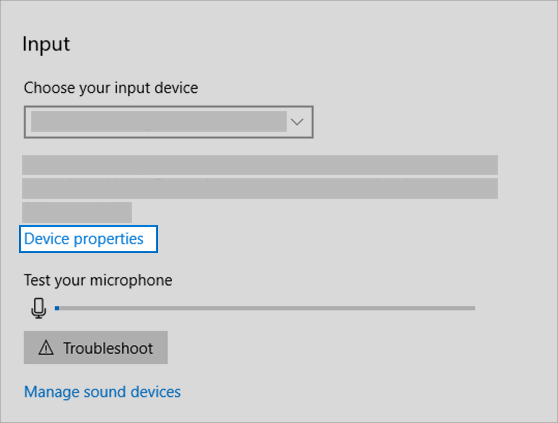
Make sure the Disable check box is cleared for the output and input devices.
If that didn’t solve your problem, continue to the next tip.
Hardware problems can be caused by outdated or malfunctioning drivers. Make sure your audio driver is up to date and update it if needed. If that doesn’t work, try uninstalling the audio driver (it will reinstall automatically). If that doesn’t work, try using the generic audio driver that comes with Windows. If you’re having audio issues after installing updates, try rolling back your audio driver.
To update your audio driver automatically
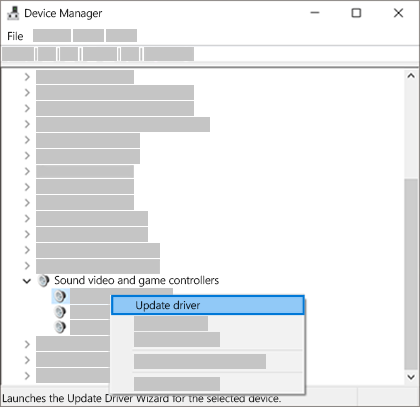
In the search box on the taskbar, type device manager, then select it from the results.
Select the arrow next to Sound, video and game controllers to expand it.
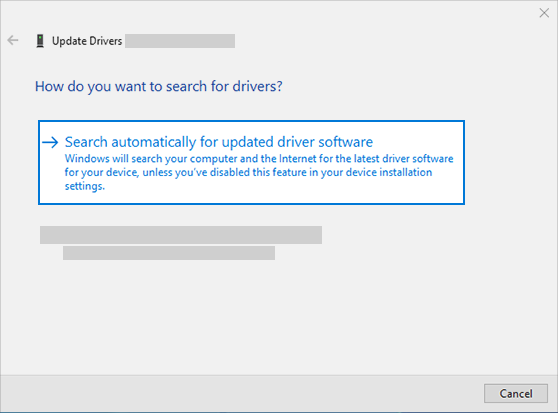
Right-click the listing for your sound card or audio device, such as headphones or speakers, select Update driver, then select Search automatically for updated driver software. Follow the instructions to complete the update.
If Windows doesn’t find a new driver, look for one on the device manufacturer’s website and follow those instructions. If that doesn’t work, try uninstalling your audio driver.
To uninstall your audio driver
In the search box on the taskbar, type device manager, then select it from the results.
Select the arrow next to Sound, video and game controllers to expand it.
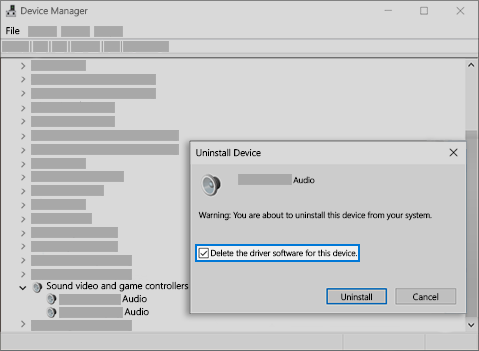
Right-click the listing for your sound card or audio device, select Uninstall device, select the Delete the driver software for this device check box, and then select Uninstall.
Restart your PC.
Note: Be sure to save documents and any other current work before you restart.
This restart will automatically prompt your PC to reinstall your audio driver.
To restart, select Start > Power > Restart .
If those options didn’t work, try using the generic audio driver that comes with Windows.
To use the generic audio driver that comes with Windows
In the search box on the taskbar, type device manager, then select it from the results.
Select the arrow next to Sound, video and game controllers to expand it.
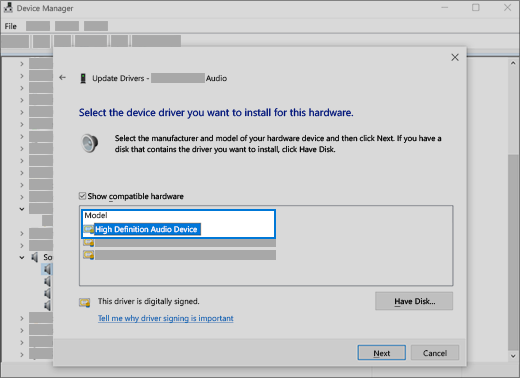
Right-click the listing for your sound card or audio device, then select Update driver > Browse my computer for driver software > Let me pick from a list of device drivers on my computer.
Select the audio device whose driver you want to update, select Next, and then follow the instructions to install it.
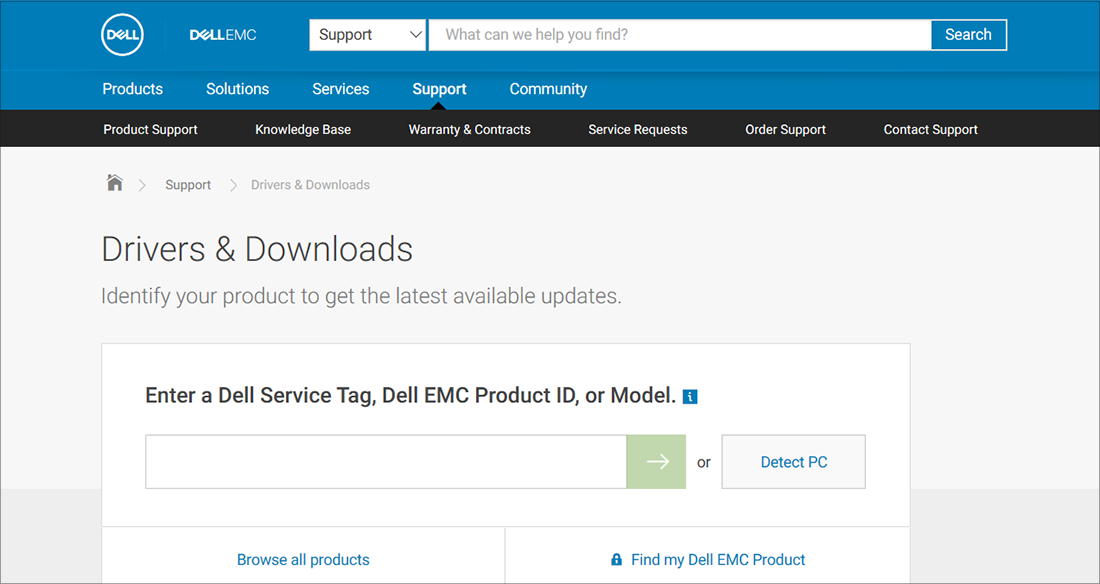
If these steps didn’t solve your audio issue, visit your device manufacturer’s website and install the most recent audio/sound drivers for your device. Following is an example of a driver download page for a sound device manufacturer.
If you have audio issues after installing updates
If your audio was working before you ran Windows Update and now isn’t working, try rolling back your audio driver.
To roll back your audio driver
In the search box on the taskbar, type device manager, then select it from the results.
Select the arrow next to Sound, video and game controllers to expand it.
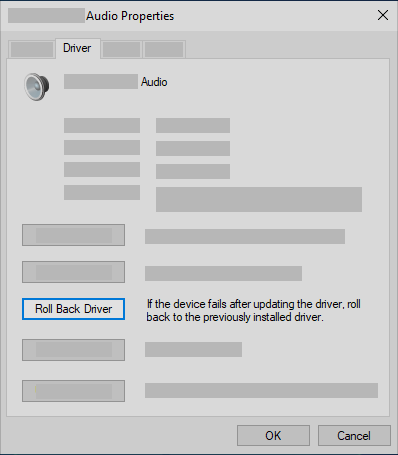
Right-click the listing for your sound card or audio device, then select Properties.
Select the Driver tab, then select Roll Back Driver.
Read and follow the instructions and then select Yes if you want to roll back your audio driver.
If rolling back your audio driver didn’t work or wasn’t an option, you can try to restore your PC from a system restore point.
Restore your PC from a system restore point
When Microsoft installs updates on your system, we create a system restore point in case problems arise. Try restoring from that point and see if that fixes your sound problems. For more info, see «Restore from a system restore point» in Recovery options in Windows 10.
If you’re connecting to an audio device—such as headphones or speakers—using USB or HDMI, you might need to set that device as the default audio device. If you’re using an external monitor that doesn’t have built-in speakers, make sure that the monitor isn’t already selected as your default output device. if it is, you won’t have any audio. You can check that when you set your default output audio device. Here’s how:
In the search box on the taskbar, type control panel, then select it from the results.
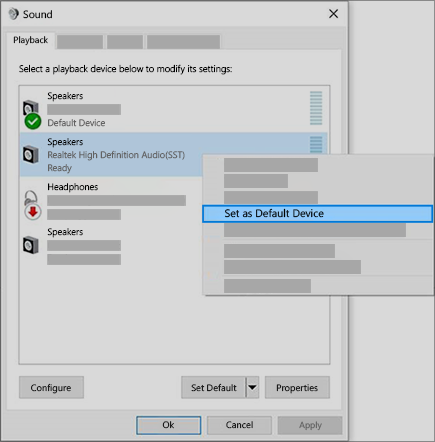
Select Hardware and Sound from the Control Panel, and then select Sound.
On the Playback tab, right-click the listing for your audio device, select Set as Default Device, and then select OK.
If setting your audio device as the default device doesn’t help, continue to the next tip for additional troubleshooting.
Sometimes having audio enhancements on can result in audio issues. Disabling them may resolve your issue.
In the search box on the taskbar, type control panel, then select it from the results.
Select Hardware and Sound from the Control Panel, and then select Sound.
On the Playback tab, right-click the Default Device, and then select Properties.
On the Enhancements tab, select either the Disable all enhancements or the Disable all sound effects check box (depending on which option you see), select OK, and try to play your audio device.
If that doesn’t work, on the Playback tab, select another default device (if you have one), select either the Disable all enhancements or the Disable all sound effects check box (depending on which option you see), select OK, and try to play audio again. Do this for each default device.
If turning off audio enhancements doesn’t help, see the next sections for additional troubleshooting.
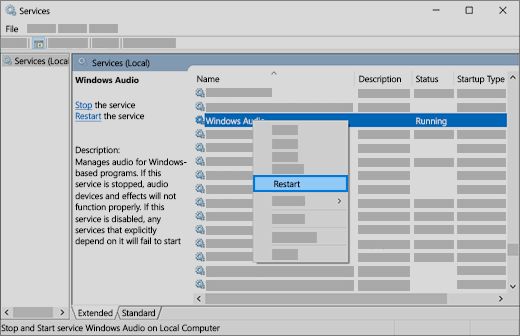
In the search box on the taskbar, type services, then select it from the results.
Select each of the following services, right-click, and then select Restart:
Windows Audio Endpoint Builder
Remote Procedure Call (RPC)
If restarting these services doesn’t resolve your issue, see the next sections for more troubleshooting.
In the search box on the taskbar, type control panel, and then select it from the results.
Select Hardware and Sound from the Control Panel, and then select Sound.
On the Playback tab, right-click (or press and hold) Default Device, and then select Properties.
On the Advanced tab, under Default Format, change the setting, select OK,and then test your audio device. If that doesn’t work, try changing the setting again.
If trying different audio formats doesn’t help, see the next sections for additional troubleshooting.
Many updates require you to restart your device.
To check and see if you have installed updates pending and need to restart
Save your work and close all open applications.
Select Start > Power . If you have installed updates pending, you’ll see options to Update and restart and Update and shut down.
Select one of those restart options to apply the updates
If restarting doesn’t help, see the next section for additional troubleshooting.
Some audio problems might be caused by an issue with the audio system’s IDT High Definition Audio CODEC. This can be fixed with a manual driver update which allows you to choose the sound driver you want to use.
Note: Not all systems will have an IDT High Definition Audio CODEC.
To check and see if you have one, and to manually update the driver
In the search box on the taskbar, type device manager, then select it from the results.
Select the arrow next to Sound, video and game controllers to expand it.
Look for IDT High Definition Audio CODEC. If it’s listed, right-click it and select Update driver, then select Browse my computer for driver software > Let me pick from a list of device drivers on my computer.
You’ll see a list of pre-installed drivers. Select High Definition Audio Device, and then select Next.
1. Select Start > Settings > Privacy , and then select Microphone from the left menu.
Under Allow access to the microphone on this device, select Change. Make sure the toggle is turned On.
If you’re having this issue with a specific app, scroll down to Choose which Microsoft Store apps can access your microphone and make sure that the toggle next to that app is turned On as well.


