- linux-notes.org
- Установка и настройка OpenSSH-сервера на Linux
- Особенности OpenSSH
- Установка OpenSSH на RHEL / CentOS 5.x/6.x
- Установка OpenSSH на Fedora 15/16/17/18/19
- Установка OpenSSH на основе Debian / Ubuntu
- Как войти в OpenSSH
- Настройка сервера OpenSSH
- RootUsers
- Guides, tutorials, reviews and news for System Administrators.
- How To Enable SSH in Linux Mint
- Enable SSH in Linux Mint
- Summary
- Как подключиться по SSH
- Что такое SSH?
- Как подключиться по SSH
- 1. Подключение через SSH в Linux
- 2. Подключение через SSH в Windows
- Выводы
- Linux Mint SSH | How to Enable and Configure it Properly?
- What does SSH stand for in Linux?
- Steps to enable SSH access in Linux.
- 1. Install the OpenSSH service.
- 2. How do you check if SSH is enabled in Linux?
- 3. Enable ssh service on boot.
- 4. Verify the SSH service.
- Verify SSH locally.
- Verify the SSH access remotely.
- 5. Verify the SCP access.
- 6. Enable security.
- how to change ssh port in Linux mint?
- how to allow specific users in ssh?
linux-notes.org

Установка и настройка OpenSSH-сервера на Linux
Secure Shell (SSH) является сетевым протоколом обеспечения оболочки услуги на удаленной машине по защищенному каналу. OpenSSH является реализацией с открытым исходным кодом протокола SSH, позволяя зашифровать сообщения по сети через набор программного обеспечения.
OpenSSH разработан группой открытого BSD и он выпущен под упрощенное лицензии BSD.

Особенности OpenSSH
1. Open Source проект ;
2. Бесплатная лицензирование;
3. Очень хорошее шифрование (3DES, Blowfish, AES, Arcfour);
4. X11 Forwarding (шифрование X Window System трафика);
5. Перенаправление портов (зашифрованные каналы для традиционных протоколов);
6. Сильная аутентификация (Public Key, Одноразовый пароль и Проверка подлинности Kerberos);
7. Экспедитор (Single-Sign-On);
8. Взаимодействие (Соблюдение SSH 1.3, 1.5 и стандартов протоколов 2,0);
9. SFTP клиент и сервер поддерживают в обоих протоколов SSH1 и SSH2;
10. Сжатие данных.
Установка OpenSSH на RHEL / CentOS 5.x/6.x
Чтобы установить OpenSSH и автоматически включить OpenSSH сервер на CentOS или RHEL необходимо выполнить следующую команду:
Запускаем ssh демон:
Добавим сервис в автозапуск системы (не нужно запускать каждый раз при старте вашей ОС):
Установка OpenSSH на Fedora 15/16/17/18/19
Чтобы установить OpenSSH и автоматически включить OpenSSH сервер на Fedora 15/16/17/18/19 необходимо выполнить следующую команду:
Запустим ssh-демон для работы:
Добавим, по желанию в автозагрузку нашей ОС:
Установка OpenSSH на основе Debian / Ubuntu
Чтобы установить OpenSSH и автоматически включить OpenSSH сервер на основе Debian / Ubuntu, необходимо выполнить следующую команду:
Как войти в OpenSSH
Для входа в систему с Unix-подобной машины, нужно зайти в терминал и в командной строке и ввести:
Настройка сервера OpenSSH
Если вы хотели бы настроить OpenSSH сервер то нужно отредактировать файл конфигурации OpenSSH /etc/ssh/sshd_config .
Есть несколько вариантов, OpenSSH вы можете быть заинтересованы в:
Порт 22 (Port 22).
По умолчанию SSHD прослушивает порт 22 для прослушивания входящих соединений SSH. Изменяя SSH порт по умолчанию, вы можете быть в состоянии предотвратить различные автоматизированные атаки от хакеров.
PermitRootLogin no
Опция PermitRootLogin говорит, может ли суперпользователь войти в систему через SSH.
AllowUsers user1 user2
С помощью опции AllowUsers можно выборочно отключить SSH сервис для конкретных пользователей Linux. Можно указать несколько пользователей, разделенных пробелами.
После изменения /etc/ssh/sshd_config, необходимо перезагрузить SSH сервис.
Чтобы перезапустить OpenSSH на Ubuntu или Debian:
Чтобы перезапустить OpenSSH на CentOS, Fedora или RHEL:
Установка и настройка OpenSSH-сервера на Linux завершена. Если нужно помочь, пишите мне ниже в комментарии и я вам помогу.
Источник
RootUsers
Guides, tutorials, reviews and news for System Administrators.
How To Enable SSH in Linux Mint
By default OpenSSH server is not installed in Linux Mint. This quick guide will show you how to install and enable SSH in Linux Mint, allowing you to remotely access the operating system over the network through SSH.
Enable SSH in Linux Mint
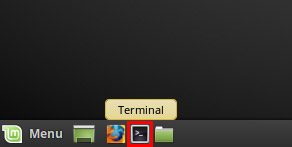
- Open Terminal
We’ll be doing this through command line, so begin by first opening up a terminal. You can find the terminal icon in the task bar in a default GUI installation, as shown below.
Install OpenSSH Server
Within the terminal, run the following command as root to install the OpenSSH server package.
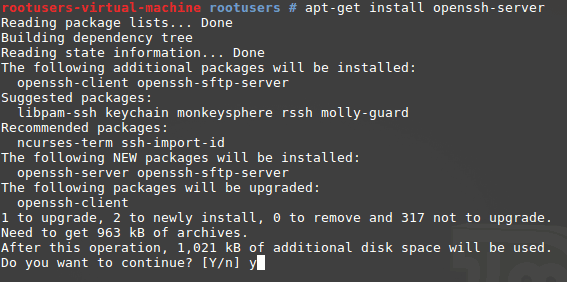
Note: You must do this with root privileges, otherwise you will receive the following error message:
You can become root by running ‘sudo su’, followed by your password. By default the first account that you create when you install Linux Mint should be able to become root.
Check OpenSSH Status
Once installed SSH should be automatically configured to start on system boot, and be already running. We’ll of course check this though rather than just assuming!
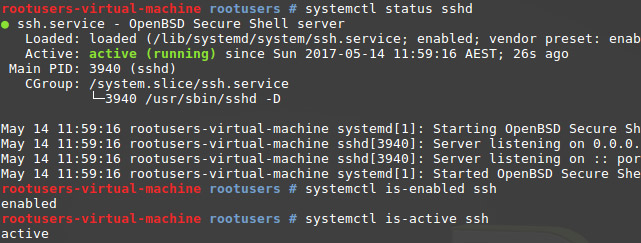
We can use ‘systemctl is-enabled’ as shown below to check that ssh is enabled to start automatically on system boot. If it comes back with ‘enabled’ then SSH should automatically start up on boot. If it’s disabled, you can run ‘systemctl enable ssh’ to enable to to start up on system boot.
We can then use ‘systemctl is-active’ as shown below to check that ssh is currently active and running. If it comes back with ‘active’ then SSH is currently running. If it’s not running, you can run ‘systemctl start ssh’ to start it up.
We can also use ‘systemctl status’ to get a quick overview of all information, in the example below we can see that it’s actively running as well as various useful information about the service.
Testing SSH Access
In this example we have confirmed that SSH is configured to start up on system boot automatically and is currently running, so let’s try and SSH to it from an external Windows system! We’ll do this using PuTTY.
You can display the IP address of the Linux Mint machine by running ‘ip a’ from the terminal.
We can see here that the IP address of our Linux Mint system is 192.168.1.20, so we’ll SSH to this using PuTTY from Windows. All you need to do is specify your username and password.
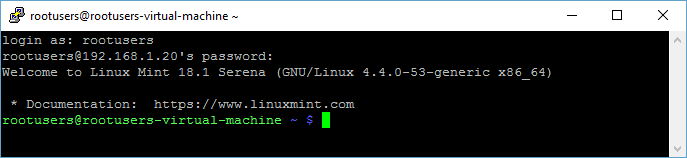
Note that by default the user ‘root’ will not have SSH access. This behaviour can be modified by editing the PermitRootLogin value in the ‘/etc/ssh/sshd_config’ file and then restarting SSH.
That’s all there is too it! We have now successfully established an SSH connection from Windows to Linux Mint, allowing us to remotely administer the Linux system over the network by running various commands via SSH.
Summary
By default Linux Mint does not have OpenSSH server installed. We have shown you how to quickly install and enable SSH in Linux Mint. Once installed we checked that it was configured to automatically start up on system boot and that it was running. Finally we connected to Linux Mint via SSH with PuTTY from a Windows computer.
Источник
Как подключиться по SSH
SSH — это основной протокол для удаленного управления серверами на базе операционной системы Linux. Все действия при подключении к SSH выполняются в командной строке, но при достаточном уровне знаний и привилегий в системе там можно сделать практически все что угодно, в отличие от того же FTP где можно только передавать и редактировать файлы.
Если вы покупаете VPS сервер или продвинутый хостинг, обычно в письме вместе с другими данными авторизации есть данные доступа по SSH. В этой статье мы рассмотрим как подключиться по SSH к серверу из Linux или Windows.
Что такое SSH?
Поскольку эта статья рассчитана именно на новичков, то перед тем, как перейти дальше давайте подробнее разберемся что из себя представляет SSH. Исторически так сложилось что на большинстве серверов используется операционная система Linux, во многом этому посодействовала ее бесплатность. Графический интерфейс на серверах Linux не используется для экономии ресурсов, поэтому единственным способом администрирования сервера остается командная строка.
Но это не является недостатком, потому что в командной строке Linux можно сделать больше чем графическом интерфейсе. Протокол SSH позволяет вам выполнять команды в удаленной системе так, как будто вы это делаете в своей системе. Вам доступен буфер обмена, вы вводите команды и можете использовать их вывод. Недоступны разве что файлы из вашей файловой системы. Например, когда вы подключитесь к серверу по SSH из Ubuntu, то все будет выглядеть так, как будто вы открыли терминал в своей системе.
Как подключиться по SSH
Для подключения по SSH нам необходимо знать такие данные:
- ip адрес сервера, к которому мы собираемся подключится;
- порт, на котором ожидает подключения SSH сервер, по умолчанию используется 22, но в целях безопасности порт подключения ssh часто изменяют;
- имя и пароль пользователя на удаленном сервере.
Больше ничего не нужно, обычно эти данные присылают в письме вместе с описанием VPS. Теперь перейдем к практике.
1. Подключение через SSH в Linux
В Linux подключение по SSH выполняется с помощью утилиты ssh. Мы более подробно рассматривали работу с ней в статье как пользоваться ssh. Для подключения к удаленному компьютеру ее синтаксис будет выглядеть следующим образом:
$ ssh имя_пользователя @ айпи_адрес
Это самый простой вариант, если вам также нужно задать порт, используйте опцию -p:
$ ssh имя_пользователя @ айпи_адрес -p порт
Чтобы выполнить подключение по SSH Linux нажмите Ctrl+Alt+T для открытия терминала и наберите команду, заменив нужные значения:
Или, с нестандартным портом:
ssh sergiy@192.168.1.2 -p 2223
Если ip_адрес и порт правильные, то на следующем шаге программа попросит у вас ввести пароль:
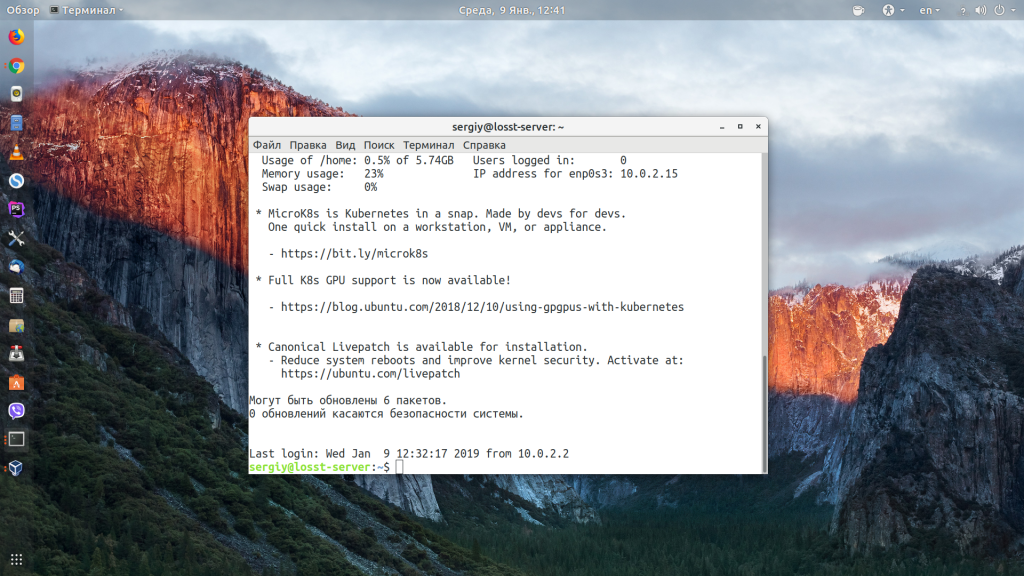
Если пытаетесь подключится через SSH к этому серверу первый раз, то утилита также попросит подтвердить добавление нового устройства в свой список известных устройств, здесь нужно набрать yes и нажать Enter:

Теперь вы подключены, и все вводимые далее команды будут выполнены на удаленном сервере:
Если же произошла ошибка и IP адрес или порт введены неверно, то вы получите ошибку Connection Refused:
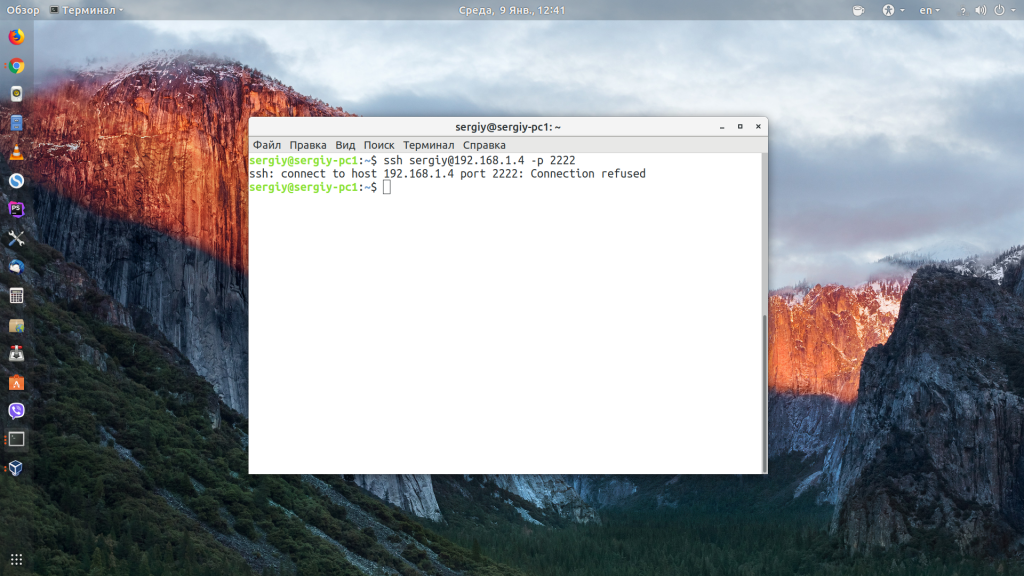
Просто убедитесь что порт введен верно. Если это ваш сервер, то, возможно на нем еще нужно разрешить подключение SSH в брандмауэре. В Ubuntu/Debian для этого на удаленном сервере выполните:
sudo ufw allow 22/tcp
А в CentOS/Fedora:
firewall-cmd —permanent —zone=public —add-port=22/tcp
Если вы используете другой порт для SSH, то замените 22 на свой порт. Для удобства подключения по SSH в дальнейшем можно настроить авторизацию по ключу ssh, чтобы не вводить каждый раз пароль.
Теперь вы знаете как подключиться по ssh linux и решить проблемы с подключением. А теперь перейдем к Windows.
2. Подключение через SSH в Windows
Раньше подключение по SSH из Windows выполнялось только с помощью сторонних утилит, например PuTTY. Но в Windows 10 был добавлен встроенный OpenSSH клиент и работает он точно так же, как и в Linux. По умолчанию этот компонент не активирован. Для его установки откройте Параметры -> Приложения:
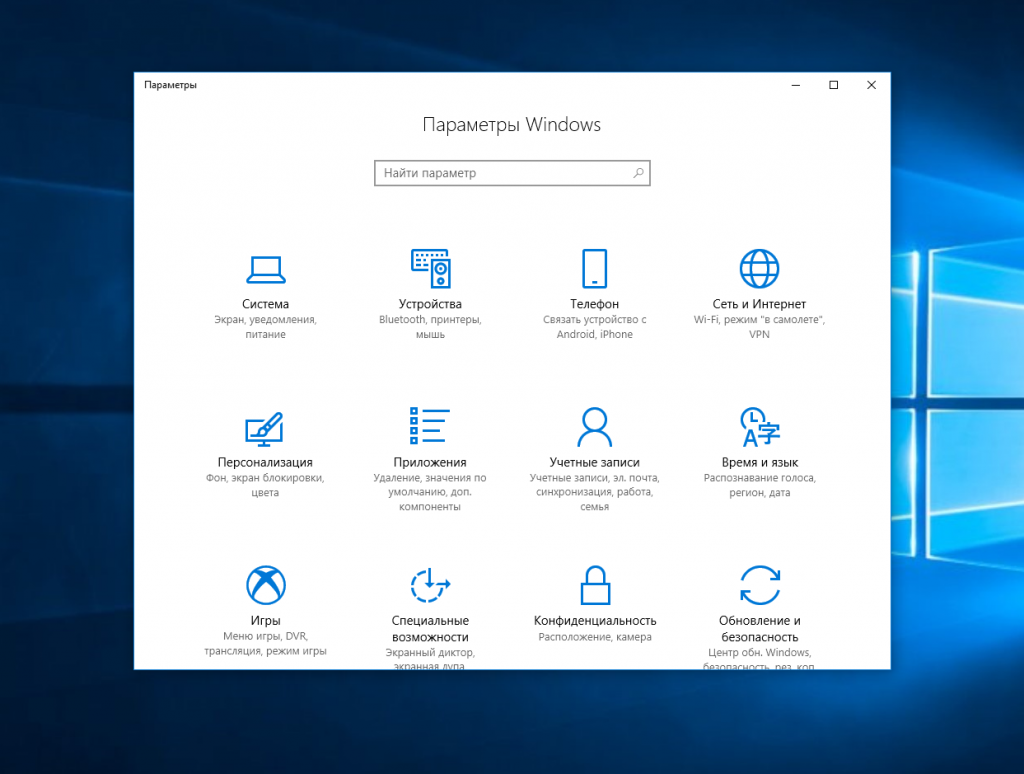

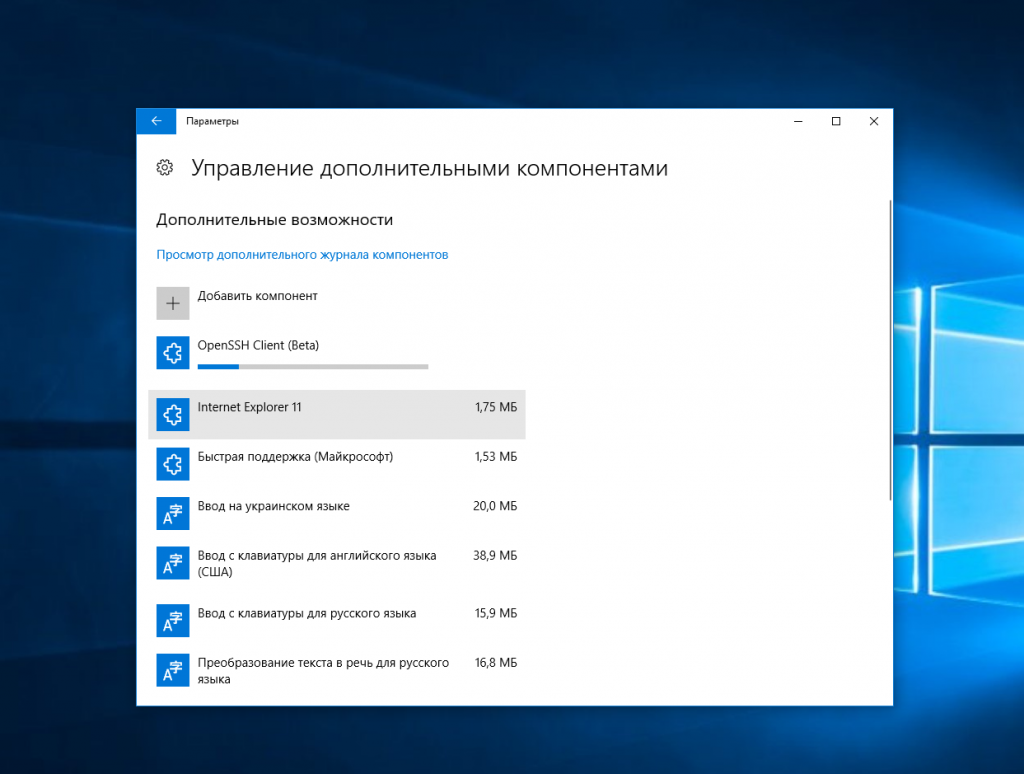
Затем выберите Управление дополнительными компонентами:
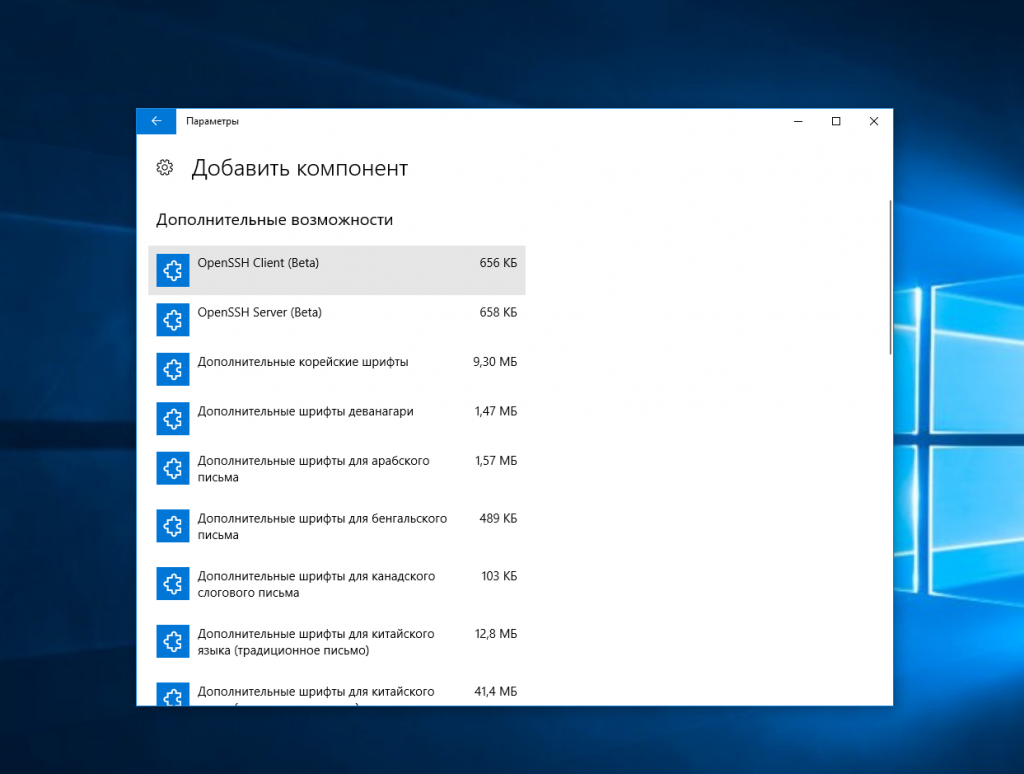
Здесь нажмите добавить новый компонент и в открывлемся меню выберите OpenSSH Client и нажмите Устанвоить:
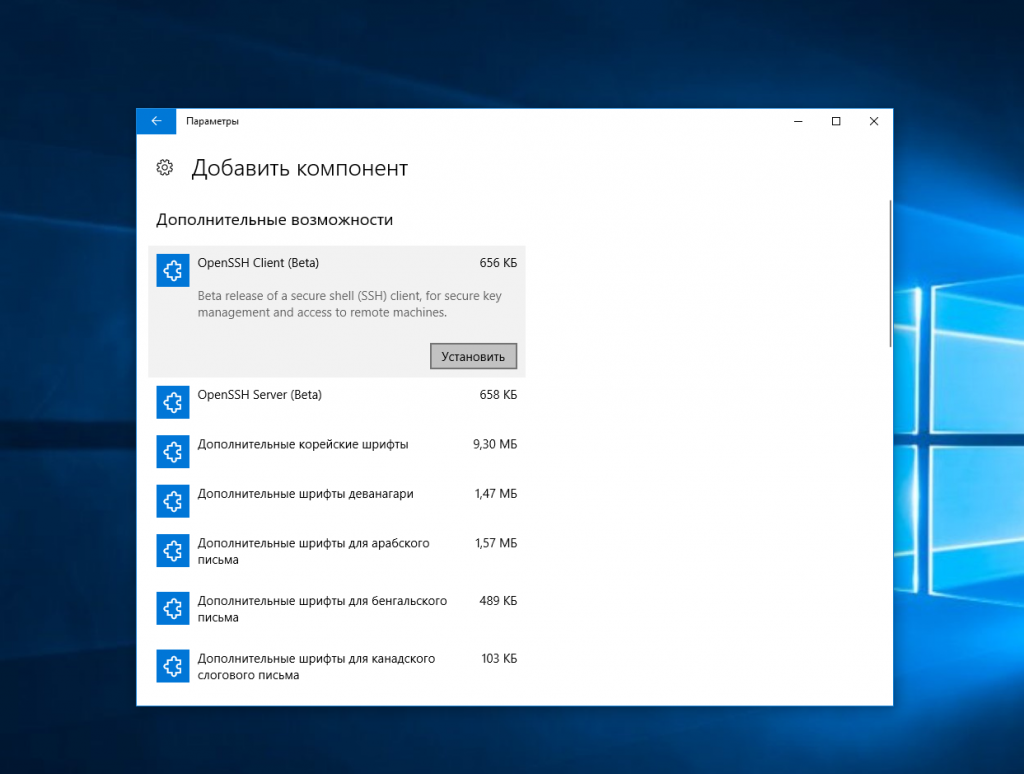
Дальше вернитесь назад и дождитесь завершения установки. После того, как SSH клиент будет установлен нужно обязательно перезагрузить компьютер.
После перезагрузки нажмите Win+R чтобы открыть окно запуска команд и наберите в нем cmd:
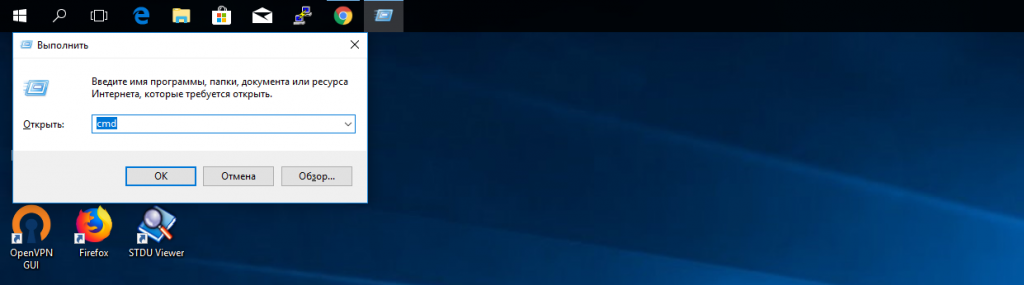
Далее нажмите Enter. Перед вами откроется командная строка Windows. Здесь можно использовать утилиту ssh. Синтаксис у нее абсолютно такой же, как и для Linux:
ssh имя_пользователя @ айпи_адрес -p порт
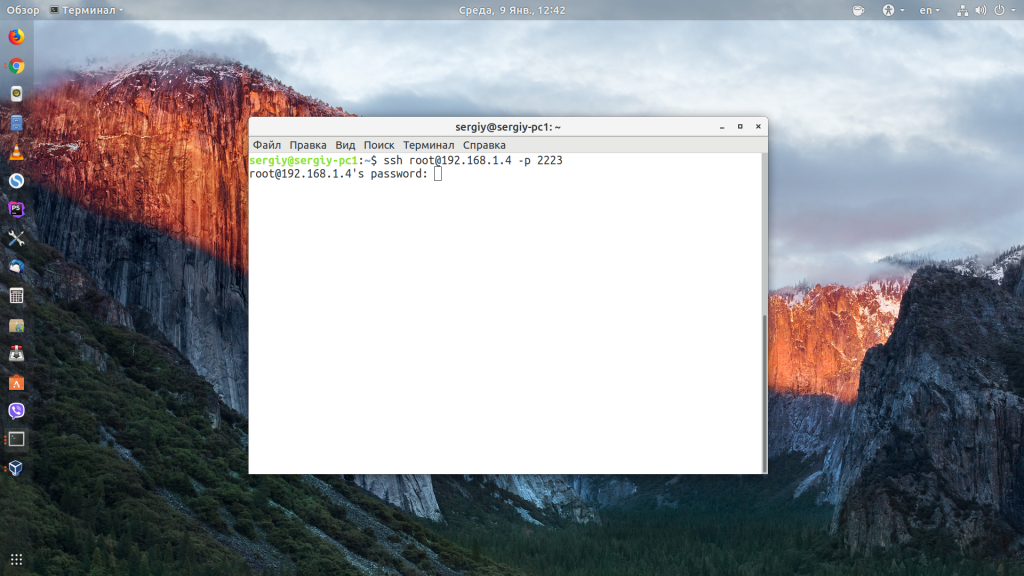
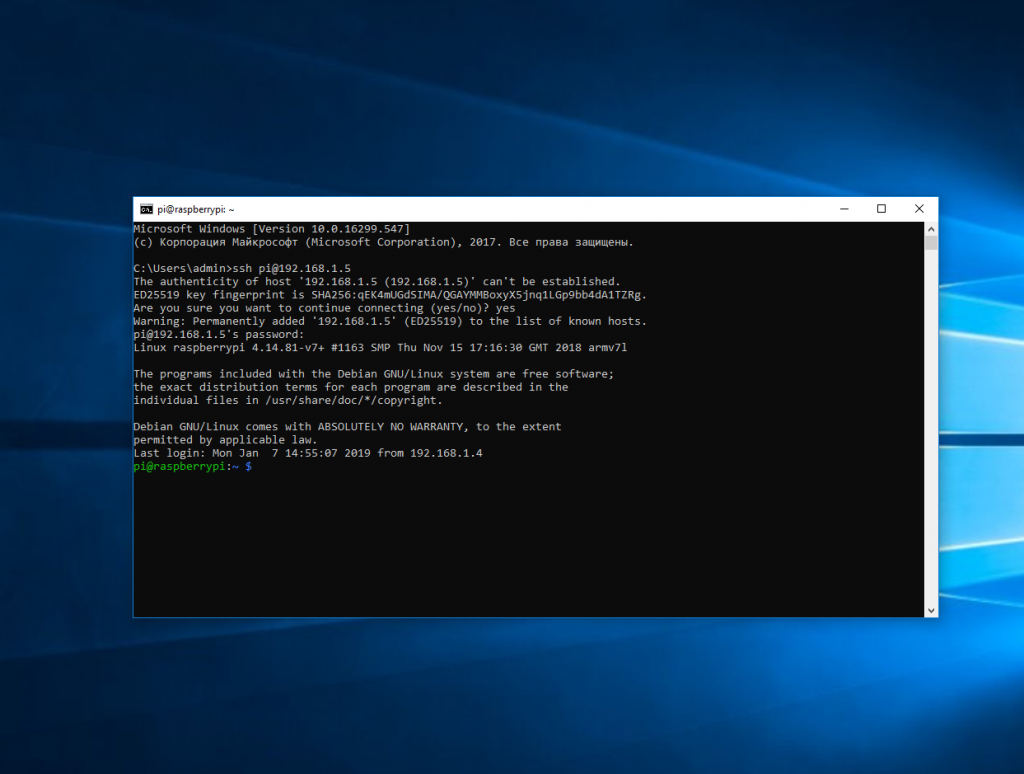
Например, такой командой можно подключится по SSH к Raspberry Pi, который находится в вашей локальной сети по адресу 192.168.1.5:
Утилита предложит добавить устройство в список известных:

Затем предложит ввести пароль:

Все следующие команды будут выполняться уже на Raspberry Pi или другой удаленной машине, к которой вы подключились.
Теперь подключиться к серверу по ssh из этой операционной системы также просто как и из Linux.
Выводы
В этой статье мы рассмотрели как выполняется подключение к серверу по SSH из Linux или Windows. Как видите, это очень просто. А дальше, для работы с удаленным сервером вам понадобятся команды терминала Linux.
Источник
Linux Mint SSH | How to Enable and Configure it Properly?
In Linux mint the ssh service is not enabled by default, you need to enable the service manually. In this blog, we are going to enable ssh service on the Linux mint and to secure the access we will go ahead and change the default port and also allow specific users to the ssh service.
What does SSH stand for in Linux?
SSH is known as a secure shell lets you access the remote Linux machines over a secure channel, it uses TCP port number 22 by default. Unlike telnet where the traffic between the client and server is not encrypted, in ssh, the packets are encrypted so no one can see what you are doing with the SSH.
This SSH protocol is not just used by Linux, there are plenty of network devices do use ssh to remotely manage the devices. In Linux, you can use the OpenSSH service to enable ssh access, more on that later.
Since we don’t have the ssh access enabled on the Linux mint by default, you will get an error message when you try to ssh into the host saying connection refused. As you can see below.
The error that you see ‘Connection refused’ means there is no port open on the host to let you connect, in our case it is port 22.
So let’s go ahead and install the ssh on the Linux mint host.
Steps to enable SSH access in Linux.
1. Install the OpenSSH service.
For the SSH access, we are going to install a service called the OpenSSH server.
Open terminal and type the below commands.
Sudo apt update
After a few seconds, the ssh service will be installed on your Linux mint host.
2. How do you check if SSH is enabled in Linux?
After the installation you can check the ssh service status is by typing service ssh status, it will show you whether the service is active or not.
You can also try to stop, start, or restart the services if you would like.
In our machine, you can see the ssh service is active and running.
Alternatively, you can also try the command systemctl status ssh or systemctl status sshd .
Similar to the previous command, it does show you the status of the service on your machine.
3. Enable ssh service on boot.
You need to enable the ssh service during the boot so that anytime when you reboot the machine you can still ssh into the machine after it is rebooted.
If you don’t enable this option, by default the ssh service will not be started at the boot, and at that time when you try to ssh into the Linux mint, you would get the error message that says connection refused, of course, you don’t have the ssh service running to access the device.
To enable the ssh service at start enter the command sudo systemctl enable ssh .
4. Verify the SSH service.
Alright, we have successfully installed the ssh service on your Linux mint machine, lets try to ssh the machine to verify whether it is working or not.
There are two ways you can do this test, first from local machine and second is remote ssh access.
Verify SSH locally.
To access the ssh service locally on the machine, on the local machine terminal type ssh [email protected]
As you can see, you can ssh and it is prompting to enter the credentials, after I authenticated I can log in. Which is good.
Note: This test also can be performed when you are not able to ssh from the remote and if you can ssh locally which means the service is working as expected but there seems to be some issue with port 22 not been allowed on the network.
Verify the SSH access remotely.
We just verified the ssh access locally on the machine, let’s try to ssh into the machine from the remote.
In this scenario, I have a windows box with mobaxterm installed, and I am going to ssh into that.
The First error that you see is before the ssh installation, after the installation you can see that it is authenticated successfully.
Did you notice that I didn’t have to enter the credentials to login?
That’s because I already had another Ubuntu machine with the same Ip address accessed from the same mobaxterm hence the credentials are cached.
Mobaxterm is just an ssh client, and you can try an alternate ssh client if you want to for example putty, SecureCRT, Tera term, and so on.
5. Verify the SCP access.
Though this step is not mandatory, it is essential if you wanted to transfer some files from your local machine to a remote host (Linux Mint) and vice versa.
After enabling the SSH access, you should be able to access the files over SFTP.
I am using WinSCP software for this here, you can try FileZilla for this purpose as well.
Open Winscp, and in the hostname, you may enter the IP address of the machine and its username and password.
As you can see, after you entered the credentials the WinSCP is authenticated and you can access the Linux mint folders from the windows host machine.
At this point you should be good to go with respect to accessing the remote host remotely over SSH. You can follow the further steps, if you would like to add more security to the SSH access.
6. Enable security.
To enable security to the ssh service you have multiple options.
- how to change ssh port in Linux mint?
- how to allow specific users in ssh?
how to change ssh port in Linux mint?
By default ssh use port number 22, to enable the ssh on a different port number you can go to the file /etc/ssh/sshd_config and uncomment the part that says, port 22 and mention the port number that you like.
Change the port number to whatever port that you wanted to choose, there are well know port numbers from 0 to 1023, it is recommended to choose port numbers outside that range.
For example, I am going to use port number 2200 on the ssh configuration file.
I opened the file, and changed the port number from 22 to 2200, and saved the file.
For the changes to take place you need to go ahead and restart the ssh service.
So restart the ssh service by typing the command
sudo service ssh restart
Enter the system password
After the ssh service has restarted, you can try ssh into the machine just like you tried last time.
As you can see, it says connection failed which used to work before this change. So how do I access the system now over the ssh?
You need to specify the port number whenever you would like to ssh into the device.
To specify the different port number you can add -p.
For example ssh [email protected] -p 2200 .
As you can see, I am now able to access the remote host on ssh port number 2200.
how to allow specific users in ssh?
If you want to allow only specific users can log in to the system, you can add those users to the ssh configuration file.
Access the sudo nano /etc/ssh/sshd_config and add the line AllowUsers username .
For example, I added a user called user1 to the ssh and restarted the ssh service.
Note: To add more users, you can type the same AllowUsers and add the username.
Try to access the system now using the old ssh username.
As you can see, I used to be able to access the Linux mint host using the username saif, however, when I try to access it now, it prompted me for the password, and then permission was denied.
Источник


