- What Are Network Credentials in Windows 10
- What Are Network Credentials in Windows 10?
- Extra Tips: How to Fix “Enter Network Credentials Username and Password Incorrect” Error in Windows 10?
- Top 4 Ways to Fix Enter Network Credentials Problems on Windows 10
- Solution 1: Change Advanced Sharing Settings
- Solution 2: Add a Windows Credential in Credentials Manager
- How to Reset Windows 10/8/7 Password Easily
- Solution 3: Check Whether the IP Address are Properly Assigned
- Solution 4: Modify Local Group Policy
- Fix Enter Network Credentials Access Error in Windows 10
- Fix-1 Changing Windows Credentials
- Fix-2 Changing your IP configuration
- Fix-3 Turning off Password Protected sharing-
- Fix-4 Disable particular Security policy from Local Security Policy-
- Fix 5- Disable Credential Manager automatic Startup
- Fix 6 – Use your Windows 10 Credentials
- Fix 7 – Try Computer Name and account name as the Username-
- Fix 8 – Change your Network Profile to Private-
What Are Network Credentials in Windows 10
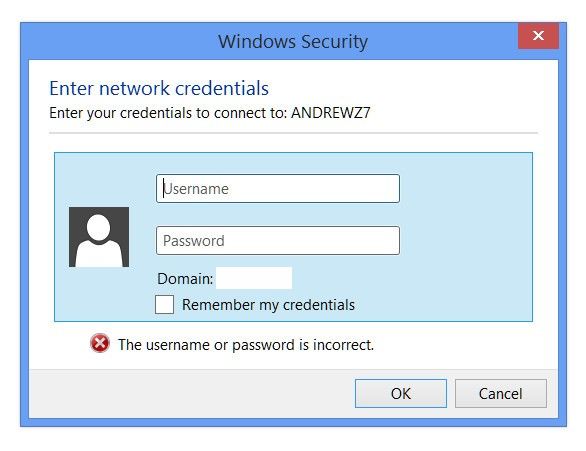
“What is the ‘enter network credentials’ pop up while sharing files between two Windows 10 PCs via Wi-Fi network? I have a laptop and desktop both connected to my Wi-Fi router. Now when I try to access my laptop from my desktop and vice versa in the Network option I’m asked for some username and password. What’s that username and password and where will I get those?”
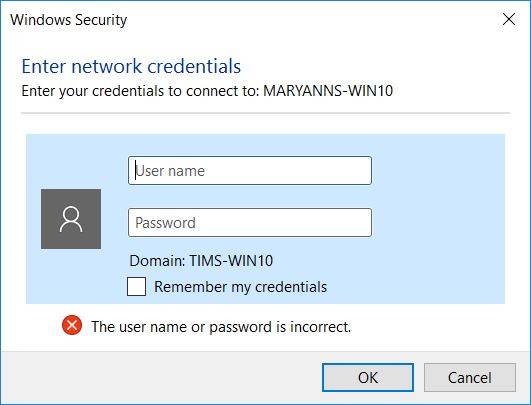
From the above quote description, the asker raises a subject, which is what network credentials are in Windows 10. On the Network Credentials screen, you need to type the user name, password, and sometimes, even the user domain of the user account you would like to use for this operation. Some Windows users may be lack of knowledge about Network Credentials in Windows 10 computer. Consequently, we will tell you what they are in the following content.
What Are Network Credentials in Windows 10?
In Windows 10, it is impossible to access shared resources on the network without entering a valid username and password. Suppose that everyone can access other person’s computer and visit data with a blank password, then it will cause severe issues, nobody could protect their personal privacy. To prevent things getting worse, the “password protected sharing” is enabled by default when a user attempts to share data. The other person who would like to visit them will need to type the username and password in the “Enter Network Credentials” screen.
Network Credentials are the account and password that stored in local host in order to visit network resource. This is to validate that the correct person and service are sending data to the right receiver’s device. And usually, you can’t remove this password from Windows 10.
It should be the login credentials of the machine on which you are accessing the folder/data. If the sender is prepared to share some folders or driver and set the appropriate permissions by using username and password, then the receiver should use the same username and password to login into that particular computer.
If you have a local network in Windows 10, it is likely that you are willing to share files between different PCs. For the sake of protecting your computer from unauthorized access, there are network credentials, which is a satisfactory protection.
Extra Tips: How to Fix “Enter Network Credentials Username and Password Incorrect” Error in Windows 10?
Sometimes you have no idea about the username and password; sometimes you know the password but Windows 10 prompts it is incorrect. Here are the possible scenarios to fix “Username and password is incorrect” error in the “Enter Network Credentials” of Windows 10.
- Way 1. Type Microsoft Account and Password
If you use Microsoft account to login Windows 10, try to use it to access other network devices in your local network, instead of local account username and password.
Way 2. Type Computer Name in the Username Field
Another attempt is to press your computer name follow by the username in the username input filed. For example, if the computer name is A and the username is B, you may enter both of them. Here your username is A\B. Take note that there is no slashed before A.
Way 3. Stop PIN Code in Windows 10
If you have no way to login other network computers because there is no username and password, such as login Windows 10 with PIN code, try to stop using PIN code provisionally and then try again to access the network credentials.
Way 4. Check if your IP address are properly assigned
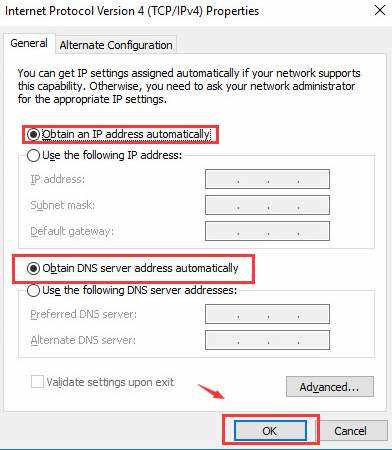
If your IP address is set to automatic, try to change it to static because the former may cause to issues with network credentials. Just to right-click network icon in the right side of your computer, then choose “Open Network and Sharing Center”. Navigate to: Ethernet -> Properties -> Internet Protocol Version 4(TCP/IPv4) -> Properties -> Obtain an IP address automatically -> Obtain DNS server address automatically -> OK.
Way 5. Change Advanced Sharing Settings
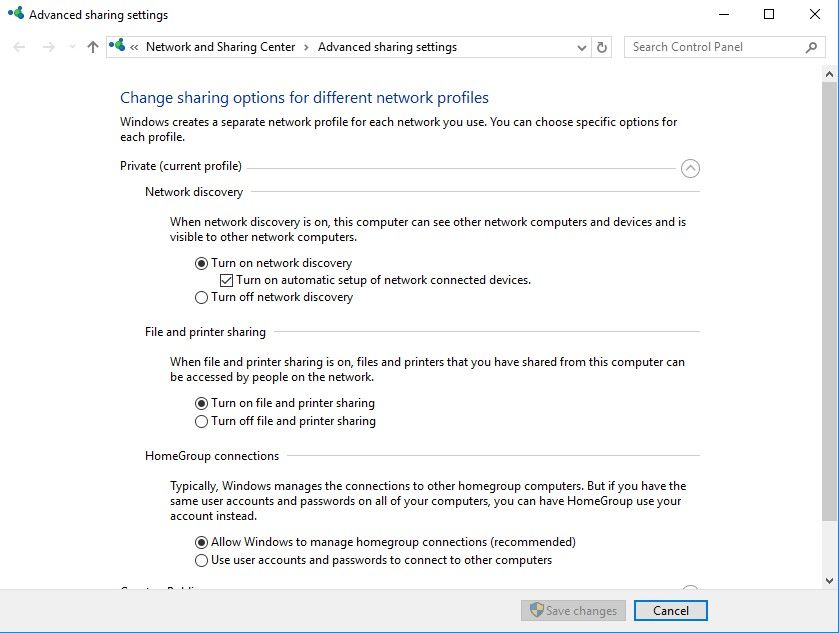
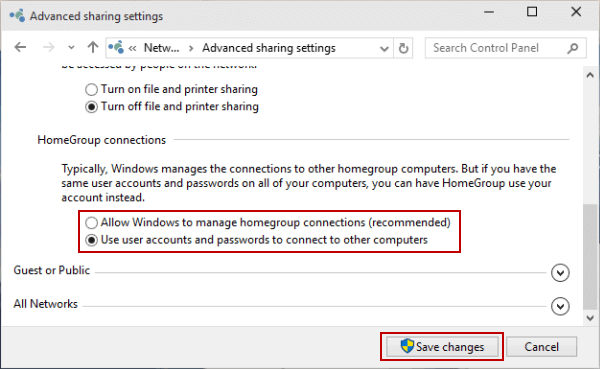
Search “advanced sharing setting” in the search option on Windows 10 desktop, which is close to Start button. Then you will be navigated to “Advanced sharing settings” window, just click “Allow Windows to manage homegroup connections(recommended)” in the HomeGroup connections option and then click “Save changes” button.
Way 6. Increase New Network Credential to Credential Manager
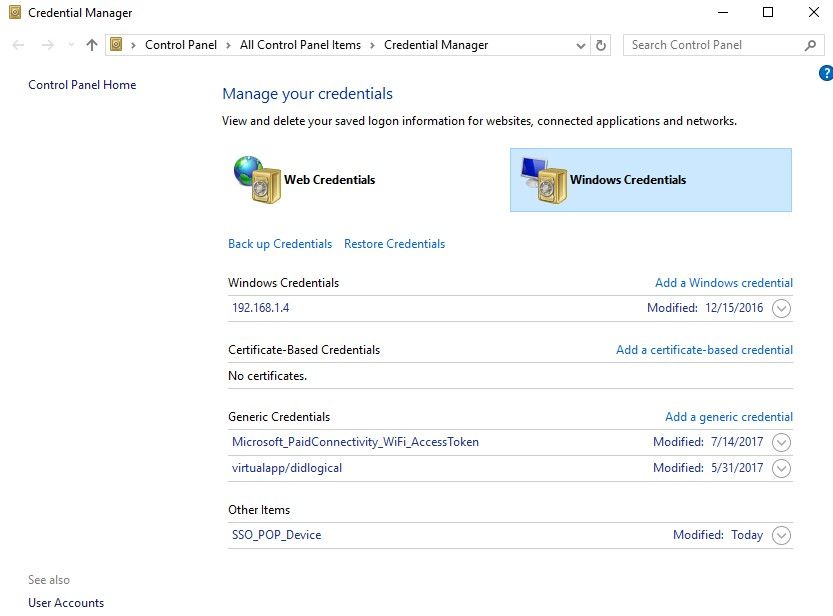
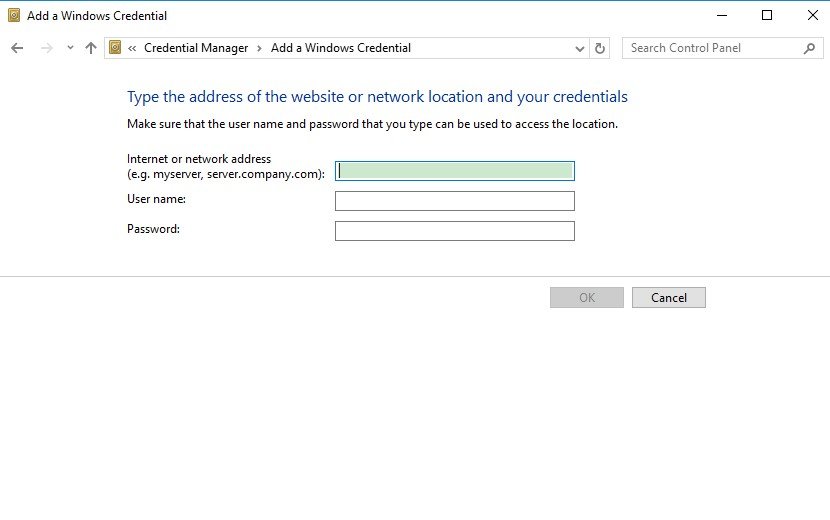
You can also increase other computer’s credential to Credential Manager. In this way, you have to get the computer’s name, the username and password united with that account. Then you can begin the change. To get started, search “credentials” and then type “Credential Manger” to access the window. Tap on “Windows Credentials” and then hit “Add a Windows credential”. In the new window, type the computer name, user name and password and finally click “OK” button.
That’s all about network credential in Windows 10 and how to fix network credential incorrect user name and password error! It won’t ask you to enter network credentials in Windows 10 then after. I hope these help someone one day so they can avoid the frustration issue with wrong username and password. By the way, if you lose login account password in Windows 10, Windows Password Key is the best tool to remove/reset/unlock it.
Top 4 Ways to Fix Enter Network Credentials Problems on Windows 10
Windows Security will ask you to enter network credentials when access network drives to share files between computers or connect to remote desktop. This is because of Microsoft’s policy to protect Windows 10 computers, but we’ve heard from users that when they enter network credentials the username or password is incorrect, or saying the credentials used to connect server IP does not work. If you are in this case, don’t freak out. Here we will provide you with 4 ways available to fix Windows 10 keeps asking for network credentials.
Solution 1: Change Advanced Sharing Settings
The problem you can’t enter network credentials on Windows 10 may result from the fact that some sharing settings are not enabled on your PC. So let’s do a simple check before taking further steps.
1. Type Network and Sharing Center in the search box to view your network information and connection settings.
2. Choose Change advanced sharing settings from the left side of the panel. Scroll down Private section to change sharing options.
3. Locate HomeGroup connections to see if you have enabled the option to Allow Windows to Manage homegroup connections. If not, please kindly select it.
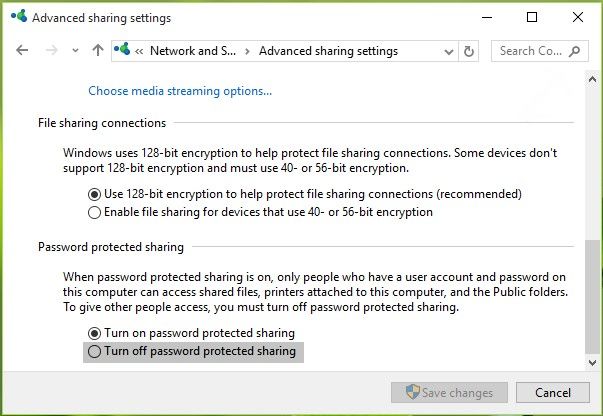
4. Now move to All Networks section and find Password protected sharing from the sub menu. Make sure you Turn off password protected sharing. Then click Save changes to execute what you have changed for network connection.
Solution 2: Add a Windows Credential in Credentials Manager
If you still have enter network credentials access error on Windows 10, you can manually add a credential of the computer you want to access. To do this:
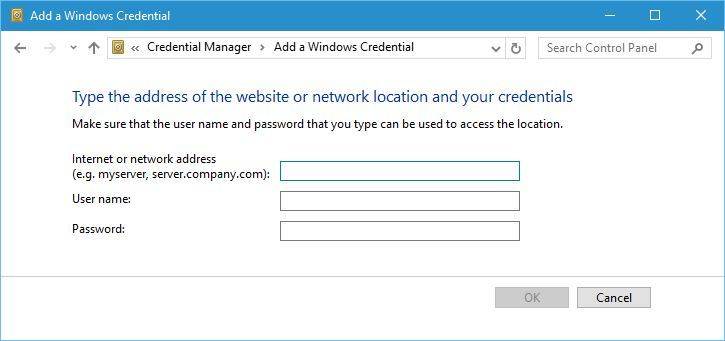
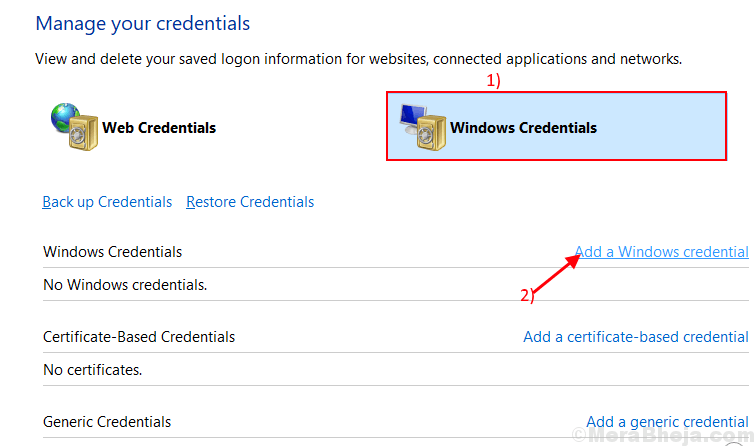
1. Type Manage Windows Credentials on search box and hit it to open Credential Manager. Make sure that Windows Credentials is highlighted on the interface and then choose Add a Windows credential below.

2. Enter to Server IP address you would like to access to. Fill in the User name and Password with the same as other computer’s local username and password.
Tip: Some Windows 10 users also replied that you can use Microsoft account username and password instead of local accounts when enter network credentials to connect to another PC. It sometimes doesn’t work, but there is no harm to try it. If you have your Windows 10 computer locked and forgot the password of either the Microsoft account or the local account, you are recommend to try the Windows Password Key to remove or reset your password.
How to Reset Windows 10/8/7 Password Easily
Solution 3: Check Whether the IP Address are Properly Assigned
If you have not set your computer IP address to static, it can works fine in a local network but sometimes may cause issues when the network server changes, such as Windows 10 network credentials access is denied, so you are suggested to use a fixed IP.
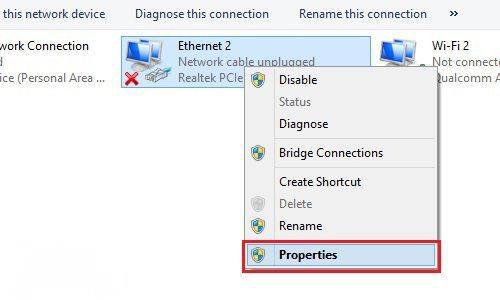
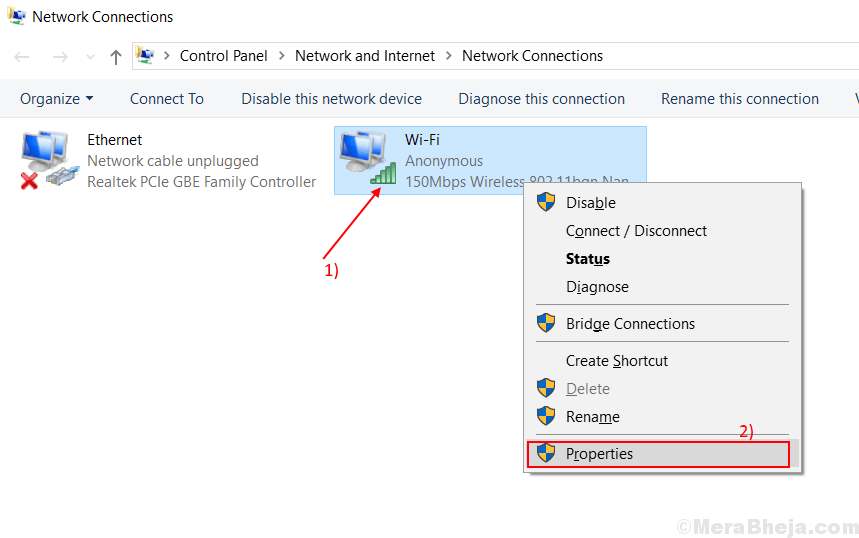
1. Press Windows + X at the same time and choose Network Connections. Right click network connect and choose select Properties.
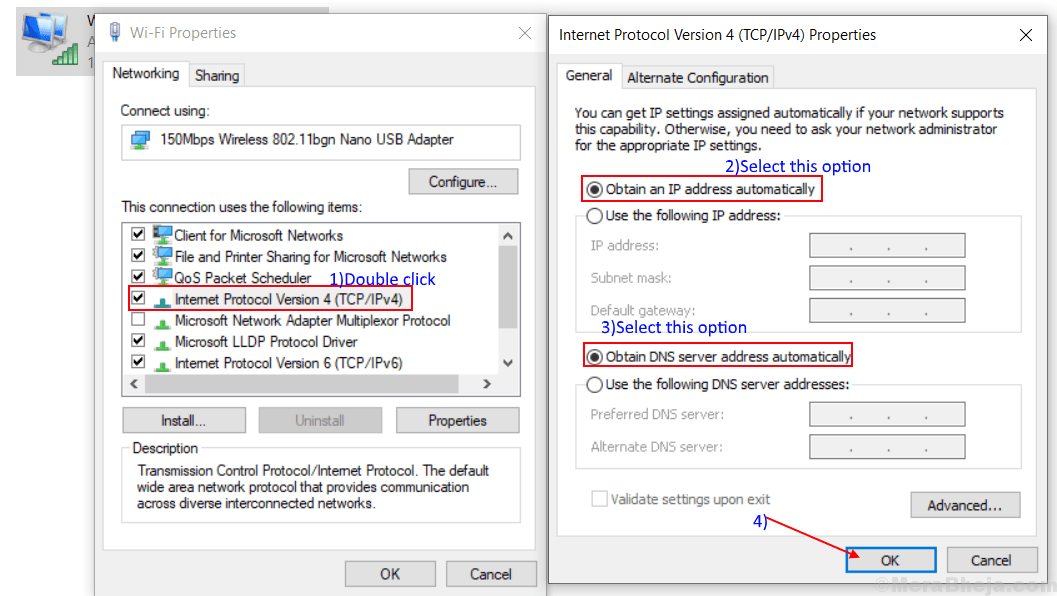
2. Make sure the Internet Protocol Version 4 (TCP/IPv4) is selected and then click Properties below.
![]()
3. Choose Obtain an IP address automatically and Obtain DNS server address automatically both to get IP address assigned.

Solution 4: Modify Local Group Policy
One last choice to solve Windows 10 network credentials not working or Windows 10 doesn’t remember network credentials even if you have preserved the password is to edit the Local Group policy.
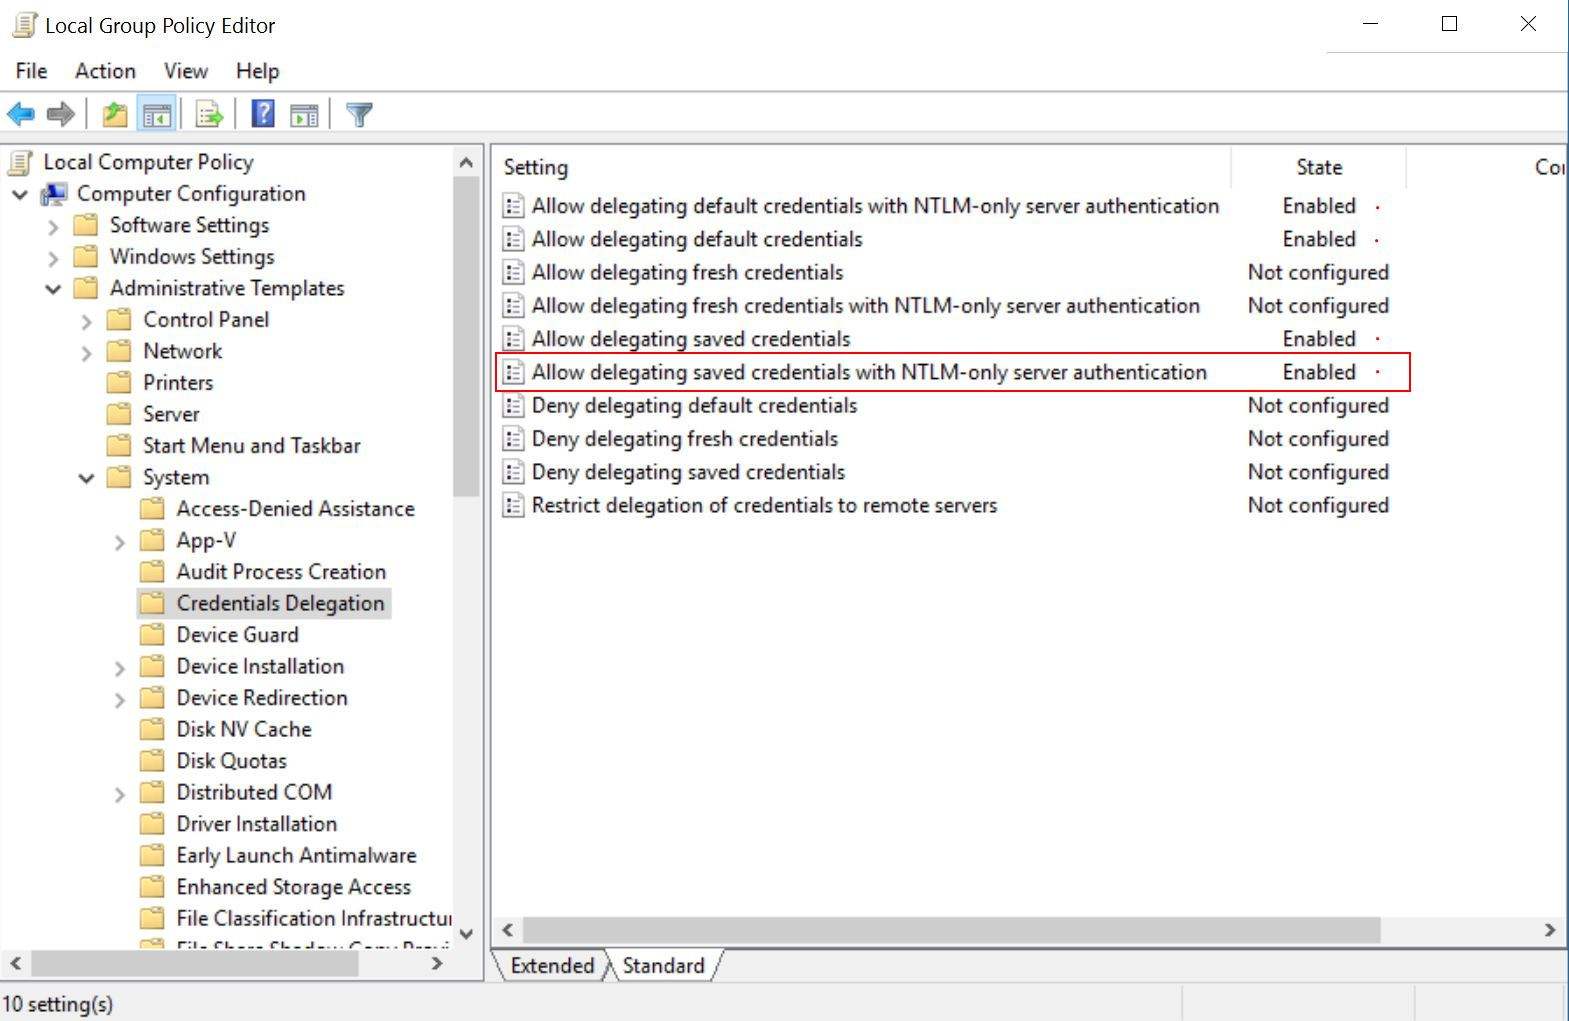
1. Press Win + R and enter gpedit.msc. Go to Computer Configuration > Administrative Templates > System > Credentials Delegation and choose Allow delegating saved credentials with NTLM-only server authentication.
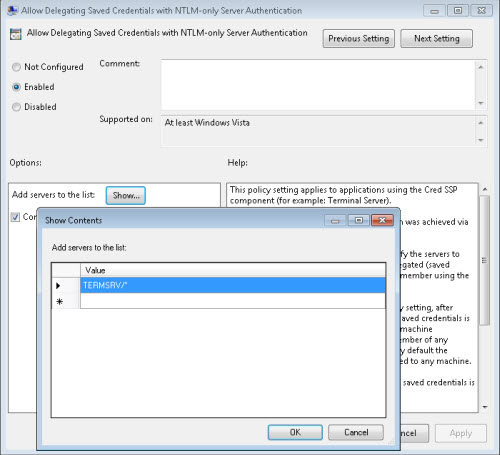
2. Click Enabled and Show and enter TERMSRV/*. Then exit Local Group Policy.
3. Now press Win + R again and enter gpupdate /force to force update policy.
That’s all about how to deal with enter network credentials not working when Windows 10 accessing network drive. You may need to try one or even more until this issue gets solved. Share with your friends or families with similar problems if this post is helpful.
Fix Enter Network Credentials Access Error in Windows 10
August 3, 2020 By Sambit Koley
If you have more than one personal computer on same network, file sharing between computers is very easy for you. Now, if you want to use this feature you have to enter certain Network credentials (which protects the files of the computer from falling in wrong hand). But some of the Windows 10 users are reporting to have an issue as they are facing ‘Enter Network Credentials Access Error‘ when they are trying to access the files on another computer on the same network.
Now, the reason behind this error can be simply wrong username or wrong password or it may be an ip mismatch. Here are working solutions to fix this problem straightaway.
Fix-1 Changing Windows Credentials
Credential Manager is a control panel utility that manages your logon information for websites, networks. Adding the Network name/address, username and password can solve the problem. Follow these steps to add network name/address, username, and password-
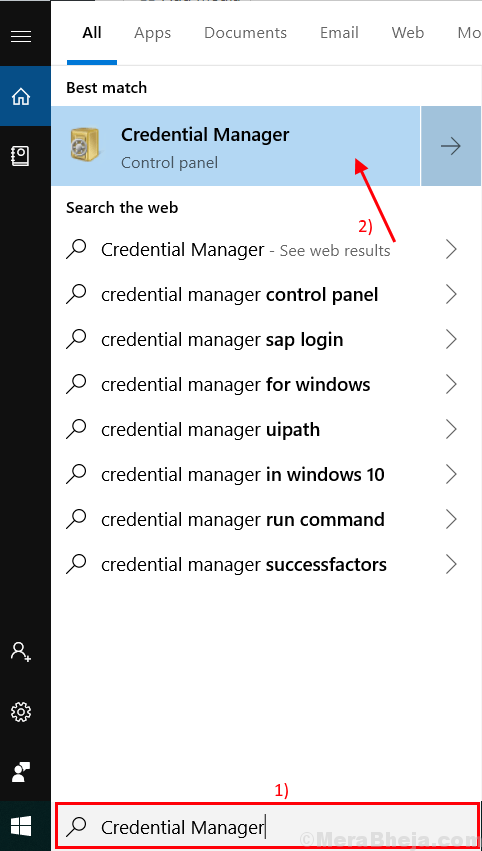
1. Click on the search box just beside the ‘Windows button‘, and type “Credential Manager” and click on Credential Manager.
Credential Manager window will open.
2. Click on “Windows Credentials” and then click on “Add a Windows credential“.
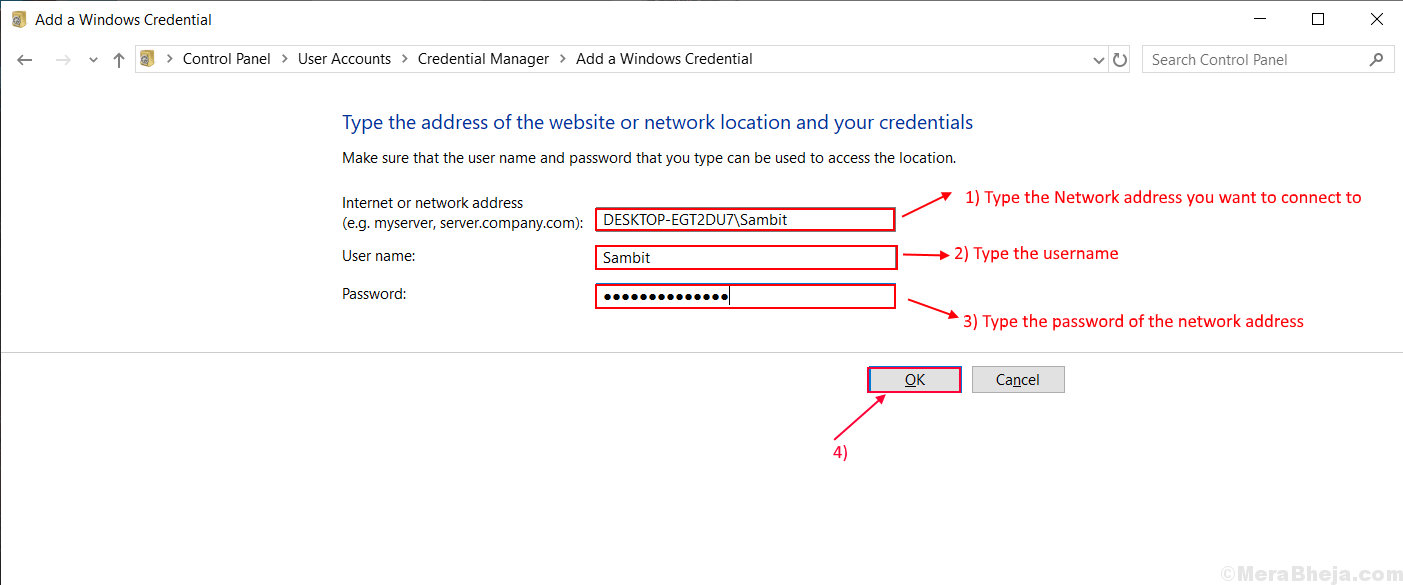
3. Now, type the Network address you want to connect to in the box beside the “Internet or network address (e.g. myserver, server.company.com):“.
4. Just under that option, type the Username of the network you are trying to access in the box beside “Username:”.
5. Type the password of the network address in the box beside “Password:“.
6. Don’t forget to click on “OK“.
Close the Credential Manager window.
Restart your computer. Now try to access the network again. If the error is still there go for the next fix.
Fix-2 Changing your IP configuration
IP or Internet Protocol is a set of instructions which is followed by interconnected network devices. Now, if the IP is not configured properly then you can face ‘Network Credential Access Error’ when you are trying to access other computers on the same network. Follow these steps to configure your IP setting-
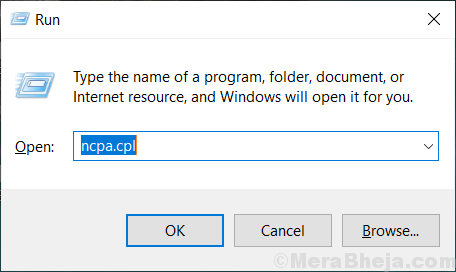
1. Press Windows Key+R to launch the Run window. Then, type “ncpa.cpl” in that Run window and press Enter.
Network Connections window will open.
2. In the Network Connections window, right-click on the network connection you are using and click on “Properties“.
3. Look for the option “Internet Protocol Version 4 (TCP/IPv4)“.
4. Double click on that option which will open the “Internet Protocol Version 4 (TCP/IPv4) Properties” tab.
5. Now, click on “Obtain an IP address automatically” and then click on “Obtain DNS server address automatically“.
6. Finally, click on “OK” to save the changes.
Restart your computer. After rebooting your computer try to reconnect with the network. If you are still having the same problem go for the next fix.
Fix-3 Turning off Password Protected sharing-
Sharing, accessing, or transferring the files from another computer to your computer on the same network requires a password. Turning “Password protected sharing” OFF can solve the ‘Network Credential Access Error’. But before moving ahead to the steps of the process, let’s be clear that Password protected sharing is the safest way to transfer your files or to access the network. Removing password protection can make your computer vulnerable to other users on the same network. Follow these steps to turn off “Password protected sharing” –
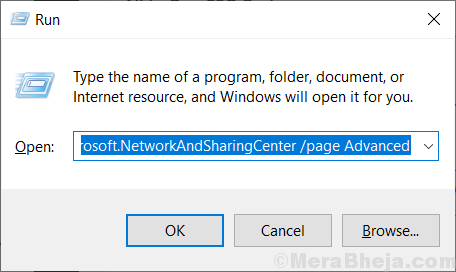
1. Press Windows key +R to open Run.
2. Then, copy-paste this line “control.exe /name Microsoft.NetworkAndSharingCenter /page Advanced” and hit Enter. Advanced Sharing settings window will open.
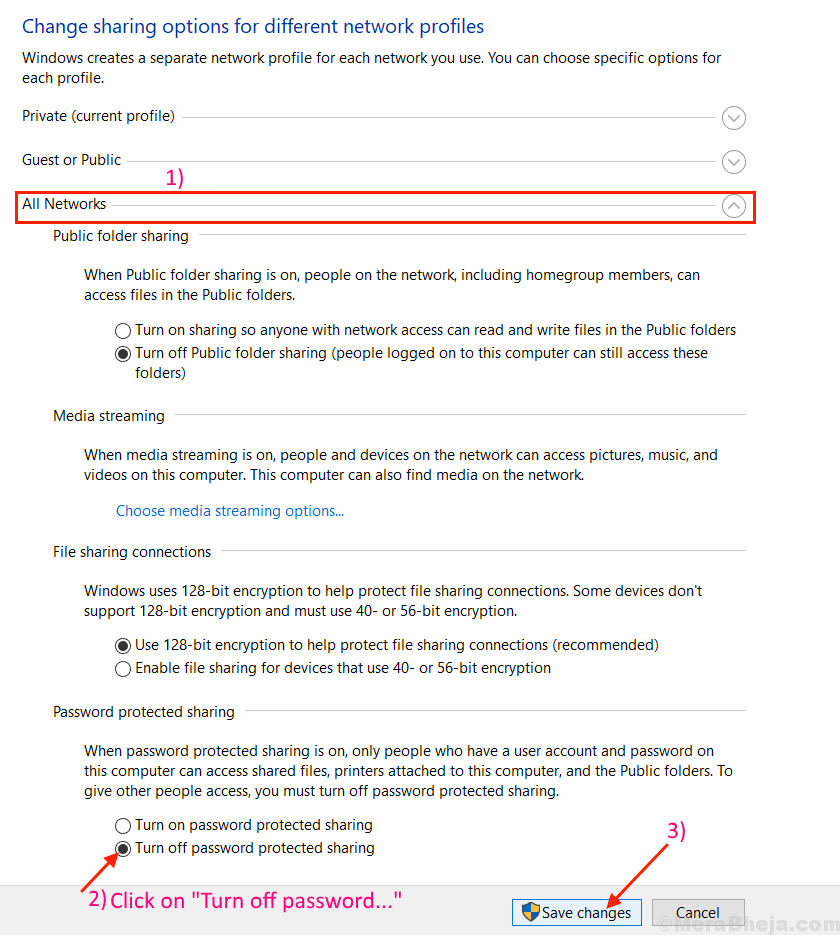
3. In the Advanced Sharing settings window, click on “All Networks“.
4. Under “Password Protected Sharing” option, select “Turn off password protected sharing“.
5. Click on “Save Changes“.
Close Advanced Sharing settings tab. Restart your computer and try to reconnect. If the issue still persists go for the next fix.
Fix-4 Disable particular Security policy from Local Security Policy-
Sometimes some security policies can affect your access to the network which can cause the error ‘Network Credential Access Error’. You can disable the particular policy which you are hampering access. Follow these next steps-
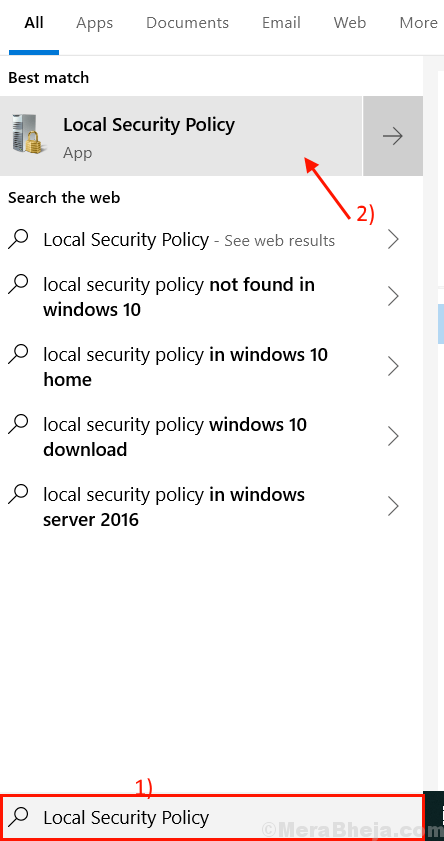
1. Click on the search box just beside the ‘Windows button‘, and type “Local Security Policy” and click on Local Security Policy.
It will open the Local Security Policy window.
2. Click on “Local Policies” and then expand “Security Options” on the left pane.
3. After that double click on “Accounts: Limit local account use of blank passwords to console logon only” on the right pane.
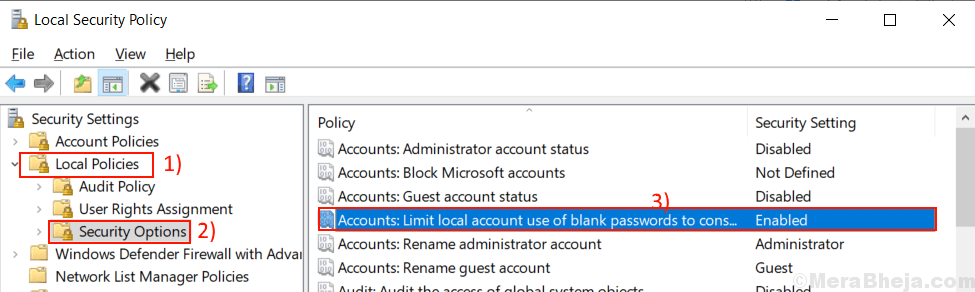
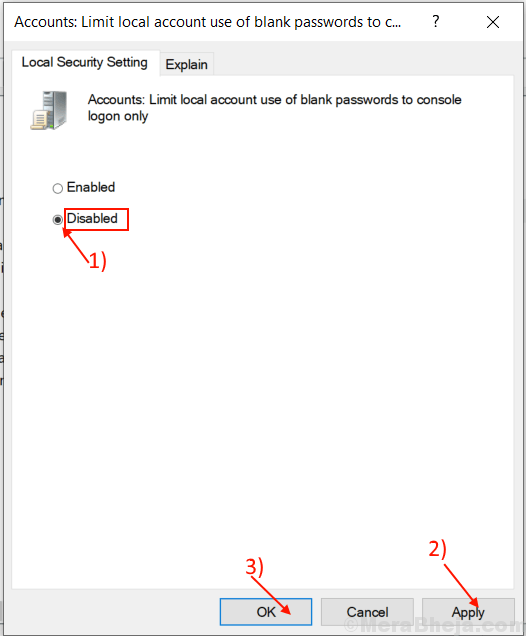
5. Select “Disabled” and then click on “Apply” and “OK“. Close ‘Local Security Policy‘.
Restart the computer. Try to connect with the network again. If the error is still there, go for the next fix.
Fix 5- Disable Credential Manager automatic Startup
You can disable Credential Manager Service from Services window. It may solve the error. To disable Credential Manager Service follow these steps-
1. To open Run instance, press Windows key+ R from the keyboard.
2. Then, type “services.msc” and hit Enter from your keyboard.

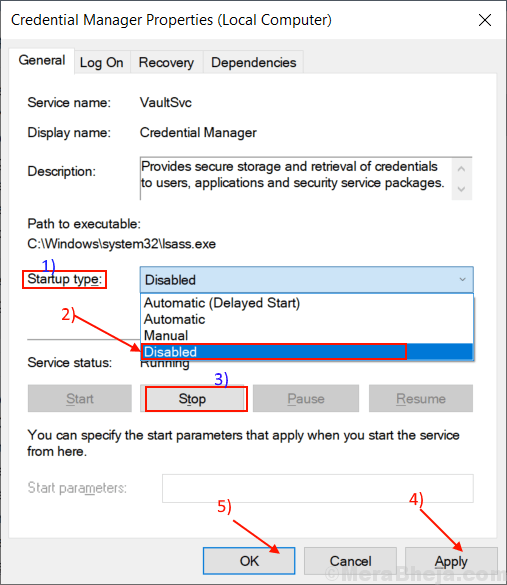
2. Now, look for the “Credential Manager” service. Double click on “Credential Manager“.
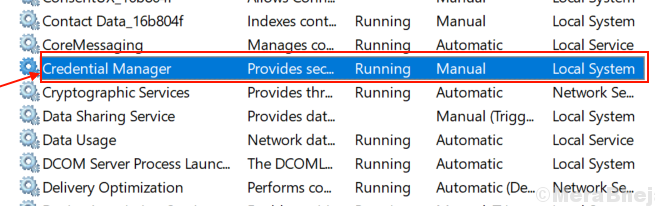
3. Click on “Startup type:” and select “Disabled” from the drop-down and then you have to click on “Stop“.
4. After that, click on “Apply” and “OK“.
Close the ‘Services‘ window.
Restart your computer. Try to connect with the network again, you will be able to connect with the network. If you can’t then go for the next fix.
Fix 6 – Use your Windows 10 Credentials
Try to use your username and password (which you use at the time of login) to access the network. It may solve the problem. Though if you are using PIN or Windows Hello to log in to the computer, you have to have a password with which you have logged in to the system. Type the account name you are using as the Username, and type your password in the Password box. This will solve your problem.
If the problem is still present, go for the next fix.
Fix 7 – Try Computer Name and account name as the Username-
Use the Computer name and account name in the same field of Username. This process can help you to remove ‘ ‘Enter Network Credentials Access Error‘. Let’s take an example to understand the point.
Suppose you want to access another computer with a computer name– Comp7, and suppose the account name on that computer is ‘Sam81‘. So, you have to write the Computer name and account name without any space in the middle as the Username. Then you have the type the password of that computer.
So, the Username- Comp7Sam81
Try to access the network again. If the problem is still there then go for the next fix.
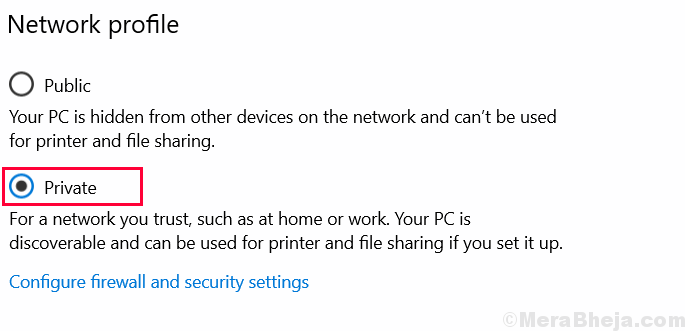
Fix 8 – Change your Network Profile to Private-
Windows prevents the access of another network from your computer or vice-versa if your network profile is set as ‘Public.’ Setting it to the ‘Private‘ will help as Windows will allow access to the network. Before going for these steps make sure you are not using any “Public” internet connection such as Hotel or Airport WiFi, which can make your files vulnerable.
Follow these steps to change your network profile to ‘Private‘
1. Click on Windows Icon in the Taskbar, and click on ‘Settings‘ in the lower-left corner.
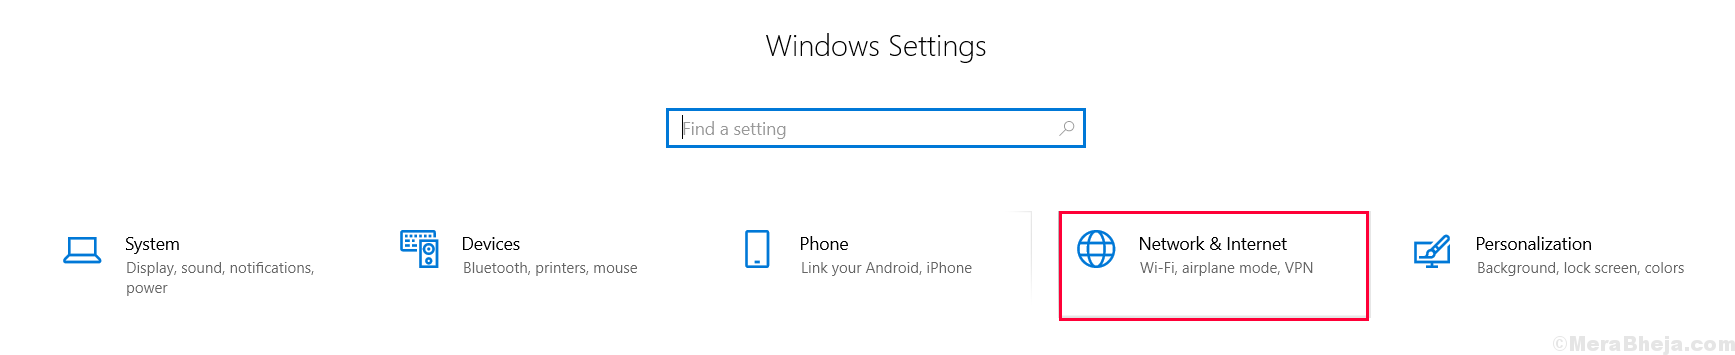
2. In the Windows Settings, click on the “Network & Internet” option.
3. In this window, click on “Change connection properties“.
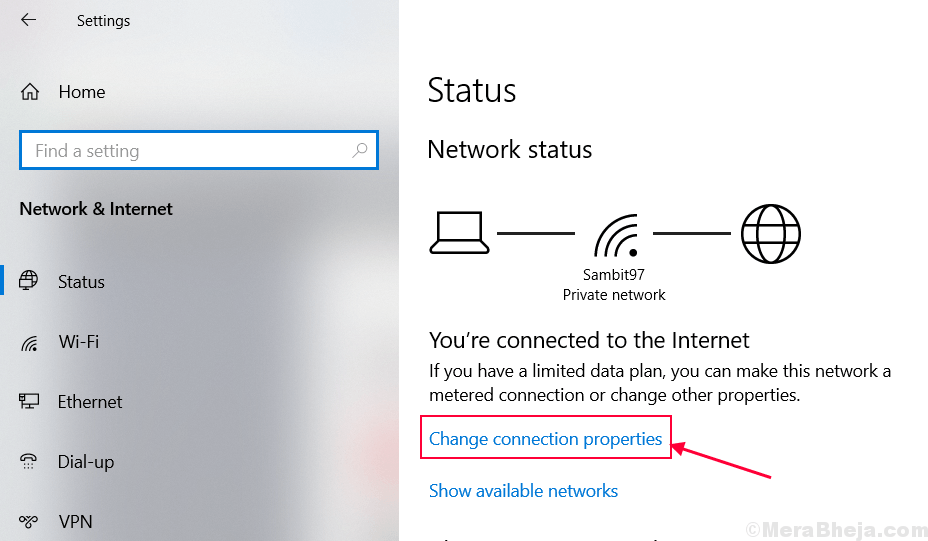
4. Now in this window, under Network profile, click on “Private“. This will set your network profile as “Private“. Close Settings window.
Try to reconnect your computer again with the network. Your problem should be solved.

Sambit is a Mechanical Engineer By qualification who loves to write about Windows 10 and solutions to weirdest possible problems.


