- Скачать драйвер для ESP32 (CP2102)
- Установка драйвера для CP2102 в Windows
- Проверка работы драйвера для ESP32
- USB to UART драйвер CP210x для ESP32
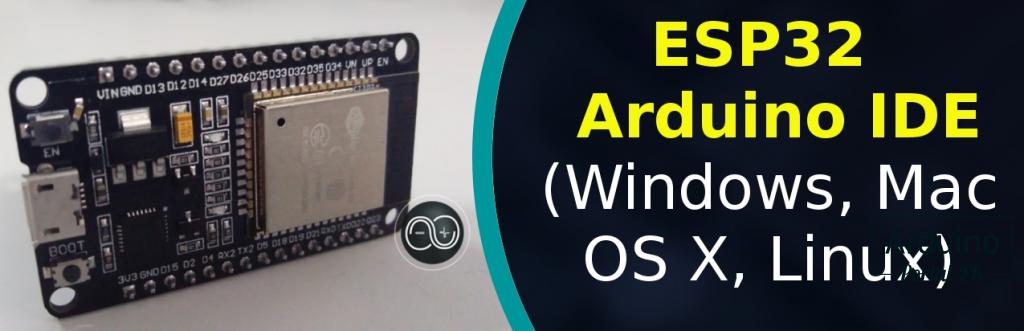
- Установка, прошивка платы ESP32 в Arduino IDE (Windows, Mac OS X, Linux)
- Подписывайтесь на наш канал на Youtube и вступайте в группы в Вконтакте и Facebook.
- Всем Пока-Пока. И до встречи в следующей статье.
- Esp32 драйвер для windows 10 x64
- About
- Esp32 драйвер для windows 10 x64
Скачать драйвер для ESP32 (CP2102)
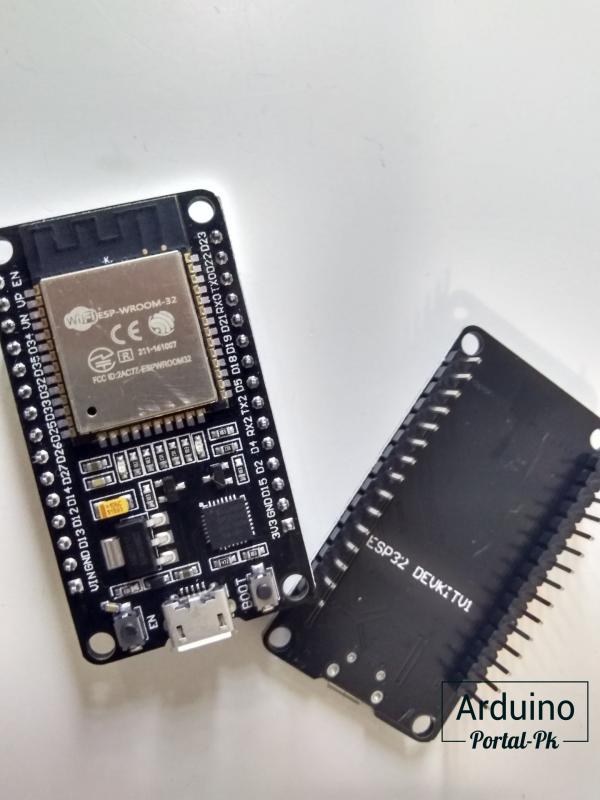
CP2102 является мостом USB – UART, который позволяет ESP32 вести обмен данными с ПК через USB. Чип CP2102 обведен на рисунке красным кругом.

Установка драйвера для CP2102 в Windows
1. Подключаем ESP32 к ПК с помощью USB-кабеля.
2. Скачиваем архив с драйвером. Ниже приводятся ссылки на драйверы для ОС Windows и MacOS.
3. Распаковываем архив.
4. Запускаем файл CP210xVCPInstaller_x64.exe для 64-битной или CP210xVCPInstaller_x86.exe для 32-битной версии Windows.

Нажмимаем «Далее» в окне приветствия инсталлятора.

Соглашаемся с лицензией.

Нажимаем «Готово» в окне сообщения об успешной установке.
Установка драйвера закончена.
Проверка работы драйвера для ESP32
При правильно установленном драйвере в диспетчере устройств можно увидеть появившийся виртуальный COM-порт (при подключенном ESP32).
Запускаем диспетчер устройств (Панель управления >> Система и безопасность >> Система >> Диспетчер устройств) и проверяем наличие драйвера CP210x USB to UART в разделе «Порты COM и LPT». Номер COM-порта может отличаться от приведенного на рисунке.

USB to UART драйвер CP210x для ESP32
Скачать драйвер CP210x для Windows
Скачать драйвер CP210x для Mac OS
Драйвер для CP210x в Linux (Linux Mint, Ubuntu, Lubuntu, Kubuntu, Debian, Arch Linux, Manjaro, Fedora, MX Linux, openSUSE . ) присутствует по умолчанию и не требует установки.
Установка, прошивка платы ESP32 в Arduino IDE (Windows, Mac OS X, Linux)
Существует надстройка для Arduino IDE, которая позволяет программировать ESP32 с использованием Arduino IDE и его языка программирования. В этой статье мы покажем вам, как установить плату ESP32 в Arduino IDE, не зависимо от используемой вами операционной системы: Windows, Mac OS X или Linux.
Если у вас возникли какие-либо проблемы во время процедуры установки, сообщите об этом на форуме.
Необходимые условия: Arduino IDE последней версии.
Перед началом установки убедитесь,что на вашем компьютере установлена последняя версия Arduino IDE. Если у вас стоит не последняя версия, сперва удалите текущую версию и затем установите более новую версию. В противном случае, данная инструкция может не сработать.
Имея последнюю версию Arduino IDE, установленную с официального сайта, продолжайте установку по данной инструкции.
Установка дополнения ESP32 в Arduino IDE
Чтобы установить плату ESP32 в Arduino IDE, выполните следующие действия:
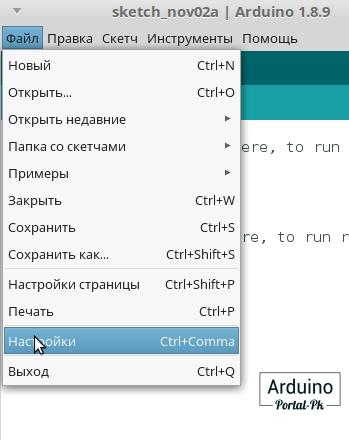
1. В вашем Arduino IDE перейдите в Файл> Настройки
2. Войдите https://dl.espressif.com/dl/package_esp32_index.json. в поле «Дополнительные ссылки для менеджера платы», как показано на рисунке ниже. Затем нажмите кнопку OK.
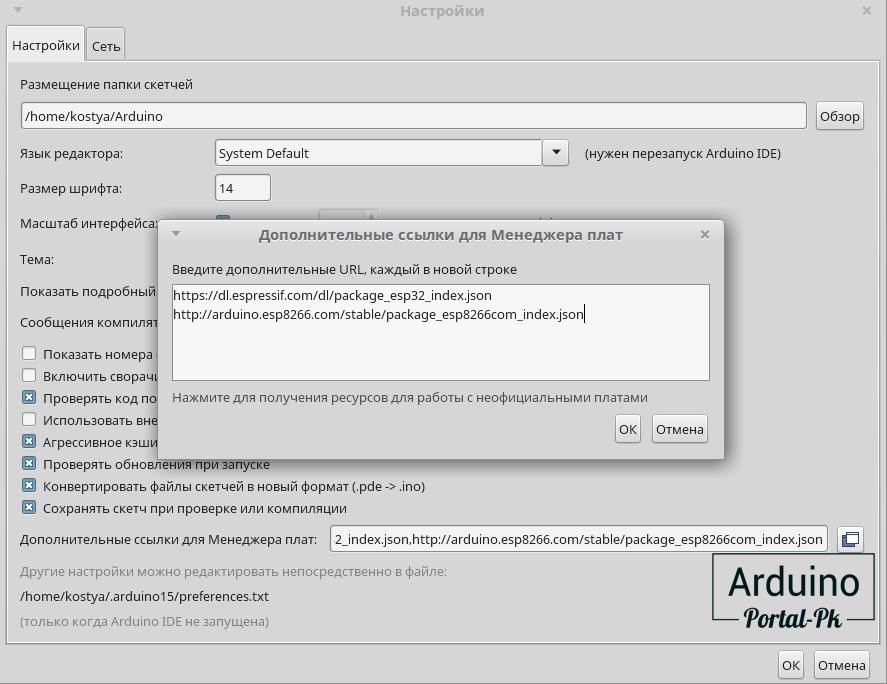
Внимание: Если вы у вас установлена в Arduino IDE ESP8266 то добавьте 2 строки или через запятую:
3. Откройте Менеджер плат. Перейдите в меню Инструменты > Платы > Менеджер плат
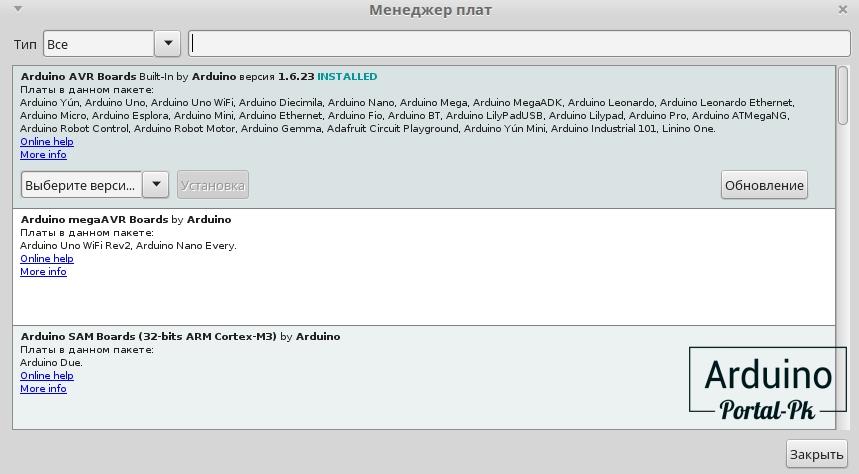
4. Ищем ESP32. И нажимаем кнопку Установка.
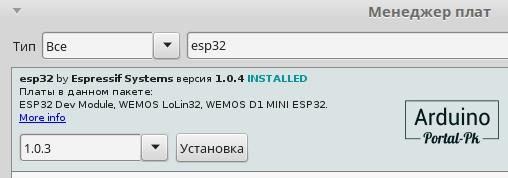
5. Вот и все. Через пару минут у вас все установиться.
Первая загрузка скетча в ESP32.
Подключите плату ESP32 к компьютеру. Открываем Arduino IDE и выполним следующие действия:
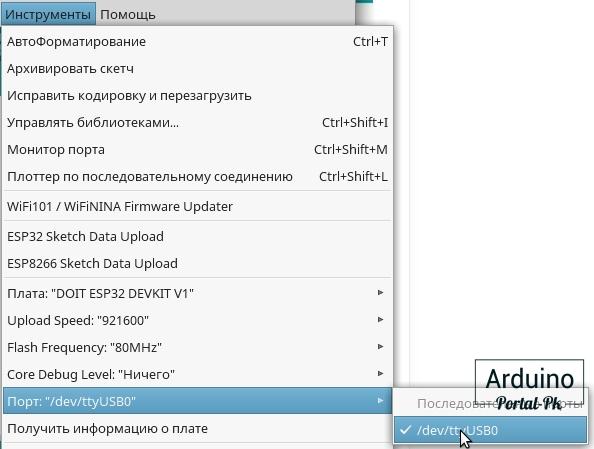
1. Выберите доску в меню Инструменты > Плата (в моем случае это DOIT ESP32 DEVKIT V1 )

Плата (в моем случае это DOIT ESP32 DEVKIT V1)» width=»382″ height=»240″ style=»display: block; margin: auto; width: 382px; height: 240px;» rel=»display: block; margin: auto; width: 382px; height: 240px;»>
2. Выберите порт (если вы не видите COM-порт в Arduino IDE, вам необходимо установить драйверы CP210x USB to UART Bridge VCP). В моем случае ком порт отображается по другому. Это связанно с тем что я использую OS Linux.
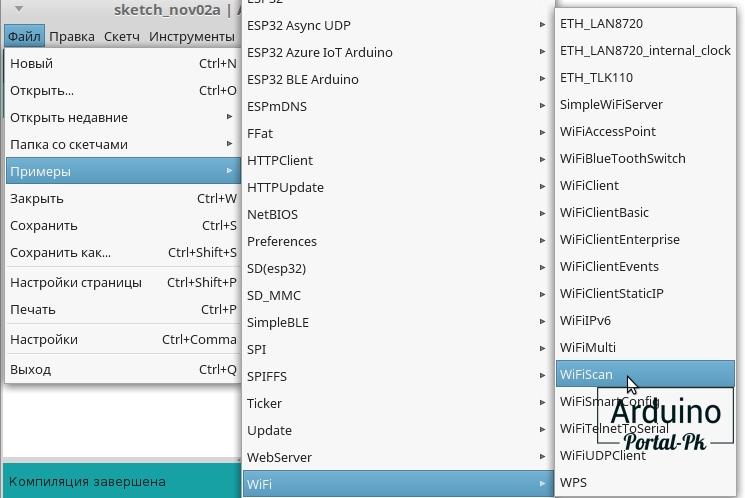
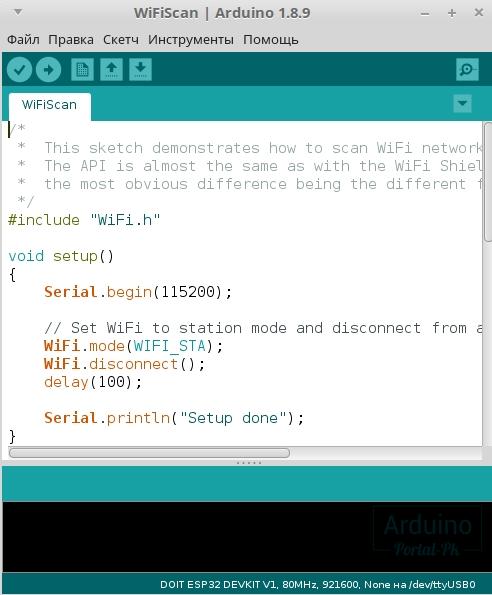
3. Открыть в следующем примере в Файл > Примеры > WiFi > WiFiScan
4. В вашей среде Arduino IDE откроется новый скетч.
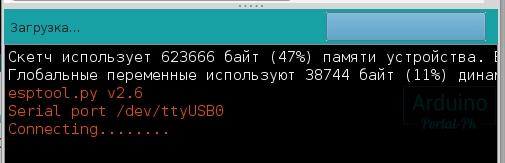
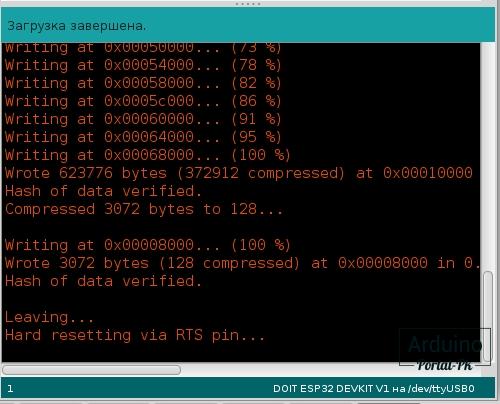
5. Нажмите кнопку Загрузить в Arduino IDE. Подождите несколько секунд, пока код компилируется и загружается на вашу плату.
Внимание! Если у вас бежит строка с повторяющимися точками и линиями. Нажмите кнопку Boot на плате и удерживайте ее пока не побегут проценты загрузки. После чего кнопку можно отпустить.
6. Откройте последовательный монитор Arduino IDE со скоростью передачи данных 115200.
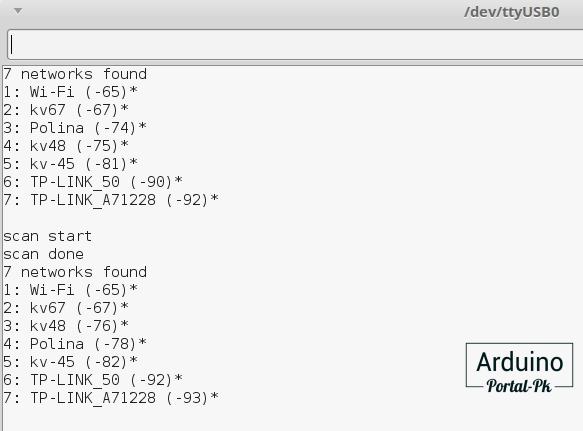
7. Нажмите кнопку EN на борту ESP32 , и вы увидите список сетей, доступных для вашей ESP32.
Подведение итогов.
Это краткое руководство, которое иллюстрирует, как подготовить ваш Arduino IDE для ESP32 на компьютере с ОС Windows, Mac OS X или Linux. Если во время установки возникнут какие-либо проблемы, пишите на форум.
Теперь вы можете начать создавать свои собственные проекты IoT с ESP32.
Подписывайтесь на наш канал на Youtube и вступайте в группы в Вконтакте и Facebook.
Всем Пока-Пока. И до встречи в следующей статье.
Понравилась статья? Поделитесь ею с друзьями:
Esp32 драйвер для windows 10 x64

![]()

A library for Invensense MPU chips. It is written in C++ and designed for working with ESP32 microcontroller esp-idf framework. Supports both SPI and I2C protocols interchangeably, selectable bus port, and even multiple connected MPUs.
| part | sensors | protocol |
|---|---|---|
| MPU6000 | Gyro/Accel | I2C, SPI |
| MPU6050 | Gyro/Accel | I2C |
| MPU6500 | Gyro/Accel | I2C, SPI |
| MPU6555 | Gyro/Accel | I2C, SPI |
| MPU9150 | Gyro/Accel/Compass | I2C |
| MPU9250 | Gyro/Accel/Compass | I2C, SPI |
| MPU9255 | Gyro/Accel/Compass | I2C, SPI |
- Support to SPI and I2C protocol (with selectable port)
- Basic configurations (sample rate (4Hz
32KHz), clock source, full-scale, standby mode, offsets, interrupts, DLPF, etc..)
- Quaternion (3-axis Gyroscope)
- Quaternion (6-axis Gyroscope and Accelerometer)
- Screen Orientation (Android’s screen rotation algorithm)
- Tap Detection
- Pedometer
- Gyroscope calibrated data
MPU driver depends on the following protocol libraries to communicate with the chip with ease: [ I2Cbus | SPIbus ].
You must download the one according to the protocol you’ll use and place within your components directory as well.
Note: At least one of these libraries must be installed as components for the MPU library to work. It won’t work otherwise.
Download the repository here, or clone it right into your project components directory with the following command.
This way you can easily update the library with git pull whenever a update is available.
First of all, make sure MPU Driver is a component in you project, then run make menuconfig , select your chip model and communication protocol you’ll use browsing through to Component config -> MPU Driver .
Now, in your source code, include the mpu main header MPU.hpp , the communication library I2Cbus.hpp or SPIbus.hpp and any other mpu headers that you’ll use. Then get the bus ready as shown below.
Note: You can initialize/configure the bus through the esp-idf API normally, it should work just fine too.
Create a MPU object, setup and initialize it.
Call set functions to configure the chip as needed.
Read sensor data:
Convert to more readable formats.
The API provides many other functions to manage and operate the sensor in its full potencial. See API Reference .
See MPU Unit Test for more information.
This project is licensed under the MIT License — see the LICENSE file for details.
About
ESP32 full library for all MPU6000 MPU6050 MPU6500 MPU9150 MPU9250 with SPI and I2C support and more.
Esp32 драйвер для windows 10 x64
Steps to install Arduino ESP32 support on Windows
Tested on 32 and 64 bit Windows 10 machines
Download and install the latest Arduino IDE Windows Installer from arduino.cc
Download and install Git from git-scm.com
Start Git GUI and run through the following steps:
Select Clone Existing Repository

Select source and destination
Sketchbook Directory: Usually C:/Users/[YOUR_USER_NAME]/Documents/Arduino and is listed underneath the «Sketchbook location» in Arduino preferences.
Source Location: https://github.com/espressif/arduino-esp32.git
Target Directory: [ARDUINO_SKETCHBOOK_DIR]/hardware/espressif/esp32
Click Clone to start cloning the repository


open a Git Bash session pointing to [ARDUINO_SKETCHBOOK_DIR]/hardware/espressif/esp32 and execute git submodule update —init —recursive
Open [ARDUINO_SKETCHBOOK_DIR]/hardware/espressif/esp32/tools and double-click get.exe

When get.exe finishes, you should see the following files in the directory

Plug your ESP32 board and wait for the drivers to install (or install manually any that might be required)
Start Arduino IDE
Select your board in Tools > Board menu
Select the COM port that the board is attached to
Compile and upload (You might need to hold the boot button while uploading)

How to update to the latest code
Start Git GUI and you should see the repository under Open Recent Repository . Click on it!

From menu Remote select Fetch from > origin

Wait for git to pull any changes and close Git GUI


