- Windows
- dshow
- vfwcap
- List devices
- Encoding example
- Linux
- List devices
- List device capabilities
- Encoding example
- Adjusting camera functions
- AVFoundation
- QTKit
- recording from webcam using ffmpeg at high framerate
- Ffmpeg from camera windows
- Ffmpeg from camera windows
- About
- Потоковое видео средствами ffserver & ffmpeg
- Для организации трансляции нам потребуется:
- Теория
- Практика
Windows
dshow
Uses the dshow (DirectShow) input device which is the preferred option for Windows users. See the wiki article about DirectShow and the dshow input device documentation for more information.
vfwcap
Warning: vfwcap is outdated. Use dshow instead if possible. See DirectShow for more information.
Uses the outdated vfwcap input device. See the vfwcap input device documentation for more information.
List devices
To list the supported, connected capture devices:
Encoding example
Example to encode video from the camera:
-i 0 is the index (zero based) in the list of present capture devices ( Driver 0 in this instance).
Linux
Uses the video4linux2 (or simply v4l2 ) input device to capture live input such as from a webcam. See the v4l2 input device documentation for more information.
List devices
To list the supported, connected capture devices you can use the v4l-ctl tool. This example shows two connected webcams: /dev/video0 and /dev/video1 .
List device capabilities
To list available formats (supported pixel formats, video formats, and frame sizes) for a particular input device:
Alternatively you could use v4l2-ctl —list-formats-ext to list available formats.
Encoding example
Example to encode video from /dev/video0 :
Adjusting camera functions
Brightness, zoom, focus, etc, can be adjusted with v4l2-ctl . Display all controls and their menus:
Then adjust the value:
OS X users can use the avfoundation and qtkit input devices for grabbing integrated iSight cameras as well as cameras connected via USB or FireWire:
- AVFoundation is available on Mac OS X 10.7 (Lion) and later. Since then, Apple recommends AVFoundation for stream grabbing on OS X and iOS devices.
- QTKit is available on Mac OS X 10.4 (Tiger) and later. QTKit has been marked deprecated since OS X 10.7 (Lion) and may not be available on future releases.
AVFoundation
To list the supported, connected capture devices:
To use the default device which is usually the first device in the listing the user can either use an empty name string or default :
To use one of these devices for capturing the user has to specify either the name of the device or the index shown in the device listing. Abbreviations using just the beginning of the device name are possible. Thus, to capture from a device named Integrated iSight-camera :
To use the device’s index provide the index either as the input or use the -video_device_index option that will override any given input name:
will use the device with the index 2 ignoring the default device in the second case.
QTKit
To list the supported, connected capture devices:
To use the default device which is usually the first device in the listing the user can either use an empty name string or default :
To use one of these devices for capturing the user has to specify either the name of the device or the index shown in the device listing. Abbreviations using just the beginning of the device name are possible. Thus, to capture from a device named Integrated iSight-camera :
To use the device’s index provide the index either as the input or use the -video_device_index option that will override any given input name:
will use the device with the index 2 ignoring the default device in the second case.
recording from webcam using ffmpeg at high framerate
I have a webcam (model Brio 4K stream edition from Logitech) that is able to record at resolution 1280×720 and 60 fps in guvcview on Ubuntu 16.04. I then use a video codec ‘raw camera input’. This is working fine and as expected, and the result is well a 60 fps video at the desired resolution.
However, I need to record using command line and not GUI. The guvcview GUI crashes on my machine (segmentation fault, this has been reported by other users before), so I want to use ffmpeg instead.
Unfortunately, when I use the command (in terminal):
I only get around 30 fps out. This is of course not due to the camera by itself (it works at 60 fps in guvcview), but I cannot understand why I get 30 fps when I ask for 60 fps explicitely. It also looks in the output of ffmpeg as it records at 30 fps:
Any suggestion how I can solve this and record at 60 fps using ffmpeg?
Note: I also tried something like this, with the same result (only 30 fps):
Edit 1 thank you for the help in comment: order of arguments matters. Now using:
I get still around 30 fps, and a new (probably more understandable) warning message:
I find several entries for this problem ( video4linux2 + The driver changed the time per frame ), but no clear solution.
Edit 2 + 3:
Edit 4:
It looks like there may still be a problem using:
As the output of ffmpeg looks like:
Is the fps indicated in the last line (37 instead of 60) reliable? It was working at 60 fps with guvcview, so I do not think the laptop write speeed or CPU is the problem.
Ffmpeg from camera windows
The picture is converting mp4 to webm using ffmpeg.
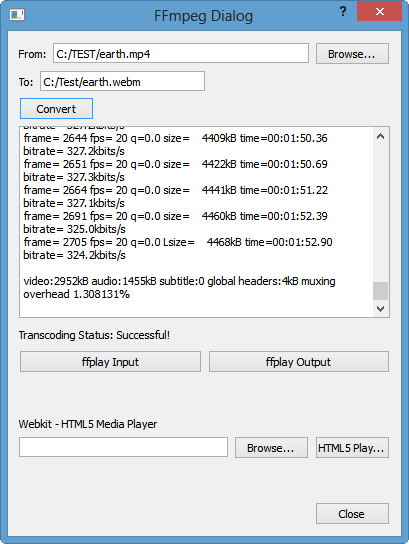
The video recording below is the player built using HTML5 video tag with QWebView as its canvas. Internally, we have two containers: mp4 and ogv, and both are converted from recorded avi. The very converter of this tutorial was used for the conversion.
Your browser does not support the video tag.
Tutorial for the code:
FFmpeg on Ubuntu 13.10 is used for the capture.
The commands for capturing video from webcam can be found from How to capture a webcam input.
On Linux, we can use video4linux2 (or shortly v4l2) input device to capture live input (such as web camera).
«Video4Linux or V4L is a video capture and output device API and driver framework for the Linux kernel, supporting many USB webcams, TV tuners, and other devices. Video4Linux is closely integrated with the Linux kernel.» — from http://en.wikipedia.org/wiki/Video4Linux
Ok, let’s do the capture:
After the capture, we can check it by simply playing the video:
Ph.D. / Golden Gate Ave, San Francisco / Seoul National Univ / Carnegie Mellon / UC Berkeley / DevOps / Deep Learning / Visualization
Sponsor Open Source development activities and free contents for everyone.
Sponsor Open Source development activities and free contents for everyone.
Ffmpeg from camera windows
Homebridge Camera FFmpeg
Homebridge Plugin Providing FFmpeg-based Camera Support
Before installing this plugin, you should install Homebridge using the official instructions.
Install via Homebridge Config UI X
- Search for Camera FFmpeg on the Plugins tab of Config UI X.
- Install the Homebridge Camera FFmpeg plugin and use the form to enter your camera configurations.
- Install this plugin using: sudo npm install -g homebridge-camera-ffmpeg —unsafe-perm .
- Edit config.json manually to add your cameras. See below for instructions on that.
Other users have been sharing configurations that work for them on our GitHub site. You may want to check that to see if anyone else has gotten your model of camera working already, or share a configuration setup that works for you.
Most Important Parameters
- platform : (Required) Must always be set to Camera-ffmpeg .
- name : (Required) Set the camera name for display in the Home app.
- source : (Required) FFmpeg options on where to find and how to decode your camera’s video stream. The most basic form is -i followed by your camera’s URL.
- stillImageSource : If your camera also provides a URL for a still image, that can be defined here with the same syntax as source . If not set, the plugin will grab one frame from source .
- motion : Exposes the motion sensor for this camera. This can be triggered with dummy switches, MQTT messages, or via HTTP, depending on what features are enabled in the config. (Default: false )
- doorbell : Exposes the doorbell device for this camera. This can be triggered with dummy switches, MQTT messages, or via HTTP, depending on what features are enabled in the config. (Default: false )
- switches : Enables dummy switches to trigger motion and/or doorbell, if either of those are enabled. When enabled there will be an additional switch that triggers the motion or doorbell event. See the project site for more detailed instructions. (Default: false )
- motionTimeout : The number of seconds after triggering to reset the motion sensor. Set to 0 to disable resetting of motion trigger for MQTT or HTTP. (Default: 1 )
- motionDoorbell : Rings the doorbell when motion is activated. This allows for motion alerts to appear on Apple TVs. (Default: false )
- manufacturer : Set the manufacturer name for display in the Home app. (Default: Homebridge )
- model : Set the model for display in the Home app. (Default: Camera FFmpeg )
- serialNumber : Set the serial number for display in the Home app. (Default: SerialNumber )
- firmwareRevision : Set the firmware revision for display in the Home app. (Default: current plugin version)
- unbridge : Bridged cameras can cause slowdowns of the entire Homebridge instance. If unbridged, the camera will need to be added to HomeKit manually. (Default: false )
Config Example with Manufacturer and Model Set
Optional videoConfig Parameters
- returnAudioTarget : (EXPERIMENTAL — WIP) The FFmpeg output command for directing audio back to a two-way capable camera. This feature is still in development and a configuration that works today may not work in the future.
- maxStreams : The maximum number of streams that will be allowed at once to this camera. (Default: 2 )
- maxWidth : The maximum width used for video streamed to HomeKit. If set to 0, the resolution of the source is used. If not set, will use any size HomeKit requests.
- maxHeight : The maximum height used for video streamed to HomeKit. If set to 0, the resolution of the source is used. If not set, will use any size HomeKit requests.
- maxFPS : The maximum frame rate used for video streamed to HomeKit. If set to 0, the framerate of the source is used. If not set, will use any frame rate HomeKit requests.
- maxBitrate : The maximum bitrate used for video streamed to HomeKit, in kbit/s. If not set, will use any bitrate HomeKit requests.
- forceMax : If set, the settings requested by HomeKit will be overridden with any ‘maximum’ values defined in this config. (Default: false )
- vcodec : Set the codec used for encoding video sent to HomeKit, must be H.264-based. You can change to a hardware accelerated video codec with this option, if one is available. (Default: libx264 )
- audio : Enables audio streaming from camera. (Default: false )
- packetSize : If audio or video is choppy try a smaller value, should be set to a multiple of 188. (Default: 1316 )
- mapvideo : Selects the stream used for video. (Default: FFmpeg automatically selects a video stream)
- mapaudio : Selects the stream used for audio. (Default: FFmpeg automatically selects an audio stream)
- videoFilter : Comma-delimited list of additional video filters for FFmpeg to run on the video. If ‘none’ is included, the default video filters are disabled.
- encoderOptions : Options to be passed to the video encoder. (Default: -preset ultrafast -tune zerolatency if using libx264)
- debug : Includes debugging output from the main FFmpeg process in the Homebridge log. (Default: false )
- debugReturn : Includes debugging output from the FFmpeg used for return audio in the Homebridge log. (Default: false )
More Complicated Example
Camera MQTT Parameters
- motionTopic : The MQTT topic to watch for motion alerts.
- motionMessage : The message to watch for to trigger motion alerts. Will use the name of the camera if blank.
- motionResetTopic : The MQTT topic to watch for motion resets.
- motionResetMessage : The message to watch for to trigger motion resets. Will use the name of the camera if blank.
- doorbellTopic : The MQTT topic to watch for doorbell alerts.
- doorbellMessage : The message to watch for to trigger doorbell alerts. Will use the name of the camera if blank.
Camera MQTT Example
- mqtt : Defines the hostname or IP of the MQTT broker to connect to for MQTT-based automation. If not set, MQTT support is not started. See the project site for more information on using MQTT.
- portmqtt : The port of the MQTT broker. (Default: 1883 )
- tlsmqtt : Use TLS to connect to the MQTT broker. (Default: false )
- usermqtt : The username used to connect to your MQTT broker. If not set, no authentication is used.
- passmqtt : The password used to connect to your MQTT broker. If not set, no authentication is used.
- porthttp : The port to listen on for HTTP-based automation. If not set, HTTP support is not started. See the project site for more information on using HTTP.
- localhttp : Only allow HTTP calls from localhost. Useful if using helper plugins that translate to HTTP. (Default: false )
Rarely Needed Parameters
- videoProcessor : Defines which video processor is used to decode and encode videos, must take the same parameters as FFmpeg. Common uses would be avconv or the path to a custom-compiled version of FFmpeg. If not set, will use the included version of FFmpeg, or the version of FFmpeg installed on the system if no included version is available.
Rare Option Example
Homebridge Camera FFmpeg is based on code originally written by Khaos Tian.
About
Homebridge Plugin Providing FFmpeg-based Camera Support
Потоковое видео средствами ffserver & ffmpeg
Для организации трансляции нам потребуется:
Теория
FFmpeg — это набор свободных библиотек с открытым исходным кодом, которые позволяют записывать, конвертировать и передавать цифровое аудио и видео в различных форматах. Он включает libavcodec, библиотеку кодирования и декодирования аудио и видео и libavformat, библиотеку мультиплексирования и демультиплексирования в медиаконтейнер. Название происходит от названия экспертной группы MPEG и «FF», означающего «fast forward».
ffserver идёт в комплекте с ffmpeg и выполняет роль медиа-сервера — получает видеопоток от ffmpeg, который может быть запущен на другой машине, и раздаёт его счастливым пользователям.
Каждый получаемый поток называется Feed’ом (далее будет просто фид). Таких потоков может быть несколько, так же как и отдаваемых (выходных).
FFmpeg у нас будет захватывать видео с веб-камеры или читать из файла.
Практика
- Port 8090
- BindAddress 0.0.0.0
- MaxClients 100
- MaxBandwidth 20000
- NoDaemon
- # Фид, надо запомнить feed.ffm, он нам потребуется при запуске ffmpeg
- File /tmp/feed.ffm
- FileMaxSize 3M
- # Ранее объявленный фид
- Feed feed.ffm
- Format flv
- VideoCodec flv
- VideoFrameRate 30
- VideoBufferSize 80000
- VideoBitRate 200
- # Качество видео от 1 до 31, 1 == отлично 31 == фи!
- VideoQMin 1
- VideoQMax 5
- # Разрешение, везде должно быть одинаково!
- VideoSize 352×288
- PreRoll 1
- # Если у вас есть микрофон, или вы транслируете видео со звуком, закомментируйте эту строчку
- Noaudio
- # Флешка test.swf для просмотра трансляции
- Feed feed.ffm
- # Будет запускаться в Adobe Flash Player
- Format swf
- VideoCodec flv
- VideoFrameRate 30
- VideoBufferSize 50000
- VideoBitRate 100
- VideoQMin 1
- VideoQMax 5
- # Разрешение, везде должно быть одинаково!
- VideoSize 352×288
- PreRoll 0
- # Если у вас есть микрофон, или вы транслируете видео со звуком, закомментируйте эту строчку
- Noaudio
Пускаем ffserver:
$ ffserver
Пускаем ffmpeg:
$ ffmpeg -s 352×288 -r 30 -f video4linux2 -i /dev/video0 http://localhost:8090/feed.ffm
-s разрешение, указанное в конфиге ffserver, -r количество кадров/секунду, -f формат, -i путь к камере (или к видео-файлу), http://localhost:PORT/FEED это адрес, где ffserver будет ждать наш поток
PS: если выдаст ошибку, то можно попробовать формат v4l (-f video4linux)
Открываем в браузере http://localhost:8090/test.swf и широко улыбаемся:)
Для отправки видео поменяем параметр -i на путь к файлу, уберём -f (ffmpeg сам определит формат файла):
$ ffmpeg -s 352×288 -r 30 -i


