- Best 3 Software to Transfer Files to/from Your Android Phone via a USB Cable
- Dr.Fone — Phone Manager for Android
- Dr.Fone — Phone Manager (Android)
- Video Guide: How to Achieve Android USB File Transfer with PC?
- Mobogenie Android USB File Transfer
- MoboRobo Android USB File Transfer
- Top 5 Ways to Transfer Files Between Mobile Phone and PC
- Part 1: How to transfer files between PC and iOS using Dr.Fone — Phone Manager (iOS)?
- Dr.Fone — Phone Manager (iOS)
- Part 2: How to transfer files between PC and Android using Dr.Fone — Phone Manager (Android)?
- Dr.Fone — Phone Manager (Android)
- Part 3: Transfer files between PC and Android Using Android File Transfer
- Part 4: Transfer files between PC and Android /iOS via Send Anywhere
- Part 5: Transfer files between PC and Android via Copy and Paste
Best 3 Software to Transfer Files to/from Your Android Phone via a USB Cable

Blandine Moreau
Jan 07, 2021 • Filed to: Data Transfer Solutions • Proven solutions
If you are worried about deleting important information from your Android device, you may wish to simply transfer it up to your computer to keep it. Or you may simply want to transfer the photos from your day at the beach onto your computer.
However, due to the open nature of the Google Android operating system, there are several software available that aim to help you manage your Android device through your computer. In this article, we will look at some of the best Android software management software available. Note that all the software enables you to connect Android to PC for file transfer, as well as allowing the selection of specific files onto your computer. But, some are better than other.
Dr.Fone — Phone Manager for Android
![]()
Dr.Fone — Phone Manager (Android)
One Stop Solution for Android USB File Transfer
- Transfer files between Android and computer, including contacts, photos, music, SMS, and more.
- Manage, export/import your music, photos, videos, contacts, SMS, Apps etc.
- Easily integrate entire iTunes library with a click.
- Work much faster and incredibly stable.
- Transfer iTunes to Android (vice versa).
- Manage your Android device on computer.
- Fully compatible with Android 8.0.


Refer to the following guide for Android USB file transfer:
Step 1. Download Dr.Fone and install it to your computer. Connect your Android phone to PC with USB Cable. Notice how it displays the same image that is on the screen of your device.
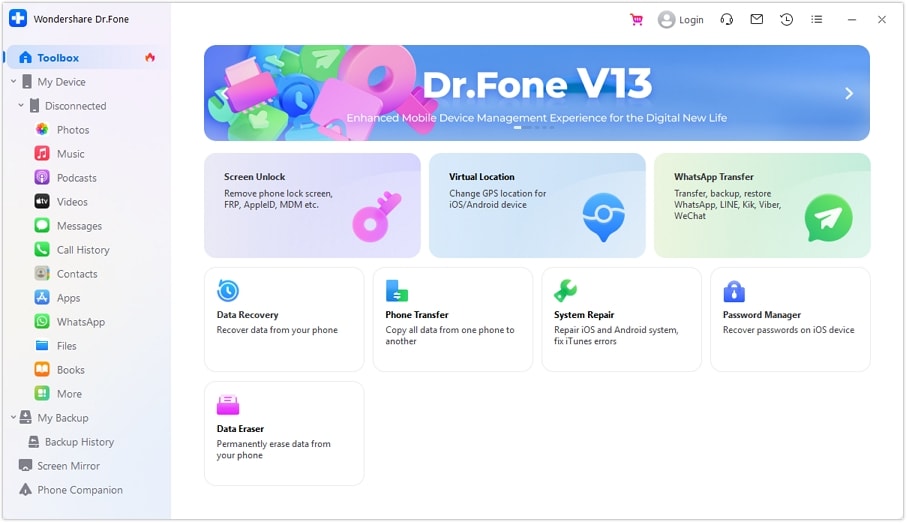
Step 2. Click on the «Phone Manager» tab among other options. The following main interface for Dr.Fone — Phone Manager will be displayed.
![]()
Step 3. We will take Android USB file transfer (photos) as an example. Other file types share the same operations. Hit on the «Photos» tab. You can see that the software shows all the albums in the left part.
Step 4. Select your photos you want to transfer to the PC, and click the Export icon > «Export to PC».
![]()
Video Guide: How to Achieve Android USB File Transfer with PC?
Dr.Fone — Phone Manager also features other helpful tools, such as the De-Duplicate option, which automatically scans all your contacts for any repetitions, which is always a nuisance (you often end up with duplicate contacts if you sync your contacts with Facebook, as well as already having them on your device, for example).
Mobogenie Android USB File Transfer
Advantages:
- Uninstall stock apps in batches.
- Easy-to-use interface.
- Easily download and manage apps.
- Easily transfer multiple files from your PC to your Android, and vice versa.
- Free of charge.
Disadvantages:
- USB only.
- Only connect one Android device at a time.
- Does not have integrated music sharing.
Overview:
Download Mobogenie and run it, and connect your Android device to the computer. Once your device has been connected, you will be prompted to install the driver for your device so that the application is automatically downloaded onto it. Once you have completed this process, you will be taken to the home screen:
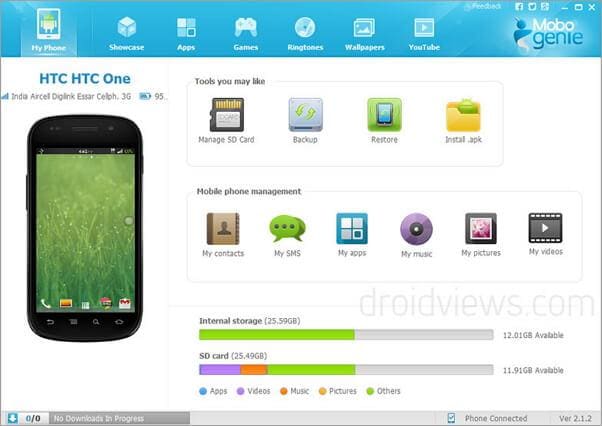
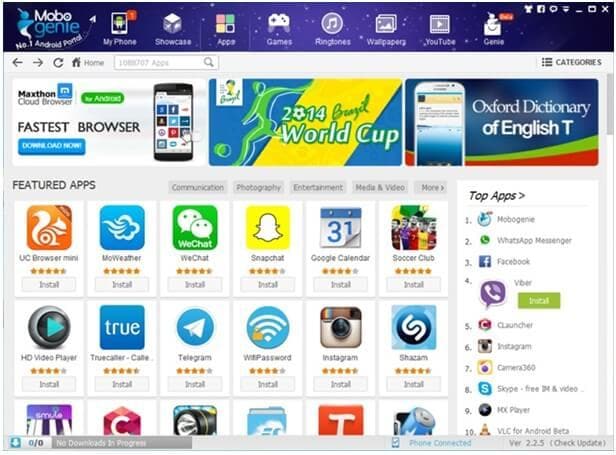
As with other data management software, you can download and install apps onto your Android device from your PC. The advantage of this is that apps can be downloaded quickly, and also without costing you in terms of data roaming charges.
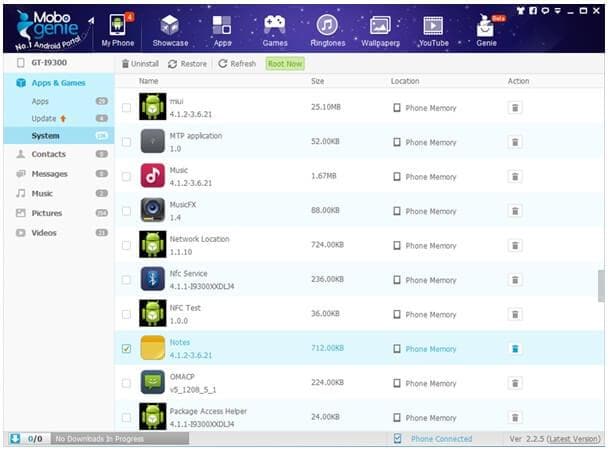
A neat feature is the ability to uninstall apps that came preloaded on the phone as often we find ourselves with apps that we never use that we cannot delete.
The transfer of photo files is straightforward, and several photos can be selected from your computer to import onto your device at once, or vice versa.
![]()
MoboRobo Android USB File Transfer
Features:
- Free.
- Support wireless connection of devices on the same network (although temperamental).
- Support multiple devices.
- Download apps onto it through app store.
- Simple to use.
Overview:
Download MoboRobo and install this Android USB file transfer tool on your computer. Upon opening it, you will be prompted to connect your Android device with a USB cable or over WiFi, and then once connected, you will be asked permission to install the app on your Android device as well.
Once connected, you will be brought to this home page, notice the options to use different devices as well as connected through Wi-Fi.
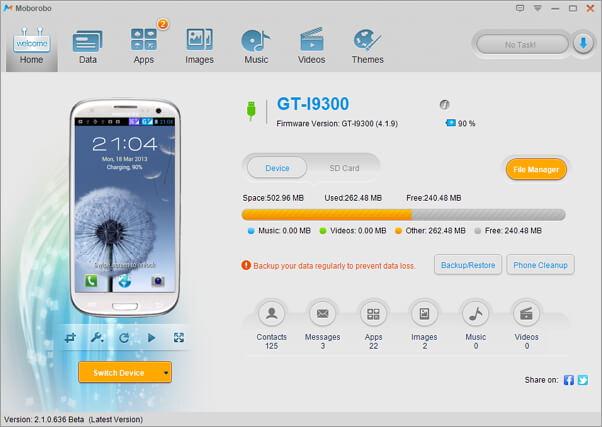
As with Mobogenie, once you are on the software, it is fairly easy to navigate around, and you can do everything from sending SMS from your PC to transferring apps and contacts. However, a drawback is that the management of your music requires you to have all your MP3 files on your PC and moving them on to the software- not extremely inconvenient, but as we will see much easier solutions exist.
Top 5 Ways to Transfer Files Between Mobile Phone and PC

Alice MJ
Jan 07, 2021 • Filed to: Backup Data between Phone & PC • Proven solutions
Today, the data transfer process between the mobile phone and PC has become very fast and easy. There are numerous ways to transfer files from phone to PC. You can transfer data either wirelessly or with the help of USB cable. When a single process has many ways, you will get confused which way is genuine and reliable one. In this guide, we have resolved your confusion by providing the top 5 ways to transfer files between phone and Pc.
Part 1: How to transfer files between PC and iOS using Dr.Fone — Phone Manager (iOS)?
The Dr.Fone — Phone Manager (iOS) is the ultimate data transfer software to transfer any type of files from an iPhone to a computer or vice versa. It is also one of the easiest and robust ways to transfer files from phone to PC.
![]()
Dr.Fone — Phone Manager (iOS)
Transfer Files between Computer and iPod/iPhone/iPad without iTunes
- Transfer, manage, export/import your music, photos, videos, contacts, SMS, Apps etc.
- Backup your music, photos, videos, contacts, SMS, Apps etc. to computer and restore them easily.
- Transfer media files between iOS devices and iTunes.
- Fully compatible with iOS 7, iOS 8, iOS 9, iOS 10, iOS 11, iOS 12, iOS 13
 and iPod.
 and iPod.
Below is the detailed step-by-step guide on how to use Dr.Fone for transferring files between iPhone and computer:
Step 1: To begin the transfer process, go to the Dr.Fone official website and download the software on your computer and after that, launch the software. Once the whole setup process of the software is done, open the software and you will see the «Phone Manager» option on its main window.
Step 2: Now, connect your iPhone device to your computer with the help of USB cable. Once your device is detected, you will see the three options on the screen. Select the last option which is “Transfer Device Photos to PC”.
![]()
Step 3: Now, select the location in your computer where you want to transfer iPhone files. Within a few seconds, your all files will be moved to your PC from iPhone.
![]()
Step 4: You can also send other media files. Click on the other options such as music, videos, and images which are along the “Home” option of the software.
![]()
Step 5: Select your desired media file that you want to transfer to your iPhone and then, select all the files and click on the “Export” button and choose the location where you want to save files. After a few seconds, your iPhone files will be transferred to your PC.
![]()
Step 6: You can also transfer your computer files to your iPhone by clicking on the “Add file” option and add all the files that you want to transfer to your iPhone.
![]()
Part 2: How to transfer files between PC and Android using Dr.Fone — Phone Manager (Android)?
The Dr.Fone software is also compatible with Android devices. You can easily transfer files from Android device to computer or vice versa using Dr.Fone — Phone Manager (Android) mobile to pc file transfer software.
![]()
Dr.Fone — Phone Manager (Android)
One Stop Solution to Transfer Files between Android and PC
- Transfer, manage, export/import your music, photos, videos, contacts, SMS, Apps etc.
- Backup your music, photos, videos, contacts, SMS, Apps etc. to computer and restore them easily.
- Transfer iTunes to Android (vice versa).
- Fully compatible with 3000+ Android devices (Android 2.2 — Android 10.0) from Samsung, LG, HTC, Huawei, Motorola, Sony etc.
Follow the below instructions to transfer files from Computer to Android device using Dr.Fone:
Step 1: First, download the software on your computer and launch it after installing. Then, click on the “Transfer”.
![]()
Step 2: Now, you will see the various media files option. Choose your desired media file and choose one album for saving files to the device.
Step 3: The, tap on “Add”, then tap on either “Add file” or “Add folder. Now add all the files in this folder that you want to transfer your Android.
![]()
Follow the below instructions to transfer files from Android device to Computer using Dr.Fone:
Step 1: After opening your device data on software. Click on that media file option that you want to transfer.
Step 2: Now, select all the media files and then, click on the “Export to PC” and now select the desired location where you want to transfer the pictures.
![]()
Part 3: Transfer files between PC and Android Using Android File Transfer
The Android File Transfer is mobile to PC file transfer software. You can transfer files from Mac PC to your mobile device. It supports all Android versions. It is very easy to operate. Below, we have described the step-by-step guide on how to use Android File Transfer:
Step 1: Download the software on your computer and once the download completes, open the androidfiletransfer.dmg by double-clicking it.
Step 2: Now, drag or move the Android File Transfer to Applications. After that, with the help of USB cable, connect your Android device to your computer.
Step 3: Thereafter, open the software and then, browse the files that you want to transfer on your mobile device. Then, copy the files to your computer. You can use the similar process for transferring the files from computer to your Android device.
Part 4: Transfer files between PC and Android /iOS via Send Anywhere
The Send Anywhere is one of the amazing file sharing application. With the help of this software, you can quickly transfer files from phone to PC or vice versa. If you want to share files with multiple people, you can share by making a link through this software. Below there is proper guidance on how to transfer files from computer to Android/iPhone or vice versa using Send Anywhere.
Step 1: To commence the process, you need to download Send Anywhere software on your computer and your mobile device. After downloading the software, launch the software and complete the setup process.
Step 2: Now, open the software on your computer and on its dashboard, you will see the “Send” option. Click on it and choose your desired files that you want to transfer to your mobile device. Then, again click on the “Send” button.
Step 3: Now, you will get PIN or QR code for transferring the files and save that PIN for future use. After that, open the app on your mobile device either iPhone or Android. Click on the “Receive” button and enter the PIN or QR code that you get from the app.
Step 4: Within a few minutes, your files will be transferred from computer to your mobile device. With this similar process, you can easily transfer files from mobile device to the computer.
Part 5: Transfer files between PC and Android via Copy and Paste
Transferring files via copy and paste method is one of the simplest ways and common way to transfer files between computer and Android device. Many people use this way rather than using software for mobile to PC file transfer. Follow the below instructions to transfer files using copy and paste method:
Step 1: Initially, go to your computer and connect your Android device with your computer using the USB cable.
Step 2: If you are connecting your mobile device to your computer for the first time and then, you need to enable the “USB debugging” option from your Android phone.
Step 3: Once the computer detects your device, you will see your phone name on your computer. Open your phone data and copy the files that you want to transfer to your computer. After that, go to the computer location where you want to transfer the files and paste it.
Step 4: With the same process, you can copy the files from your computer and select the mobile location where you want to move your files and paste it.


