- Filmconvert pro davinci resolve mac os
- Download
- DaVinci Resolve Studio 17
- Информация
- Описание
- Filmconvert pro davinci resolve mac os
- FilmConvert Nitrate
- CineMatch
- FilmConvert Bundle
- Adobe Plugin with Nitrate
- OFX Plugin with Nitrate
- FCPX Plugin with Nitrate
- Academic Discount
- Academic Discount Terms & Conditions
- Filmconvert pro davinci resolve mac os
- GIVING POWER BACK TO THE FILMMAKER
- We believe Filmmaking should be enhanced by technology, leaving no limitations! So we’re giving the power back to the filmmaker by providing software that delivers beautiful colors, leaving you to create beautiful stories.
- Camera profiles
- Real Film Grain
- 19 Film Stocks to choose from
- Create and export 3D LUTs using FilmConvert
- Camera Profiles
- 6K Grain Scans
- 19 Film Stocks
- Export 3D Luts
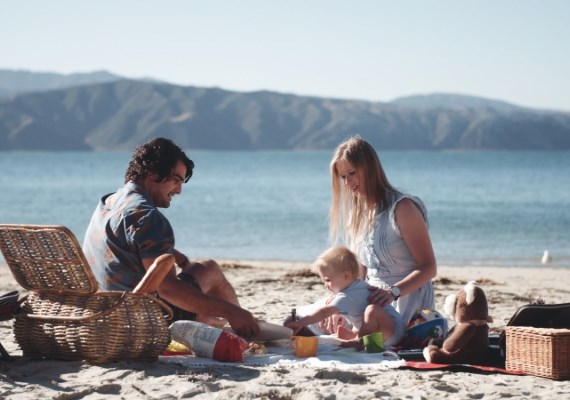
- Antarctica
- Golden Hour Surf From Above
- Start learning & exploring
Filmconvert pro davinci resolve mac os
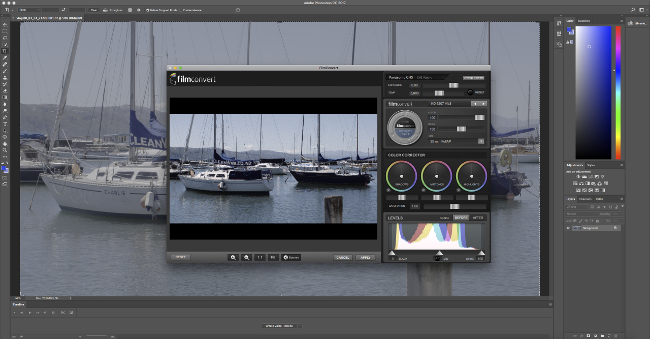
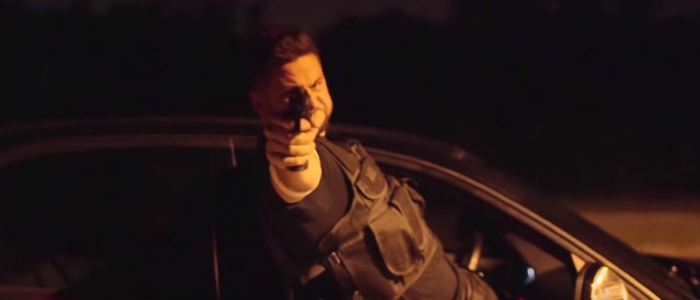
Either way with digital sensors being too clean for some people who have loved the look of film there is a program called FilmConvert that takes the color information of specific cameras and actually uses that to determine how a specific film stock could best be represented using that sensor.
Real Film Grain
Add real grain to your footage and render at up to 4k. Unlike other plugins that simply overlay film grain FilmConvert realistically models the mount of grain required for each color and exposure level in your image.
Accurate Color Modelling
FilmConvert models the characteristics of digital sensors and provides a complex algorithm to transform digital footage to match your favorite film stocks.
Multiple Platform Support
FilmConvert is available as Stand-alone software as well as a plugin for After Effects Premiere Final Cut Motion Vegas and Photoshop.
More info _http://www.filmconvert.com/
Download Links :
Download
TO MAC USERS: If RAR password doesn’t work, use this archive program:
RAR Expander 0.8.5 Beta 4 and extract password protected files without error.
TO WIN USERS: If RAR password doesn’t work, use this archive program:
Latest Winrar and extract password protected files without error.
Источник
DaVinci Resolve Studio 17
Информация
Описание
DaVinci Resolve — единственное в мире решение для монтажа и цветокоррекции, наложения визуальных эффектов, создания графики и постобработки звука в единой программной среде. Его современный, стильный интерфейс достаточно прост и интуитивно понятен как для новых, так и опытных пользователей.
DaVinci Resolve позволяет существенно оптимизировать творческий процесс, поскольку овладевать несколькими приложениями или переключаться между разными системами не требуется. Таким образом, можно работать с оригинальным изображением высокого качества. По сути, DaVinci Resolve сочетает в себе все атрибуты студии постпроизводства. Теперь у вас есть доступ к инструментам DaVinci Resolve, которые применяют в Голливуде!
Многие специалисты кино- и телеиндустрии отдают предпочтение DaVinci Resolve. Причиной тому — его невероятное качество и расширенный набор инструментов, которые ставят это приложение вне конкуренции. В системе DaVinci Resolve используется отмеченная премией Emmy™ запатентованная технология обработки в цветовом пространстве YRGB с точностью 32-битной плавающей точки.
Также предусмотрена поддержка последних HDR-форматов. Кроме того, есть блок Fairlight, предназначенный для микширования и сведения аудиоматериала. Теперь грейдинг видео можно выполнять с помощью средств из повседневного арсенала профессиональных колористов, редакторов, художников и звукорежиссеров.
DaVinci Resolve 17 имеет новые инструменты для обработки HDR-изображения с широкой цветовой гаммой и трехмерного объемного звука. Колористы получают доступ к самым современным способам грейдинга HDR-материала и методам маскирования с применением алгоритмов искусственного интеллекта. Оптимизированные процессы выбора клипов с помощью компьютерной мыши и клавиатуры в сочетании с мощной платформой Fairlight Audio Core обеспечивают поддержку 2000 треков
Предусмотрено создание автоматически заполняемых ящиков на основе метаданных для более быстрой систематизации и поиска материала, улучшены индикация в форме волны для редактирования аудиодорожки, функции кадрирования и предварительный просмотр эффектов, а также применение прокси-файлов. Кроме того, VFX, титры и переходы, созданные во Fusion, можно использовать на страницах «Монтаж» и «Сборка».
Источник
Filmconvert pro davinci resolve mac os
Save 20% off all software!
Sale prices as shown below
FilmConvert Nitrate
CineMatch
FilmConvert Bundle
All plugins
with Nitrate Upgrade
Adobe Plugin
with Nitrate
After Effects
Premiere Pro
OFX Plugin
with Nitrate
FCPX Plugin
with Nitrate
Final Cut Pro X
Motion

Premiere Pro
DaVinci Resolve
Academic Discount
Student discounts are available to full-time students and academic staff.
To receive a discount, please fill out the form below with your school email address and details of your academic status or enrolment. Common academic email addresses ending with .edu will be confirmed automatically.
If you wish to use a non-academic email address for your purchase, you can upload a snapshot of a current student ID with a visible expiry date.
Academic Discount Terms & Conditions
The person purchasing the license must be a student or faculty member. We will not provide student academic discounts to non-students purchasing «on behalf of a student» or to someone whose spouse/child is a student.
Academic licenses are provide for educational use. Licenses purchased with an academic discount are not intended for commercial use and may not be purchased primarily for commercial use.
Источник
Filmconvert pro davinci resolve mac os
Download the free trial version of FilmConvert for your editor from filmconvert.com/download. The free trial is fully functional, and gives you everything you get in the paid version — the only difference is that while using the trial, you will see a FilmConvert watermark over your export.
When you purchase the software, you will receive a license file sent to your email address that you can use to activate the software and remove the watermark.
- Save the .fkv license file from your Purchase Confirmation email to your Desktop
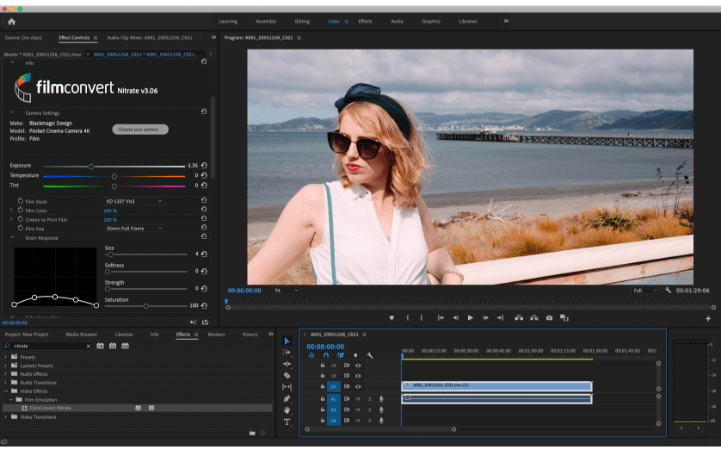
- Download and install the latest trial version of the Adobe Premiere Pro plugin from www.filmconvert.com/download
- Open Adobe Premiere Pro and start a new project
- Add some media to the timeline
- In the Effects menu, search for ‘Nitrate’, and drag the FilmConvert Nitrate plugin onto your clip in the timeline. You will see some color changes and the FilmConvert logo appear on your clip
- Under Effects Controls, find the FilmConvert Nitrate settings and scroll to the bottom of the settings list
- Next to Register Plugin, click the ‘Open License File’ button
- In the popup window that appears, click ‘Load Registration File’ and browse to your Desktop to select the .fkv file
- In the popup dialog click «Load License File» and then select your .FKV file.
- Your plugin will be registered successfully!
- Save the .fkv license file from your Purchase Confirmation email to your Desktop
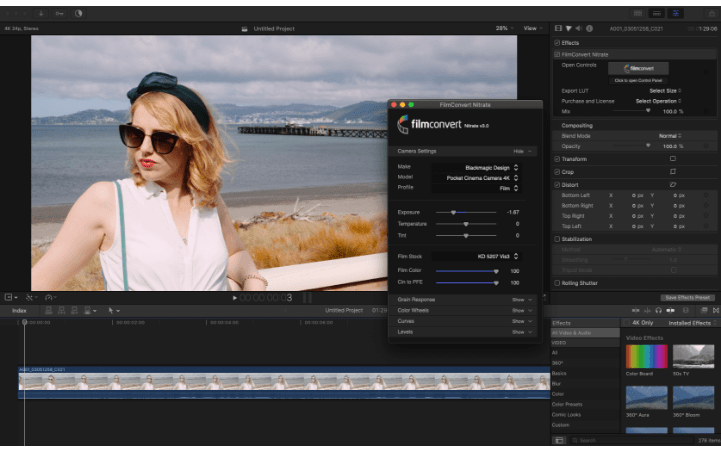
- Download and install the latest trial version of the Nitrate plugin from www.filmconvert.com/download
- Open your editor and start a new project
- Add some media to the timeline
- In the Effects panel, search for ‘FilmConvert Nitrate’, and drag the effect plugin onto your clip in the timeline. You will see some color changes and the FilmConvert logo appear on your clip
- Under Effects Controls, find the FilmConvert Nitrate settings. Next to ‘Purchase and License’, click ‘Select Operation’ and select ‘Activate’.
- In the popup window that appears, click ‘Open FKV File’ and browse to your Desktop to select the .FKV file.
- You should see a pop up message saying ‘Activation Successful!’. Click Ok to close.
- If the watermark does not disappear automatically, please try re-rendering your timeline, or adjust one of the sliders to refresh the image.
- Save the .fkv license file from your Purchase Confirmation email to your Desktop
- Download and install the latest trial version of the FilmConvert plugin from www.filmconvert.com/download
- Open your editor and start a new project
- Add some media to the timeline
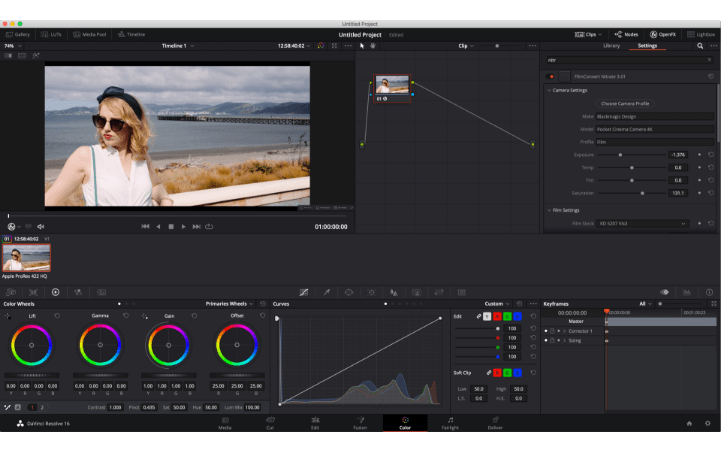
- In the Color Tab, at the top right click OpenFX > Library and search for ‘FilmConvert Nitrate’
- Drag the Nitrate effect onto a node in your tree
- Under the OpenFX > Settings, find the FilmConvert Nitrate settings and scroll to the bottom
- Under Export and License, click the Activate License button
- In the popup window that appears, click ‘Load Registration File’ and browse to your Desktop to select the .FKV file
- In the popup dialog click «Load License File» and then select your .FKV file. Click Open.
- Your plugin will be registered successfully!
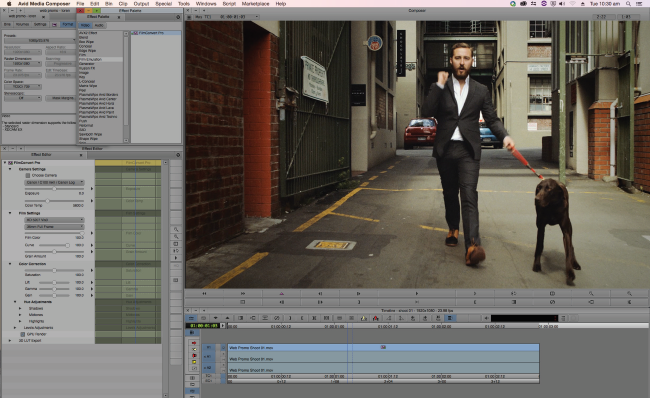
- Download and install the latest Avid Media Composer Plugin installer
- Open Avid Media Composer and create a new project
- Create a new sequence, import some media, and drag it onto the timeline.
- Click on Effects from the menu bar
- Open the Effects Palette window.
- Go to the Film Emulation category, and drag the FilmConvert effect onto your media. You should see some color changes, grain and FilmConvert watermarks on your media
- Click on the Effects Editor
- At the bottom of the plugin settings ‘Activate’
- On the popup window that appears, click Load Registration File and browse to your Desktop where you saved your license file. Click OK.
- You should see a message that says ‘Your software has been registered successfully!’
- Download and install the Photoshop plugin
- Open Photoshop and start a new project
- From the Filter menu, choose Film Emulation and click ‘FilmConvert. ’
- In the popup interface which appears, at the top of the menu click Activate
- Click ‘Load Registration File’ and browse to the Desktop where you saved your .fkv license file
- Click OK, and your plugin will be successfully registered
This is most often caused by your mail client trying to ‘unzip’ the license file. Try the following steps:
- Download the .fkv file using a browser from your webmail. Save the .fkv file to your desktop or another local location
- If you are downloading via Safari, please un-tick «open safe files after downloading» in your browser preferences
You should receive an email from FilmConvert with your license file and activation instructions within a few minutes of your purchase.
- If you completed your purchase via Paypal, your license file will have been emailed to the email address associated with your Paypal account
- If using Gmail, please check your Spam folder and Promotions folder, as Google may have filed it in there
- If you are using a .edu email address, some university mailservers will reject attachments outright. Please email support@filmconvert.com and we can update your email address
To fix the license problem please make a backup of Macintosh HD/Library/Application Support/RubberMonkey/Profiles or have the original camera pack installers handy.
Next delete Macintosh HD/Library/Application Support/RubberMonkey, then re-install the plugin.
Your FilmConvert license allows you to activate the software on up to 3 machines at one time. If you’ve reached your max activations limit, you will need to deactivate an existing machine before you can activate on your new computer. Click the Deactivate Plugin button at the bottom of the plugin settings to deactivate a machine before you wipe/sell/upgrade it.
If your old computer is no longer active or able to be deregistered, please contact us.
No! Your best bet is to upgrade to our full Bundle package — it gives you access to all the plugins across all the editing platforms we support: Resolve, Premiere+AE, FCPX etc. That way you can maintain backwards compatibility to older projects you’ve edited as well as work on your new projects.
As you may have heard, we’ve recently released an optional paid upgrade for FilmConvert called Nitrate, which gives you even more power and flexibility in your grading.
If you just want to keep using FilmConvert Pro, you can download the legacy installer from here and activate it using your original license key.
If you want to upgrade to FilmConvert Nitrate, you can upgrade your license for $89 here.
Источник
GIVING POWER BACK
TO THE FILMMAKER
We believe Filmmaking should be enhanced by technology,
leaving no limitations! So we’re giving the power back to the
filmmaker by providing software that delivers beautiful colors,
leaving you to create beautiful stories.
“FilmConvert has not only sped up my colour grading workflow it has drastically improved it. The film stocks are tremendous and with the profiles to match the cameras I shoot with I would be lost without it now! FilmConvert is essential to all my work.”
“I was looking for a way to lend more of a cinematic/film saturation/grain to my shots but without it looking completely unrealistic. This plugin has become my secret weapon and if you go to my website you will see that nearly 95% on the images have some form of this plugin embedded in the shots.”
“We are HUGE fans of FilmConvert, we absolutely love it and use it for every single one of our videos. I don’t know how we ever managed to color grade without it! We really love how authentic FilmConvert is with film emulation.”
Camera profiles
We work with a wide range of popular cameras to deliver the most precise picture profiles available. We then use those profiles to match to your chosen film stocks to create a stunning and accurate result.
Our Camera Packs contain accurate data for each Camera Picture Style so we can tailor each film stock to your camera, allowing authentic Film Stock looks across a wide range of cameras and settings. We continue to work directly with camera companies to bring you the latest profiles.
Your FilmConvert license gives you access to all the camera packs currently available + 12 months of new camera pack updates

Real Film Grain
Add real grain to your footage, scanned at 6k.
Unlike other plugins that simply overlay film grain, FilmConvert realistically models the amount of grain required for each color and exposure level in your image.


19 Film Stocks to choose from
With the majority of people shooting on digital these days, film makers are striving to achieve the desirable qualities of film stocks when grading in post. Often, this requires a good team of colorists, however we bridge that process for everyone! We recreate the grain structure and spectral responses of a variety of modern film stocks, from Kodak® to FujiFilm®.


Create and export 3D LUTs using FilmConvert
LUTs are a great way to export your grade for use on devices or any compatible software. Here are some ways this can help improve your workflow.
- You can use 3D LUTs on your monitor for on-set visualization. View on your monitor the look you will apply during post-production.
- You can load 3D LUTs into most color-grading software, which can be useful in workflows where plugin support is limited.
- You can export a 3D LUT to share your grade with others working on your film.
You can export your grade as a .cube LUT from any non-trial plugin version of FilmConvert. You cannot currently export .cube LUTs from the desktop app version at this time.
Camera Profiles
Choose from our range of precise Camera Profiles, matched to your camera.
6K Grain Scans
Industry leading quality grain, scanned at 6K to give the best results.
19 Film Stocks
Motion and Photographic.
Color Positive, Negative + Reversals.
Export 3D Luts
Create & export 3D LUTS using FilmConvert for on-set use.
Antarctica
Antarctica was shot during a trip in December 2014 starting in Ushuaia, Argentina. The crew spent a total of 16 days in the Antarctic before returning to Ushuaia and got to see the most magical scenery and wildlife. Kalle wanted to remove the obvious ‘digital’ look so choose to use FilmConvert to help him. You can read Kalle’s interview with Wired Magazine here.
GoPro HERO3+ Black Edition // DJI Phantom 2
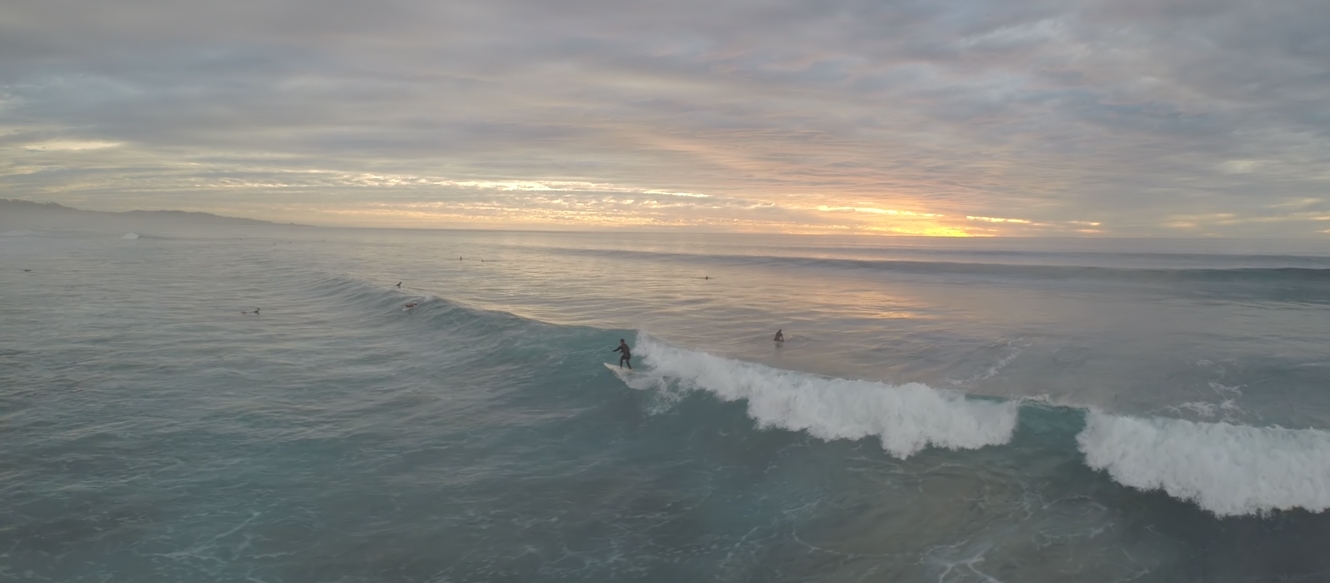
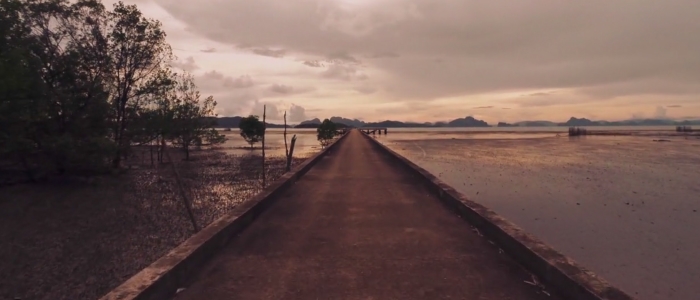
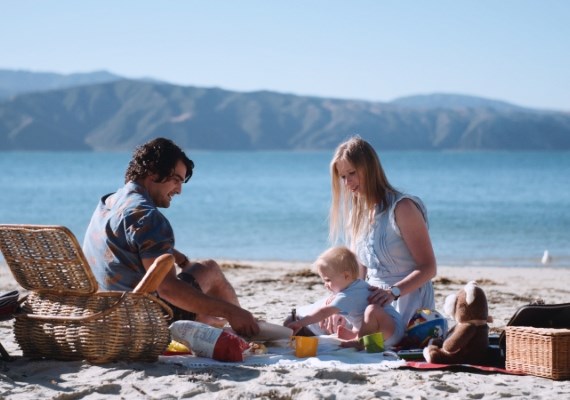
Golden Hour Surf From Above
This stunning film was shot one evening during a beautiful sunset over Del Mar, San Diego, California. Filmed during two flights with the Phantom 2 with Zenmuse H3-3D and GoPro 3+ Black Edition with the Snake river prototyping BlurFix Air ND4/CP filter, all in wide mode, on protune & flat in 2.7k.
“FilmConvert was vital in my grading of this film. 100% of the grading from original source files to output were done in FilmConvert. I recorded in flat mode, so there was very little contrast or colour in the original files and FilmConvert allowed me to reveal the amazing colours that were locked away.”
DJI Phantom 2 // GoPro 3+ Black Edition
Start learning & exploring
Head over to our community section to see examples by our amazing #FilmConvert users, tutorials & more!
Источник


