- How to Light Windows: The Indie Filmmaker’s Guide
- 1. WORK WITH THE DIRECTIONALITY, NOT AGAINST IT.
- 2. USE THE WHOLE SPACE TO CREATE DEPTH
- 3. OBSERVE THE TIME OF DAY
- 4. BOUNCE THE SUNLIGHT
- 5. WINDOWS AS MOTIVATION
- 6. APPROACH OTHER SOURCES WITH CAUTION
- 7. THINK OUTSIDE THE ROOM
- Best Privacy Window Films For Your Home
- 10 Best Privacy Window Films
- 1. Rabbitgoo 3D No Glue Decorative
- 2. RABBITGOO 3D Static
- 3. Coavas Non Adhesive
How to Light Windows: The Indie Filmmaker’s Guide
UNDERSTANDING HOW TO LIGHT WINDOWS IS AN IMPORTANT SKILL FOR EVERY FILMMAKER. READ OUR COMPREHENSIVE INDIE-FILMMAKER’S GUIDE FOR WINDOW-LIGHTING TIPS THAT CAN BRIGHTEN UP YOUR GAME.
Written by Devan Scott
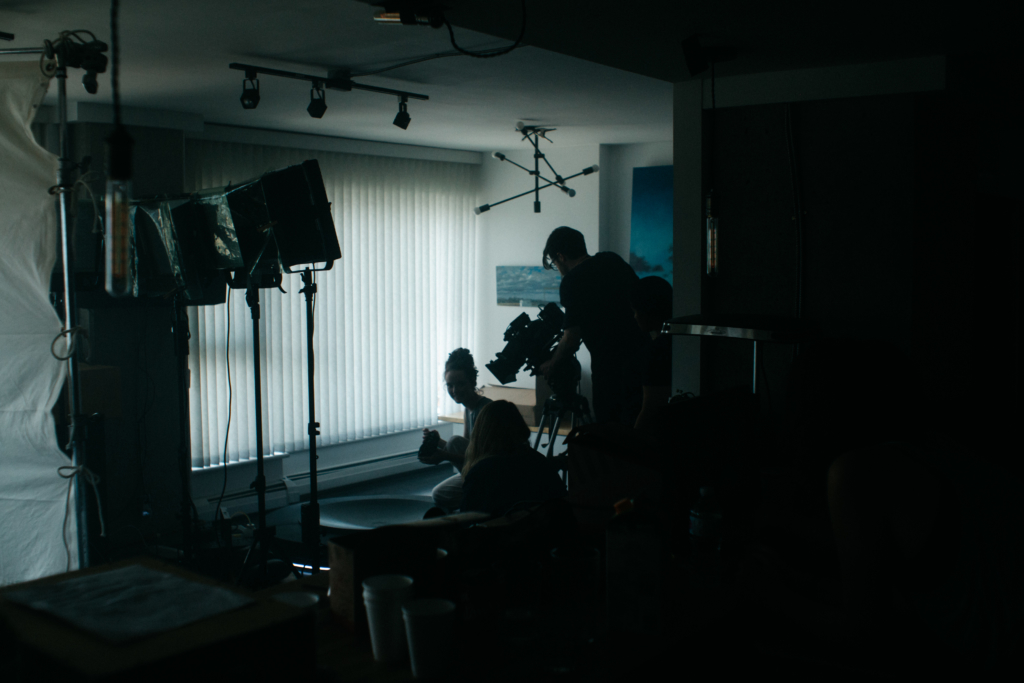
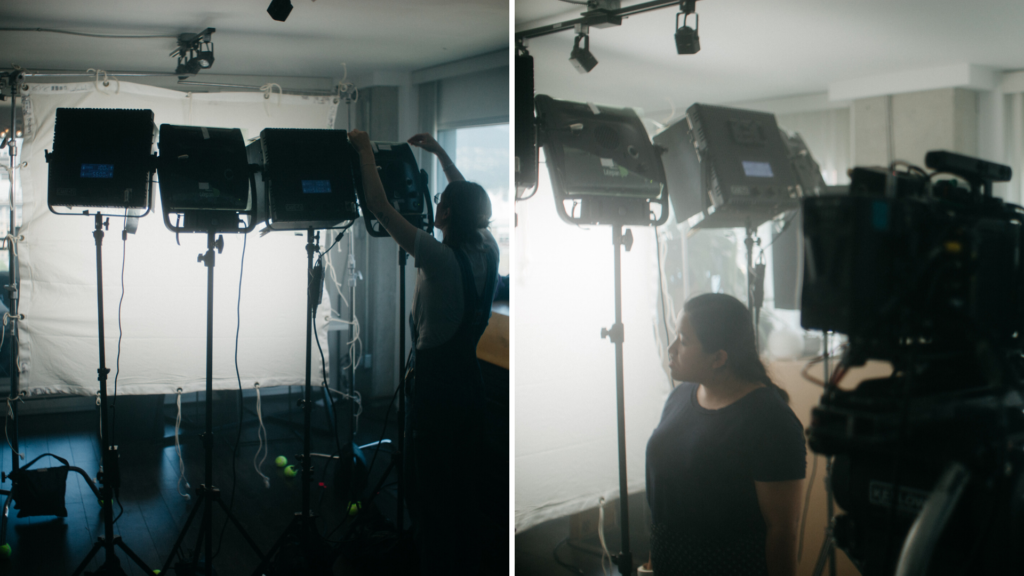
It’s the first day of your shoot. You arrive on location; it’s an interior. Daytime. You need to figure out how the heck you’re going to light this blank canvass of a room. Those of us tasked with shooting independent films have all been there, and those of you who want to shoot independent films will just as inevitably encounter this situation. Yet despite its commonality, this is one of the trickier situations you’ll be asked to shoot in.
Rooms are dark, surprisingly so! On film, an unlit room photographs much like a cave: mostly dark, with some bright points of light. In most rooms, these bright points are windows. They cut and control the real source of light: the sun.
How can we corral and enhance the sun to render rooms less cave-like, and more suitable to our storytelling needs? Here are some simple principles.
1. WORK WITH THE DIRECTIONALITY, NOT AGAINST IT.
When filming outside, sunlight comes at us from all directions. Unless you’re filming in a greenhouse, sunlight operates somewhat differently when indoors; it’s cut by windows. This represents equal parts limitation and opportunity.
High Energy (Dir. Peter Faint)
Unless we’re able to knock out a wall (a rare privilege in indie films), we’re limited in where we can place our actors; however, by carefully observing directionality, we can work with the light rather than against it.
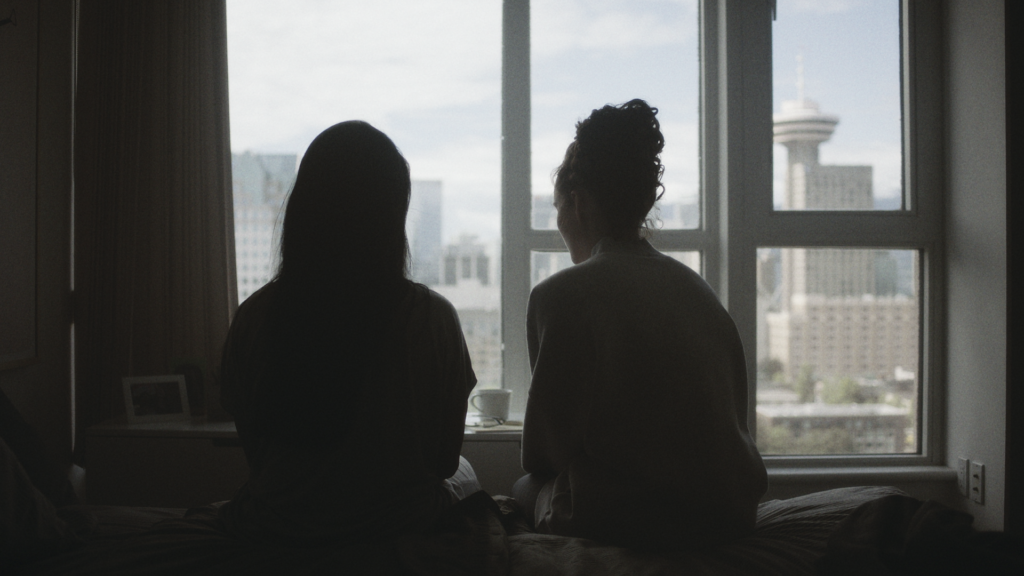
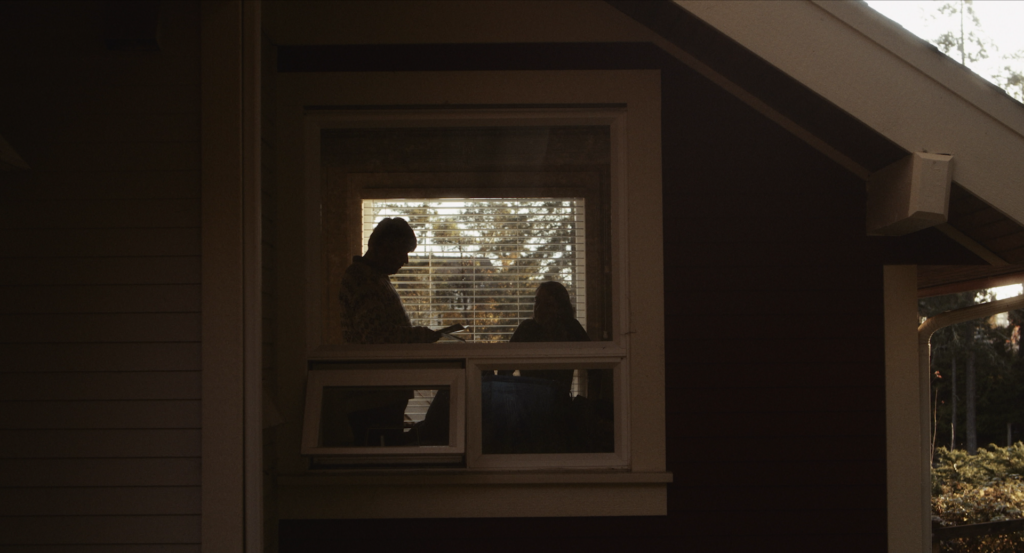
Characters generally resemble silhouettes when shot directly against windows. You’d need to add a lot of light to fight against this amount of sunlight. – ‘Hekademia’ (Dir. Gloria Mercer)
We can try to shoot out a window — right into the bright sunlight. It’s a great way to induce silhouettes, but it makes our lives very difficult if we want to see an actor’s face. When shooting in this manner, we’re pointing the camera directly at the dark, unlit side of our subject.
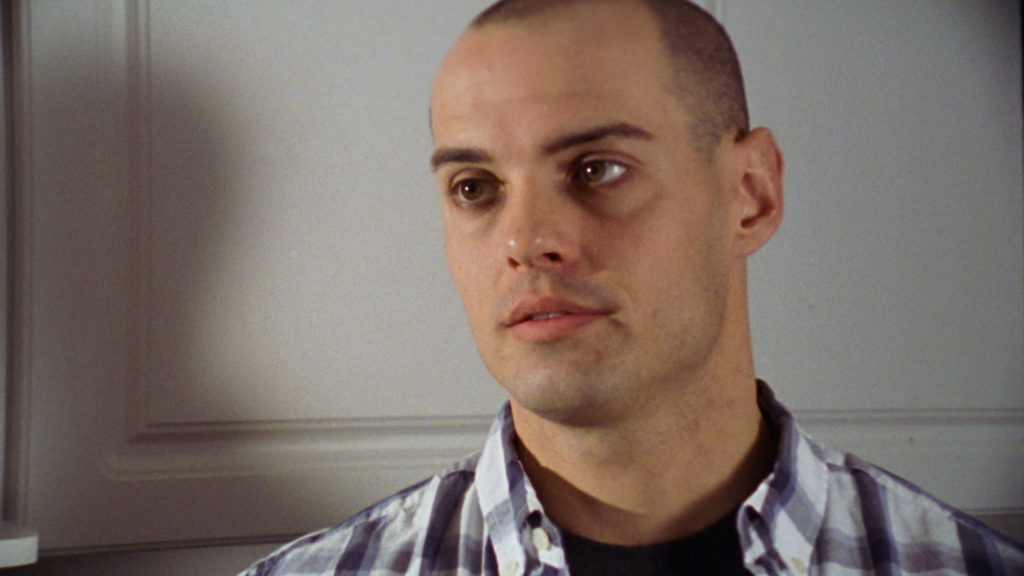
I did this actor no favors with my flat frontal window-lighting in this old student film. – ‘HIT ME!’ (Dir. Vladimir Fedulov & Daniel Jeffery)
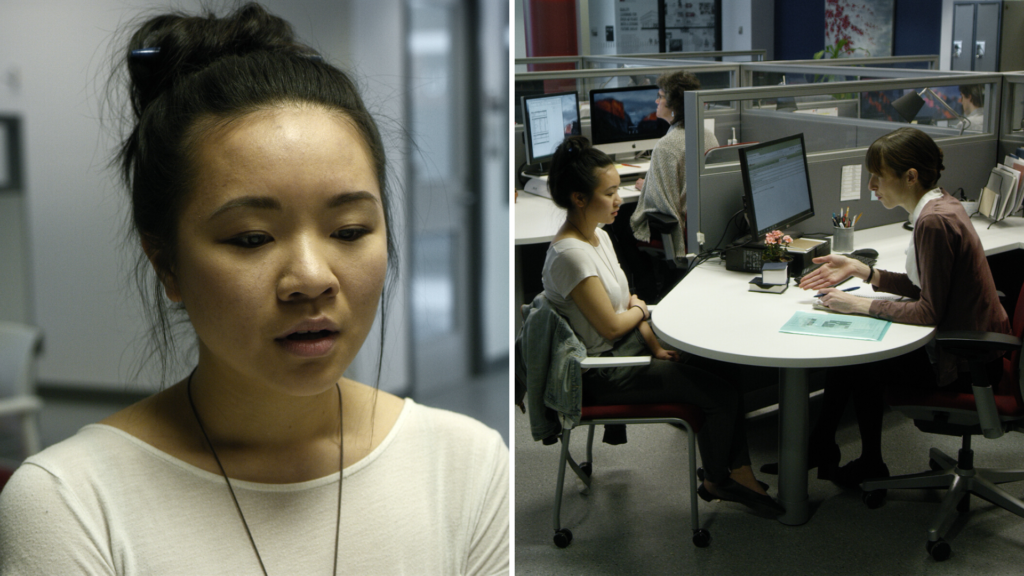
If we reverse the subject and shoot away from the window our subject will be well-lit, but the lighting may end up flat as can be seen above. To emphasize depth (nearly always a good thing) we can split this difference, and…
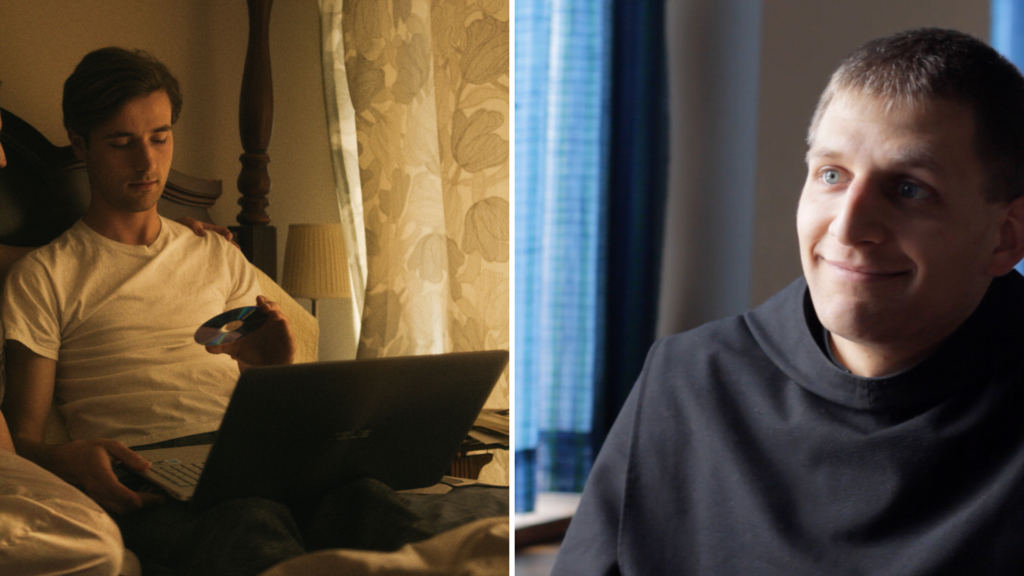
La Cartographe (Dir. Nathan Douglas) / Set Apart (Dir. James Penco)
…Light from the side. By placing the window to the side of our subject, we can work with the light it provides to effectively convey a sense of depth. As light wraps around a subject, it creates a gradient, and this gradient is a wonderful tool for giving shots a sense of depth. See the way that the light sculpts the faces in the shots above?
Silhouettes and frontal lighting absolutely have a place in every cinematographer’s toolkit, but more often than not I find myself lighting faces from one oblique angle or another.
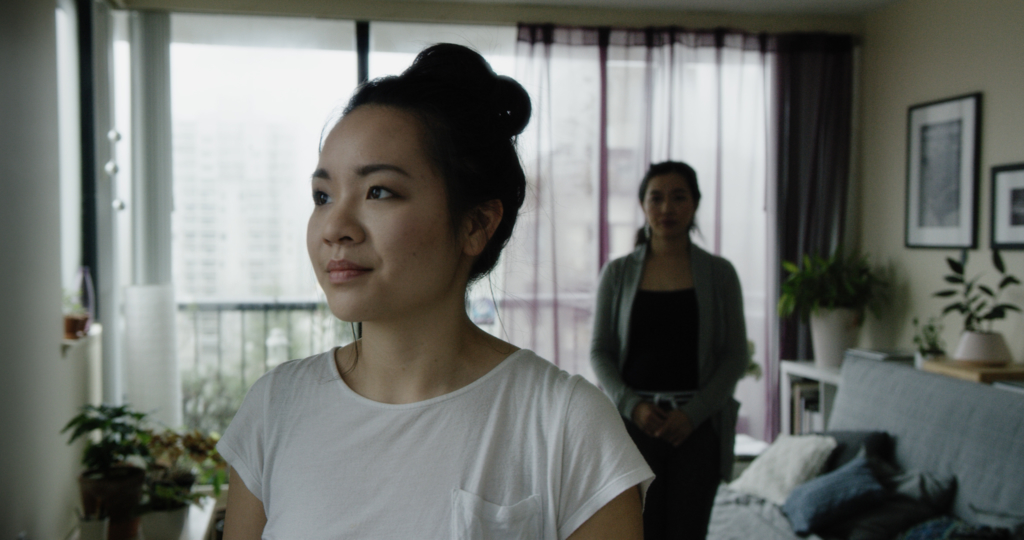
2. USE THE WHOLE SPACE TO CREATE DEPTH

Multiple layers of action in ‘Son in the Barbershop’ (Dir. Nathan Douglas)
Note that despite taking place mostly in cramped rooms the images presented here feature distinct foreground and background layers. Depth is key to giving ourselves flexibility when lighting; if we can light the foreground and background separately, it gives us a far greater degree of control over the image. Physically separating our subjects from their backgrounds enables this.
3. OBSERVE THE TIME OF DAY
Unfortunately, we cannot lasso the sun, but we can predict where it’ll be. Use this knowledge to your advantage.
As the sun tracks across the sky, the effect on a room changes drastically. At 9:00am, sunlight might be streaming directly through the windows of an apartment; by 10:00am, any incoming light may be entirely indirect.
While shooting this scene from Lifeguard , we avoided an overexposed background by waiting for the sun to disappear behind a large building, shadowing the entire road in the background and evening out the exposure of these shots. If we had shot an hour earlier or an hour later, this street would have been hugely over-exposed and distracting.
4. BOUNCE THE SUNLIGHT
Need to brighten your subjects? Add some fill light? Let’s not reach for those expensive electrical lights just yet; a bounce board, cloth, or purpose-built flexfill will often do the trick. These enable us to harness the pre-existing light and redirect it back to our subject.
I generally stick to neutral white bounces for the most subtle possible effect when indoors. Mirrors or silver bounces risk giving away our source manipulations. In other words, the audience might notice our trickery!
Click here to learn more about our film production program!
5. WINDOWS AS MOTIVATION
We’ve been dancing around the central idea of lighting here – that of motivation . Time to address it.
Film is an unreal medium. We manipulate things constantly. It’s our job to fool the audience into believing that what they’re looking at is, in fact, happening in something resembling reality and not on a film set. To pull off this illusion, lighting is key; that means observing what’s in the frame and asking ourselves how it can be manipulated to realistically light a subject or, failing that, inventing an excuse that feels believable. A window (or, more accurately, sunlight) is a great excuse.
If an audience sees a window in your shot, well done — you’ve established that your room has windows. You can now ‘extend’ those windows using other light sources; this involves adding our own manufactured light into the mix to make an in-frame source brighter or punchier than it might otherwise be.
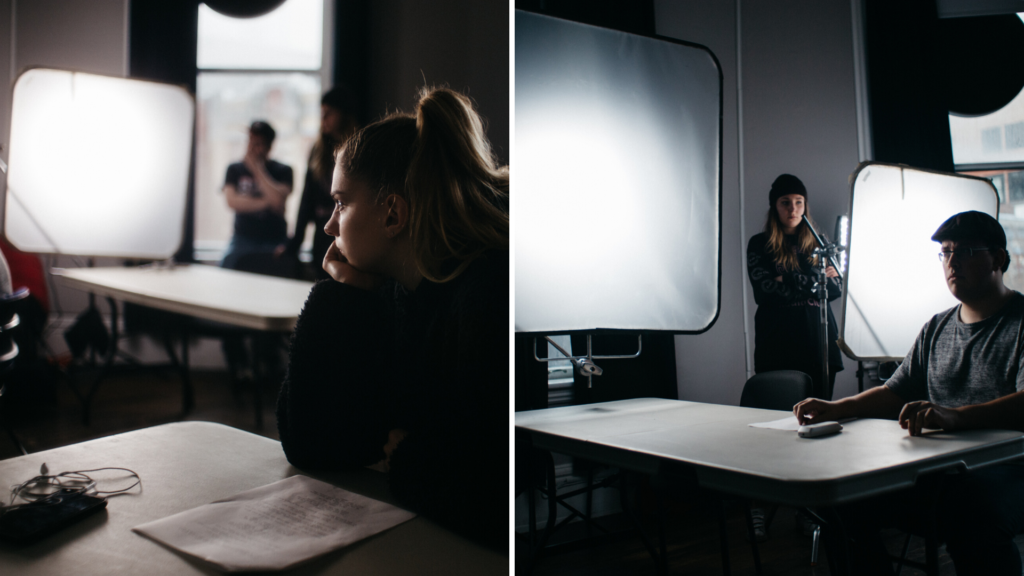
In an exercise, our subjects are lit by imaginary ‘windows’ that pack far more of a punch than ordinary windows might otherwise. This enables the entire room to be lit from these sources.
To do so believably we need to observe the quality and directionality of our real-world source. Is a shaft of hard sunlight shining through the window? Extend it with a hard, unfiltered source, or imagine that the source is bounding off of the floor or a wall and extend that by bouncing your own light source off of a bounce or reflective surface.
Directional sources in Paradiso (Dop. Aerlan Barrett) and Berg (Dir. Brit Kewin). These scenes feature hard, directional light sources shining through windows to replicate direct sunlight.
If it’s a cloudy day or sunlight is indirect, extend it by adding a soft source to the mix. Keep in mind that, in all of these examples, the ‘fake’ light is coming from the same general direction as the ‘real ‘light; we’re simply adding our own manufactured wattage to make a pre-existing source appear to light the scene better.

A large, soft bounce enables this window’s illumination to ‘wrap around’ our subject in ‘Hekademia’
We can also use what the audience doesn’t know against them! If your audience never sees a wall, they have no idea what’s there; why not an unseen window? I’ve used this technique numerous times to escape from literal and figurative tight spots.
In ‘That’s Money in My Pocket’ (Dir. James Penco), there appears to be a window lighting our foreground subject; this is, in fact, a completely fabricated source. No such window exists, but the audience doesn’t know that!
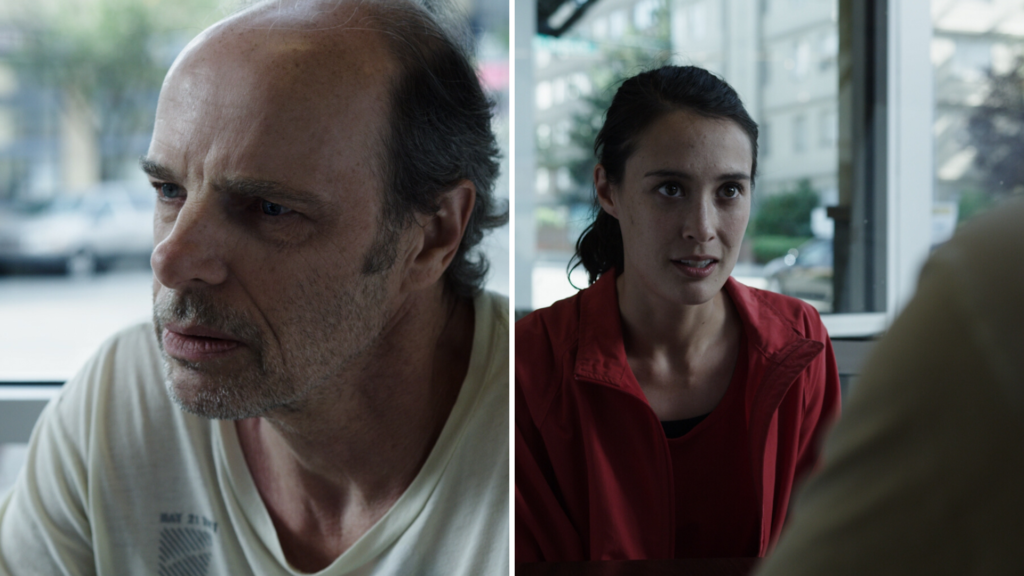
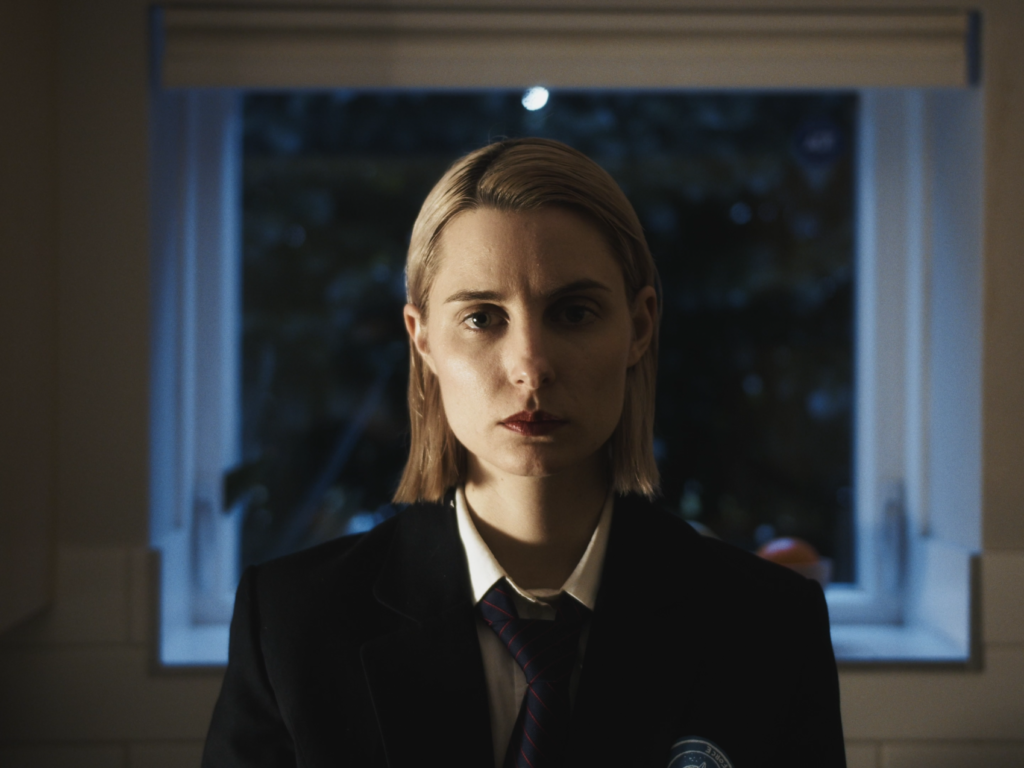
6. APPROACH OTHER SOURCES WITH CAUTION
Green fluorescent fixtures illuminate the foreground of this daylight interior in That’s Money in my Pocket, lending the scene a sickly institutional feel.
Of course, the sun is far from the only source that illuminates our day-to-day lives. Lamps, fluorescent ceiling fixtures, screens, pot lights… the list goes on, and the possibilities are endless; too endless to explore in a single article.
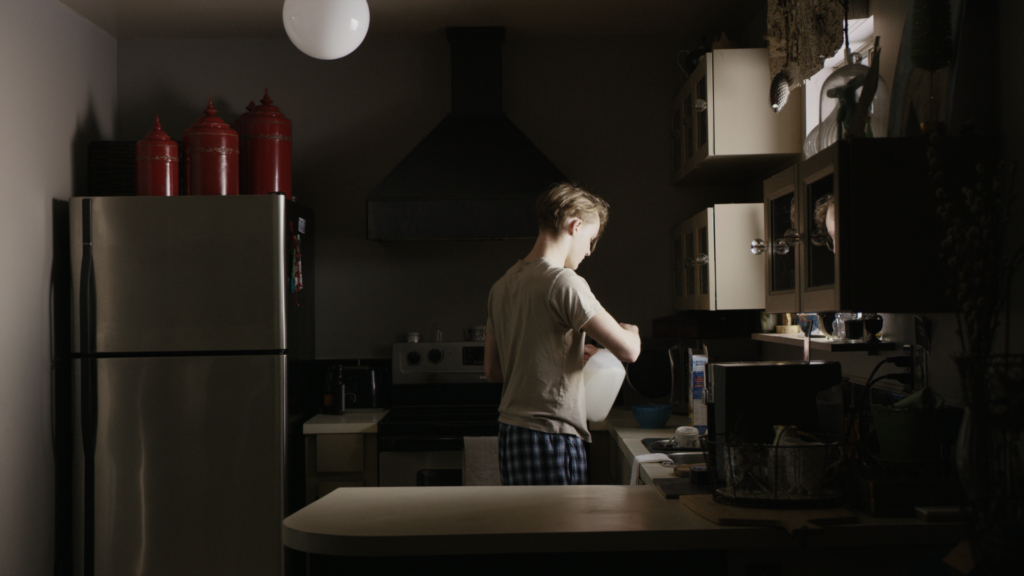
A household source lights the subject’s face in ‘Space Force’ (dir. Hannah Dougherty). Note how the foreground and background are lit completely separately.
We must, however, approach a mixing of sources with caution. To achieve a coherent lighting plan we must be bold and decisive. If we use a half-dozen sources — or even just two — in a way that muddles those sources together, problems will ensue.
To prevent this, use the three-dimensionality of the physical space by separating the lighting into different layers. Light the background with a different fixture than the foreground. Light two sides of the same object with different sources. Beware of colour differences; manufactured lights range from orange to green and anywhere in between, but they rarely mix well with daylight sources unless great care is taken to separate them.
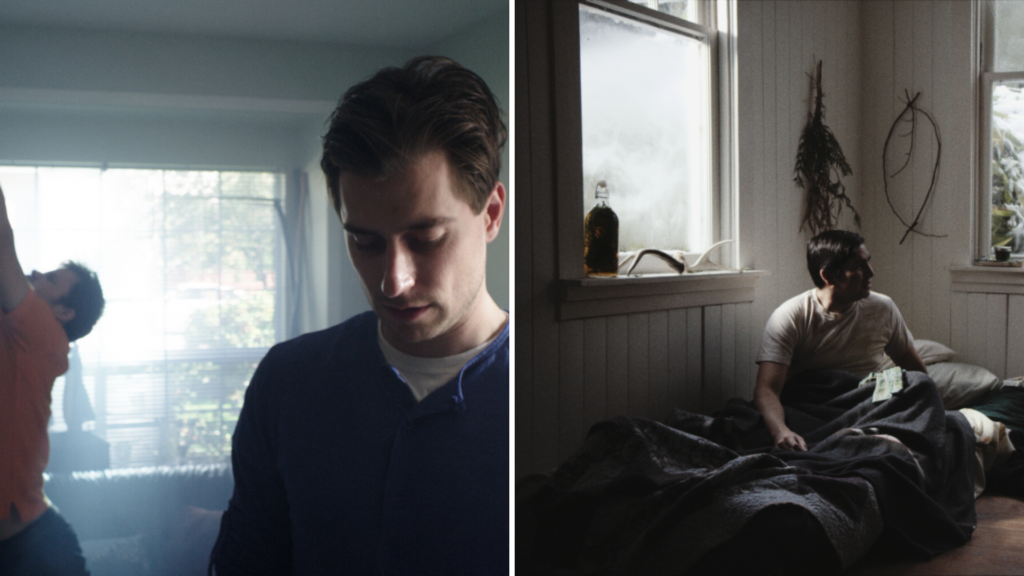
7. THINK OUTSIDE THE ROOM
Preface (Dir. Will Ross & Devan Scott)
On a recent shoot, we shot a whole scene in a bedroom so small that our camera could barely fit, much less lights. In lieu of cramming our equipment into a tiny room, we simply waited for the sun to light the landscape nicely, threw our actors into silhouettes, and filmed the entire scene from outside the room. Don’t be afraid to throw caution to the wind and find clever ways around seemingly impossible situations.
Lighting is an almost irreducibly complex subject, and it’s impossible to boil down the principles of lighting daylight interiors to an article such as this one. However, I hope this handful of pointers can serve as a roadmap for you on your cinematographic journey.
Best Privacy Window Films For Your Home
Windows are a crucial part of your home, but how much do you like people looking ate what you’re doing inside your own home? This is even more of a real issue for those homes that sit right along a street or close to a sidewalk, where people stroll along throughout the day. There are a couple of options you can go with here. You can replace all of your front facing windows with expensive privacy glass. Or, you can apply privacy film on specific windows for a fraction of the price it would cost for full window replacements.
We know what you’re thinking… You don’t want to put tacky looking stickers over your window that might ruin your home’s appearance. We recommend you take a good look at the current options, then you will see for yourself that many of the products these days look pretty good when applied. So for that reason, we went through the available options and put together our own list of the best privacy window films we could find. Take a look and see for yourself!

- Rabibitgoo
- 5 out of 5
Our rating - No Glue
- Price: See Here
- Rabbitgoo 3D
- 4.6 out of 5
Our rating - Good Design
- Price: See Here
- Coavas
- 4.3 out of 5
Our rating - Durable
- Price: See Here
A privacy window film is a material which is multi-layered, thin, and made of polyester. It consists of various layers that aid in controlling UV light, glare, heat as well as privacy. Also, it comes in various prices, and with different shades, designs, and levels of performance.
Nonetheless, getting the best in the criteria above might be an issue, since there are literally multitudes of products available. In this article we’ll be taking a look at 10 of the best privacy window film available on the market today.
10 Best Privacy Window Films
1. Rabbitgoo 3D No Glue Decorative
The design of this film produces a unique rainbow-like effect with different patterns every time the sun hits it. Simply put, you have to experience it yourself to understand the level of depth it has. The film is great for both winter and summer applications, as it can reduce the heat in the summer and also increase the heat in the winter.
To eliminate chemical pollution and release of residue, gum and other adhesives are not present in the product. In turn, the film is perfect for the environment and even you.
The window film uses a static cling which positions it firmly on the glass without any hassle. Also, you can easily remove and reapply as you go.
There is a protective backing which should be pulled off before placing the film on any surface. To make this a lot easier, a scotch tape can be put on the corner of the smooth side and then the backing removes by carefully pulling the tape.
This film offers privacy in a way, that it prevents prying eyes but still gives room for the entry of sunlight into your home. On that note, it is capable of blocking the entry of up to 96% of UV rays. This is an excellent way of reducing risks to your health and also the aging of your furniture.
Features
Available in different patterns
Allows light to enter
It is easy to remove
There is no glue
Reusable film
Absence of chemicals
Offers privacy to a room
It is heat resistant
Price
In addition to helping curb aging of furniture/to reduce fading, this window film comes at a price with minimal impact on your wallet. Combining these excellent qualities, each buyer saves money when purchasing the film and also on the cost of furniture maintenance when using the film.
Conclusion
The rainbow lighting effect which this window film produces is quite an attractive beautification which most homeowners will love to add to their homes. There is also no damage to the windows or residue when using this films due to the static cling.
- After removing from a window, it does not leave any residue
- Capable of reducing the UV rays entering a room up to 96%
- It sticks to the windows without the use of glue to reduce chemical pollution
It’s not suitable for use in bathrooms as privacy level is heavily balanced
2. RABBITGOO 3D Static
RABBITGOO is quite popular for their craftsmanship when it comes to producing the best window film. So, it comes as no surprise that there is another one of their product on our list when they’re that good.
This particular film offers a stained glass finish with a repeated squares pattern. Each square offers a unique color when sunlight passes through it to give the room a more colorful lighting. It also has an excellent energy saving feature which helps to retain heat in the winter period and reject most of the heat during the summertime.
The film does not give full privacy and is only a semi-private option which prevents its use in bathrooms. It finds excellent use in office windows, and sliding doors, though use at home is very much welcomed too. The film is an eco-friendly product which can be reused and does not cause any stain or residue on the surface where it’s applied.
Nonetheless, though it is only semi-private, it has an improved privacy feature. This is unlike the common window films which only offer privacy during the daytime due to their designs. This piece gives privacy both during the day and at night. A lot of people find this very useful especially those looking to avoid the use of curtains in certain places.
Features
Excellent for use on smooth glass surfaces
96% UV protection
Firm static cling
Reusable window film
Other patterns available
Stained glass pattern
Heat retention and dispersion capability
Price
Excellent quality items at a very affordable price have become one of the main selling points of RABBITGOO privacy films. This is another reasonably priced privacy film selling at a price below average.
Conclusion
The absence of toxic materials and chemicals from gum is one excellent quality which makes this window film a suitable selection for a nursery or children room while still reducing the amount of sunlight entering the room. Also, its design language permits use in literally any environment.
- No chemical or toxic substance making it safe for use around children
- Design is exceptional aesthetic-wise
- Gives privacy both during the day and at night
- Price is reasonable
- The edges that do not stick properly to the window make it easy to notice the privacy window film
3. Coavas Non Adhesive
This film provides a beautiful frosted finish to your window with an additional privacy feature. The privacy it offers increases with the distance and at a distance of one meter, the level of privacy the film offers is more than 95%. This capability is nice and unless someone comes very close to peek through the window (obvious by the way), it is difficult to discern what is happening inside.
The film has a static cling, which implies that all it needs to stick firmly is water, applied to the surface. In-depth, we mean once the surface is wet with enough water, apply the film on the surface and if need be, use a dry cloth to force out air bubbles and water which are on the backing of the film to smoothen out the result. Also, the window film comes with a protective backing which should be removed before application and should likewise be placed on the front before smoothening the surface. This prevents scratches which may result from the use of the cloth.
Points made, extreme weather conditions have no adverse effect on the film. This, in turn, means that changes temperature level do not cause the film to shrink which makes it an excellent choice both in summer and winter. The film can additionally preserve heat in winter periods and offer insulation from heat during the summer.
Features
Vinyl colored film
Static cling
17.7 x 78.7 inches in dimension
No chemical adhesive required just water
Leaves no residue behind
More than 95% privacy at a one-meter distance
Energy conservation feature
Does not shrink due to a difference in temperature
Price
One of the cheaply priced window films, this is a really affordable film for anyone looking for a great privacy window film as it offers up to 95% privacy.
Conclusion
Using it gives a welcomed privacy which is actually necessary for different places and scenarios. It has a beautiful vinyl color with excellent qualities (durability is one) which make it usable in extreme conditions in various regions.


