- Как восстановить загрузчик Windows в главной загрузочной записи (MBR) из Ubuntu
- Требования
- Загрузка в Ubuntu live USB
- Способ первый: утилита Boot Repair
- Метод второй: Syslinux
- Метод третий: LILO
- Заключение
- Ubuntu Documentation
- Using the Ubuntu CD (Recommended)
- The graphical way
- The terminal way
- Using the Ubuntu Alternate CD
- See also
- Windows 10 Ubuntu dual boot not working [QUICK SOLUTIONS]
- What can I do if there is no GRUB on Windows 10 Ubuntu dual boot:
- Solution 1: Repair from Windows – Command Prompt
- Solution 2: Disable Fast Boot
- Solution 3: Use the Boot Repair Tool
- Solution 4: Windows and Ubuntu are installed in different modes
Как восстановить загрузчик Windows в главной загрузочной записи (MBR) из Ubuntu
Оригинал: How to Fix Windows MBR from Ubuntu
Автор: Matthew Muller
Дата публикации: 21 августа 2018 года
Перевод: А. Кривошей
Дата перевода: март 2019 г.
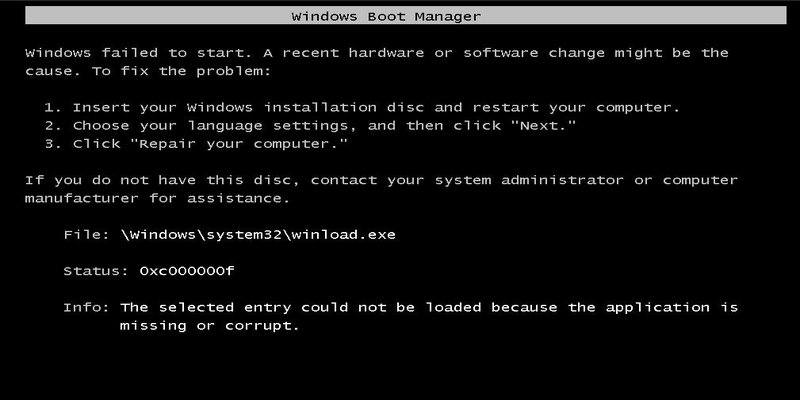
Если вы пытались настроить двойную загрузку Windows с Linux, то вы, вероятно, столкнулись с некоторыми изменениями, которые могут вами не приветствоваться. При установке Linux в такой среде загрузчик GRUB перезаписывает загрузчик Windows в основной загрузочной записи (MBR).
Это также верно в обратном направлении: если вы сначала установили Linux, а затем решили установить Windows, загрузчик Windows перезапишет GRUB, и вы обнаружите, что невозможно загрузить вашу систему Linux. Или, возможно, вы решили, что Linux не для вас, и хотите полностью удалить его, оставив только Windows.
Любой из этих сценариев может быть проблематичным для нового пользователя, но, к счастью есть способы восстановить загрузчик и MBR.
Примечание. В качестве дополнительной информации, который затронет многих пользователей, похоже, что Windows 10 Anniversary Update перезаписывает загрузчик как само собой разумеющееся.
Требования
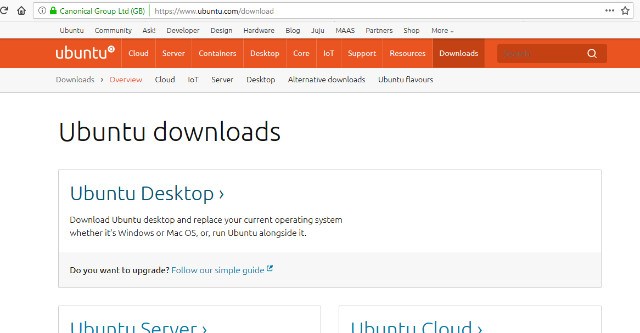
Первым шагом будет скачивание и создание вашего Linux live CD или USB. Ubuntu — безусловно, самый простой и доступный дистрибутив, хотя для наших целей могут использоваться большинство дистрибутивов Linux. Используя другой компьютер, перейдите на веб-сайт Ubuntu и загрузите версию, подходящую для вашей архитектуры. Если вы сомневаетесь, возьмите 32-битную версию, так как она будет загружаться на любой машине.
Следуйте этому руководству , чтобы создать Linux live USB в Windows.
Загрузка в Ubuntu live USB
Создав свой live-носитель, необходимо загрузить компьютер с вашего носителя с Ubuntu и выбрать в загрузочном меню пункт «Try Ubuntu without installing». Если это не удается, убедитесь, что в BIOS отключена secure boot, иначе ваша система никогда не загрузится с диска Linux.
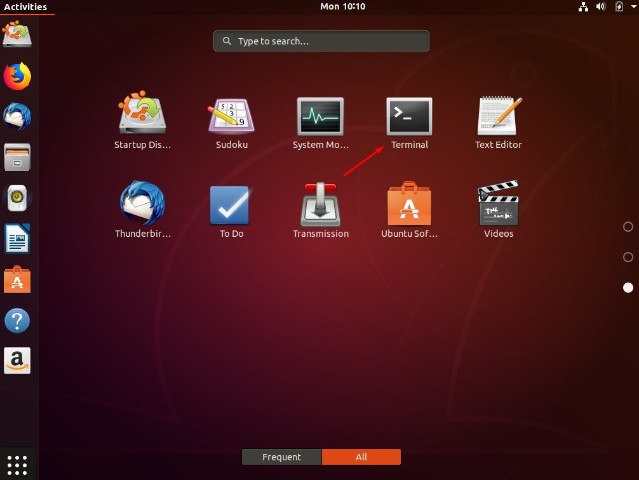
После запуска рабочего стола вам нужно будет открыть терминал, который можно найти в меню «Приложения».
Примечание: на этом этапе имейте в виду, что вы имеете дело напрямую с жестким диском, и полностью прочитайте руководство, прежде чем вносить какие-либо изменения, в противном случае вся ваша система может стать нестабильной или неработоспособной.
Безусловно, самый простой способ восстановить MBR — использовать небольшую утилиту под названием «boot-repair», а не работать непосредственно в терминале.
Способ первый: утилита Boot Repair
Во-первых, вам нужно добавить репозиторий. Введите:
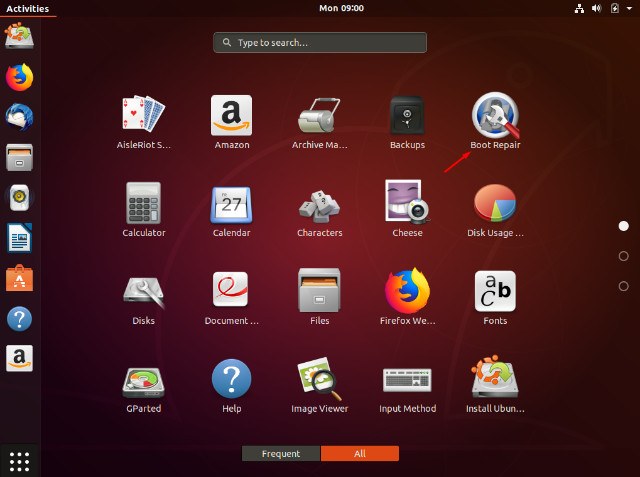
После установки найдите приложение в меню «Приложения» и кликните, чтобы запустить.
После запуска утилиты выберите тип восстановления. Для большинства случаев это будет рекомендуемое восстановление.
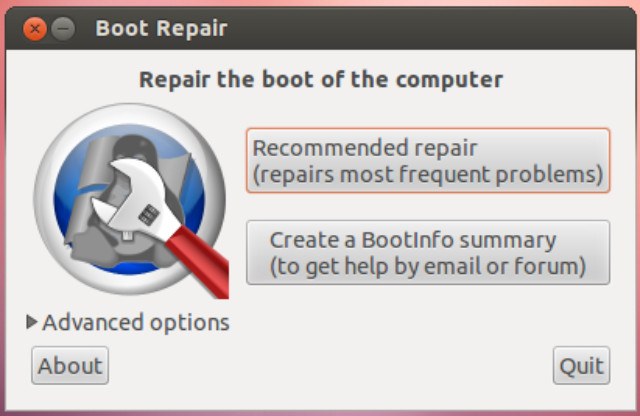
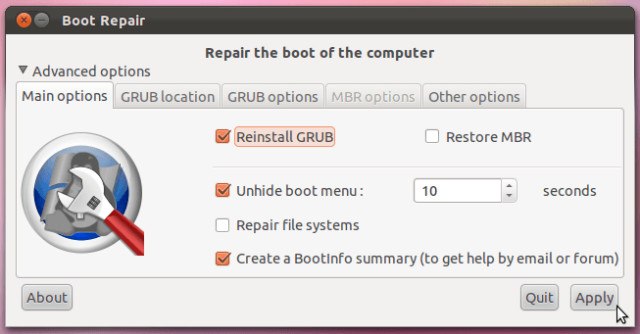
Когда утилита завершит работу, вы сможете загрузить свою систему и выбрать либо Windows, либо Linux из меню GRUB. Запуск утилиты также позволит вам изменить или изучить некоторые другие опции, если вам требуется более сложное восстановление загрузки. Кликнув «Restore MBR», вы сможете использовать вкладку MBR.
Если вы застряли, у Ubuntu есть руководство на их сайте.
Метод второй: Syslinux
Это немного сложнее и требует от вас работы с терминалом. Если вы не уверены, то, пожалуйста, придерживайтесь первого метода.
Откройте терминал, как и раньше, и введите:
По завершении установки введите следующую команду, не забывая изменить имя диска «sda» на свое:
Кроме того, вы можете восстановить MBR, введя:
Метод третий: LILO
Загрузитесь с live CD или USB, и в терминале введите:
где «/dev/sda» — это имя вашего диска. Это должно исправить вашу MBR.
Заключение
Если вы используете двойную загрузку Windows и Linux, очень легко перезаписать MBR. Описанные выше действия должны помочь вам восстановить MBR.
Ubuntu Documentation
This page documents how to restore or recover the boot-loader (GRUB) after installing Windows. Some reasons to repair your boot-loader might include installing Microsoft Windows after you have installed Ubuntu, adding or removing a hard drive, or changing hard drive settings.
Note: this tutorial does not apply if you had installed Ubuntu inside Windows (via the Wubi installer). In this case, please read this page.
Using the Ubuntu CD (Recommended)
The graphical way
- Insert your Ubuntu CD, reboot your computer and set it to boot from CD in the BIOS and boot into a live session. You can also use a LiveUSB if you have created one in the past.
Install and run Boot-Repair
The terminal way
* Open a terminal. As of Ubuntu 11.10 and 11.04, this can be done by opening the Unity Dash (you can click the Ubuntu logo in the top panel or use the Windows key on your keyboard) and typing in «Terminal», and clicking what comes up. On earlier versions, you can achieve this by going to Applications -> Accessories -> Terminal. Alternately use the Keyboard Shortcut: CTRL + ALT + T.
For full details on using terminal to fix grub on hard drive from Live Installer DVD or Flash: https://help.ubuntu.com/community/Grub2/Installing#via_the_LiveCD_terminal
- You are then presented with a standard bash prompt, type — this only works to reinstall to MBR of a working system:
where XXX is the device of your Ubuntu install. (eg: grub-install /dev/sdb). Hint: You can also use /dev/disk/by-label/ if the partition you installed on has a label. You can determine the /dev node for such a device by running:
This will give the output of something like:
You can also use fdisk if you do not see the /dev/disk/by-label:
From here, find only the drive name, ignore the partition number, that is, for partitions labeled «root», «data2», «fat», «home» and «swap» it’s all still just sda. This is due to the fact that GRUB is installed in the MBR of the drive, and not on a partition.
Trouble? If other things are messed up, e.g. if you have deleted the partition from where Grub was previously installed, grub-install may return an error message such as «cannot find a device for /. (is /dev mounted?)». You may have to do grub-install a bit differently. Refer to the handy guide on fixing a broken system
Now reboot your system. The usual GRUB boot menu should appear. If it does not, hold Left Shift while booting. You will be able to choose between Ubuntu and Windows.
Using the Ubuntu Alternate CD
- Boot your system from the Ubuntu Alternate CD.
When the Ubuntu splash screen comes up with the boot: prompt, type in rescue and press enter.
At this stage you are presented with a screen where you can select which partition is your root partition (there is a list of the partitions on your hard drive, so you are required to know which partition number Ubuntu is on). This will be dev/discs/discY/partX, where the X is a partition number and Y is the number of the drive.
See also
RecoveringUbuntuAfterInstallingWindows (последним исправлял пользователь mcchots 2015-01-27 14:44:04)
The material on this wiki is available under a free license, see Copyright / License for details
You can contribute to this wiki, see Wiki Guide for details
Windows 10 Ubuntu dual boot not working [QUICK SOLUTIONS]


Many people use a dual boot setup on their PCs depending on their requirements and need. Some use both Ubuntu and Windows 10 because both have their pros and cons.
Ubuntu, like many other non-Windows operating systems, does support dual booting. Windows 10, on the other hand, usually ships with settings that are not optimal for dual boot setups.
GRUB (the acronym for GRand Unified Bootloader) is the bootloader which is used by Ubuntu to manage the operating systems installed on your computer.
Basically, it is the software that looks at the operating systems installed on your PC and allows you to choose which one to start after switching on the machine.
Most of the problems are related to GRUB, so if you are unable to boot into Grub and the system boots directly to Windows repeatedly, you are going to find below some solutions to this problem.
You can use this guide to fix the following Windows 10-Ubuntu issues:
- Dual boot option not showing in Windows 10
- GRUB menu not showing in Ubuntu
- Ubuntu won’t dual boot with Windows 10
What can I do if there is no GRUB on Windows 10 Ubuntu dual boot:
Solution 1: Repair from Windows – Command Prompt
The simplest way to try to solve this issue is by using the Command Prompt from Windows. In order to do this, please use the steps described below:
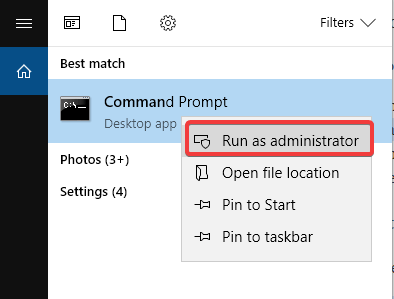
- In Windows go to menu and search for Command prompt
- Right click on Command Prompt and choose the option Run as administrator

- Copy and paste the command bcdedit /set
path EFIubuntugrubx64.efi - Restart your computer

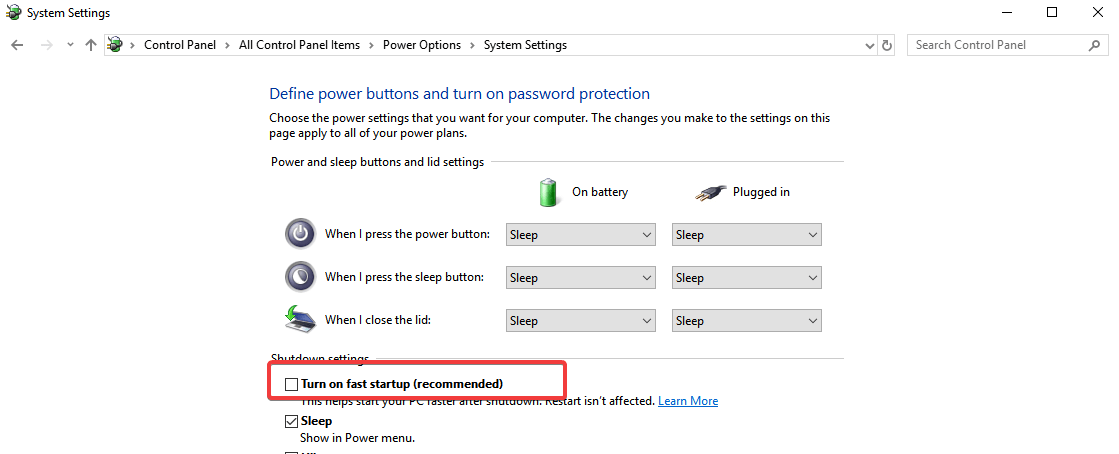
Solution 2: Disable Fast Boot
You can also try to deactivate fast boot function of Windows 10 to access the GRUB menu. To do so, please follow the steps below:
- Access Control Panel
- Search for the term power in the search bar at the top right
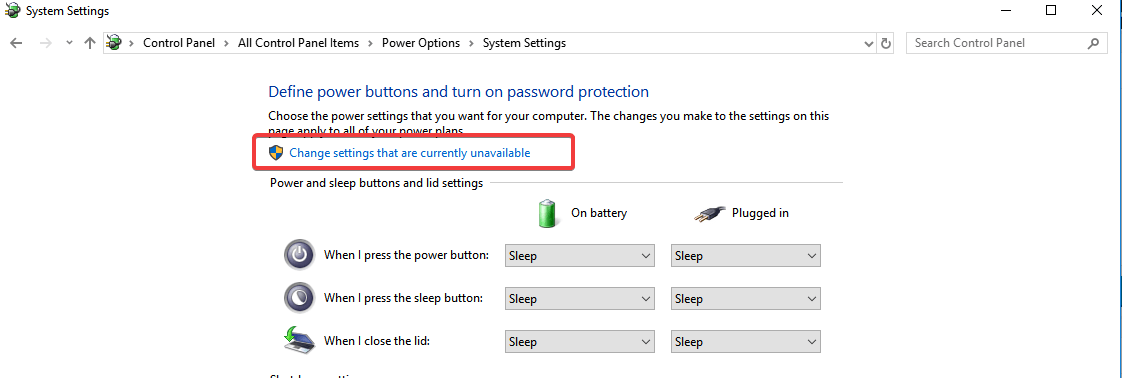
- Click on Change what the power buttons do
- Click on the Change settings currently unavailable
- Uncheck the item Turn on fast start up (recommended)
- Press Save Changes to save the settings
You can’t open Control Panel? Take a look at this step-by-step guide to find a solution.
Solution 3: Use the Boot Repair Tool
The Boot Repair Tool is a small software that can solve most of the boot related problems. In order to install it and use it:
- Boot into your operating system
- Enter the following commands:
sudo add-apt-repository -y ppa:yannubuntu/boot-repair
sudo apt-get update
sudo apt-get install -y boot-repair && boot-repair - After the installation is complete, you can launch Boot Repair tool from the apps menu
- It will do some scanning so let it finish its job
- Then a screen will appear which will be saying recommended repair based on the scan
- After choosing recommended updates, it will start the repair
- Open the terminal and copy and paste the highlighted command in terminal one by one.
- Select yes by using arrow keys or tab buttons and hit enter to select
- in Boot Repair Tool screen hit forward
- Copy the command mentioned there and paste it into terminal and hit enter and let it do the job
- If prompted some options to configure where to install GRUB Choose yes and then hit enter
- Use spacebar to select an option and TAB to navigate through options
- After you finish installing GRUB, you can close Terminal
- select the forward option in Boot Repair Tool screen
- Select Yes for every option regarding confirmation
- a successful confirmation message will appear on the screen
- restart your computer
Solution 4: Windows and Ubuntu are installed in different modes
It is not possible to dual boot two operating systems if they are installed in different modes – one in UEFI mode and the other one in BIOS Legacy mode.
Therefore, to solve the problem and restore the dual boot you have to convert the installation of Ubuntu to the same mode in which Windows is installed.
In order to solve this, you can use the Boot Repair Utility and you will need a live bootable DVD of your installed operating system. Afterwards, you can follow one of the steps below, depending on your situation.
- To convert Ubuntu to UEFI mode you need to start Boot Repair and activate the panel with the Advanced options, then select the GRUB Position tab, put the check on separate Partition/boot/efi and click Apply.
- To convert Ubuntu to BIOS Legacy mode, start Boot Repair and activate the panel with Advanced Options, then select the GRUB Position tab, uncheck the separate Partition/boot/efi item and click Apply.
Afterwards, enter into the UEFI firmware configuration panel and choose whether to start the computer in UEFI or Legacy mode.
Most users don’t know how to enable Legacy Boot on Windows. Check out this guide and be a step ahead. If you’re having UEFI boot problems on Windows, this guide should help you solve them in no time.
We hope that one of the solutions described above helped you solve the dual booting problems and now you are welcomed by the familiar Grub screen.
If you have any more questions, feel free to post them in the comments section below.


