- Fix Touchpad Scroll Not Working: Windows 10 (Solution)
- How To Fix Touchpad Not Scrolling: Windows 10
- Method 1: Reboot/Restart Your PC
- How To Start PC IN Safe Mode
- Method 2: Roll Back Touchpad Driver Update
- Method 3: Update Touchpad Driver
- Alternative way to update Touchpad Driver
- Method 4: Enable Virtual Scrolling
- Closing Words
- How to Fix Scroll Bar Jumps To Top When Scrolling in Windows 10
- Fix 1 – Via Settings App
- Fix 2 – Launch folder windows in a separate process
- Fix 3 – Re-zoom in File explorer
- Fix 4 – Update Windows
- Fix 5 – Update Mouse drivers via Device manager
- Related Posts:
- Reader Interactions
- Comments
Fix Touchpad Scroll Not Working: Windows 10 (Solution)
Touchpad scroll not working is a very common issue that has been observed with many laptop users. Usually, the touchpad scroll is located at the right side of the touchpad of a laptop. With the help of a single finger, one can easily scroll up or down while browsing the internet, files, documents, etc.
The instances when touchpad scroll stops working usually occur after Windows updates or due to other issues at times.
The introduction of Double Finger Scroll Touchpads has replaced touchpad scroll. But, there are a large number of laptop users who still have laptops and notebooks with touchpad scrolls. With touchpad scroll not working in Windows 10, getting a new laptop with double finger scroll might be a solution for few, but it’s not practical for most of us. Thus, we try to fix the Touchpad Scroll Not Working issue in this article. Let us see…
Before we proceed, I’d like to mention that these solutions work the same, regardless of your laptop brand. The following solutions can fix touchpad scroll not working for Dell, HP, Lenovo, Acer, etc.
How To Fix Touchpad Not Scrolling: Windows 10
The first step to fix a non-functioning touchpad scroll is NOT TO PANIC.
There are huge chances that you updated your Windows 10. And, right after the update, your touchpad scroll stopped working. Sometimes, the reason might be something else. So, we are going to keep all the possibilities open while trying to fix touchpad scroll not working issue.
Method 1: Reboot/Restart Your PC
Whatever be the case, at times, a simple restart might fix the problem. Do not shy away, just give your PC a reboot. It’s a standard procedure. Every tech-support guy’s dream is to get customers PC restarted to get the problem solved, so I’m just trying to follow the legacy. Just kidding, I’m serious; Have you tried to restart your PC?
So, you’re back, huh? Still touchpad scroll not working? It’s time to shut down your PC, and start it in Safe Mode. If your touchpad scroll starts to work, then it’s probably the startup programs that are keeping your touchpad scroll from working.
How To Start PC IN Safe Mode
While you start your computer, you will hear a beep tone. As soon as you hear that tone, start pressing the F8 button continuously. Keep an interval of around half a second between every press, until you see the Advanced Boot Options screen.
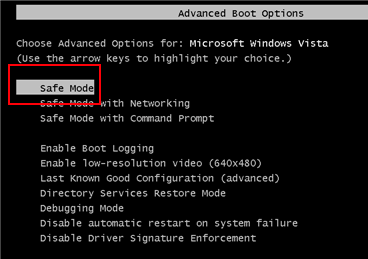
Select the Safe Mode option and hit Enter key. Your PC will start in Safe Mode. If the touchpad scroll is not scrolling, then there is some issue with startup applications.
To stop unwanted startup applications, you can visit the startup menu.
Press Windows + R keys together. The RUn box will appear. Type msconfig and press Ok. This will open the System Configuration window. Here, go to Startup tab.
Here, you can unselect and disable all the programs except those whose manufacturers are Intel Corporation and Manufacturing brand of your PC. For example, I unselected all startup items except those with manufacturers Dell and Intel. After that, press Ok to save the settings. Restart your PC and see if this works.
So, until here, we were carrying out basic troubleshooting. Now let’s checkout a couple advanced methods, which will resolve the touchpad scroll not working in Windows 10 issue in almost 95% of the cases.
Method 2: Roll Back Touchpad Driver Update
One of the major problems, when touchpad scroll stopped working for people, is because of driver issue. There might be chances that the new driver update is incompatible or simply not functioning well with the touchpad. You can fix this issue by rolling back touchpad driver update. Now, there’s no rocket science behind this. You can rollback touchpad driver update to fix touchpad scroll not working in Windows 10 issue through following steps:
Step 1: In Windows 10, press Windows + X keys together. This opens up the Quick Access menu. From the menu list, click on the Device Manager option.
Step 2: In the Device Manager window, look for “Mice and other pointing devices” option. Click on it to expand it. From there, you will have to right click on the touchpad driver option. From the context menu, select the Properties option.
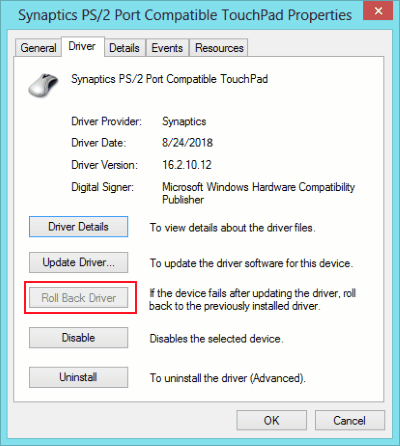
Step 3: In the Properties window, go to the Driver tab. Here, you will find several options and buttons. One of the buttons which you want to click on is “Roll Back Driver“.
If you find the Roll Back Driver option to be grayed out, it means that your touchpad driver has not been updated yet. One of the things you can do is, go to your Laptop / Notepad manufacturer’s website, select your PC model, and download the immediately earlier version of touchpad driver. Install the driver and see if this works.
Method 3: Update Touchpad Driver
The next thing to do to fix touchpad not scrolling issue is to update your touchpad driver to the latest version. The process to update driver is somewhat similar to that of rolling back the updates.
Follow the steps mentioned in the above method to open Device Manager. When in Device Manager, right click on the touchpad driver option like mentioned above and select Properties option.
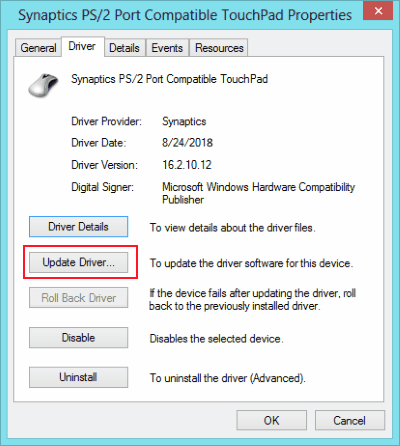
From the properties window, you will have to select the Update Driver option, instead of Roll Back Driver option.
Once the update is complete, restart your PC and see if the issue has been fixed.
Alternative way to update Touchpad Driver
If the above method didn’t work, the following method will probably fix the touchpad not scrolling issue.
Step 1: Open Device Manager as shown above. Go to the touchpad driver and right click on it. From the right-click menu, select the Uninstall option. After uninstall is complete, Restart your PC. It is suggested to have a mouse connected before uninstalling the touchpad driver. If you do not have access to a mouse, it is suggested that you carry out the second step first.
Step 2: Go to the website of your PC’s manufacturer, select your model number, and download the latest touchpad driver from there in compatibility mode.
Step 3: Right click on the downloaded driver file, and click on Properties.
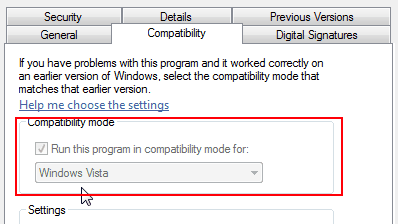
Step 4: Go to the Compatibility tab in Properties window. There, you have to select the “Run this program in Compatibility mode” option, then from the dropdown, select your current OS, that is Windows 10.
Step 5: Install driver and restart your PC.
This would solve the problem for you and your touchpad scroll would be working fine.
Method 4: Enable Virtual Scrolling
Here’s another thing that you could try to fix the touchpad scroll not working issue. Enable Virtual Scrolling from the Control panel. Here’s how to do it:
Step 1: Open Start menu and type “Control Panel“. Click and open Control Panel.
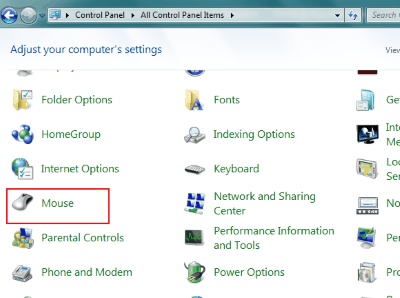
Step 2: In Control Panel, you have to select the Mouse option. If you cannot find Mouse, it means the options show up as categories. Click on the Hardware option to find the Mouse option.
Step 3: In the Mouse window, go to the Pointing Device Properties tab. Here, click on the “Device Settings” option.
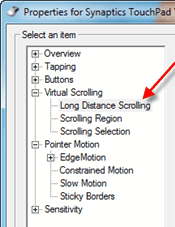
Step 4: From this window, select the “Virtual Scrolling” and “Long Distance Scrolling” options. Checkmark other necessary options to according to your preference.
Step 5: Now, select the Scrolling Region and point the area where touchpad scroll is available on your touchpad.
Note: This is not exactly a fix to the issue of touchpad scroll not working in Windows 10, but an alternate solution to scroll using your laptop touchpad.
Closing Words
Although these methods will definitely solve your problem, you are probably reading this because none of the solutions worked for you (sad and irritating at the same time). Probably it’s a hardware problem; you never know. It’s time you take your laptop for a check at the nearest service center and utilize that unused warranty card that you probably forgot about. I know it’s a hassle and takes time, but that’s the perk of getting your PC checked by professionals.
How to Fix Scroll Bar Jumps To Top When Scrolling in Windows 10
March 25, 2021 By Madhuparna
With the Windows 10 getting frequent updates, while there are many new useful features added, there are also a few issues that come along. There’s this common issue where the scroll bar does not scroll down and constantly stays up. This means, even if you are trying to pull the scroll bar down using your mouse, it jumps back to top.
For instance, you open the File Explorer and try to scroll down, but the scroll bar doesn’t go down. It’s stuck at the top. This can be really annoying and makes it difficult to view or access files or folders towards the bottom. So, how do you fix this issue? Let’s find out how.
Workarounds:-
1. For some users , usually 4k screen users, try this. Just resize file explorer by grabbing its one of the corner.
2. Try using a different mouse and if the issue seems to does not occur, then your mouse may be the reason for this. Change your Mouse.
Fix 1 – Via Settings App
Step 1: Click on the Start button on your desktop, and select Settings from the context menu located above the Power option.
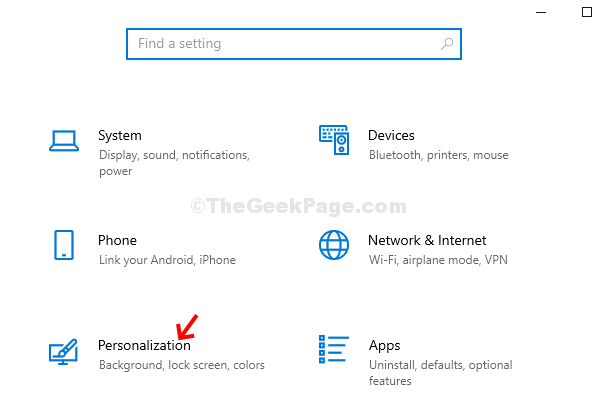
Step 2: In the Settings window, click on Personalization.
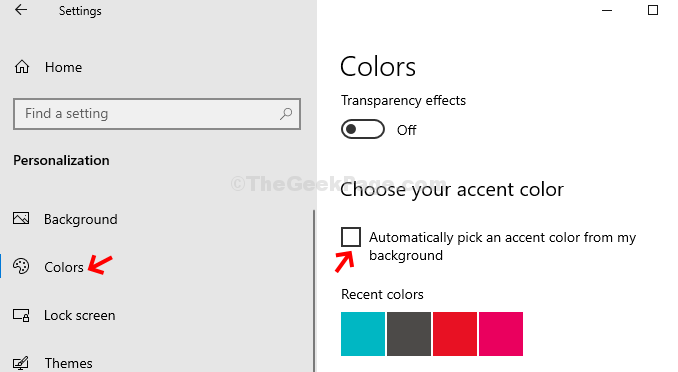
Step 3: In the next window, click on Colors on the left side of the pane. On the right side of the pane, scroll down, and uncheck Automatically pick an accent color from my background option under Choose your accent color.
That’s it, and now when you back and try scrolling down, it starts working.
Fix 2 – Launch folder windows in a separate process
1. Search file explorer options in windows 10 search box
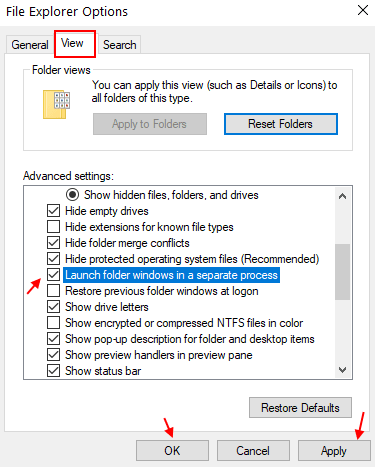
2. Now, Click on View Tab and then select Launch Folder windows in separate process.
Fix 3 – Re-zoom in File explorer
Press and hold the CTRL key on your keyboard. Now, keeping it pressed, just scroll down your mouse, it will zoom up or zoom down and your file explorer icons will show up with different size and style. Just zoom down a bit smaller by zooming down it once.
Fix 4 – Update Windows
For some users , it has been update related.
1.Just Press Windows key + I together to open settings.
2.Now, click on update & Security and then check for recent updates and install updates.
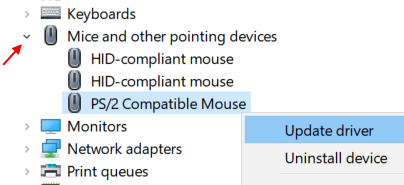
Fix 5 – Update Mouse drivers via Device manager
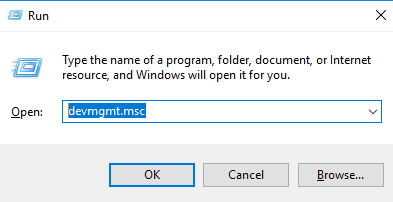
1. Press Windows key + R key together to open run.
2. Write devmgmt.msc in it and click OK.
3. Now, click on left side of mice and other pointing devices to expand it.
4. Now, right click and update your mouse driver , which you are currently using on your PC.
5. Click on Search automatically for updated driver software
6. Follow , on screen instructions.

I find passion in writing Tech articles around Windows PC and softwares
Related Posts:
Reader Interactions
Comments
It was an extremely easy fix for me
Normally
Holding down CTRL key and scrolling on mouse
Zooms the screen bigger or smaller
I just made it a smidge smaller
and
everything was normal again
Try this:
In Folder Options, View:
Activate “Launch folder windows in a separate prosess”. Maybe the annoying file explorer auto jump disappears.
I too have tried all of the “theoretical” solutions mentioned on a lot of the forums found in my search. NONE OF THEM WORKED for me!
I got my first Win-10 OS computer 1½ years ago. This issue was a problem then and it is still a problem now. I am trying to work Smarter, not Harder. But MSFT keeps working against this philosophy with File Explorer.
Their software code must be VERY fragile that MSFT developers are afraid to fix it for fear of disrupting something else. Instead of developing File Explorer as a stand alone application, they chose to imbed it as part of a lot of other OS operations. So to amputate it and make it an independent piece of software, would cost them $$$. And there-in lies the rub. It’s NEVER about you or me. It’s ALWAYS about SHAREHOLDER value.
Take it from someone who’s seen this rodeo show before!
Didn’t work for me either. This problem is so annoying! Takes me double time to do any work.
SHADI AL SADI says
nothing is solving this problem , i think microsoft updates has to do with it ,microsoft should intervene so quickly because it is so annoying .
This does not work.
Seems it is update related.
Just finished recent update, ever Chrome has behaved strange since.
Trying to delete and reinstall Chrome, perhaps.
Epic fail, anyway.
Same story here.
It seems that the cursor itself stuck to the top. Page down works fine nicely scrolling down, but once page up pressed it jumps back to the top of the page. Extremely annoying.
Dylan J Gillis says
This does not work. Many have said this is issue and I have tried everything related turning off auto save pick color, windows slideshow background etc. does not have any effect, there is other issue….
It seems weird to me Microsoft does not understand this….


