- How to Fix Low Volume on Windows 10
- Solution 1: Restarting your PC and Updating Drivers
- Solution 2: Changing the Sound Quality
- Solution 3: Enabling Loudness Equalization
- Solution 4: Changing the Communications Sound Settings
- Solution 5: Changing the Volume using Volume Mixer
- Solution 6: Installing the default drivers
- Fix: Volume Automatically Goes Down / Up Windows 10
- What is causing the ‘automatic volume adjustment’ issue on Windows 10?
- Method 1: Disabling Sound Effects and Immediate Mode
- Method 2: Disabling automatic volume adjustment via Communications tab
- Method 3: Downgrading to a generic Windows driver
- Method 4: Disabling Dolby Digital Plus Advanced Audio
- Method 5: Dealing with physical triggers
- Method 6: Uninstalling and Reinstalling Drivers
- Method 7: Disable Attenuation
How to Fix Low Volume on Windows 10
Windows 10 has issues outputting full volume primarily because of incorrect settings in your computer or because of corrupt and outdated drivers. This issue rarely surfaces because of hardware problems so rest assured. Here are some solutions on how to overcome the low volume in Windows 10.
Solution 1: Restarting your PC and Updating Drivers
One of the basic fixes is to restart your PC. If you installed an application, it is possible that it isn’t properly configured with your computer and requires a restart. Furthermore, you should update your sound drivers. Sound drivers are the main bridge between the operating system and your sound hardware. If the correct drivers are not installed on your PC, you might not get the optimum experience and the sound might not be generating to its full capacity. Update your sound drivers and turn them on and off. Then after restarting your PC, check if the problem got solved.
Solution 2: Changing the Sound Quality
We can increase the frequency of the sound output from the sound settings. Having a high-frequency output doesn’t harm your computer in any way and it is reported that varying the frequency increases the sound output from the speakers significantly. You can always change back to default settings if this doesn’t make a difference.
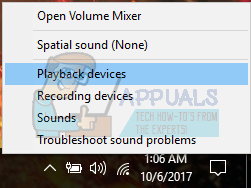
- Right click on the sound icon present at your taskbar and select “Playback Devices” (bottom right side of the screen).
- Navigate to the Playback tab. Select the output device (your speakers) and click on Properties present at the bottom right side of the screen.

- Once in the properties, navigate to the Advanced tab. Select the drop-down under the subheading of Default Format and select the highest quality.

- Press Apply to save changes and exit. Now check if there is any significant difference in the sound quality.
Solution 3: Enabling Loudness Equalization
Loudness Equalization is an option present in the sound settings which enable you to boost your sound so the output increases. However, you might be doing a tradeoff with the performance of the sound but since this increases the sound volume a lot, we can go with it.
- Right click on the sound icon present at your taskbar and select “Playback Devices” (bottom right side of the screen).
- Navigate to the Playback tab. Select the output device (your speakers) and click on Properties present at the bottom right side of the screen.
- Once in the properties, navigate to the Enhancements tab. Check the option which says “Loudness Equalization”. Click on Apply to save changes and exit.

- A restart might be required to implement the changes. After restarting, check if the problem got fixed. If you are facing a lot of baffled and low sound than before, you can easily revert the changes.
Solution 4: Changing the Communications Sound Settings
Windows has a built-in feature which reduces your master volume by a significant percentage if it detects incoming telecommunications. We rarely use this feature in our daily lives and most probably, we don’t even know if it works. It is possible that this feature is not configured properly with your hardware and OS; thus causing your problems. We can try disabling this feature and check if the sound output changes.
- Right click on the sound icon present at your taskbar and select “Sounds” (bottom right side of the screen).

- Once in the Sound properties, navigate to the Communications tab. Select the option of “Do nothing”. Press Apply to save changes and exit.

- Restart your computer and check if the sound quality got any better.
Solution 5: Changing the Volume using Volume Mixer
Windows has the option to set different volumes for different applications present on your computer. Mostly, the sound of other applications isn’t set to the highest potential. If you are using Chrome or some other application, and not receiving the expected sound, you should check the settings of Volume Mixer and turn all the settings to highest.
- Right click on the sound icon present at your taskbar and select “Open Volume Mixer” (bottom right side of the screen).

- Once in the volume mixer, make sure that all the sounds are at their highest.

- Re-launch the application where you were having problems and check if the problem got solved.
Solution 6: Installing the default drivers
If you are having the Realtek audio drivers installed on your computer, we can try uninstalling them. We will replace Realtek with the default audio driver used by the audio hardware. For some, this solved the problem instantly. Follow this solution after all the previous ones didn’t work for you.
Windows, by default, will automatically try to update your drivers to the latest version available. We can turn this behavior off by doing the following steps.
- Press Windows + S to launch the search menu of your start bar. Type “system” in the dialogue box and select the first item which returns in the result.

- Once in the system, click on “Advanced system settings” present at the left side of the screen.

- Navigate to the Hardware tab and click on “Device Installation Settings”.

- Select the option of “No (your device might not work as expected”. Press Save changes and exit. This will disable the Windows update from updating your audio drivers automatically.

- Now press Windows + X to launch the quick start menu and select “Device Manager” from the list of options available.
- Once in the Device manager, expand “Sound, video and game controllers” category. Right-click on Realtek device and select “Uninstall device”.
- Check the uninstall driver checkbox to uninstall the driver as well and proceed with the uninstallation.

- Once the device is uninstalled, right click on any empty space on the Device manager and select “Scan for hardware changes”. Your computer will now detect the audio hardware on your computer and automatically install “High Definition Audio Device”.

- Now check if this brings any difference. Also, reboot your machine after the installation of default drivers.
Note: Try to disable hardware acceleration and check if that fixes this particular issue.
Fix: Volume Automatically Goes Down / Up Windows 10
Some users have been reporting that their volume automatically goes up or down over time without any manual adjustment. Some affected users report that the issue only occurs when they have more than one windows/tab that produces sound. Other users report that the volume randomly jumps to 100% with no apparent trigger. In most cases, the values of the volume mixer are not changing even if the volume of the sound has clearly been modified. The vast majority of reports are confirmed to occur on Windows 10.
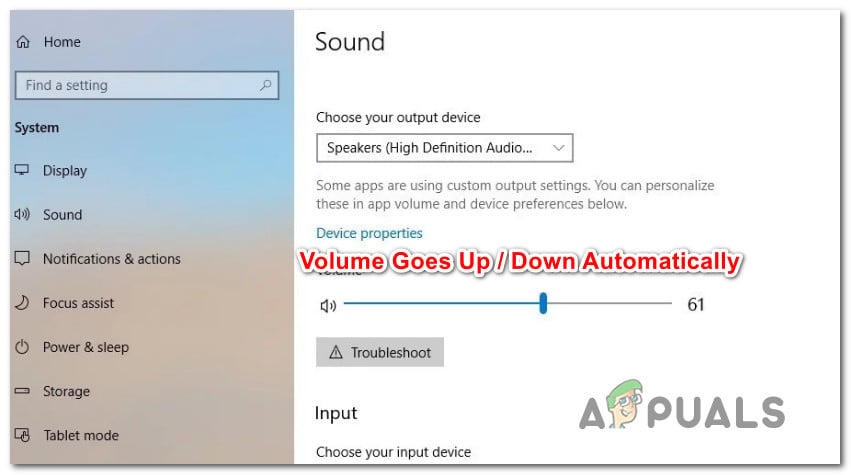 Volume Automatically goes down / up on Windows 10
What is causing the ‘automatic volume adjustment’ issue on Windows 10?
We investigated this particular issue by looking at various user reports and the repair strategies that have been successfully used to resolve this problem. Based on our investigations, there are several common culprits that are known to trigger this odd behavior on Windows 10:
- Sound Effects or Immediate Mode are causing this – Realtek audio drivers do include a few features that might cause this particular behavior. Most of the time. Realtek’s Immediate Mode and a few other sound effects can cause automatic volume adjustment to some degree. Several users in similar situations have reported that the issue was fixed after they disabled any additional sound effects.
- Issue is being caused by Windows Communications feature – There’s one Windows feature that ends up creating this particular issue for a lot of users. Although it’s designed to automatically adjust the volume when the PC is used for communication purposes, it can sometimes pick up false-positive which will end up reducing the volume when it’s not the case. In this case, changing the default behavior to ‘Do nothing’ will resolve the issue.
- Windows audio driver is causing the issue – As a lot of users have reported, the default Realtek driver will get updated over time, which will end up causing this particular issue on some machines. If this scenario is applicable, downloading to a generic Windows driver should resolve the issue.
- Dolby Digital Plus is adjusting the volume – One of the few 3-rd party audio drivers that are known to cause this issue is Dolby Digital Plus. This happens due to an audio feature called Volume Leveler. Unfortunately, disabling it will still preserver the same behavior, so you’ll need to disable Dolby Digital Plus altogether to resolve the issue.
- A physical trigger is lowering/raising the volume – Stucked volume keys on your keyboard or a mouse USB dongle that is acting up are all potential causes that might lead to this particular problem. Unplugging the connected devices or getting the stuck keys unstuck will resolve the issue in this case.
If you’re looking for ways to prevent your Windows volume for getting automatically adjusted, this article will provide you with several troubleshooting steps. Down below, you’ll discover a collection of methods that other users in a similar situation have successfully used to prevent this behavior from occurring.
Method 1: Disabling Sound Effects and Immediate Mode
As it turns out, several Realtek drivers are known to cause this particular problem. We haven’t managed to find an official explanation on why this issue occurs, but it seems like the most popular trigger is playing something with sound, pausing it and then playing it again. For most affected users, this scenario will result in a volume change that doesn’t get recognized inside the speaker volume meter.
Fortunately, some affected users have reported that this odd behavior no longer occurred after they accessed the Sound settings and disabled all sound effects + Immediate mode. Here’s a quick guide on how to do so:
- Press Windows key + R to open up a Run dialog box. Then, type “mmsys.cpl” and press Enter to open up the Sound window.
- Go to the Playback tab, select the playback device that you’re having issues with, right-click on it and choose Properties.
- In the Properties screen, go to the Enhancement tab and check the boss associated with Disable all enhancements (Disable all sound effects). Then, hit Apply to save the changes.
Note: If you’re speaker/headset settings include Immediate Mode, disable that also. - Restart your computer and see if the issue has been resolved at the next startup.
 Disabling Sound Enhancements on Windows 10
If you’re still noticing that the sound volume tends to go up or down over time, move over to the next method below.
Method 2: Disabling automatic volume adjustment via Communications tab
As it turns out, another possible culprit that might end up lowering your audio volume is a Windows feature that is designed to automatically adjust the volume when you are using the PC to place or receive telephone calls. While this feature is great when it functions correctly, we saw a lot of user reports where Windows is wrongly interpreting incoming or outgoing communications and lowering the volume when it’s not necessary.
If this scenario is applicable to your current situation, you’ll be able to resolve the issue by going to the Communications tab of the Sound menu and modify the default behavior to ‘Do Nothing‘ when a new communication is detected.
Here’s how to do this:
- Press Windows key + R to open up a Run dialog box. Then, type “mmsys.cpl” and press Enter to open up the Sound screen.
- Inside the Sound window, go to the Communications tab and set the Do nothing toggle under ‘When Windows detects communications activity’.
- Hit Apply to save the changes, then restart your computer to see if the issue has been resolved.
 Disabling automatic volume adjustment during communications
If you’re still encountering the same odd behavior with your sound volume, move down to the next method below.
Method 3: Downgrading to a generic Windows driver
If none of the methods below have helped to stop your sound volume from getting automatically adjusted, you can probably start blaming your sound driver that is currently active. We have seen a lot of reports where it was confirmed that the issue ended up being caused by a Realtek driver that Windows Update automatically installed.
If you’re using a Realtek sound driver, chances are you will be able to resolve this particular problem by downgrading your current sound driver to the generic Windows driver that is already stored on your system. Here’s how to do so:
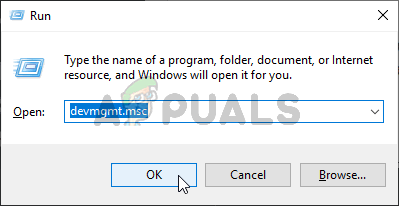
- Press Windows key + R to open up a Run dialog box. Then, type “devmgmt.msc” and press Enter to open up Device Manager.
- Inside Device Manager, expand the Sound, video and game controllers drop-down menu.
- Right-click on the Audio device that is acting up and choose Update driver (Update Driver software).
- At the first prompt, click on Browse my computer for driver software.
- Then, on the next screen, click on Let me pick from a list of available drivers on my computer.
- Next, start by checking the box associated with Show compatible hardware. Then, select High Definition Audio Device from the list and click Next.
- Click Yes at the warning prompt to install this driver over your current driver installation.
- Restart your computer to save the changes and see if the volume issue is resolved at the next startup.
 Downgrading to a generic audio driver
Method 4: Disabling Dolby Digital Plus Advanced Audio
If you’re using audio equipment that supports Dolby Digital Plus, there’s a high chance that the program behind it is causing automatic volume changes. This happens due to an audio feature called Volume Leveler. But, unfortunately, disabling this effect will not resolve the issue. Sadly, you’ll need to disable Dolby completely in order to prevent it from conflicting with your playback device.
Several users in a similar situation have reported that the issue was resolved after they visited the Sound menu and disabled Dolby Digital Plus entirely. Here’s how to do this:
- Press Windows key + R to open up a Run dialog box. Then, type “mmsys.cpl” and press Enter to open up the Sound screen.
 Running dialog: mmsys.cpl
 - In the Sound menu, select the speakers that are getting automatically adjusted and choose Properties.Accessing the Properties screen of the Dolby speakers
- Then, go to the Dolby tab and click the Power button (near Dolby Digital Plus) to disable it. Disabling Dolby Digital Plus
- Restart your computer and see if the automatic volume adjustment stops with the next system startup.
 Running dialog: mmsys.cpl
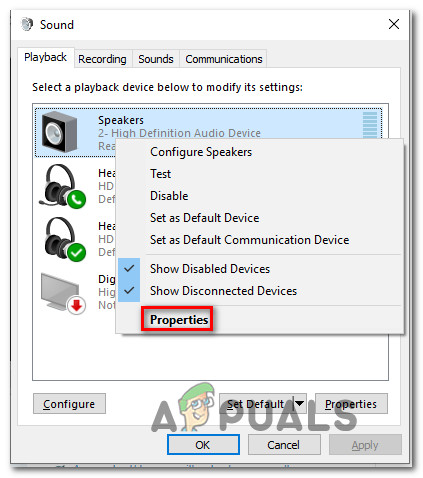 Accessing the Properties screen of the Dolby speakers
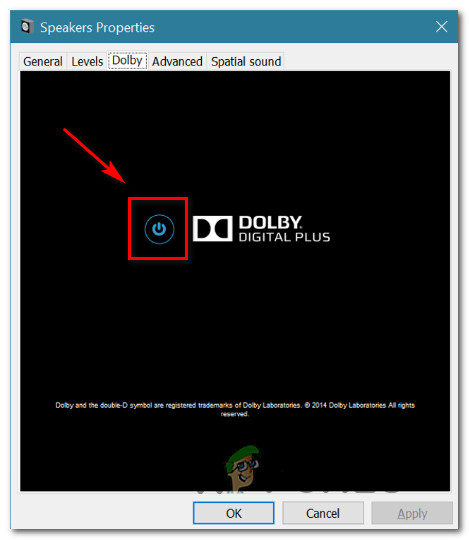 Disabling Dolby Digital Plus
If you’re still having the same automatic volume adjustment issues, move down to the next method below.
Method 5: Dealing with physical triggers
Now that we’ve burned through all the potential software culprits that might end up causing the issue, let’s investigate for a physical trigger. You’d be surprised on the number of people that have discovered that the issue was being caused by a mouse wheel or a volume key being stuck.
If you’re using a USB mouse with a wheel that can be used to reduce the volume, a mechanical (or driver) problem can cause it to become stuck on downgrading or upgrading the volume. In this case, unplugging the mouse and rebooting the laptop will most likely resolve the issue.
Another potential physical trigger is a physical volume key being stuck (most keyboard models have volume keyboards). If you’re using a monitor with speakers, a stuck key on the monitor might alter your sound volume.
Method 6: Uninstalling and Reinstalling Drivers
Some users have reportedly fixed this issue by refreshing their Sound drivers and replacing them with the ones that Windows installs automatically. For that:
- Press “Windows” + “R” to launch the run prompt.
- Type in “devmgmt.msc” and press “Enter”.Running Device Manager
- Click on the “Video, Sound and Game Controllers” option and right-click on the “Sound Drivers”.Uninstall Drivers
- Select the “Uninstall” button to remove them from your computer.
- Wait for the drivers to be uninstalled and restart your computer.
- At startup, the drivers will automatically be reinstalled.
- Check and see if this fixes the error.
 Running Device Manager
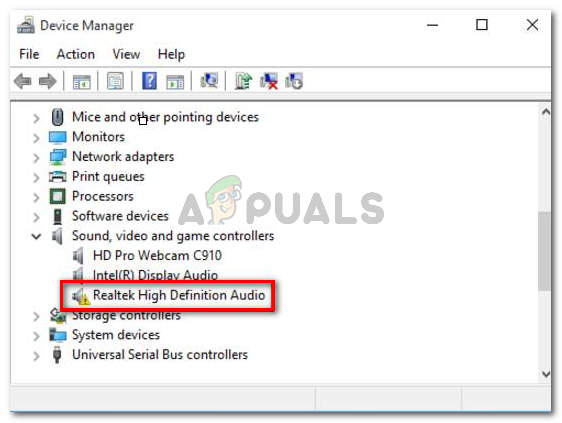 Uninstall Drivers
Method 7: Disable Attenuation
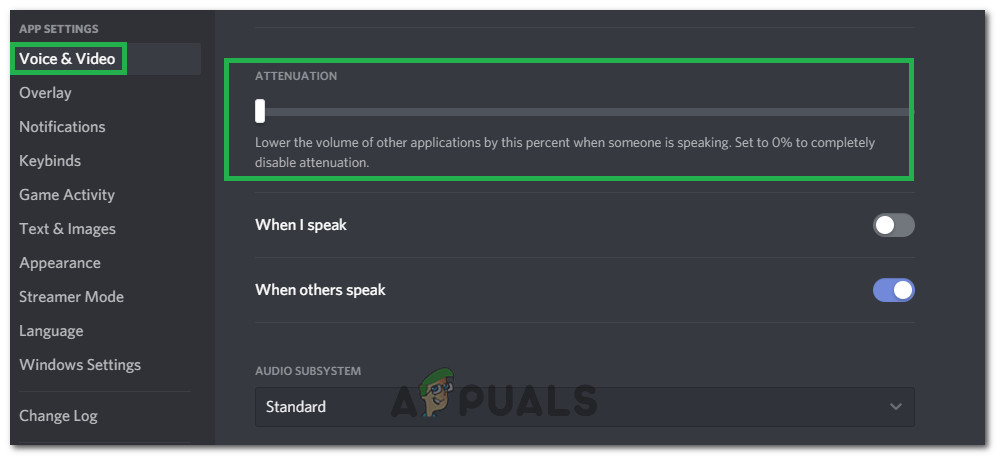
In some cases, the Discord’s Attenuation feature might be causing this issue on your computer. Therefore, in this step, we will be disabling it completely. For that:
- Launch Discord and click on the settings cog.
- In settings, click on the “Voice and Video” option and scroll down.
- Under the Attenuation heading, there should be a slider for the Attenuation option.
- Turn this slider down and save your settings. Turning the slider off
- Check and see if doing so has fixed the issue.
 Turning the slider off


