- Как включить Защитник Windows 10, если с работой антивируса возникли проблемы
- Содержание
- 1. Заражение системы как причина невозможности запуска Защитника Windows 10
- 2. Повреждение системных файлов Windows 10 как проблема запуска Защитника Windows
- 3. Как включить Защитник Windows с помощью системного реестра
- 4. Как включить Защитник Windows с помощью редактора групповой политики
- 5. O&O ShutUp10 и другие подобные программы как причина невозможности запуска Защитника Windows
- 6. Как включить Защитник Windows, когда ни один из способов не помог
- How to install/fix Windows Defender manually in Win 10?
- FIX: Windows Defender closes games in Windows 10
- What can I do if Windows Defender closes your games?
- 1. Switch to a third-party antivirus
- VIPRE Antivirus Plus
- 2. Add an exclusion
- 3. Turn off Windows Defender using group policy and the registry
- 4. Turn off Controlled folder access
- 5. Turn off Real-time protection
- Run a System Scan to discover potential errors
- 6. Make sure that the file you’re trying to run isn’t blocked
- 7. Enable Game Mode
- 8. Install the latest updates
- 9. Perform an in-place upgrade
Как включить Защитник Windows 10, если с работой антивируса возникли проблемы
В некоторых случаях при использовании стороннего антивируса, бывает, что Защитник Windows автоматически не отключается и в таком случае пользователь прибегает к различным способам принудительного отключения встроенного антивируса.
В этой статье мы поэтапно разберем все способы решения проблем с обратным запуском Защитника Windows 10.

Итак, если вы столкнулись с тем, что Защитник автоматически не включается и в Параметрах Windows 10 сообщает об отключении системным администратором, то тогда вам стоит выполнить перечисленные ниже рекомендации.
Содержание
1. Заражение системы как причина невозможности запуска Защитника Windows 10
Вредоносная программа может различными способами блокировать включение Защитника Windows. В первую очередь зловредную программу нужно удалить. Для этого выполните сканирование системы антивирусным сканером, стоит выполнить сканирование даже двумя различными сканерами. Советую выбрать сканер из числа Рекомендуемых сканеров на странице: Антивирусные сканеры.

Для лучшей эффективности работы сканеров, проводить сканирование советую в Безопасном режиме загрузки системы.
После того как угроза была устранена, пользователь может столкнутся с тем, что из-за последствий работы вредоносной программы, Защитник Windows все еще не запускается. Для её решения переходим к следующему этапу рекомендаций.
2. Повреждение системных файлов Windows 10 как проблема запуска Защитника Windows
Вредоносная программа или ошибка другой программы могут нарушить целостность системных файлов Windows 10. Это так же может повлиять на работу Защитника Windows.
Для восстановления системных файлов Windows нужно в меню Пуск ввести слово Командная строка или cmd.exe и запустить её от имени Администратора (нажмите правой кнопкой мыши по приложению Командная строка и из появившегося списка действий выберите Запуск от имени администратора).

После того как вы открыли Командную строку от имени Администратора переходим непосредственно к восстановлению поврежденных файлов. В первую очередь с помощью инструмента DISM мы выполним проверку и исправления внутреннего системного образа Windows 10, с помощью которого чуть позже будем восстанавливать файлы системы.
В командной строке Windows поочередно вводим следующие команды DISM:

Следующая команда, как и команда выше, выполняют проверку целостности образа Windows без его восстановления:
Команда восстановления поврежденного образа Windows:
Завершив восстановление образа Windows, переходим к восстановлению системных файлов. Оба этапа являются важными для восстановления повреждений системы.
В Командной строке выполняем команду:
Как правило этого будет достаточно для восстановления системных файлов. У нас на сайте вы можете подробнее прочесть о работе инструмента DISM и о восстановлении системы с помощью команды SFC.
3. Как включить Защитник Windows с помощью системного реестра
Распространенным способом отключения Защитника является отключение с помощью системного реестра. В нашем случае мы будем включать Защитник через редактирование реестра.
В первую очередь нам нужно удалить ключи реестра, отвечающие за отключение Защитника Windows.
Редактор реестра можно открыть через меню Пуск или запуском команды regedit.exe (клавиша Win в сочетании с клавишей R ).
Перед началом любой правки реестра советую сделать резервную копию реестра. Для этого в меню редактора реестра выберите Файл > Экспорт и сохраните указанный файл.
Открыв редактор реестра, в его адресной строке вводим следующий путь:
Если в папке реестра есть подпапка с названием Real-Time Protection, то её нужно удалить, нажав на неё правой кнопкой мыши и выбрать Удалить.

Далее нам нужно создать ключ DisableAntiSpyware:
- Щелкните правой кнопкой мыши по папке “Windows Defender”, выберите Создать > Параметр DWORD (32 бита).
- Назовите параметр DisableAntiSpyware и нажмите Enter.
- Щелкните дважды по созданному ключу и установите значение от 0, затем нажмите ОК. Важно, значение обязательно должно быть 0, т.к другое значение отключит Защитник Windows.

После внесения изменений в реестр, необходимо перезагрузить систему.
4. Как включить Защитник Windows с помощью редактора групповой политики
С помощью редактора групповой политики Windows, можно так же отключать или включать Защитник Windows.
- Для открытия редактора групповой политики нажмите на иконку Поиск (или клавишу Win + R ) и введите gpedit.msc.
- Нужный нам параметр расположен по следующему пути:

- В правой части окна выберите политику Выключить антивирусную программу “Защитник Windows”. В появившемся окне установите состояние политики на Отключено или Не задано и примените изменение, затем нажмите ОК.
- Затем перейдите по следующему пути:

- В правой части окна выберите политику Включить наблюдение за поведением. В появившемся окне установите состояние политики на Отключено или Не задано и примените изменение, затем нажмите ОК.
- Находясь в разделе “Защита в режиме реального времени” выберите политику Отслеживать активность программ и файлов на компьютере. В открывшемся окне установите состояние политики на Не задано и примените изменение, затем нажмите ОК.
- Находясь в разделе “Защита в режиме реального времени” выберите политику Включить проверку процессов, если включена защита реального времени. В открывшемся окне установите состояние политики на Не задано и примените изменение, затем нажмите ОК.
- Находясь в разделе Защита в режиме реального времени” выберите политику Проверять все загруженные файлы и вложения. В открывшемся окне установите состояние политики на Не задано и примените изменение, затем нажмите ОК.
Затем перезагрузите систему.
5. O&O ShutUp10 и другие подобные программы как причина невозможности запуска Защитника Windows
Если вы пользуетесь программой O&O ShutUp10 или другими подобными утилитами, то самое время вспомнить о них и в их настройках выключить опцию отключения Защитника. После применения изменений нужно перезагрузить систему.

6. Как включить Защитник Windows, когда ни один из способов не помог
Бывают случаи, когда ни один из описанных выше способов не помогает включить Защитник. Пользователь все так же получает сообщение о том, что «Невозможно открыть данное приложение. Ваш системный администратор отключил Центр безопасности Защитника Windows«.
В таком случае должен помочь следующий твик реестра — Включить Защитник Windows reg.zip. Твик реестра нужно обязательно запускать в Безопасном режиме системы.
Примечание. Напомню, перед работой с реестром рекомендуется сделать резервную копию реестра (в меню редактора Файл > Экспорт).
В архиве два файла реестра, WinDefend.reg и wscsvc.reg, поочередно нажимаем на них правой кнопкой мыши и из выпадающего списка выбираем Слияние.

Перезагружаем систему. Скорее всего после проделанных рекомендаций у вас включится Защитник Windows.
How to install/fix Windows Defender manually in Win 10?
I have allowed a keygen with WD, however it is not a keygen but a software contains virus.
After that, my WD cannot be switched on anymore.
I have tried every single method on the internet but it still cannot scan or start updating by using WD, for sure, that ‘error 577‘ problem happened to me and I cannot solve it anyway.
After that, I have tried the ‘Microsoft Fix it‘, but every time it try to download the Microsoft Fix it diagnostic tools, it says ‘we were unable to download the necessary components from our server.‘ Don’t know if this was caused by Chinese GFW (A fire wall which blocks huge amount of abroad website)
In the end, I try to reinstall WD with WindowsDefenderX64.exe , and it said that ‘ You do not need to install this software because Windows Defender is included in Windows Vista. and so on‘, however, my OS is win10.
Finally, I have tried to deleted entire Windows Defender folder in C:\\Program files first and reinstall it again, however, ‘MpClient.dll‘ cannot be removed anyway. So now is only this ‘MpClient.dll‘ within this Windows Defender folder. And then I try again the WindowsDefenderX64.exe , still that ‘You do not need to install this software because Windows Defender is included in Windows Vista. and so on‘
FYI, I have tried also the offline WD update package mpam-fe.exe , nothing happened when I double click it.
I was suffering from this for 6 hours, I am so desperate, I want my Windows Defender back without reset my PC, is that anyone can help me? Please?
ps. I am a Chinese, hope that my English can be understood, if there is anything unclear, please feel free to ask for my clarification.
Furthermore, I have installed another Anti Virus software after I have been harmed, so the PC should be clean now.
Dying for a feasible solution, please let me know if you have any proposal.
FIX: Windows Defender closes games in Windows 10

- Windows Defender is the default antivirus protection software preinstalled in Windows 10.
- Sometimes, Windows Defender is held responsible for closing games, but we will fix that quickly.
- It’s very important to stay protected so check out our Antivirus Software section.
- Visit our Windows 10 Hub for any news, guides, and tips about this popular OS.

- Download Restoro PC Repair Tool that comes with Patented Technologies (patent available here).
- Click Start Scan to find Windows issues that could be causing PC problems.
- Click Repair All to fix issues affecting your computer’s security and performance
- Restoro has been downloaded by 0 readers this month.
Windows Defender is a basic antivirus software that comes with pre-installed with Windows 10.
Although Windows Defender isn’t the best antivirus software it can do a decent job, but sometimes it can cause problems.
We have reports that Windows Defender is closing games, so let’s see if we can fix this somehow.
Here are some problems reported by users:
- Windows Defender blocking programs, everything, application – The software can sometimes block certain applications from running. Unblock the application or disable the Controlled folder access feature.
- Windows Defender blocking Steam – Many gamers reported that they are unable to run Steam because Windows Defender is blocking it. Add your Steam folder to the exclusions list.
- Windows Defender exclusions not working – Windows Defender might block certain applications even if they are on the exclusions list. Disable Windows Defender entirely or switch to a different antivirus solution.
What can I do if Windows Defender closes your games?
1. Switch to a third-party antivirus

Windows Defender offers solid protection, but sometimes it can cause certain issues with games to appear. On the other hand, third-party antivirus applications often offer better protection and more security features.
We recommend VIPRE Antivirus Plus because it’s light on your system and it doesn’t interfere with any of your games.
Another great advantage of this solution is the RapidScan technology that speeds up future scans by bypassing the files that were found to safe the previous times.
VIPRE Antivirus Plus offers anti-threat and ransomware protection but it also features cloud-enabled security.
If you care a lot about your privacy, you will also like the History cleaner feature. It checks the system for any files that may hold information about your computer and browsing habits and removes them.

VIPRE Antivirus Plus
2. Add an exclusion
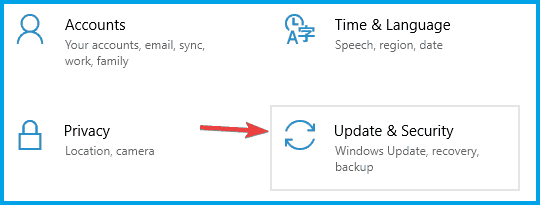
- Go to Settings and open Update & Security.

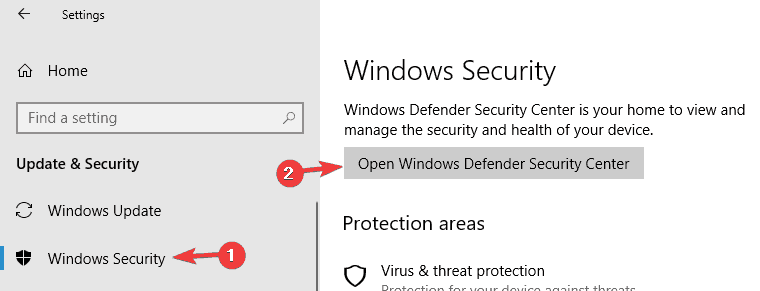
- In the menu on the left select Windows Security. In the right pane click Open Windows Defender Security Center.
- On the right side of the window navigate to Virus & threat protection and click on Add or remove exclusions.
- Choose Add an exclusion.
- Now select the directory of the game that is being closed by Windows Defender.
- Click Exclude this folder and this folder won’t be monitored by Windows Defender anymore.

3. Turn off Windows Defender using group policy and the registry
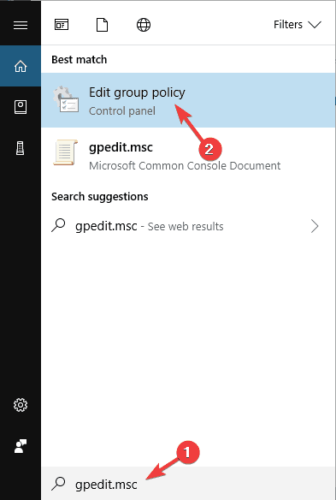
- In the Search bar type gpedit.msc to open Local Group Policy Editor.
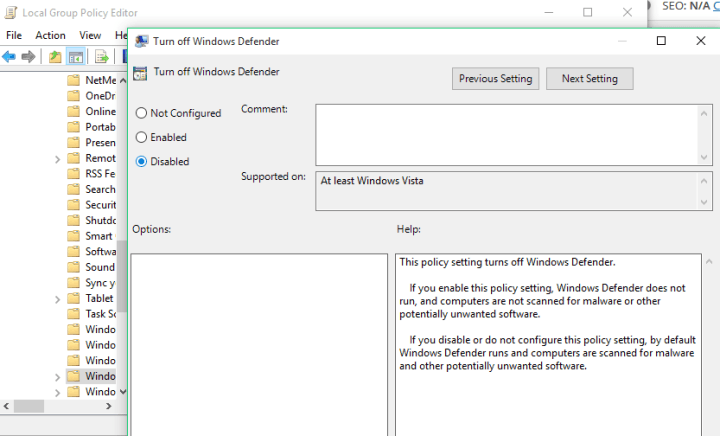
- On the left side navigate to: Computer Configuration/Administrative Templates/Windows Components/Windows Defender
- On the right side find Turn off Windows Defender and double-click it.
- Select the Disabled option.
- Click Apply and OK.

4. Turn off Controlled folder access
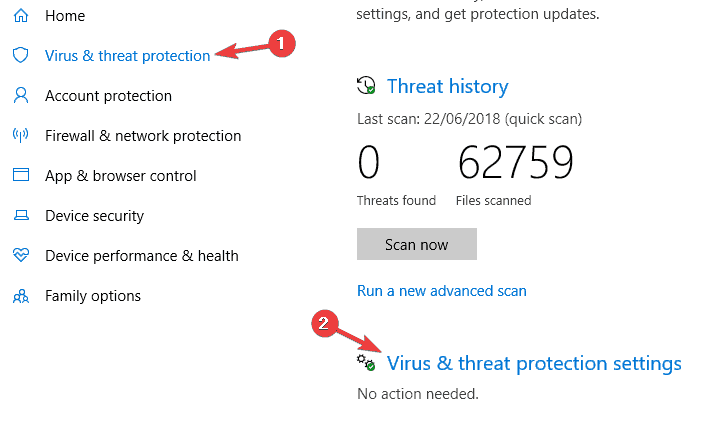
- Open the Settings app and navigate to Windows Defender Security Center.
- Go to Virus & threat protection in the left pane and click on Virus & threat protection settings from the right.
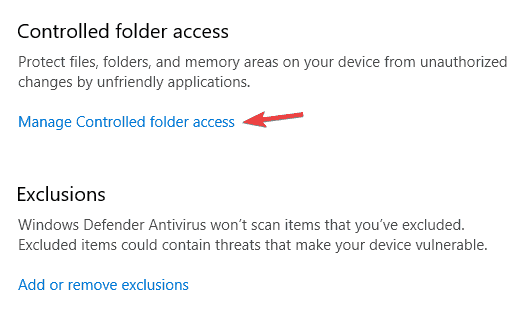
- Scroll all the way down to the Controlled folder access section and click Manage Controlled folder access.
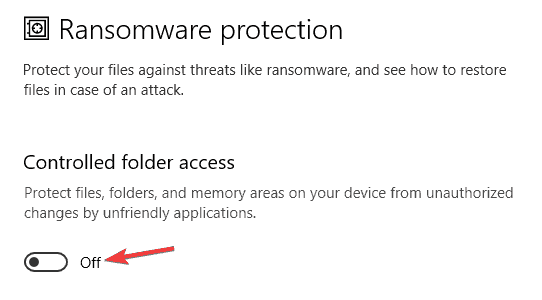
- Disable the Controlled folder access feature.
Note: According to users, sometimes certain features can cause Windows Defender to close games. This antivirus has a useful feature called Controlled folder access, and thanks to this feature it protects certain folders from third-party applications.
Unfortunately, this means that this feature can sometimes prevent your games from making changes in certain directories. As a result, the game might not be able to start at all.
After turning this feature off, your games and other applications should be able to modify your directories, and the issue should be permanently resolved.
5. Turn off Real-time protection
- Navigate to Windows Defender Security Center.
- Go to the Virus & threat protection and then choose Virus & threat protection settings.
- Locate the Real-time protection option and disable it.

Note: Windows Defender scans your computer in real-time, and if it notices anything suspicious it will block it from running or give you a notification.
Sometimes, Windows Defender can interfere with certain software, and that can lead to various issues. However, you can circumvent this issue simply by disabling real-time protection.
Run a System Scan to discover potential errors


Once you disable real-time protection, your games should start working again without any issues.
Keep in mind that disabling this option will make your system more vulnerable, so use this workaround only during the gameplay sessions.
Once you’re done with the game, be sure to turn on Real-time protection once again.
6. Make sure that the file you’re trying to run isn’t blocked
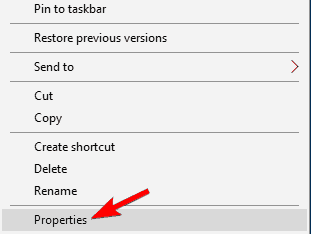
- Locate the application you’re trying to run, right-click it, and choose Properties from the menu.
- You should see the Unblock option at the bottom of the Properties window. Check the Unblock option and click Apply and OK to save changes.
After doing that, the application should be able to run without any problems.
7. Enable Game Mode
- Open the Settings app.
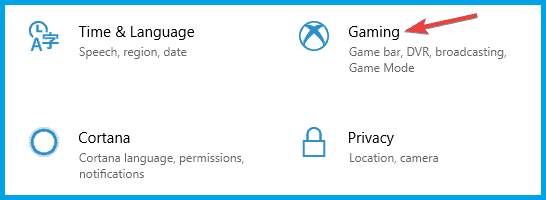
- When Settings app opens, go to the Gaming section.
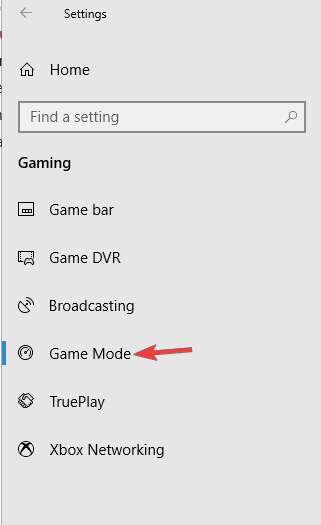
- In the left pane, select Game Mode and enable the Game Mode feature.
Note: After enabling the Game Mode feature, you should be able to run your games without any interference.
If you found this too complicated, you can also read our complete guide on how to enable the Game Mode in Windows 10.
8. Install the latest updates
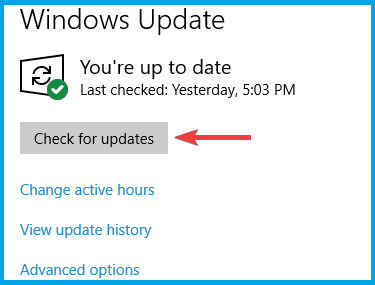
- Open the Settings app and navigate to Update & Security section.
- Click the Check for updates button.
If any updates are available, they will be downloaded automatically in the background. Once the updates are downloaded, you’ll install them automatically as soon as your system restarts.
Once everything is up to date, check if the problem is still there.
Note: According to users, sometimes there might be a bug with Windows Defender that causes issues with games. However, you can fix the problem simply by installing the latest Windows updates.
Microsoft is frequently releasing new system updates, and these updates address various bugs and issues, so if you’re having any problems with Windows Defender, be sure to keep your system up to date.
9. Perform an in-place upgrade
- Download and run Media Creation Tool.
- Select Upgrade this PC and follow the instructions on the screen.
- Select Download and install updates (recommended).
- Follow the instructions until you reach Ready to install screen. Choose Change what to keep.
- Select Keep personal files and apps and click Next.
Follow the instructions to complete the process. Once the in-place upgrade is finished, you’ll have the latest version of Windows 10 installed and the problems with Windows Defender should be resolved.
We have to mention that this method will keep all your files and installed applications, so you can continue where you left off.
At the moment we don’t have any other solutions on how to fix this issue, but we’ll keep you updated with new solutions if we find them.
Meanwhile, we also have an article regarding Windows Defender, so you can learn more about it.
If you have any comments, questions, or suggestions, reach for the comment section below, and maybe we can help you even more.


